Description
About This Video
Transcript
Read Full Transcript
(waves lapping against shore) Namaste. So this is the first of a series of practices and this particular series is really great for folks who are just beginning yoga and also for all of us who want to and should continue to review some of the fundamental principles in yoga. I really like this practice because it helps, if I've got a lot going on mentally, it helps to really stabilize and ground my body. And in fact, the series itself is devoted to stability. So there's several things we want to remember as we're practicing.
One is that essentially we're taking shapes here. We're here at the wall because we're going to use the wall and if you've got a wall nearby, that's going to be extremely helpful. Clear a path. If you, also if you got a block that will help you as well. So, there you go for your props.
We're taking these shapes and many of the shapes we're taking, not all of them, but a lot of them have to do with vertical and horizontal lines. And we're learning how to distribute, I like to say distribute the stress equally in the body because inevitably life has stress involved and actually stress can be something that helps propel us to the next place in our life if we use it wisely and in the practice what we learn is if one area takes too much stress, then there's collapse. So we want to learn to distribute the sensations that we're feeling equally, okay. Next, with the breath, you're just watching the breath. We talk about stability and we talk about equanimity.
Equal breath, equal inhale, equal exhale. If you need to stop and come to samastitihi please feel free to do that. And as with every practice we attempt to bring beginners mind to the practice, we're exploring what's going on inside these shapes as an inquiry or you know, a moving meditation. What's going on in here? Let's check this out.
Live with the questions, okay, all right. Let's begin. So, let's start in child's pose. And child's pose, if this is uncomfortable on your knees and you happen to have a blanket nearby that you can toll up like a cigar and stick between your thighs and your calves, please do. And for this child's pose, we'll have the knees wide so there's space for the belly.
We'll come down, if the head does not make it to the floor, this is a great place for the block. You can just place the block underneath the head. And notice what feels better. Does it feel better to have the arms forward or back behind you? Cause you want to be kind of comfortable here.
Child's pose, this is where we begin. Pose of the beginner. And this is where we come to if we need to rest at any time. So, we're just here feeling the sensations in the body. Noticing what we came to our mat with today.
If we have any concerns and feeling, just a really calm, easy breath in and out through the nose. Just feel your forehead on the mat. So we've got gravity as our friend in this practice. Use gravity. Slowly take the hands under the shoulders and let's rise up and we're going to back up just a little bit.
You're gonna tuck the toes under. And send the hips back behind you. And you're gonna look through the legs at the feet. They love to splay out here. You're trying to line up the feet so they're parallel with each other.
And I'll tell you, you may want to reach back for your pinky toes, cause often they'll stay out of, they don't like to get involved. There's a lot of sensation here so just opening, opening the fascia slowly. Because those feet you know, they're in shoes all day and so they do not have the dexterity that they once had and we want to have, we want to have some space in the feet. (exhaling) And slowly come up on the hands and knees. Now, I'd like you to align your feet.
You're going to have to play with this a little bit but place the balls of your feet right up against the wall and from here we talk a lot, I talk a lot about sort of zipping up. You want to feel as though you've got some tight jeans on, you're zipping them right up here and that there's a connection between the bottom ribs and the top of the hips. As if, not a lot of cinching but just a little bit of activity so that you can feel your upper body and your lower body and you'll notice that if you don't have that, you just let everything soften, just notice if you fell less of a connection to your lower body. And then if you draw the hips and the front ribs toward each other a little bit, all of a sudden there's more access in sensation to the lower body. Okay, so what's going to happen next is we're going to just walk forward a little bit and then see if the right leg can come to the wall so that it's as straight as can be.
If the ham strings are tight, no worries, the knee can be bent. Push, push into the wall. So we've got the surface of the floor and we've got the surface of the wall to help support and create buoyancy in the body. Take a look at your wrist creases, be sure they're parallel with the top of your mat. Then remember to zip up here and you can send the left arm up.
Now this is the point at which you've zipped up and you've established a steady gaze. And then you're looking to see what you can feel from the sole of your right foot through your left hand. (exhaling) You may find that you've got to roll the right hip down just a little bit, notice where what I call the headlights of the hips are positioned. Both headlights want to point down. (exhaling) Going to inhale here.
(inhale) And exhale, left hand down. Right knee down, take a breath. (inhale) (exhale) Good. Left leg draws back behind you. You might look down the body.
Be sure the toes are actually turned down. Good, remember to zip up. Check your headlights. Right arm extends forward. (inhale) (exhale) And I like to imagine that I can inhale into my fingertips and my left heel simultaneously and then exhale the breath back to the middle of the body.
So, I'm growing the shape. (exhale) And inhale here and exhale, right hand down. Left knee down, take a breath. (inhale) (exhale) Good, walk your hands in beside your knees. Tuck your toes under and we're going to slowly rise up here so that the hips come against the wall.
But first off, be sure that your knees are bent so your belly can relax. The whole upper body can relax because your legs have you. That's really important. When you look at your feet, you're, you may discover that you're a flat-footed person. And if that's the case, if there's no space under here under the arch, I like to imagine, because I'm one of these people and there's a whole bunch of us out there.
Imagine that there's a zipper and that we're literally zipping, we're learning to use these muscles to zip up the inside of the legs. Okay, so you can literally take your fingers and just place here, just as a reminder, there's three points we're really interested in. Here, here, here, and this pressure pushing down is creating this lift here. That actually helps support our lower back. That's why we're talking about it so much.
We want to check this in every standing posture that we have. (inhale) (exhale) So while we're here, just notice that the lower body is supporting the upper body. And then, take your hands to the walls, slide your hips down a little bit. Let's slowly, slowly roll up. Good, and so you've got your feet hip width apart, the toes are pointed forward.
We're going to place the back against the wall. I'm going to sit down, some of you may decide you don't really want to go down that far, no worries. We're just waking up the front of the thighs. So we woke up the soles of the feet. And now we want to notice, oh, what's this like?
What's this sensation like? (inhale) (exhale) You notice that while we're here, the breath can move the sensation around the body if we fixate ourselves on this right here and don't think about anything else this becomes accentuated. (inhale) (exhale) A couple more breaths. You can use this, really draw the navel into the spine here, feel the back against the wall. (inhale) (exhale) And then slowly, slowly, let's rise up and come to a standing position.
So, we look down at the feet and why don't we all just sort of spread the toes really wide. Spread them really, really wide. Good, set them down one at a time and go pinky, fourth, third, second, first. Good, notice which ones are cooperative and which ones don't move so much, is always worth noting. Remember to zip up the inner line.
Check the pelvis so we've got this bowl at the pelvis that we imagine is holding water, nothing's spilling. Notice the rib cage. Some of us tend to pop up like this. We still want to have what I call the vertical girdle, like a corset right here. (inhale) (exhale) The arms beside us and the hands, it's interesting to see where the arms place themselves.
Let the upper body relax but close your eyes for a moment and imagine your own spine and those natural curvatures that take place in the spine at the lumbar and then up into the mid back between the blades, the thoracic, and then into the neck, the cervical. And I like to imagine that I'm sort of dropping anchor with my tailbone. It just drops straight down into the ground. And we talked about the three corners of the feet with the buoyancy at the arch, notice that sensation. Notice how the floor is supporting the body.
Notice where your head is placed on your body. Many of us have the head forward because we're always ready to go to the next place. And feel the central axis of your spine. Neither forward, you can go into the toes and feel what forward feels like. Nor back, go into the heels, nor to the right.
Nor to the left but right there at center. Samasthiti. Good, sama meaning same, equal standing. Equanimity, we're really interested in that idea here. And so this sensation that we're having, this experience that we're having, we'd like to have in every single one of the postures as we go forth.
The sense of easy balance and alignment. And then open the eyes. Okay, so let's send the arms all the way up. Inhale, reach up, exhale, we'll fold forward out and down right over the toes, remember if you need to keep the knees bent too and if you've got to step away, do that as well and then take your hands to your shins. Inhale, create a flat back.
(inhale) Good, flat, flat backs, send the tailbone back, lift your kneecaps up and then bring your hands to the ground. We'll come back down to the floor for a moment with the hands underneath the shoulders, we're going to actually straighten the legs and push our heels into the wall. We may need to walk the hands forward. We're using this to feel what plank pose feels like. This is a really common posture, in my series.
So, you want to feel hips up, hips low, notice what that does to the back and find the middle way, the middle way, find your samasthiti right here and at this point you may decide, you know what, I need to bring my knees to the floor and that's a really good decision to make. Check the knees, place them down and then remember the zipper from your pubic bone up through the front. Check your elbow creases, be sure that they are even. Inhale here, exhale as we lower down, we're going to bring the elbows right beside the ribs, right beside the ribs. Until we land.
Place everything down on the floor, take the balls of the feet, push into the floor. Push your thighs into the floor and as much as possible using the legs only, inhale, just lift the chest up off the floor. Notice that the elbows love to go out like this, draw them in, keep the shoulders out of it. The shoulders do enough in our lives, we keep them completely soft. Inhale, lift up, exhale, lower.
Let's try that one more time. Inhale, lift up. Push up into the wall and the floor, exhale, lower. Good and then take it back to child's pose. (inhale) (exhale) As if we've never been here before.
Beginners mind. Notice what it feels like to be in the body right now. Good, slowly rising up. And let's walk the feet forward and come all the way up to standing. So, we're going to do this series where we're going to use the wall, we'll have one foot at the wall at all times and if you've got a block, this is a really good time to get it out as we may very well need it.
We'll have to gauge, as we move back, where our foot goes, okay, so we'll just play with proper foot placement. So, let's inhale, extend up again. (inhale) Exhale, fold forward out and down. And then bring your hands to your shins, inhale, lengthen, exhale, place the hands down. We're going to take the left leg all the way back behind us until the ball of the foot comes to the floor and we're going to walk in.
The knee has come down, if you are sensitive in the knee, go ahead and get a blanket for under your knee. And then lean in. Good, so, in this case, some folks, if your knee is sensitive, you may want to back up here and have the shin remain vertical. In this posture, it's one of the few postures that we can actually draw the knee safely over the toes if that feels okay for you. Hands to hips.
Remember the bowl of water that we talked about and then the zipping up and extend the arms up. And use the pushing of the left foot into the wall to help support you. (inhale) (exhale) Distribute your breath through the body as if it was an empty vessel and that you're whole body was a lung. (inhale) (exhale) And inhale here. Exhale, let's release the hands to the ground.
Now, we're going to lift the knee off the floor so that now the heel comes to the wall. You might walk your foot forward just a little bit. And gradually rise when you're ready. The inner thighs draw together to help with that stability. Hands to the side.
Hands to the hip. It's nice to use the hands to help prompt us. Gonna lift the rib cage and extend. Push back into the back wall and just notice how that helps us and some day we won't be practicing with the wall at all but you want to use the wall now so you can get a sense of what the action is like when you're on your own without it. Inhale here, exhale, hands down.
Now watch. We're going to walk the right foot back a little bit and we're going to take the left leg up the wall. This is where we might want to use the block. You're gonna take a look at your legs. So just take a look.
Sometimes this leg gets funky. You've got to turn the toes down. And draw the left hip further down than you might think. You might take your right hand, your hip, pull it back, inner thighs draw together. (inhale) (exhale) And then play with, see how easy it would be for the belly to just soften here, so keep this relationship.
The ribs love to look for the hips. Play with lining everything up from the sole of your left foot through the top of your head and see if you can find the horizontal line that exists there and I like to imagine, as bizarre as this sounds, that that line exists beyond my head and beyond my foot and my work is to find the line and then rest on that line with my body. Good, inhale. Exhale, set your left foot down. Move your block out of the way.
Inhale, lengthen. (inhale) Exhale, hands to the ground. Good we take the right foot back behind us. Knee to the floor. Let's slowly rise.
Settle in. So let the lower body get heavy and then extend through the upper body. Notice that the weight of gravity actually helps to create buoyancy in the body. So we use gravity to our advantage. Inhale here, exhale, hands down, toes are tucked under, lift up.
Good, feel the inner thighs engage toward one another. Gradually rise up, push deeply back, deeply down. Send the arms up when you're ready. I like to roll my upper arm bones in toward one another so that my shoulder blades have wrapped a little bit around the chest and there's an engagement here. Lower ribs draw to hips.
Inhale, exhale. Hands down, walk your left foot back a little bit, bring your block to the mat and when you're ready, lift your right foot off. Now push. Take a look at your left kneecap and be sure that the thigh is firing upward so you can feel it's relaxed, uh no it's firing. Relaxed, firing, know what that feels like.
And then once again the navel draws in, right hip down, create length. (inhale) (exhale) But if you're feeling really bold, you can take the palms to prayer position. That's a big move and this in and of itself is quite challenging. Good, two more breaths. (inhale) (exhale) Inhaling, exhaling.
Come down, move your block out. Come to child's pose. It is what's here now. What's here now? What do I feel now?
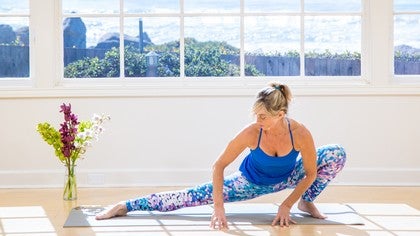
How's the breath? Slide the hands beneath the shoulders, okay so from here, we're going to do the same kind of setup except this time we're going to open the hips. So, rise up. And let's take the right leg back so that the outside of the right foot presses into the baseboard and then your left foot is a lot of argument in the yoga community about where the heel, whether it should be heel heel alignment or heel arch. I like heel heel but notice the difference for yourself.
What does it feel like? So, that's part of what this practice is about is you may be given an instruction, check to see, well, what's that like in my body? Take our hands to the hips. Good, remember the bowl of water. Zip up, wake up the inner thighs.
And some day, eventually this this is making its way to parallel with the mat, no hurry. Take the arms out, maybe your hand touches the back wall. You can use that. Take your gaze right down your left middle finger. Relax the shoulders, see if you can find mountain pose, tadasana, samasthiti right here.
(inhale) (exhale) Good, inhale and exhale. Straighten your left leg. Lift the kneecap, inhale. Exhale, we're going to reach forward out and down, pushing into the back wall. The hand comes to the shin or the ankle.
The right goes up, check your neck. You might have your gaze down if it bothers your neck or turn up, look at the hand. Good. Deepen your left crease, deepen the left hip crease. Watch this knee if it's a lose joint, pull the knee forward a little bit so you're using your muscles around your joints.
Inhale here. Exhale, hands down, now walk your left foot in a little bit, find your block. All right, same idea. Now, the hands on the block, we've got the left foot on the floor. We're going to take the right leg up, but this time the toes are going to turn, so that the foot is parallel with the wall.
Okay, the right hip stacks the best it can on top of the left hip. Remember the three corners of your foot. The zipper through the inner line, the knee is lifted, and the rib cage hunts for the hips. The arm extends up. And imagine samasthiti right here, so see if you can find an ease.
Whatever sensation you notice, notice it then move your attention somewhere else, especially anywhere in the body you can't feel so much. (inhale) (exhale) Two more breaths. (inhale) (exhale) Inhale, exhale, we slowly lower the hand to the floor, bring the right foot down, let's just fold forward for a moment because that was a lot. The knees bend, grasp your elbows. (inhale) (exhale) So, if you feel like, oh, my goodness, this is so much work, there's some truth to that, essentially we're building long-term strength.
Long-term strength and stability. All right, the knees bend, we slowly rise up. Now, let's do the other side. Left leg goes back. Outer edge touches, heel heel or heel arch, settle in, if this knee is not tracking over the foot, if it looks like this, turn here, let this hip come around that's absolutely fine.
Check the container of water. Good, then arms extend out. And anything that touches ground or wall, really make contact. Shoulders are soft. (inhale) (exhale) Inhaling, exhale, straighten, reach, deepen the hip crease, hand comes down where it does.
Good, roll the rib cage a little bit, keep your connection with your ribs and your hip, left arm up, gaze up or down. Watch the shoulders. This right shoulder, the bottom shoulder will love to get involved, it usually curls around. You're doing this with your torso. The arms are easy.
Inhale here, exhale, let's bring the hands to the floor, walk your right foot in a little bit. Set your block and if you need more height, of course take it the tall way. And let's take the left leg off. Look back at the wall. Turn the toes.
Good, then check with your left hand, stack, stack, stack. Good, hand right under the shoulder. Push into the floor and the wall. Left arm up. Good, make room.
Make room with the breath. Good. Push against, push against the floor. And have them help support you. The floor and the wall.
Inhale here, exhale, hand comes down. Leg comes down. Let's come back to child's pose. Good, knees wide. (inhale) (exhale) When you breath, breathe into your belly so you have the inhale fill the belly.
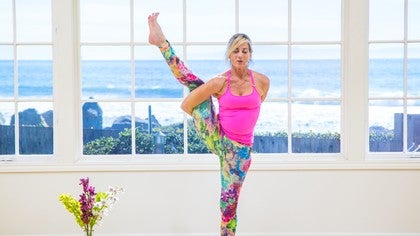
Slide the hands beneath the shoulders and slowly rise up. All right, so from here, we're going to come right back up and we're going to work with one balance pose. So, I like to have, especially if balance is new to you or you have issues with balance, it's nice to know that this wall is back here. And you don't have to get too right up against but just know maybe if you're buttocks touches the wall, that might be enough to just know that it's there. So, let's come back to samasthiti.
And feel everything all at once. Transfer the weight into the left foot. Lower navel draws in. Interlace your fingers around your shin. Watch the shoulders, use your upper back, draw the shoulders back and down.
Keep the lower navel hollow. And then, if you wish to take this further, foot either to the ankle, to the inner calf, or to the inner thigh, keep it off the knee. Check your hands at your hips. Feel the rooting downward as if you're rooting down, this is tree pose, rooting down another three feet and the arms can extend maybe. (inhale) (exhale) Shoulders soften.
The Shoulder blades wrap around the lower ribs, draw in toward the hips so you can feel connected to your lower body. Your gaze is steady. Inhaling, exhaling, let's release the arms. Bring the knee back in and right foot down. Take a breath.
(inhale) (exhale) Good, root the right foot. Draw the left knee in, interlace around the shin. Inhaling, exhale, set your foot in the appropriate place, not on the knee. Hips, zip. Arms up perhaps.
And spread your attention throughout your body. The interline is really strong. The left foot presses into the inside thigh. The thigh presses back. Good, open it out.
And palms in prayer position, bring the knee back. Interlace and release. Good. Standing again in mountain pose. Kind of like a way of saying, yes, I have arrived.
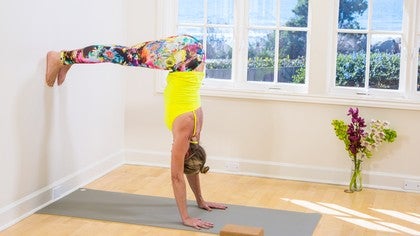
Right? You know, we're really interested in this practice and being here now. Be here now, I've arrived. All right, so from here we're going to come down to the floor and one last posture that we want to attend to before we come to the seat, this may not be appropriate for you yet but you can try and I'll show you a couple of the issues that come up for people when they're learning how to do this, that make it more difficult. So here we go.
Remember the wrist creases, they're parallel. Now, I'm going to lift up and come into a downward facing dog but it's gonna be a short dog, right? Because what I did here was I had the balls of the feet up against the wall, I come up and I've got the heels pressing and my kneecaps lift and I'm going to roll like an angry cat. I'm going to roll those shoulder blades around and I'm going to zip up. And actually now, I'm zipping up a zipper, I'm zipping down a zipper.
I'm zipping from the chest down to the navel okay. Now the deal here is that you're gonna wanna probably look forward. Don't do that. Look at your feet. Take your right foot or your more dominant leg, that'll be easier, to your, as high as your hip.
And watch your right foot as you lift your left foot up. So this is another right angle. We've done a lot of right angles. You're gonna lift the leg bones up, use the floor, push, take the lower ribs toward your hips. Wrap your upper arm bones, feel the whole body push into the wall.
(inhale) (exhale) Inhaling, exhaling, we return. Child's pose. Several breaths. And notice what that's like. (inhale) (exhale) So we take the hands under the shoulders.
Inhale, rise up and let's just turn. Have your wall handy because it could be useful. We're gonna face the wall with the feet right up against the wall. Now if you find that your back rounds, you may want to sit up on a blanket or a bolster or a block because that will help lengthen the spine. We're actually, we're facing the wall now and one of my favorite quotes is, every wall is a door and I really use my practice to engage whatever obstacles happen to be in my life at the time and many of those obstacles look like things out there when in fact they're here, so we'll just use this as the wall.
Whatever the wall, the current challenges that happen to be in our lives, okay. So, the toes are going to go wide. We're gonna spread, spread, spread them. Check what that's like. Good.
Be patient if there's toes that don't move so well, just be patient, invite them to play. Drop the inner legs. Good, zip up once again. And dandasana with the hands beside the hips, the arms are long, we all have different size arms that draw the shoulders back. This is the seated samasthiti, the seated mountain pose.
So we're looking to feel the same sense of steadiness and equilibrium we felt when we were standing. Just aware of the whole body. When we first start practicing sometimes we've been in our head for so long, it's hard to feel things. We're just looking around for what we can feel. (inhale) (exhale) Good, draw the navel into the spine.
Bring the foot in close like tree pose. We're going to roll the knee out to the side. Come into janusirsana, if this knee bothers you, please place a block under the knee to help support it. Okay, should be no pain in the knee. And we're gonna turn and face the left pinky toe.
Root your right sit bone down, okay. The sit bones become rooting devices and help lengthen. Exhale as we fold forward we want to lengthen the spine but we also want to remember the rib cage hip connection. As you make your way down, wherever it is for you, re-root the right sit bone. So, we're not going to care about how far we get, we're gonna care about staying rooted and grounded and centered.
(inhale) (exhale) You can use your inhale to lengthen. And then exhale, recommit to the root. (inhale) (exhale) (inhale) (exhale) Good, pause and enjoy the posture. And inhale, rise back up, exhale, leg comes up and release it forward. Good, you might block on the other side, or not.
Good, inhale, come up. Exhale, over to the side. Good, turn, sit bones stay stationary. A little twist at the upper spine, inhale. Exhale, folding forward.
And rooting downward. It's kind of like a way of saying, I'm here and I'm here, and I'm here. At any contraction or tension that accrues move your breath right into those areas. (inhale) (exhale) Two more breaths. (inhale) (exhale) Good, hands under the shoulders, push the ground away, slowly rise up.
All right. So, from here we're going to move the sit bones in just a little bit. Now we're going to walk the feet up the wall. We'll keep the knees bent for our purposes right now. So this is supported boat pose, easily the easiest way to do this posture.
(laughs) This posture can be a real challenge and it's so nice to have the wall here. So, we're gonna root the sit bones down, we're just a little bit forward on the sit bones, we prefer not to be on the tailbone, all right. So, we're forward. If you need to hold your calves, do. Draw the shoulders down.
And if you'd like to play with arms forward beside the legs, do. Then take your shoulder blades, draw them back and down. Some of you might walk the feet up. Good, feel the sit bones root. And use the wall here.
It's lovely to have the wall. (inhale) (exhale) Notice how we've got this whole body to support us. Sometimes what we'll do is we'll use the same parts of our body to support us over and over again and after awhile, they accrue tension and they begin to wear out a little bit so we've got all of these places that we can use in the body to support and gauge. Right, if there's not one way to address a challenge then there's another. We're always looking for where we can go where we haven't been before.
Inhaling and you might take it back just a little bit. Inhaling, exhale, release your legs to the floor. Good, well done. So, we're gonna walk the hips in and gradually lie down. So that if you can have your toes right up against the baseboard, fantastic.
I love this, the use of the block in this posture. The block will come underneath your hips. You're feet are hip width apart, they're parallel, going to simply lift the hips up and slide the block in any height you like. It could be the low height. There are three settings to the block.
The middle setting or the upper, if you're feeling bold, so I'm going to go for middle and you want it right there under the sacrum. Sometimes people put it up at the lumbar spine when they're first learning and that's terrifically uncomfortable so keep it low and settle in. Slide the blades under, send your kneecaps forward and inner lines of the thighs is long. Move your breath into your top chest. (inhale) (exhale) This feels supported by the block.
This is one thing that is so interesting is that there's always support. Sometimes we forget that. We've got the ground supporting us constantly as a reminder. You feel supported. Now when we make our way out of this, I like to think of these wheels at the hips.
We're going to simply spin the wheels at the hips, lift, lift, lift, lift up, slide the block out and one vertebrae at a time, come down. So, from here you might decide you prefer to use the block again. That this is bridge pose on its own, we'll curl the tailbone under, remember the wheel, good. And there's a wheel here, the chest comes to the chin. We slide the arms in underneath.
The kneecaps draw toward the wall, they don't touch or they won't, you might need to walk in a little bit. If they do touch, use the wall again to help support the body. So you're through rooting, we actually create this buoyancy and this opening. (inhale) (exhale) Good, use your upper arm bones to press into the ground and feel that root there. Whatever is touching the ground is the root.
Good, now lift your heels up off the floor. Inhale, exhale, one vertebrae at a time comes down. Good, you can move your block out of the way. Take your arms out to the side, just let the knees roll out to the right. They'll land wherever they do.
Take a long breath right down the left side of the torso. (inhale) (exhale) Inhale and come back up. Exhale, over to the other side. Long breath down the right side of the torso. (inhale) (exhale) Inhale, rise back up.
And we're going to come over to the right side and rise up here. Now I'm going to place my left hip right up against the wall. This is a really important practice. It's something I recommend for people every day. If you work all day long and this is the one thing you could do, I would say do this.
So, we're gonna come right up against, the left leg goes up, the right leg will follow. It's really important that you come in close and then you're gonna lie back with the legs straight up. If you need more space away from the wall, please take that space, if the hamstrings are tight. Slide the shoulder blades under, turn the palms up, we'll close the eyes. Feel supported by the ground.
Notice the sensations in your legs. Just notice the natural weight of gravity and the effect on our body. And we use this practice to help remind us to be steady and centered. And in the moment we can use the ground and our ability to contact the ground to remind us to be present. That wherever we are and whatever situations arise, we are here.
Now if you would prefer to stay here, please feel free to do that. I like to do this for 20 minutes. We're gonna make our way out to close this practice by drawing one knee at a time into the chest. Give yourself a hug. Send your right arm up over your head.
Roll to the right. Gradually rise up. Coming up to a comfortable seat. Good. Set your palms down on your knees and root your sit bones and feel that rooting help to support your spine.
Have your head rest lightly on your torso as if it could nearly disappear. And steady and with equanimity. We use the practice to simply be present. Let's bring the palms together at the heart. We'll take the hands to the forehead.
Right though, may we be steady and present and joyful. The hands come to the mouth, right speech may our words improve upon the silence. And our hands come to our heart, right action, may we be the change that we wish to see. Namaste.
Mandala Yoga
Mention
 |
Jennifer Prugh (Teacher) |
 |
Kate M |
 |
Gigi M |
 |
Frederic M |
 |
Christy Li |
 |
Whitney S |
|
|
Patricia I |
 |
Lauri K |
 |
Anne J |
Comments


 I had a great time making it!
 I just finished shooting a back bend series against the wall for Yoga Anytime, I'm looking forward to sharing that one as well!


You need to be a subscriber to post a comment.
Please Log In or Create an Account to start your free trial.
