Description
About This Video
Transcript
Read Full Transcript
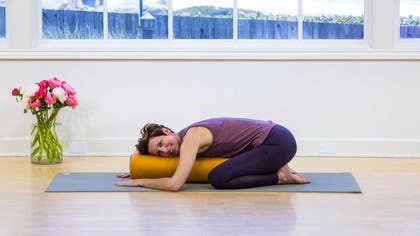
For this practice you'll want to have a blanket or two, a bolster or some other kind of cushion and some kind of chair or a couch toward the end to put your legs on. We'll start in a seat just with a moment of settling, feel your base orient, feel the ground and let your body settle and land. And then with an opportunity to redistribute any energy which might be condensed in some area and share it with areas where it's not flowing so much before we come into some restoratives. Let's do a few torso circles. So you can take your whole torso, your rib cage over to the right and then circle it back and over to the left and forward. Your hands can be resting on your knees or they can slide on your legs if that works. And let your head follow along naturally so you don't have to hold it any one place as you move. And the next time you circle back just easy change direction. Letting this also start to loosen and widen the breath. And then come back to a steady center. So one way to soothe the nervous system, one practice or tool that's kind of nice to have in your toolkit is eye palming. So we'll cover that here so that we have it as a resource later. Sensitize the hands just bringing them together, rub them together briskly and then take a moment to feel the sensation or tingling or temperature that's in the palms. And then you'll use the entire rim of the palm or the rim of the hand to encircle the eye socket with the center a divot of the palm as an opening or a hollow for your eye. So I like to actually turn the pinky fingers in just slightly so that the big pinky knuckle fits right in between the nose and the eyebrows and then seal across the eyebrows under the eye socket or around the eye socket under the eye. The fingers can be loose just resting on the forehead or the hairline. Make sure the shoulders are relaxed and the elbows will be out in front of you for a moment. Now this is a gentle pressure. It's enough to seal so that if you were to barely open your eyes, it's dark in there. There's no light. So if there's a way that you can create that seal, if there's any place that is that light is getting in, see if you can seal it without struggle, without strain. We'll take another breath here and then keep your eyes closed as you slowly start to release the hands and you'll you'll see the light coming in and we don't want that to be jarring in any way. So keep the eyes closed as you take the hands all the way down and then really slowly crack the eyelids and blink the eyes open. So you might notice that even just those few breaths of having the seal and having that pressure around the eye socket had a certain effect and we want to stay with whatever calming, easeful feeling was available there without just popping right back out into the bright light. So that'll be a resource as we go through this practice. Our first pose is going to be child's pose. So you'll come around starting on hands and knees and I'm going to use a bolster. So you can stack blankets or other cushions or a bolster, use a bolster between the knees so as I sit back toward the toes, big toes toward each other, knees a little wide taking that bolster just between the inner legs and then hands on either side of the bolster have a moment here and then start to walk the hands forward and you'll feel your torso and chest start to come down toward the bolster, the support. Turn your head to one side and let that ear come all the way down. Now if you find you want a little more head support or you want more lift underneath you, you can add props or layers. We'll be here for about four minutes. It can take a few breaths to settle in and really start to let your body trust and rest into the support underneath you. Find a comfortable place for your arms where you're not holding yourself up, where your shoulders feel at ease. You're never stuck in any of these shapes so if something doesn't work or stops working, feel free to come out or make adjustments. As the body continues to release and unlayer onto the support, into the shape, we're going to tune into the flow of the movement and count of the breath and the idea here will be making the inhale and the exhale just about equal length. So you can use a count or you can just be general feeling an approximate length of inhale and exhale or you could count maybe a one two three inhale and then a one two three exhale. Your own count, your own length, just noticing your breath as it is and encouraging equal length of in-breath and out-breath.
If anything about noticing or affecting the breath starts to feel overwhelming or stressful, let it go and resume completely spontaneous natural breathing. Turning the head very gently lifting and turning the head to the other side, settling back in. So as we start to transition out of this pose, very consciously keep your neck and head as relaxed and heavy as you can. First we'll slide the hands back so that they're to the sides of the support maybe under the shoulders and then again keeping the head heavy, neck relaxed, press yourself away from the support. Let the head hang. You're pushing yourself up to that halfway point and then you can just scoot the support forward. Shift onto all fours, hands and knees. Take your knees underneath you, your hands a little bit forward and we'll stretch one leg back, tucking the toes, pressing back through the heel, getting a little flow in the knee and then other side. If a cat cow or any other movement feels good here, feel free to do that and then we'll transition into our next pose. A twist, a supported twist. So we'll again use the cushion or the bolster as well as a another blanket or two. So we're sitting kind of side saddle on the right hip and outer leg with the knees more or less stacked and then perpendicular out from the hip is your support. So it can be nice to put a little something between the lower legs like a little spacer. If you don't have that it's not a big deal and sometimes it's nice to have a little bit of cushion here for the head. You can pick that as you come into it. Okay so we'll start by turning, feeling that turn toward the support and again straddling that support with your hands and then much like we did in the child's pose, elongate as you turn. So there's kind of two pieces, getting long and turning toward the support as you lower to your forearms and then widen the elbows and turn the head. Let's turn the head in the direction of the knees that tends to be a little more gentle in the neck and then like in child's pose let the arms widen so that you don't need to hold yourself up here. Let yourself settle into the support, get heavy, be held and we'll be here for about two minutes. You can come back into that equal length breathing. Inhale and exhale about the equal length and you can count that if that feels good. Again if anything about that feels stressful, letting it go. You might find that after a couple of moments in these poses the body wants to settle a little more deeply. Let yourself make any adjustments that help you create a container of calm, of love, of care, anything that helps you feel more regulated and then like our exit from child's pose keep the neck relaxed, the head heavy, slide your hands back under your shoulders and begin to feel the press of the hands into the solidness of the ground. As you lift yourself away from the support let your head go, find that halfway point to acclimate and then walk the hands back toward the body come the rest of the way up and you'll orient toward the knees again. A little counter twist if that feels good and then coming back to center. So the best way I've found to switch sides is you can keep your spacer or let it go. Just swivel over onto your seat and then do the same thing to the other side. So now the knees are to the left. You're sitting side saddle on the left outer leg. You're arranging your spacer if you have it between the lower legs and you might need to make an adjustment to that support so that it is again aligned perpendicularly with the left hip. And then we'll turn and we'll take that halfway point and feel that rotation starting to happen now as you begin to walk out and lower, elongate kind of like a telescope as you turn toward the support. Turning, walking, lowering, turning, walking, lowering. And when you get to the forearms there might be a little adjustment in it in the bottom hip in the waist so you have elongation and nothing's pinching, nothing feels distracting. And then coming the rest of the way down and turning the head again in the direction of the knees, finding a place for the arms. And we'll be here for a couple of minutes. If any part of your body feels like it's in the way you can just come up, readjust, move it. So make sure that you have the support you need.
You're physically as comfortable as you can be so that you really can release into feeling supported and feeling held. If it's working for you that equal breathing, equal inhale, equal length exhale, the breath is the fastest way to access and regulate the nervous system. And the equal breathing is great to use to balance. And then head heavy, slide the hands back, press into the floor, let the head hang as you come up halfway, pause. And then coming up the rest of the way, turn toward the knees, maybe a little counter turn toward the feet. And then releasing the spacer. And let's take a seat for a moment. Have a little check-in. You might wiggle, do those torso circles again, redistribute any energy that's collected into areas where it's not moving so much. For our next pose, we'll be transitioning onto the back with a blanket underneath the back of the body. So if you have a fatter cushion or some bolster that you were using, you can set it aside. And for this, you'll take whatever blanket you're using and unfold it so that it's a longer rectangle shape. Put it on your mat with a little bit of space toward the head side of your mat. The fringy edge, if there's fringe on your blanket, make sure it's toward where your feet will be. And then this is kind of particular here. So we're gonna put this behind the heart as a little chest opener. And little is the operative word. This isn't like a big heart roll or a heart bolster. This is very, very subtle opening. So just one fold. And you'll have an opportunity to even decide if one fold is too much, in which case you could come up, unfold, and do it with this edge of the blanket. So we'll try it with one fold and see how that goes. Also the wear of this heart support is important. We want it just underneath the arms. So if you think of the band of your upper chest, not under the shoulders and not way down here, just under the arms. So keeping the feet on the floor, lowering the back of the body, and then as you feel that little bump of support, you might need to walk yourself forward or back so that as your arms come out into a T, your arm might be grazing that fold, but it's not on the fold. You're clearing the fold on the other side, on the head side. I like to lift the hips, lengthen the tail toward the feet, and then come back down, rock the head a couple of times. You can keep the knees bent, feet on the floor. You could do the constructive rest with knees together that we did in a prior practice, and you have the option of straightening the legs as well. We just want to make sure that the lower back is happy. So we've changed orientation in a really important way, and this is a good time to check in. We've had the front of the body supported, which is rare and wonderful for the nervous system, even for the mind. Now we are on our backs and the front of the body is exposed, so just see how that feels. Does it feel welcome to open in this way? If not, you have the option here of rolling onto your side. We'll spend about three minutes here. As you continue to settle, feel the back of the body widening and getting heavy. It's always curious to watch how the body might be inclined to hold itself up. Little by little, we start to rest into fully rest into the support. This is a place, if you really liked the eye palming or found that restful, you could do some eye palming here. And whereas the equal breath, equal inhale, equal exhale, was more of a balancing breath, when there is anxiety or a heightened sense of energy, we can bring in a longer exhale, so elongating the length of the exhale, maybe by one count or two counts or even double the length of the inhalation. So if this started out okay, but now it's beginning to feel a little charged or at any time in your day, elongating your exhale to what feels like, even if you can't manage the counts, to what feels like longer than the inhale, again is that direct access to the nervous system and is very calming and soothing. After your next exhalation, start to wiggle the fingers, maybe roll the head side to side. To come out of this pose, we're going to roll all the way over onto the right side. You can use your bottom arm as a pillow for the head and then keep rolling like you're turning your chest and your face toward the floor. Press yourself up and just make a seat for a second in this transition because even as this was a really subtle lift under the back of the chest, the back of the heart, I want you just to notice if there was an effect. Notice how that effect, if there was one, distributes through the body or resonates into your other states, your mental state, your emotional state, even into your breath. Our next pose is going to be legs on something, which could be some kind of chair or couch. So get that near and we'll come into legs on the chair. Okay, so I have my chair. I'm going to unfold the the heart roll that we used so that I now have just a long blanket again. Your chair can go right at the other end of the blanket where your legs will go and this is just so that your entire torso, including your head, will be on the softness of the blanket. Oh, I also like to have a little bit of padding and then temperature control. If the seat of the chair is cold, put a little something if you have it onto the seat. Just a little more cush for the legs. You'll scoot close-ish kind of to the edge of the seat. Do a little side shuffle as you roll onto your back and it's not technical. You don't have to be any specific place. Just somehow that your calves, the backs of the calves, can rest on the floor. Your heels might be on or off of the the back of the chair. Again, make sure that your head is supported so if you need to make any adjustments. All of your torso from head to tail is on the blanket and then letting the arms come down, making any little settling in or fine-tuning adjustments. You can keep the eyes open or closed. You could do some eye palming if that serves you, supports you, and we'll be here for about four minutes.
This is another time to check in. How does it feel to be belly up, face up? If anything about this doesn't feel right, makes you feel anxious or overwhelmed, you can roll to your other side if you rolled onto your side in the last pose. This practice is really about supporting all of your systems, in particular your nervous system, a little bit of a reset, a little bit of a resource. So activation, anxiety is the opposite of what we're going for here. Using that elongated exhale as it works for you. Maybe there are a little shift. Lifts or layers that fall away, layers of tension, layers of worry, and you start to settle in to this physical place with a little more ease. Letting the legs be fully supported so that they can enjoy this inversion, this release, waterfall. Feel this next exhalation move all the way through, all the way out, feeling of emptying, and then at the end of that exhale, bring some movement, some wiggle, maybe even some gentle stretching, that eventually brings the legs in. So you can stand your feet, your heels or your feet on the support, and then from there take your right arm overhead as you roll to your side, and then keep rolling as though you're turning your chest and your face to the floor as you press yourself up.
Situating back into a seat for a moment. You might close your eyes here or orient around where you are with a more kind of dreamy, hazy gaze, and check in with this inner state. Restorative is such a courageous practice. It's quiet and can be very soothing, and yet it can also not feel so quiet and not feel so soothing. So congratulate yourself, appreciate yourself for being here, for being with your experience, and loving on your body in this way. Thank you so much for being in practice. See you next time.
Yoga for Grief: Michelle Marlahan


Mention
 |
Michelle Marlahan (Teacher) |
 |
Sandra Židan |
Comments


You need to be a subscriber to post a comment.
Please Log In or Create an Account to start your free trial.
