Description
About This Video
Transcript
Read Full Transcript
Hello, everyone. Welcome. So in today's session, we are going to focus on neck and shoulders. And it's a lovely practice to release tension in the neck and shoulders. Okay. I'm also gonna emphasize and teach how you can use your arms as a gateway to the upper spine. So it's a really effective tool.
Your arms are a really effective tool. For releasing the tension in your neck and shoulders. Okay. What you will need or what you may need, you may wanna have on hand, is a chair couple blankets, a strap, a bolster, and a block. Okay? But to start, you can have a clear mat and just a spot at the wall. And begin by placing your right hand on the wall and standing straight, right, avoid leaning like this, but stand up straight and have your arm absolutely straight as well.
I'd recommend having your legs just slightly apart. And then spread your hands. Spread your fingers. So just like with the feet, how we talk about the toe mounds, you also have finger mounds. And you wanna connect this area really strongly to the wall. Okay? Look at your hand.
And even use your free hand to really separate all the fingers as far from each other as you can. K. Emphasize the thumb and spread, spread, spread it from the index finger. Okay. Now suction your palm to the wall. And from the underside of your arm there, push into the heel of your hand. Right? This right here, this is the heel of your hand.
Push into the heel of your hand. Rotate your upper arm out. Okay. Turn it back. Roll your shoulder back and lift your chest up. Once again, from the underside of your arm, push the heel of your hand into the wall, turn your upper arm out, lift your chest up. Okay? Just observe the texture of your arm, the quality there.
Push the wall, turn your upper arm out, lift your chest up. Okay. Release. Take a moment. And now we'll go for the second variation in this sequence. This is Parshva, Hassan, sideways, Okay. So now for the second version, turn your hand back. Okay. And we're going for 3 rounds.
So see if you can find some kind of halfway mark. Okay? I like to turn my fingers straight back. K. And then again, at about shoulder height, and spread all those fingers as much as possible away from one another and then push into the heel of the hand. Now if you have the structure where you can sort of overdo in your joints hypermobility, I I do have that, ability to do that, just put a little bit of a break at the elbow joint so that all the information, the messaging is going into the neck and shoulder region. Okay? So hand on the wall, suction the palm to the wall, push there, reach the underside of the arm towards the heel of the hand, push the wall even more.
Now roll your shoulder back, turn your upper arm out, and again lift your chest up. Feel where there's a connection to the wall and where air pockets are sort of creeping in and as best as you can push. Push push push. Maintain it. Breathe.
Yeah. Okay. And then release. Pause for a moment. Now even just this much, we've only done much. I want you to observe the arm you're working on compared to the other arm.
So right arm versus left. And notice again the quality, the texture, the amount of alertness or dullness on each side. K. Can you spark that sensitivity? That alertness. Alright. Final presentation here. You've done fingers up, fingers back. Now how far down are you able to go within reason?
For this next variation. And again, this would be if you hyper extend in the elbow, it's really easy to go in there. So just put a little break on the elbow. And insist that the information is coming towards the neck and shoulders. Okay? Spread the thumbs strongly away from the index finger reach into the heel of the hand, turn your upper arm out, lift the chest up.
Straighten your arm completely. Hold it. Okay. Notice if the fingers are buckling. Then even shift a little bit more weight towards the thumb and index finger side of the hand. Okay. Externally rotate your upper arm, but press that wedge between the thumb and index finger.
Maintain this. Push. Okay. And then release, and just feel feel the vibrations. Okay. Release. And let's do this much on the second side.
Okay. Left hand goes on the wall. Shoulder height, feet a little bit apart. And once again, spread the thumb strongly away from the index finger. K, reach into the heel of the hand and push the wall. So it's really not just that your hand is touching the wall, but it's actively engaged, stand into the heel of the hand and push the wall. Okay.
Rotate your upper arm out. Roll the shoulder back. And from the underside of your arm again, reach into the heel of the hand. Now because we've already done the right side, let's engage there as well. Broaden your right collarbone and roll that shoulder back. Okay.
Externally rotate the upper arm. And lift your chest. Go back to the left side. Turn your upper arm out. Roll that shoulder back and from the underside of the arm, push push the wall.
And you may just catch sort of an equal and opposite action. As you push the heel of the hand into your into the wall, the outer edge of the blade just sucks sucks into the midline slightly. Okay. Push there. Draw the outer blade in. And once again, roll your shoulder blade down your back. Hold it for a moment.
And then release. Tadasna. Take a second. If there's any wrist issues, feel free to do some circles. There's work out any stiffness there. Alright. And then round 2.
So now we've had the hand the fingers pointing up. Turn the fingers back. Spread and do feel free to use your free hand. Really open up those fingers. You can even, actually look at the nail bets. Right? You wanna you can see how the nail bed of the index finger starts to roll towards the middle finger.
So center it, roll some weight towards the thumb and index finger side, and then again straighten your arm. K. Rotate that upper arm back. Roll the shoulder back. And from the underside of your arm, push the wall away. K. Stay lifted on the right side as well.
Chest up. Maintain this. Perjba. Okay. Release again. Take a couple breaths, and then last variation.
Turn the fingers as far down as you're able. Okay. Again, watch for hyper extension. So a little bit of a bend. If you have those types of arms where that can be an issue.
Okay. Spread the thumb away from the index finger. Roll your shoulder back, rotate your upper arm back, push into the heel of the hand, lift your chest up. Push into the heel of the hand and suck that outer blade into the midline, drop the shoulders again, push into the wall again. Chast up. Maintain this.
Again, notice if the thumb starts to shrink. That's really common. Extend into it. Okay. And then again, release being taught Asana. K. Notice yourself here in this Tarasna.
Feel the sensations, the vibrations, just the quality of your your your skin, your muscles, and where you're starting to be sensitive So it may be the upper arms, it may be the neck and shoulders, but just start to notice if there's a certain level of awareness that's starting to surface. Okay. I love that sequence. I think it's I love it, especially because it's it's no fuss, right? You can do it anywhere.
You're having some strain in neck and shoulders. I highly recommend just a quick insert it into your day. Okay. We will move along. This next sequence I love this one too. Also a really good one.
You'll use the chair for this and a bolster. If kneeling is a bit of an issue for you, if your knees don't love it, please feel free to add some extra padding So you can place a blanket down. You can fold your mat. So you've got some extra extra padding there like that. And This next sequence is a variation of Arta.
So, actually, it can be done standing. The kitchen counter is an excellent place to do this sequence. I'll show it kneeling just because it's sort of practical here. At this in this moment, but both are really, really good ways to do this. Okay? So what you're gonna do is you're gonna place your right forearm down on the bolster. I'm gonna show you in a sec, but then you're gonna line yourself up with your elbow on your hand there and stack the forearms.
So what I'm looking for here is that your elbows are coming straight out from your upper arms. Okay. Please, just to know, the tendency will be for the arms to slide like this and go really wide. So avoid that, but also avoid over correcting. Right? Wanna find that that middle place. Okay. So it's gonna look like this.
Place the right arm down. Stack your left elbow on your palm there, on your hand, and then stack the 2 forearms, one on top of the other. I like to keep the finger spread, palms open, and then adjust yourself so that the forehead is supported on the bolster. If you feel that's really a stretch to get the head down, you can always support your forehead on your top arm there. K. So see what's what's reasonable there for you and then reach your hips back. So, again, we're looking for hips over the knees. Right? So not not this, but reach back.
Gauge it as best as you can. Okay? Now find the downward pressure. Press your right arm down into the bolster. Press your left arm into your right arm.
Now externally rotate your upper arms out and reach your hips back. Reach your hips back. And lengthen through your side body. Be here. Breathe. Press down through your forearms.
Rotate your upper arms out. Reach your hips back and lengthen your side trunk. Open up through your side chest. Okay. And then slowly release. Okay.
You'll carefully come back up. Walk in a little bit and then change the order of your crossed form. So left arm goes down first. Right elbow on top of the left palm, stack the forearms, and come back into this Arta Otonasna position. K. The whole idea here is that we're opening up this area. We're opening up the side chest armpit region.
Press down through your forms, externally rotate your upper arms, reach your hips back. And with each exhalation, see, can you absorb those shoulder blades onto the body more and more. Okay. You're not sinking. Avoid something like this. Keep everything nice and stable.
But reach those hips back and absorb just the shoulder blades onto the body. Now from the underside of your arm, Again, not dissimilar to the standing parsvahastasna we just did. Reach the underside of your arm towards the elbows. Hips back, equal and opposite. K. Couple more breaths.
Press down through your forearms. Rotate your upper arms out, reach your hips back, but from the underside of your arm, extend into your elbows. Okay. And then release. Carefully come up.
Just take a moment. You can drop the arms. Let the shoulders rest. Okay. And now we'll go for round 2.
So next, this is progressive. We're building here. Okay. So we'll pick up exactly from where we left off, but now we'll introduce the idea of lifting the head up Okay. And I always think about it like a turtle coming out of its shell. Hey. You wanna expose the length of the neck. Alright. Let's give it a go. Again, start with the left arm down, right elbow on top of the hand, and then stack your forearms.
Come into position and come to where we've just left off here. Okay. Press down through the forms, turn your upper arms out, reach your hips back, and then lengthen through the underside of your arms. Alright. Now as if your neck starts halfway down the middle of your upper back, right from that spot. Right from there. Slowly.
Raise your eyes up. Raise your eyes up. Chin forward. Chest forward. Hip back, like a turtle coming out of its shell. Just emerge the sides of the neck.
And as you reach your chin and chest forward that upper back, the middle of the upper back penetrated in. Back to front. Hips back, chin, and chest forward, and then release and slowly come back up. Okay? We'll go for the second side, but do be mindful that when you're raising your head up, you're not kind of cutting yourself off at the neck. So you may not even see above your arms, above your forearms, or above the bolster there very much. Really understand that the neck is an extension of the spine.
As the chin and chest goes forward, this middle of the upper back, goes into the body. You wanna feel those connections. Okay? Second side, Left arm down first, right arm up top, find your distance, K. Press down through your forearms and rotate your upper arms just to be really clear inside out. Rotate your upper arms from inside out.
K. Reach your hips back, back, back, back, and underside of the arm, extend forward. Okay. Now, again, as if you're chin is connected to the middle of your upper back. That's the the dialogue you're seeking to create there. Slowly raise your eyes up. Raise your eyes up, shin, and chest forward.
Penetrate the back body into the front body. Hips back. Chin and chest forward and like a turtle coming out of its shell, reach forward and up. Forward and up. Back of the neck is still long.
And then release. K. Slowly come out. You can sit back on your heels and just lower your arms. Take a moment.
Okay. We got one more in this sequence. And for this next one, we'll need a brick. Okay. So have that. And you're going to palm the brick.
So what I mean by that is the heel of the hand. Heal of the hand is absolutely supported by the brick, but the fingers can go beyond like this. Okay? So it it creates a different feeling, a different sensation than gripping the brick. Here, we're palming the brick. Okay? You'll palm the brick and then remember the rotation that I've described. Upper arm rolls out. This here is the outer elbow, and I want you to prick the outer elbow onto the bolster. Okay.
So palm the brick. Outer elbow catches on the bolster. Outer elbow catches on the bolster. Okay. And then reach back. Lower your head.
And be here. Rotate those upper arms out even more. They're probably being encouraged in that direction already. And then reach your hips back from your armpits to your elbow, feel like you can extend forward hips back again. With each exhalation, absorb the shoulder blades onto the body.
Arm pits can go down a little bit. But please, if you're particularly flexible in the lower back, something like this, you gotta stabilize. Watch for that. Reach the hips back. Right? So navel up hips back and armpit elbow reach forward. Pause here. Breathe here.
Hold it. Okay. Now we'll add the turtle coming out of the shell. From here, raise your eyes up, raise your eyes up slowly turtle coming out of the shell, shin and chest forward, upper back, penetrate back to front. Hips back, chin, and chest forward. Hips back, chin, and chest forward.
Hold it to send the side chest. Okay. Lower your head to neutral. Lower it down, forehead supported, and just one last variation here. Press those elbows down, but now start to lower the brick, your thumbs towards your back. K, reach into the elbows, lower the brick, and see if this just gives you a slightly different kind of a stretch different access point.
Okay. And then raise the brick back up. And slowly come back up. Okay. You can lower the brick down and pause. Okay. Moving along.
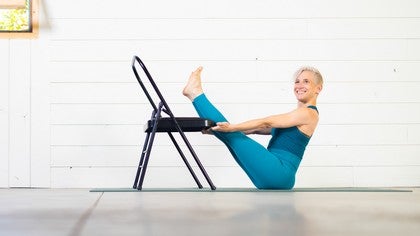
Stand yourself up, and you can clear your mat for now. Bolster and brick off to the side, but the chairmate will likely come in handy again. So It can be off to the side for now, but we will use it again. And then take a strap. Okay. With your strap, you'll need a loop that's about shoulder distance, and we'll go next into a supported with the legs angular.
Okay. So stand, what I usually like to say is to stand maybe the length of one of your own feet out from the wall. And for this, go nice and wide. You can even go out to the edges of the mat. But go at least hip distance, if not a little bit wider. Okay? And then from here, exhale everything.
Let all the air out from your lungs. And hinge forward. Okay. Hinge forward. Let go through the back of your neck. Head down.
Then take your strap behind you and slip your wrists inside the strap. Okay. Now from here, lift your shoulders up and away from your neck and then hit out against the strap and press back. K. Lift the shoulders up and reach your arms back and into the room. A lot times the neck wants to get involved. So sometimes I just like to swing my head around there a little bit.
Just make sure there's no tension. Let it go. Lift the shoulders and swing the arms back here. K. Breathe. Take your mind for a moment to the bottoms of your feet and find those three points. Big toe mound press.
Inner heel press. The middle point on the outer edge of your foot, press down. Okay. And lift your kneecaps, lift your thighs, slide the buttocks up the wall, roll the buttocks over, lengthen yourself down your legs even more. And, again, hit out against the strap. Lift your shoulders up and press back.
Alright. And then release carefully. Remove yourself from the strap. And then take one hand to your hip, other hand to your hip, and slowly bring yourself back up. K. Find Tadas now. Study yourself.
Breathe. Okay. Pajva. Okay. We'll go I into a slightly, different variation of this. And here, we'll use the wall again, k. You may wanna become a little narrower this time.
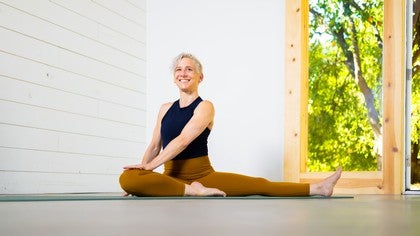
And in this variation here, you'll come as far forward as, as you're able. And then you'll take both hands onto one leg. And the, the challenge here, the idea is as if when the wall is behind you, when you take one hand to, excuse me, both hands to one leg, this hip has to stay on the wall. So you get this really nice length on the side body there. Okay. It's giving you a slight, slight twist. Okay. Parshva, Otonasna, go to the right side first.
Both hands holding the right ankle, anchor back through your left hip, and from the base of your abdomen, turn to the right. Okay? Then bend your elbows to the side. Reach your elbows forward. And lengthen yourself down your leg. Release the back of your neck.
Head down. Okay. Just find some width now. The breath across your upper back. Good. And then come to the center.
Be here for a moment. Breathe. Press strongly into your feet. 3 points. From the back of your legs, lift up to the buttocks, roll the buttocks over, lengthen your side trunk down.
K. Now take both hands to your left ankle, turn the abdomen to the left, and bend the elbows to the side. Reach the elbows a little forward and lengthen yourself down your left leg more. Right hip, anchor it back, and find this parsva. K. Just re relax the shoulders broaden them. And then come back to the center and breathe.
K. Straighten your arms. Look forward. Concave your back. If the floor is not within reach, you can take your hands to your legs and then one hand to your hip other hand to your hip, wrap the elbows back, and with a lifted chest stand up.
Okay. Push off the wall. Join your legs, stand in Tadasna. Okay. One more. Now we'll use the chair here for this.
And this is arresting Otenasana. So here Again, legs apart, exhale everything, come forward, and see if you can. Rest your forearms and your forehead on the chair here. Okay? And what I'm looking for in this variation, it's not necessarily concave back. Don't be aggressive with it, but just allow the torso to fall to, like, cascade down, cascade down. Legs are active in otana.
It's not, but the torso just releases itself down. Okay. Broad in across your upper back. Can lift the shoulders a little, but please don't don't don't be aggressive about that and just broaden right shoulder blade to the right shoulder blade to the left. Adjust your head in such a way that the skin of your forehead is just being encouraged towards the bridge of your nose, and you've got a nice neutral neck there. The back of the neck is is long. Be here. Breathe.
Take another moment. Okay. Shift the weight of your legs. Just slightly forward. Be mindful that you're not. Slinging back into the knees, but those three points of the feet, absolutely press.
Okay. And then again, slowly come back up. And stand yourself in Tadas now. Alright. Okay. We're gonna go next into a version of Viparita.
And for this setup, you will need the bolster and 2 bricks, excuse me, two blankets set up like this. Okay. And, you know, the props come one size, and we're all different sizes. So this setup can be modified according to your needs, but I'll show you what I've been working with lately. That's been working for me. Okay. I have a blanket here, and it's folded on top of the bolster.
And part of the purpose of the blanket is not just to lift the bolster, but also to make it a little wider. Okay? So it's intentional that the blanket is hanging on this side and this side. Okay. And then your second blanket can come here and just lift the floor a little bit and be like this. Okay? You're there's a little space here at the wall. The bolster's not quite up against the wall, but it's close.
Alright. Now, there's two different ways that you can enter this pose. K. One way is to sit on the side of the bolster. Like this. You sit with one buttock just on the bolster and one buttock almost like you're trying to sit on the wall. Like this. Okay. And you get really close in there. Okay.
And then you swing yourself in. Okay. Then once you've landed here like this, you may wanna lift up, walk yourself in a little closer, and lower your legs, your hips down here, into this space. Okay? Something that looks like this. It is irrelevant whether you're fully touching the wall.
That's a non issue. You're looking for softness in your abdomen. And this dome shape in your chest. Okay? So feel free. Go ahead and do that.
I would like to show the one other way of getting into the pose as well. And that where you almost somersault into the pose is a nice way to get the hips really tight in. So here, you'd lengthen the back of your neck, place the head down, and then roll until your shoulders are up onto the bolster. Okay. From here, Go in, and then you slide yourself down. Slide down. Okay. The hips fall. A little bit into that small, small space. Right? You shouldn't feel like the buttockses are way low, but just just just. K? Again, abdomen nice and soft, chest nice and open, release your arms to the side, and be here. Hey, you're welcome to have the legs together. Some folks like to have more space between the legs.
Some people even enjoy taking a bought a Kanasna positioning, right, feel free to experiment and then choose your position and just stay. Okay. This is Viparita Karani, and Viparita Karani can have quite a transformative effect on the breath. Hey, inhale, exhale, and be here. Hey. Viparita Krani is a lovely way to end the practice. If you're enjoying it, I suggest you stay.
Let this also be your Shavasna. If you feel you'd prefer something with a flat back, then this would be a nice time for you to transition. Into a flat back. K. I encourage you to stay for as long as you need, as long as what feels appropriate.
But I'm gonna end the session for today. K. Thank you so much.


You need to be a subscriber to post a comment.
Please Log In or Create an Account to start your free trial.