Description
About This Video
Transcript
Read Full Transcript
Hey, what's happening, how's it going? Welcome to this pushup tutorial. I'm a huge fan of pushups, love them, I feel they benefit me in so many ways and I'd like to share that with you. So I'll share a few different options of how to do a pushup and a few things I think are important to pay attention to. So with that said, let's start on our hands and knees in a tabletop position.
From tabletop, so gather yourself into tabletop, let your belly hang almost like a cow pose. Now what's happening here is your butt is lifting and your core is dropping. Can you feel that? Now the other thing that might be happening, that is happening is your low back, your low back there's a compressed feeling in your spine possibly, you may not feel it but it might be happening. So that's the first part, keep that.
Now the second part is if you take your elbows and point them out and back and lower down, so now your nose is kind of like just in between your thumbs. When you feel the stress you might feel on your elbows as they flare out and push up. So let's do one more like that and I really want you to feel your core. So the low belly is kind of hanging there is what I'm guessing, not working but is high, elbows straining. That's what I see a lot, a version or variation of that.
So now what I'd like you to work into is take your tailbone, your low, low, low back tailbone and draw it in the direction of your heels. Notice the shift in your pelvis but notice how that low belly might become a little bit more active and engaged and just as important is your low back begins to flatten out. So do that a couple of times, let your belly, it's almost like cat cow but you're not moving the rest of your body. So you're just moving your pelvis forward and back, belly down, lazy, not what we want. Tailbone back toward the direction of your heels, core engaged, flat back.
So now keep that. The next part is the elbows, so you want to make sure that the elbows stay as over the wrists or hands as possible. Do not let them come back. So if you lean your body forward but don't drop your butt, keep that work we did in our pelvis happening. Curl your toes, good.
Now breathe in, you lower down, elbows want to hug your ribcage as well as you come down. So graze the insides of your arms or elbows onto your ribcage and then push back up. It's really, I was probably even doing it myself, it's really natural as you're lowering down to let that butt rise. So work hard to draw that tailbone toward your heels. Make an effort almost to tuck the tailbone, almost.
Good, shift forward, inhale lower, exhale press up, good. Inhale lower, exhale press up, okay. So the other thing I wanted to mention is when you come up here, I see so many times people lock the arms out. And if you're hypermobile in the elbow joint, it's going to put more unnecessary strain. So what I invite you to do is with all the work we've done so far, you get the pelvis, you get the arms.
When you show up at the top, when you push up at the top, keep a micro bend in the arms the way you stay in the muscle, okay. Let's do one more like that, then we'll build onto this. Belly in, tailbone drawn to the heels, good. Breathe in, lower down, breathe out, push up, okay. So most likely you're probably feeling it in the triceps, shoulders, chest, back, core, it's a full body exercise.
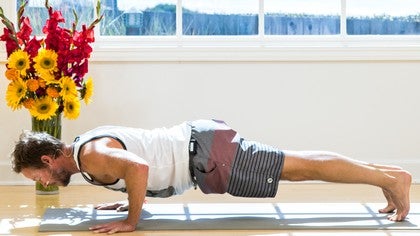
Let's try it now with legs out, full plank, okay. Hands are below the shoulders, stretch it out in that full plank, okay. So in plank pose, similar concept, right? You want to push the heels back, take the tailbone, draw it toward the heels, all right. Flatten out the low back, pull your low belly in, a little soft between the shoulder blades, okay.
Really really firm through your quads. Keep this work as you shift your body weight forward, right. So by shifting your body weight forward, this will ensure that your elbows stack over your wrists as you lower down. Look about a foot out in front of your fingertips, lower down about halfway, and then push back up on the exhalation, okay. So it's an inhalation as you lower down, exhale, push back up, good, all right.
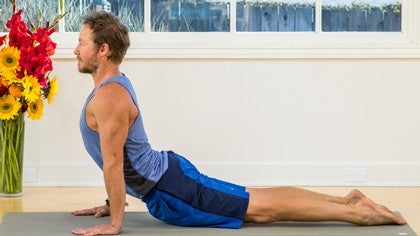
So you don't necessarily need to lower down any farther than 90 degrees, okay. When you start to do that, the shoulders start to tip forward and I think unnecessary strain especially in a vinyasa class where it's repetitive over and over and over, low push up, up dog, low push up, up dog. You may not feel it right away but over time it may tax your shoulders, okay. So with that said, let's try three other variations of push ups that you might want to play with, all right. So that was the standard kind of tricep push up, chaturanga yoga push up.
Let's take it out a little bit wider. So the hands can be about as wide as the mat and you actually might find more freedom or accessibility here with this position. But you don't want those elbows, you still want those elbows to stack over the wrist. So same setup, strong full body, right, really strong plank pose. Push those heels back, gauge the quads, tailbone toward the heels, low belly engaged, inhale lower down halfway, exhale push up, inhale lower down halfway, exhale push up.
Let's try one more, inhale, exhale, nice. That one's a little easier than this first one we did. Now to mix it up even more, we're going to alternate, it's like a practice for the one armed push up, all right. We're not going to do that right now but it isolates one side more than the other. So let's go with the left side first, meaning keep your left hand where you would have it for the regular, the first style push up underneath your shoulders, correct.
From your knees, walk the right hand forward about six to ten inches beyond your left hand. Or maybe five inches. Set up your plank, same thing we've been doing. The idea is to lean more weight to the left side, the hand that is in the normal position. Inhale lower down halfway, look at the 90 degrees, exhale push back up.
So all of it, 70% is in the left side for me. Breathe in, breathe out, elbow joint is safe over the wrist, good. Switch hands, right hand back, left hand forward. Inhale lower, exhale press, inhale lower, exhale press, nice, good. So again, triceps, shoulders, chest, back, core, legs, it's a full body exercise.
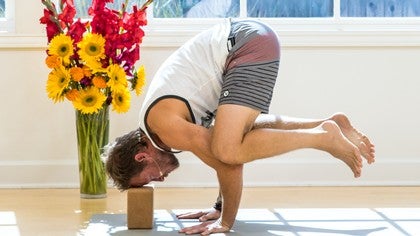
Last one, kind of a bonus play, all right. Hands are wide, this one really focuses more on your shoulders. You've got to get the hands wide, okay, so I'll take it in from, it's a downward dog position, okay. Now again, if my hands were not wide and I lowered down, my elbows would strain like crazy. Take the hands wide so that when you do bend those arms, your elbows stay over the wrist, supported.
Full downward dog position, bend your arms like your forehead is coming in the direction of the mat in between your hands and then push back up. Inhale lower, exhale push, one more time, breathe in lower, breathe out and you could even lower and move through like a wide version kind of upward dog, right, good. Take a child's pose, stretch out the shoulders. So that could be helpful, right. Pay attention to the alignment in your arms, in your pelvis, those are the two main plays and use your knees, like don't be afraid to use your knees, it's not a girl pushup, it's not any weaker.
Where do you get or where do you find you're really getting the benefit of the pushup, okay, which is strength. Body weight, strength, functional movement. Thank you, thank you, thank you.
Keepin' it Real
Mention
 |
Robert Sidoti (Teacher) |
 |
Janet L |
 |
Tracy S |
Comments


You need to be a subscriber to post a comment.
Please Log In or Create an Account to start your free trial.
