Description
About This Video
Transcript
Read Full Transcript
Oh, mamaste everyone, nice to have you here. We've got a strong shoulder practice in store for you today. And I'll mention that if you're working with some shoulder pain, you might want to make sure you review some of the earlier sessions that we have that will help build into your shoulder strength and your shoulder freedom. And then we can move into this practice together. Today you're going to need three blocks.
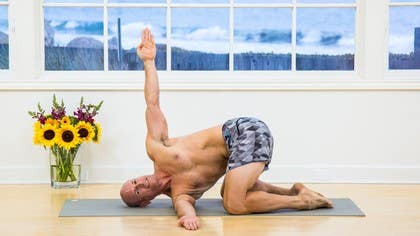
If you only have two, that's okay, the three block setup is kind of like a luxury liner setup and I'll show you how to use two if you only have them. We're going to start here seated to open up the chest in a nice twist. We'll turn to your left side first, right arm comes across, left hand behind. What we're trying to do here is use the arms and shoulders to get that nice chest opening. And for the complete twist, turn and look over your right shoulder.
And you'll see how that energy of the neck turn draws the chest in. Let's take some deep breaths and spin to the top chest, soft letting go. Use that arm power during inhale, exhaling, let's do one more together. Inhale, arm power helps turn you, little work of the neck muscles, and then release. Second side, left hand comes over the knee, right hand behind on the blankets, lift up nice and tall and turning to the right side.
Let's use that neck turn to help further the twist and we'll go with our breathing. Inhale, right up to the top of the chest, exhale, a little deeper in, inhale, tall spine turn, exhale, neck energy looking over the left shoulder, inhale, exhale and turn. And then back to center. Our next pose will be variations on cat and cow. Let's take the blankets off to the side and we'll come into our classic cat and cow position.
We'll start with the fingertips pointing straight ahead and work through the spine action. Spine coming up on your exhale, spine going down on your inhale. Let's do four more of these together, exhaling, spine goes up, push through the scapula, inhale, drop the chest through the scapula, three, exhaling up two, one and let it go. Now we'll challenge some new hand positions. We'll turn the hands out 90 degrees, fingers pointing out to the side.
Let's practice five like this, breath in, exhale, push up. Feel the different sensation in those shoulder blades, inhale, exhale. You might check and see, is there a difference between the way the two shoulders work? If there's a tender side, how does that arm work compared to the other side? There are some adjustments you can make in the way that you're pushing and dropping.
Let's do one more together. And now our final hand position, maybe something new, turning the fingers directly backward toward the knees. Here we go. Big breath in, exhale, we're going to go up first, pressing through those hands, inhale, again dropping through the shoulder blades. So this is a new position for many people and it brings up new sensations in the arms and the shoulders, new set of strength.
What does it feel like in your body? If the wrists complain a little bit, you can come out and pause and join us after you've rolled the wrists around a few times. Let's do one more together. And then take a break for a moment, roll those wrists out, give them a little rest. Working further into our shoulder strength, we're going to come into a forearm plank.
We'll start with the arms shoulder-width apart and you can make light fists. We'll begin by walking the knees back until the hips come down to about level with your shoulders. Here comes our shoulder strength. A breath in, exhale, push up through those shoulder blades, inhale, dive down a little between, exhale, pushing up, inhale, dropping down. Let's do three more together, exhale, again, feeling into those arms.
If you fatigue, if pain comes up, take a break. As you practice this, you'll find that the strength grows and you're able to do more and more over time, last one. Walk yourself out, take a little break, might roll the shoulders around a little bit. I'm going to challenge you now with a full shoulder plank. Here we go, forearms down, thumbs up, make light fists.
If you'd like to join me in the full plank, come on up, off those knees. Then one more time, we're going to do a set of five, building the strength in the shoulder joint, rotator cuff, pectoral muscles, back muscles. Breath in, breath out, one more, and rest the knees down and come on out. Let's take a moment once again to roll those shoulders and let's settle down for just a moment in a child's pose. Give everything a little bit of a rest.
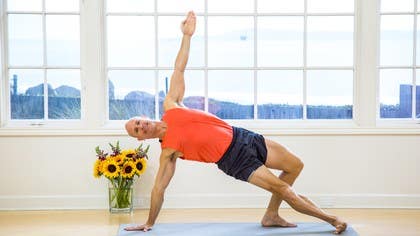
From your child's pose, press up and we'll turn onto the left side first for a side plank. We're going to keep the knees down for this one so we can focus the strength into the shoulder. We're going to point the fingers directly away from the body. Let's focus on the arms, something that we learned in the earlier sequence where we learned how to turn the bicep to open the chest. Let's do that a couple times together.
We're going to turn the bicep directly out so the shoulder blade begins to help prop open the chest. This movement in the chest is very helpful for building strong, healthy shoulders. Let's take this now into the side plank. Turn the bicep out, press that shoulder blade against the back chest, and then pressing the knees, come up into your side plank. First thing we'll do, bring the hips forward so we make a straight line from knees to shoulder.
Then we'll add this top arm for just a little bit of flare. Holding here, five, four, breathing, three, two, touch down, rest. If you ever need to come off your wrist, please do, just roll it around and we'll start again. One more time on this side. Let's do two times bicep motion, shoulder blade action, one more time.
Bicep turning out, shoulder blade opens the chest, we'll keep it. Press the knees into the floor to lift the hips. Bring the hips forward so you make a straight line and let's add the arm just to express that full pose. Holding five, four, three, two, and rest. We'll go to the other side and so you can see a little bit different view of how this works from the back side.
Let's practice, fingers facing away, bicep rolling away from the body to get the shoulder blade down the back and opening the chest. A few more times with me, turn the bicep out, shoulder blade action opens the chest. One more and we'll go in together, turn the bicep out, shoulder blade action, hold that. Ready, press the knees and lift up, move the hips forward, straight line in the body and we'll take the arm, holding five, four, three, two, come down and rest. Relax the shoulder a little bit.
Let's try one more time. Two times together, we'll turn the bicep to get the shoulder blade action and one note with this, notice that this creates a long neck. Take some of the pressure out of the neck, so helpful also there. Turn the bicep, shoulder blade going down the back, we'll hold that. Press the knees, lift the hips and bring those hips forward.
Top arm up just to express the full pose. Right shoulder blade supporting for five, four, three, two, and one. Bring it down. Let's take a moment, cross the legs and from here let's move into a seated forward fold just to relax the body and recover the breath from the shoulder work we've done so far. I'm taking a few nice deep breaths into the back body and see if you can expand the shoulders away from one another on your inhale.
One more breath here and then press your way back up to sitting. I'd like to share with you a modified headstand. I think it's a wonderful practice to do to help traction the neck and build shoulder strength for eventually getting up into a full headstand. What we'll do is we'll bring our mat to the wall and as I mentioned, we're going to do this with three blocks. If you don't happen to have three, I'll also show a two block version.
We'll take one block, what I call thin way relative to the wall and a few inches off the wall. That way our hands can interlock around and we'll take the other two blocks flat and wide way away from the wall. Here's the three block setup. I'll demonstrate that first. If you happen to only have two, you can just start with me with the second block on top.
I'll demonstrate with three blocks first. We'll start by coming down on hands and knees and interlace the fingers any amount you comfortably can around the block, the base of the block, elbows, shoulder width. We'll start to come in, drop the head and the head may or may not touch the ground. Here we lift the knees and begin to walk in to press the upper back against the blocks and the more you walk in, the more compression the upper back has against the blocks, the better it feels. It feels like just this hand of comfortable help is holding up the pose.
It allows my neck to be completely free of tension and gives my shoulders a beautiful lift. It teaches them how to hold headstand pose. So we'll hold here for about another 10 seconds. If at any time you feel too much pressure in your head, come on out and you just rest in a child's pose and to come out of the pose, walk back. You can lift the head a little, lower the knees and we'll rest in a child's pose and come on up.
I would like to show this pose with just two blocks so you can get the experience of what that would look like. It's the same basic setup, interlocking, and if you have three blocks, continue on with three blocks. We're going to do one more round of this lovely headstand. Interlocking the fingers, elbows, shoulder width apart. We'll start by bringing the head down, relaxing the neck, then lift the knees and walk in.
And you'll feel that compression from that second block on top, it just doesn't compress as high up the back as the three block setup does. So if you have a friend who's got an extra block, they can loan you. You might ask them if you can borrow it for a few days. Now, if your hamstring flexibility happens to be such that walking in is very difficult, no problem. You just bend your knees and you can still walk the body in.
As you're holding the pose, remember soft neck, but forearms pressing the floor to help lift the shoulders and give the space. About 10 more seconds. Easy breathing if you can. If at any time you need a rest, you come down and let's back the legs away, lift the head a little, come down and let's take our child's pose rest. Let the breathing settle, relax the neck, let the shoulders out to the sides away from the neck.
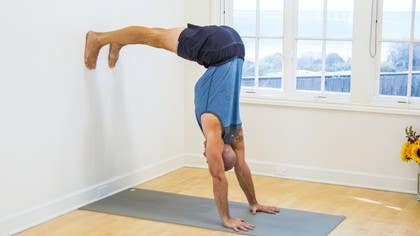
And then let's come up from there. The next pose I'll be showing you is handstand variation. This is a wonderful pose to build shoulder strength, chest openness. I think you'll like it. It'll be up against the wall.
We'll get rid of the blocks. And before we do the handstand, we're going to practice the shoulder strength needed for this pose via downward dog and a plank. If you'll find your downward dog length, we'll come up with the heels touching the wall. So here we go into downward dog and my heels are at the wall. I'm going to touch my shoulder blade area and that's what we're interested in here, the shoulder blade area.
First come forward and we're going to call that shoulders and shoulder blades coming forward away from the wall. Change, push back from the shoulder and shoulder blade area so the chest moves toward the wall. Come forward, shoulders and shoulder blades are coming off the body, let's say. Press back, shoulders and shoulder blades helping to press the chest toward the wall. One more time.
Just to get that experience because we'll need this in the handstand that we'll do in a moment. And pressing back again, the feeling is to push the hands so you feel those shoulder blades press the chest toward the wall, soft head and neck. And then release the legs, come down. Let's take a little rest and we'll prepare ourselves mentally for this upcoming handstand. The way to get into the position, to set our position up, we're going to bring first the feet to the wall and the hands under the shoulders, kind of like the cat and cow pose.
From here we'll walk the hands about a hands length forward and this is our start position. I'll begin by bringing the knees up, we don't need to straighten them at all. And practice that shoulder and shoulder blade motion against the back. This is what keeps us held up strongly. I'm going to walk a foot up about as high as my bottom and this is where I have to build a little trust as I straighten that leg and bring both legs up.
Here I'm pressing the shoulder and scapula toward the wall and from a previous session doing the leg opening action. And then slowly walking down, child's pose rest, take a break. If any thoughts are going on around in your head, you know you can take a step back from them, let them run their course. We'll try a few more times and build strength into this. Let's come up again, practice.
We'll start with the feet against the wall. Hands begin under the shoulders, we'll walk a handstand forward. Then come up with bent knees, pressing shoulder and scapula, shoulder blades toward that wall. Support the chest. Bring a leg up about as high as your bottom, no higher and begin to push through the wall and straighten that knee.
Now we've got both legs up. First action, shoulders and shoulder blades a little into the wall. That's that direction. And then lifting the knees and thighs and then walk down. Child's pose is the rest.
Relax the neck, relax the shoulders, let the body recover. And then press up from child's pose. So I have our challenge pose of the day. If you're ready to take this handstand to one more level, I'm going to demonstrate and you can follow along if you like. One leg up, we'll come down and do the second leg.
If you're not feeling ready for that, and you maybe even want to back step it to the dog pose we were learning or the upside down L that we've been practicing, please feel free and we'll gain the strength over time together. I'll start us in the cat and cow position, feet against the wall and then hands come about a hand span forward. Then we'll come up into the upside down L. Remember bent knees to start, do the shoulder shoulder blade action and we'll take the foot up about as high as the bottom. Push into the wall to lift and straighten that knee. Both legs are here.
You can heal, toe them together. First leg up. Let's try it. If you're going to join me today in that straight up and down, both heels, you'll see my toes perhaps lifting. If you're just following along for the first time, both heels reaching in their respective directions, three, two, touchdown to the wall.
Keep that shoulder shoulder blade action for support and walk down child's pose, rest, take some breaths and we'll come up. We've got one more side to do. Let's do it. Bringing your feet against the wall, hands under the shoulders, walk a hand span forward and then curling under the toes, lift the knees, bring one foot up against the wall about as high as your bottom and let's straighten the legs. If we're taking the other leg up with me, let's do it together.
Straight leg comes up and we push through the heels to come up and out of those shoulders, holding here for five, four, three, two, touchdown. Keep your shoulder and scapula strength so you can come down safely and child's pose one more time. Great job in challenging these. Take a few breaths, calm the system down a little, and then slowly press yourself up to sitting. Well done on challenging those handstands and inversions.
They're tough and they'll get easier and easier over time and after a time, sounds crazy but you actually feel like you're flying in those poses. They're so delicious to do. We're going to calm things down now with a seated twist, I'm going to recommend blankets. It just makes it easier for the body to get into the pose. Two blankets helps even more.
Folded blankets are going to come up on top. Let's start by sweeping the two bent knees off to the right side. Traditionally, I rest the top shin on the other foot. If you want to just point the toes back, that's fine as well. We'll twist to the left.
Hand comes over the knee, turning and so we're choosing this twist because it allows us to take full advantage of that chest openness we've practiced in handstand, in headstand, all the work we've been doing. So I use my right arm against the left thigh to help turn and now let's do the neck action for the last few breaths. Turning the neck, lifting the chest and spine. One more nice long breath. And then let it go.
Let's change the legs. We'll bring them forward, off to the other side. It's helpful if you shift to the edge of the blanket there. Again, my top shin is going to rest into the arch of the bottom foot. My right buttock is on the blanket.
My left buttock is off. That helps me level here. We're turning the right side. Left hand across and feel how that spine gets to blossom open all the way to the chest. Using that depth of the twist and turning towards the left shoulder.
Using the turn of that neck to really help open the chest. Take a few more breaths and then release your pose. We're going to finish this sequence with a little bit of a back bend. I call it a mini cobra. We can take the blankets off to the side and lie down on your tummy.
We'll start with the hands alongside the breast line here and legs together, toes pointing. The concept is, if I could pull my hands strongly enough, I'd slide right on across the floor. I'd be pulling myself forward. But if the hands and body can't move, it helps us get right here to the top chest to open here. We'll place the hands, begin by rolling the shoulders up away from the floor and down towards your hips, elbows in close to the body.
As though you could slide your hands, pull the hands towards the hips to focus on the blossoming open here of the top chest, the opening of the ribs. This is very important for a healthy neck and the flow of those nerve roots there, for shoulder function, and then take a rest. You can turn your head to one side, rest your head down, we'll do twice more. Let's do it again. Bring the hands alongside the breast line and we'll roll the shoulders up and down toward the hips.
Bring the elbows close together and we'll pull the hands toward the hips, focusing on blossoming open that top chest. And then ease off, take a rest. We can turn the head to the side again, couple breaths, final one. Hands alongside, shoulders rolling over the top and down toward the waist, elbows in. Pulling the hands on the floor as though we were going to try to slide ourselves and this focuses the energy to the top chest.
See if you can bring a few breaths all the way up to the top and collar bones. Let's take that final break, turning the head to the side, relax, let the legs go, breathing into the back body, side body. And then we'll press ourselves up and get ready for a nice shavasana. We've earned it. Take one blanket for the head and neck and we'll turn onto the back, let the body down.
Adjust the blanket so it's only underneath the head and neck but not underneath the shoulders. Take a moment to tuck the shoulders a little down the back toward the waist and a little in toward one another. This supports open the chest that we've been working on in this session. And then one leg at a time, extend and extend. If you happen to be against the wall or off the wall, let the feet fall out to the sides.
Take the energy out of the legs and close your eyes. Take a moment to just let the body settle down into the floor. All work is done. And this is an important part or aspect of shavasana. We've already done all the work we needed to do in this sequence.
Now it's learning to not do, to let go. Take the energy out of the shoulders and really letting the ribs and spine soften into the floor. And you can begin taking that backward step away from my voice. If there are any thoughts, stepping back away from the thoughts. Looking back far enough that you begin to notice there's a quiet stillness, even in the midst of any motion or thinking.
Just there in that quiet stillness. Okay. And then gently rest your hands on your tummy. And one leg at a time, bend the knees and stand the feet on the ground. And turn softly to your side.
Rest there, head on a blanket or supported by your arm. Just take a minute there. And then softly press your way up to a sitting position. Find a comfortable sitting position. Let's hold that closed eyes for just a moment.
Oh, namaste. So good to have you here with us in the shoulder strengthening sequence. I look forward to seeing you again soon.
Yoga Rx: Nathan Briner
Comments
 Lou
LouYou need to be a subscriber to post a comment.
Please Log In or Create an Account to start your free trial.


