
Description
About This Video
Transcript
Read Full Transcript
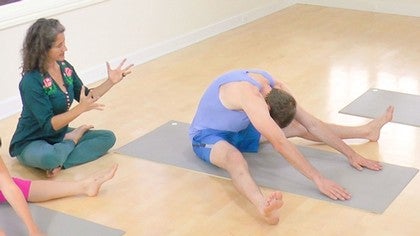
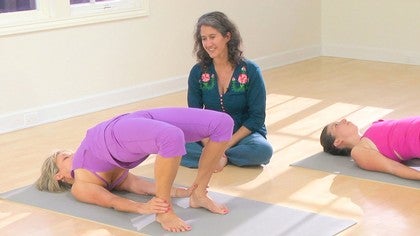
Welcome back. Thanks for being here. Thank you Julie and Winifred and Matt for still being here. You know my friends are here to help start to try to demonstrate that the yoga shape looks different depending on who's doing it. And again and I'll be repeating this a lot because I think it's really hard to get. That these shapes are simply expressions of us. The rumor, right, the rumor is that these shapes came out of seated meditation. That these sages found themselves in these shapes. Not that the shapes came first and then they made their way into them. Okay. So now we'll be exploring bridge pose. Sometimes you'll see this written as setu bandhasana. So what I'll ask my friends to do when they're ready is let their feet come to the front of the mat. Knees bend. Reach your arms out in front of you and then as you're ready you're going to slowly roll all the way back onto your back. Let your belly help you. So pretty, beautiful Julie. Now once you've landed there hug the knees into the chest and wobble and just let it feel good. This is one of those moments it's so easy to forget how good it feels to just hug your knees into your chest. And then when you're ready you're gonna find your hands around your ankles if that's available. Let your heels come down just in line with the sit bones and then let your arms come down along your side. Now I like to start bridge pose with the palms turned up. So just let's start with that palms turned up and just for a moment notice how that feels on the shoulders. And just for comparison purposes now try palms turning down. Okay. And just see if you can notice what that does in your shoulders. Okay. Try palms turning up again. Okay. And just see usually never always but usually palms up lets the shoulders roll under a little bit more and it gives an expression of the heart that's that's that's more generous. That's more towards what we're doing. Okay. So starting with palms up if it feels correct if you found differently palms down. Remember this quality of generosity in the heart we've been exploring. And as you allow this generosity in the heart to open can you remember what we've been exploring in the feet this quality of grounding. Yes. Okay. Now while I'll cue it a little bit please move at your own pace so our yogi friends at home can really start to get a sense of how real yogis move. Okay. That we don't just arrive in a posture that there's a whole way we make our way into it. Okay. So only as you're ready you'll eventually find an inhale and as you exhale you'll press down into the feet as your sit bones lift towards your knees and pause. And for some of you this might already be deep enough and so some of you might stay right here lengthening your sit bones to your knees your eyes are soft your neck is soft your throat is open. Okay. If it's appropriate to go further what you'll do is maybe inhale again exhale root down through your feet a little bit more you'll maybe lift the hips a little bit more how your hamstrings doing. Okay. And you'll start to wiggle your arms underneath you. Now as you wiggle your arms underneath you Winifred showing and Matt is showing the position of clasping. Julie is appropriately just staying right there so pretty Julie. Okay. You're pressing down through your arms maybe you're pressing through your feet you're lifting up through your hips it's kind in the eyes it's soft in the jaw. And so you may or may not be able to see what Matt's hips and legs have decided to do in the posture. Okay. You may or may not be able to see how Winifred's heels of her palms are maybe a little closer together than Matt's. And then you may or may not be able to see how Julie has chosen to approximate the exact same posture without necessarily putting so much effort and and and so much intensity into her shoulders so beautiful. Okay. Okay. So last few moments Winifred will you show the variation of grabbing a hold of your ankles just so that somebody might know. Okay. So again some of you might have a similar body type to Winifred in which case you can see that you might choose to find your ankles and then you get a little bit more leverage and a little bit more lift does that feel okay. Okay. Beautiful. Last few beats you guys. Awesome job. Okay. When you're ready to come out I like to come up onto the balls of the feet and reach the arms up to the sky and then you get super rounded in your upper back and you roll back down upper back. Yes mid-back low back. Let your arms come down along your side. So beautiful. Pause like for a few moments you're like just rest here like this is this is one of those moments the body like loves the relief of coming out of the back and this is one of those moments where it's really not quite clear whether or not it actually feels good to do yoga or to stop it. Okay. When you guys are ready hug the knees into the chest because that would probably feel good wobble. Okay. So thanks you guys for being here. Julie, Minnie, Matt. Thank you for being here. Let us know what you find in your exploration of bridge. Namaste.
Posing

Mention
 |
Kira Sloane (Teacher) |
 |
Tiffany |
 |
Sarah M |
Comments


You need to be a subscriber to post a comment.
Please Log In or Create an Account to start your free trial.
