Description
About This Video
Transcript
Read Full Transcript
Hi and welcome. This practice is for you if you're having some issues with your wrists. We'll start standing in Tadasana. Your feet could be together or hip-distance apart. Let's turn the arms to the palms, face forward, gently spreading the fingers if that's okay on your wrists. Draw your topsides back so your hips are over the ankles. Length and down through the tailbone and buttocks so your lower belly draws back and up. Lifting the top of the sternum and up through the crown of the head. Now start to turn the upper arms so the palms not only face forward but they're even beginning to face the sides of the room. Again, not turning from the wrist but rolling at the top of the arm, the bicep out, the tricep in. Then maybe close your eyes and simply breathe. Connect it to the earth, through the feet, tall through the spine. Gently open the eyes and spread your arms wide. Pause and turn the arms again so the palms face the ceiling. And with all of these turns today, not to turn from the palm but to turn from near the shoulder joint. Turn the upper arm bone in the socket. So we will roll the thumbs down here but it's the back of the arm that turns the thumbs down and roll the front of the arms to the ceiling, the pinky side. Keeping that rotation now, inhale, lift the arms up overhead, palms face in. Lifting through the side ribs, release the upper trapezius down the back. Exhale, we're going to go wide, palms that face the ceiling and then back to Tadasana, palms face forward. All right, a little more quickly now. Inhale, arms wide, palms face up, arms up, palms face in. Exhale, arms wide and down. One more time like that. Inhale and up and exhale and down. Moving on, inhale, taking the arms up, exhale, sit the hips back and down, Utkatasana. Weight heavy in the heels, release the inner and outer thighs back and down. As you draw the lower belly in and reach the side ribs towards the fingertips, soften the upper trapezius here, maybe lift the wrists, the arms a little bit higher. And then stand, arms tall, arms wide and arms down. Inhale, arms wide, arms up, exhale, press down through the balls of the feet, lift your heels. Inhale here, exhale, heels lightly land and sit the hips back and down. Coming back up, straighten the legs and raise the heels again. Breathe in, exhale, lower the heels, arms out and down. Starting the same way, inhale, arms wide and up. And then exhale, lower your left arm and step your left foot in front of the right, lean to the left, stretching the right side of the body. Soften the upper trapezius away from the ears, take the head back a little bit in line with the rest of the spine. And then come back, feet side by side. Lift your left arm up, inhale, exhale the right arm down, step the right foot in front and lean to the right, opening through the left waist. Some of the scapular stabilizers there on the left side of the torso, near the ribs, opening reach, head back, upper trapezius releasing away from the ears. And then inhale, back to arms up, exhale, lower your arms down. Bend your knees a little bit, step wide. Arms wide. Now typically we do this with the palms facing the floor, but let's turn the arms again such that the palms face the ceiling. Roll the biceps back, draw the backs of the arms down, thumb side of the arms down, turn the pinky sides of the arms up, turn your legs to the right. Inhale here, exhale, bend the right knee, Virabhadrasana II. Releasing down through the buttocks, plant the heels into the ground. Draw up the lower belly, pubis to navel, lift the top sternum, and also the pinky sides of the arms, and again near the shoulder, roll up to the ceiling. So the chest is rolling up with the fronts of the arms, palms still face the ceiling, and the thumb sides of the arms rolling down.
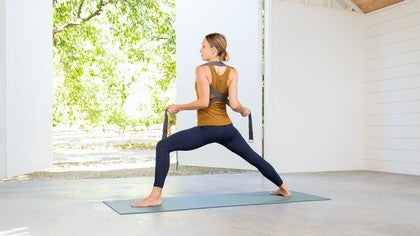
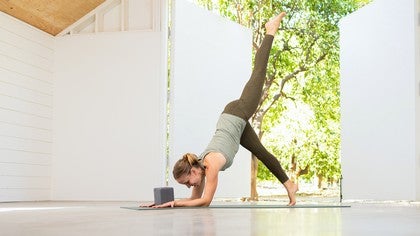
Another breath in, exhale, leaning the torso off to the right, rest your right elbow on the right thigh, and take the left arm up and over, Utthita Parsvakonasana. Pressing back through your left thigh, root your left heel, firm the right buttock forward as you open the right knee back. Inhale, arms wide again, palms face the ceiling, exhale, straighten the right leg, parallel the feet, and turn your legs to the left. Inhale here, tallen the chest, exhale, bend the left knee, stack it over the ankle, release down through the buttocks, the back of the pelvis descending, front of the pelvis lifting, lower belly lifting. But still left buttock firm, firm it forward, and press the right thigh back, root your right heel bone into the earth. Arms turning the pinky sides of the arms up, fronts of the arms up, roll the thumb sides of the arms down, inhale, exhale, left elbow onto the left leg, reach the right arm up and over. Pressing through the right heel, reach through the right arm, right waist, right ribs opening, but then also reach to the left ribs, both sides of the ribs long. Pressing through the heels, inhale now coming up, exhale, feet parallel, and then step your feet together. Tadasana, feet together or feet hip distance apart. Let's take palms forward, opening the chest. Bend your knees, step wide, reach the arms wide, turn your palms to face the ceiling as we did, turn the arms, and then lift your arms up overhead. From here we're gonna turn the legs to the right, right leg out, left foot in, ankles can be about hip distance apart, inhale, exhale, firm the lower belly up as you bend the right leg, bending the right leg, hips go down, warrior one. As you lift the lower belly up, roll the left inner thigh back, press the left heel down, maybe looking up, inhale, and then exhale, folding down over the leg, arms split wide. Spine long, reach the crown of the head forward, draw the shoulder blades away from the ears, and turn your arms again such that the palms face forward, thumbs are up. At this point adjust the back leg so the heel is up. Roll the left inner thigh up, come up on the ball of the foot. Shifting to warrior three, step your left foot forward, and then begin to lift your left leg up, parallel the floor, slowly straighten your right leg, firming the belly, you can stay here with the arms wide, palms forward, or begin to reach your arms forward as well. Virabhadrasana three, keeping your left leg up, bend the right leg, then reach for the floor with the left foot, coming back to Virabhadrasana one, warrior one, inhale, exhale, straighten the right leg, turn your feet parallel, arms still up, and then to the left, turn the legs to the left. Before bending your left leg, zipper up in the lower belly, roll the right inner thigh back, root the right heel into the earth, and then warrior one bend. Firm through the heels, lift through the side ribs so the stretch of the arms up comes from also the outer shoulder blades, the side ribs reaching up. Soften the upper trapezius, the inner shoulder blades down the back. On your next exhale, firm the belly in, and reach the arms wide as you fold over the front leg. Turn your arms so the palms face forward, thumbs are up. Breathing here, soften the sides of the neck, even though they're working, holding the head up, crown of the head reaches forward, releasing any residual tension there, unnecessary tension. Soft through the jaw, and then pop the right heel up. From there with a lift of the right inner thigh, start to transition forward. Raise the back leg, straighten the standing leg, give another turn of the upper arms, wrap the pinky sides of the arms forward, and maybe even reach your arms straight forward Virabhadrasana three. Keeping the right leg tall, bend your left leg, and then placing the right foot down, turned out, plant the heel warrior one, inhale, exhale, straighten your left leg, parallel the feet, arms wide, and step. At long last, the feet back together. Okay, taking the arms forward, bend your knees, bend and bend. We're going down to the floor. Come on down. All right, let's turn. Taking your block now on its widest width, place it down. And you're going to take the block, not so much with your fingers, but the lower part of the palm will touch the block. Press the pinky side of the forearm down into the mat, elbows about shoulder distance apart, and walk the knees back under the hips. Now as you press down through the arms, it's almost like you're trying to take the block and press it down to to set the shoulder girdle. Draw the shoulder blades away from the ears, curl the toes under, and then lift your hips up, look back at the feet, let the head hang.
The idea here is the head is not on the floor nor on the block, but you're pressing down through the forearms and lifting now the shoulder blades, the side ribs, the hips, you can lift your heels up, up, up. Next, start to coil the thoracic spine to the chest, press the shoulder blades to the chest. So the chest does move towards the ankles. And you might walk your feet, if your hamstrings allow, towards the block, walk the feet forward to pike the hips higher. At this point, with the chest near the ankles, maybe turn the head and look down at the space between the forearms. Lower your knees and rest for a moment. We're going to take this again, with the palms facing the ceiling now. So you might need to walk your elbows in a little bit, the palms face up outer edge of the hand near the block. You're trying to roll the biceps out, which will help you roll the outer forearm down, which will eventually help you get your even the nail of your thumb down on the floor. So the movement to turn the palms up once again begins at the shoulder, wrapping the biceps out, wrapping the triceps in. Same idea, tuck the toes, lift your hips, look back. Now you're not looking at your forearms, but continue to roll the outer forearms down. Wrap the biceps out, wrap the triceps in. You can take your heels up. If you're tighter in the legs, feel free to bend your knees so that you can lift the hips up and away from the head. Lift the outer hips up. Pressing the thoracic in, the shoulder blades to the chest, chest towards the ankles, walk the feet maybe in towards the block. And then release your knees down. So one of those may have felt better to you with your wrists. You can choose either one for this next one. Your choice. Curl the toes, lift the hips, moving on a little bit this time. Find your place if you can walk your feet in do so. Take the thoracic spine to the chest, chest towards the ankles and then either continue to look at the feet or you can look at the space between the forearms. And at this point see if you can lift your right leg up. It's like a Virabhadrasana three leg, the warrior three pose we did not long ago. Roll the inner thigh up to the ceiling. Leg is straight.
And release. Steady through the shoulder girdle. Changing legs, left leg up. Spin the inner thigh up, outer thigh down so the hips are side by side. Even though one leg is up, attempting to be symmetrical through the arms, shoulders, pelvis. Breathe. Relax the face. And then lower the left leg down. Lower your knees down. And rest in child's pose. You could turn the palms over to face the floor now. Some of you who have Pinchamayurasana in your practice you could go to the wall or kick up in the center of the room if you'd like. And then coming up to sitting on the heels. Let's turn around now onto our backs. You'll lie down on your back, with space at your sides. Take the feet as wide as your mat. Arms wide, relaxed, palms face the ceiling. And then allow both knees to fall to the right. Feet flexed, toes spreading, helps stabilize the knees. And maybe take your right outer edge of your foot and put the foot on top of the left lower thigh. Lengthen the buttocks towards the feet. Draw the lower abdomen towards the chest. And if you'd like more stretch, maybe firm the left buttock forward anteriorly to the front of the pelvis, which draws the tailbone towards the pubis a little bit and can help bring more stretch to the left thigh. Another option, rotate your head to look towards your left hand. Deep breath in. Exhale, release the right foot off the left knee and take your legs up, knees up and then knees to the other side. Left foot onto the right thigh. Lengthen the buttocks towards the backs of the knees. Draw the lower belly towards the chest. Maybe firm the right buttock towards the front of the pelvis. Notice how that feels. If there's any strain in your knees, again, you can flex the feet, spread the toes. And then maybe turn the head to the right now.
Coming back to the center, release the left foot off the right leg. Bring your knees up, feet hip distance apart. Bend your elbows by your sides for bridge pose. Inhale, and then exhale. Press the upper arms down, press the heels down, lift the hips up high. Wrap the outer thighs up towards the ceiling. You can firm both buttocks straight up to hold the pelvis up, just not to squeeze the buttocks together. In fact, broaden the lower buttocks, broaden the sit bones. Arms, you can keep your elbows bent 90 degrees, but maybe open the wrists, open the forearms. Externally rotating the upper arms, palms face the ceiling now. Biceps roll out, triceps rolling up towards the ceiling, biceps down, out and down towards the floor. Soften the gaze towards the space above your chest. And then slowly lower your hips and release. Draw your knees in. And find 90 90. So 90 degree flexion at the hip, 90 degree flexion at the knee and 90 degree flexion at the ankles, 90 90 90. For Chatura Parivartanasana, again the arms wide. Palms can face the ceiling or palms can face the floor if that's better for you. You can turn your palms over either way. Inhale here. Exhale, take your legs halfway to the right, pause. Press both upper arms down into the floor. Follow the abdomen back, support your lower spine. Deep breath in. And then exhale, bring the legs back to the center. Inhale, take your legs about halfway to the left. You can go lower, but make sure to keep your upper arms, including the right one, plastered down to the floor. Face is soft, belly is working. Exhale, firming the belly to lift the legs back to the center. And now maybe straighten your legs up. Inhale, reach out through your heels and exhale, take your legs off to the right so that your ankles come in the proximity that space over the right wrist. Still left upper arm in contact with the floor. Follow the abdomen back. Exhale, firming the belly, legs to the center. And then the legs to the left, taking the ankles to hover over the left wrist. Press both upper arms down, right upper arm as well. Soft through the face and jaw. Follow the abdomen back. Reach out through your heels and exhale, legs back to center. A little more quickly now. Inhale, legs to the right. Exhale to the center. Inhale, legs to the left. Exhale, center. Two more rounds. Inhale, legs right. And exhale, center. Inhale, legs left. Exhale to the center. Last time. Inhale, legs to the right. Exhale, center. And inhale, legs to the left. Exhale, center. Now reach your arms up. Legs are up. Some of you might still have your knees bent, that's fine. Either way, lift your arms straight up to the sky. Palms face the legs. And then slowly lower your arms down alongside your ears. Elbows absolutely straight, triceps firm.
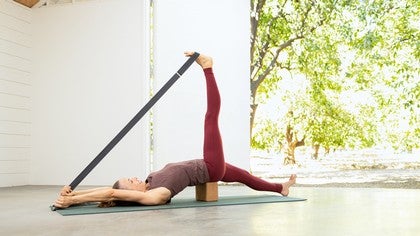
Backs of the hands on the floor. Arms are shoulder distance apart or wider if you need. Now we can do this with the legs bent or straight. I'll show first with the legs bent. Exhale, touch the big toes to the floor. Inhale, the legs come back up. Those of you with straight legs, not to touch the floor. Exhale, lower the legs down, but they don't go below the pelvis. Inhale, legs back up. Keep neutral spine, so not to let the back arch firm the belly down as the legs go down. Inhale, raise the legs. Exhale, again, firm the belly down. Lower back. Lightly touches the floor or it's slightly off the floor. Inhale, legs back up. So a ladybug could walk under the lower back, but not a mouse. Exhale, up. Last time. Exhale down. And exhale up. And next time you're going to come all the way up to sitting. Legs go all the way down. Inhale, arms up, sit tall. Exhale, reach forward. Touch the fingertips slightly to the floor. If it's okay on your wrists, of course you can hold your feet. Inhale, arms up, sit tall. Exhale, hollow the belly. Roll down through the spine.
Legs up and over. Halasana are in that direction. Inhale, do this many times. Arms up. Exhale, reach forward. Inhale, up. Exhale, hollow the belly. Reaching back. Maybe the toes touch the floor. Inhale, up. Exhale, reach. Feet can be together or hip distance. Inhale, up. Exhale, belly firm. Reach back. Inhale, sit tall. Exhale, reach long. Inhale and tall. Exhale, round. Whee! Inhale, coming up. Exhale, reach forward. Inhale, up. Exhale, go back. Last time. Inhale, up. Exhale and reach. Inhale, up. And exhale, hold. If it's okay for you, hold your halasana now. Toes tucked under on something. If you're close to the floor but not quite there, take your feet a little bit wider. Soften the back, soften the throat. Backs of the hands lightly pressing the floor, backs of the fingers. Soften between the eyebrows.
Let there be a sense that the eyes themselves are sinking down towards the earth. The gaze receding inward. Some of you may have already rolled down. The rest of us are going to join you now. Coming down through the vertebra out of halasana. Into supta baddha konasana. Arms at your sides, open the knees, soles of the feet together. Tuck the shoulder blades under. You can have your arms at your sides, palms face up. Or you could place your hands on your abdomen if that's nice for you. Or one hand on the abdomen and one hand up on the heart center. Wherever it feels good generally and then specifically good for your wrists. Losing the eyes if that helps you to settle in for shavasana. Could be here or classic with the legs extended of course. Observing your body and the feeling of wellness coursing through it. The pulse perhaps or your heart beating. The movements of the breath. The inner rhythms of your beingness. And allow this vitality to spread to all parts. Sending healing energy to anywhere that might need it. Physically the risk of perhaps other places. Or emotionally letting the wellness, the vitality support the parts that need healing. So that you can befriend yourself on your journey. If your legs are still bent, go ahead and extend them for a little bit of time and just go ahead and take a deep full breath in. Exhale, soften a little bit more. Then you can bend your knees, feet flat, roll over to your side. And use your arms to help you come up to sitting.
Join your palms if that's okay on your wrists otherwise you can rest the hands on your thighs. A quiet moment. Thank you for your practice. Namaste.
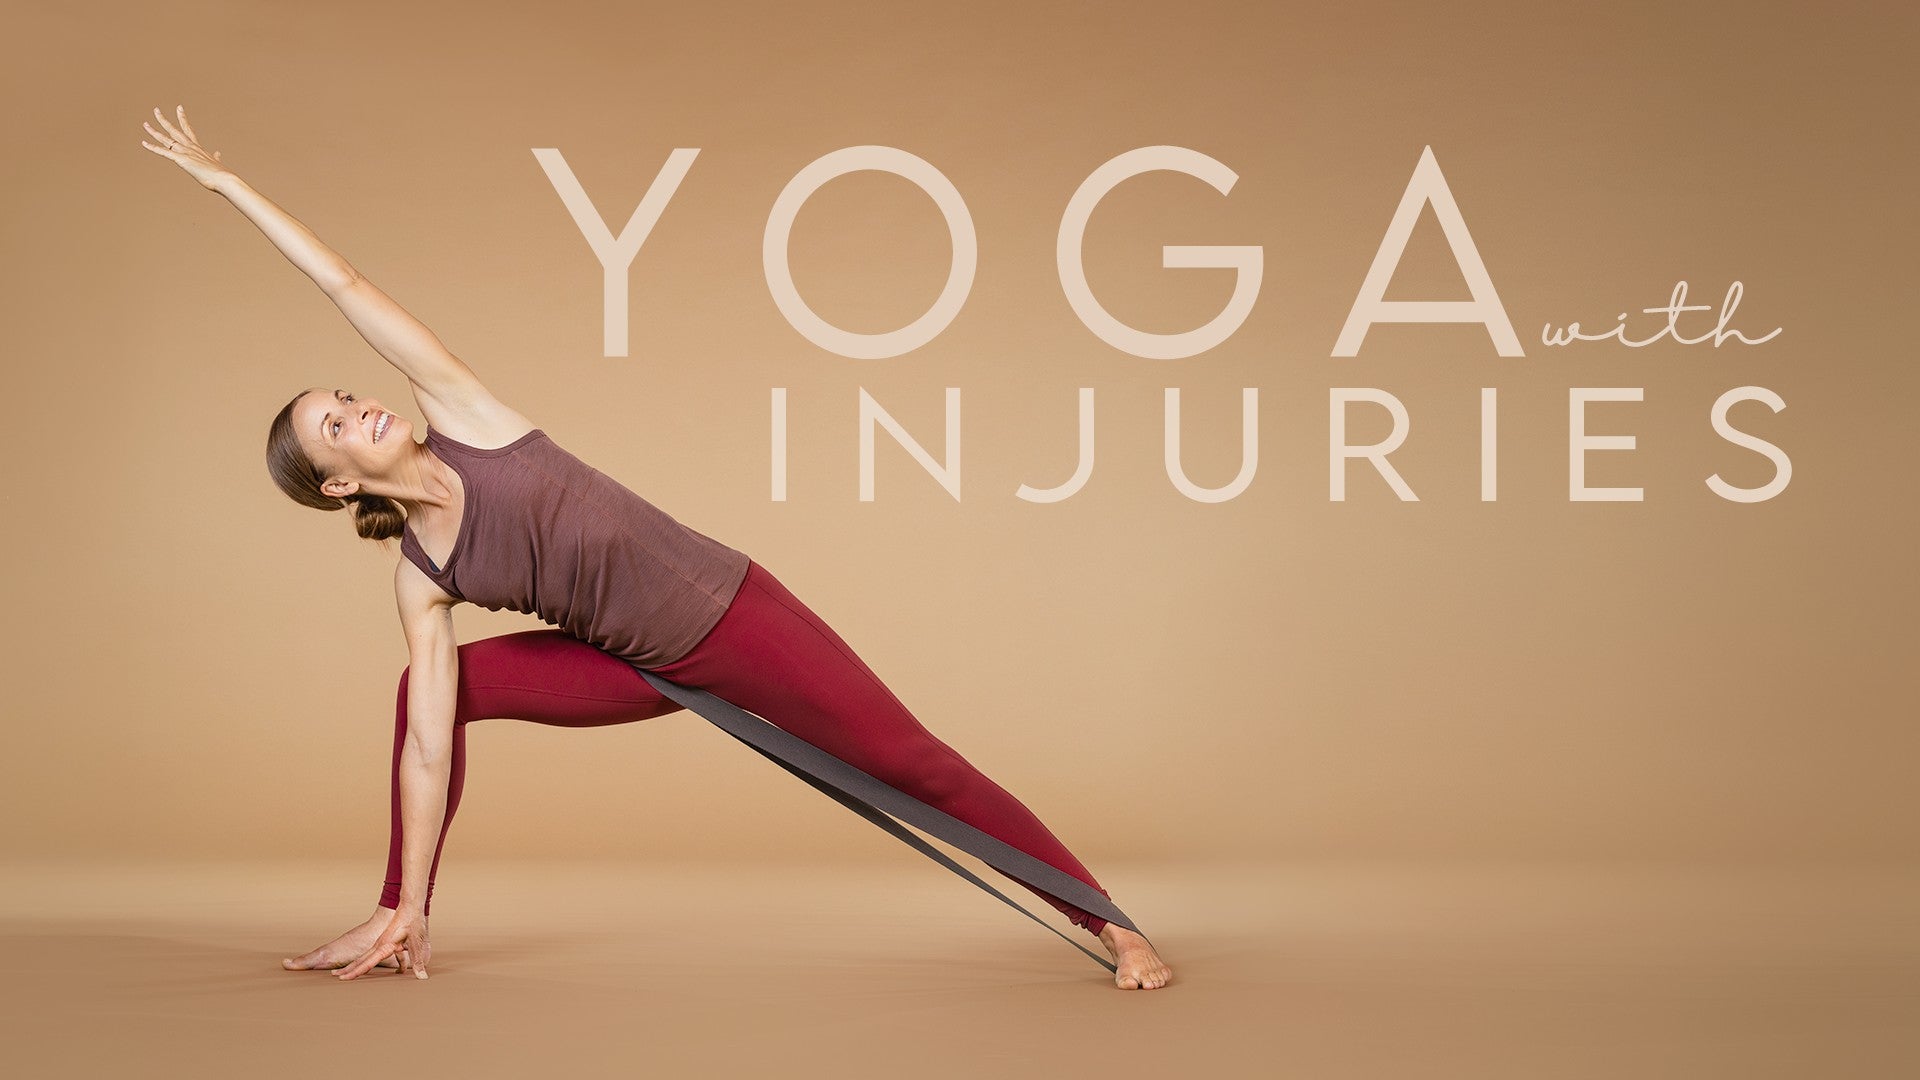
Yoga with Injuries: Olivia Barry
Mention
 |
Olivia B (Teacher) |
 |
Shaina S |
 |
Michelle F |
|
|
Martha K |
Comments


You need to be a subscriber to post a comment.
Please Log In or Create an Account to start your free trial.
