Description
About This Video
Transcript
Read Full Transcript
Hi, everyone. In this class, we'll be talking about safe spine mobility, especially for those who have low bone density and are risk for fracture. Not to induce any fear. I wanna make sure that you provide yourself with opportunities for change and how you can take care of your body, keep your bones strong, enjoy your yoga practice, and continue receiving all the benefits of a beautiful practice. So I'd like to start with talking about some precautions for moving your spine in healthy ways that is gonna help you prevent fractures in the future.
We'll talk a little bit about standing poses like forward folds, inversions, twisting poses, and things like that so that you can keep doing those versions of poses that are gonna be most beneficial for you and keep you working in your yoga practice. Let me get the spine model. So that I can demonstrate the moves, and you can also see what's happening in your body. So we're gonna start with the standing mountain pose and thinking of Tadasana and then going into your forward fold, just as if you're going into a sense patient series. So your forward fold often will look like this.
And then once you run out of hip mobility, it begins to look like a rounding posture here so that you're mostly emphasizing spine flexion in a loaded posture. So loaded means that you're vertical and you're providing an additional load to the spine because of your position or because of even lifting a heavy object. So the idea is that we prevent excessive forces on the front of the spine where your vertebral bodies are. And you'll want to hinge at the hips using the dowel as we did in our class on pack year and getting down to the mat practicing the hip hinge would be really beneficial here to see if you can do your forward fold with a hip hinge. And Again, once you run out of hamstring mobility, you could bend your knees and maintain that spine posture and then get yourself to the floor for a transition to the mat, such as a sun salutation series.
So then you're avoiding that rounding and compression on the spine as you're practicing. Then I wanna talk about getting to the floor and sitting on the floor. So that you honor the curves of your spine. So you generally have an inward curve in the low back called a lordosis. We have a an outward curve in the thoracic spine called a kyphosis and a lordosis curve or an inward curve in the neck. And those are natural curves so that I'd like to think of the spine majoring in extension in the lumbar area, and minoring inflection, so it's better at extending and less good at flexing forward. And the thoracic spine's really good at flexing forward.
And not so good at extending. And we want to make sure that we're trying to balance those curves as much as possible. Keep the vertebra stacked up so that the cylinders are not compressed, especially in the front. And that's what can cause that compression fracture is a a cough or a sneeze or a lifting something up off the floor in a rounded back position. So if you practice your yoga, where you are stacking those vertebra and honoring those curves, you'll usually be much safer.
Okay. So forward fold. My forward fold looks like that. That's about it. Alright. Because that's as much hip range emotion as I have. That's as much hamstring length as I have.
I'm not one of those people that can lie flat on their, nose to the shins, and I can barely reach my toes without rounding my back. So if I bend my knees a little bit, I might be able to do a little bit more because that takes the hamstrings out of the picture. So you could do your forward full with a slight knee bent. And that way, this is what's happening instead of this. Right? The the most popular place place for fractures is gonna be your t 6, 7, and 8. And that's just that place right between the shoulder blades, and that's where we tend to bend the most in a lot of different positions.
So you'll wanna hold on to the back of your legs and try to press yourself up and then think of getting the flesh out from under your your sit bones that you're sitting tall and maintaining that postural alignment and maintaining the bones stacking up. I love I love that image of stacking your spine. So you keep your spine stacked, and then you can practice your hinge back and forth, and you can start to straighten your legs a little bit more. And then improving your hip mobility so that you take the stress off the spine. Alright. Now coming down onto the mat and thinking of twisting poses. Right? So if you're doing a twisting pose, it's best to start in a either sideline or supine position to do your twists and then avoid using overpressure.
We'll be talking about that in this class in in towards the end. And then if you're doing twisting in seated position, you'll want to avoid using your hands to try to press further, then you can actually control your spine. So instead of doing a twisting pose where you're placing your hand on your thigh and rotating around or going into your twisting pose this way and using your elbow to force yourself around. And that's often gonna create a lot of compression and rounding in that mid back area, and that's exactly where those vertebra tend to get compressed the easiest. So you'll wanna keep lengthened up.
So I like to think of pulling my my leg towards me and letting myself get assistance with length and then let go of the feeling of using your hands to twist your spine, and then you can just rotate on your own accord, but you wanna make sure that you're vertical when you do it. So your dowels gonna come in really handy to put behind your back to make sure you're not coupling that rotation with flexion. Okay. Now what we're gonna do is play with cat cow and make sure that you have a sense of where you wanna be moving in cat cow. So most of the time when I ask a student to perform cat cow, I see this. And it's usually moving where they already move really well. And I always feel like the the purpose of cat cow is to try to get spine moving symmetrically throughout and to move where you don't normally move.
So instead of moving in that very mobile place where you have the most risk of compression on the vertebra, right, in the middle of that thoracic spine in between the shoulder blades, What if you put the dowel on your back, maybe, and tuck your tail under and up and just see if you can move just the lumbar spine and keep the thoracic spine quite still. And this could be a safe movement for your spine and and improving mobility where you don't have as much mobility. Alright. So with the spine model, it's gonna look like this. Right? Instead of coming here and compressing the front, you're gonna think of moving through here a little bit. So it's a small amount of motion, but certainly great for improving lumbar mobility. Alright. So let's talk about inversion precautions, it will be really important for you to observe caution with performing inversions. If you have been a practitioner of yoga for many years, It is likely that your body is going to be fine with those forces placed on it in riskier poses, we would say.
And As you get older, usually your bone density doesn't improve. And so you you know that your bone density is declining as you age. And if you're already aware that you have lower bone density than normal, it's really a good idea to take care of your body for the long term. So I wanna think what is gonna help me have the best longevity, the best functional experience of life as I age. What's gonna help me the most? Leg strength. Core control, posture, balance, those are all the things that are the most important.
So you wanna think, what is most important to me doing an inversion where I'm putting my feet over my head, which is lovely, but not so functional for living the rest of your life. So imagine if you're in your nineties and you are, you know, challenged with your balance and things like that. Gonna be really important to focus on your mobility of your legs. Your strength of your legs, being able to get up and down off the floor, get in and out of chairs. If you're really young and you're used to doing those things, you may be just fine. But if you're in this class and you're discovering that you have low bone density, it's a really good idea to think about these precautions and see if you can embody and maybe provide a different opportunity for exploration of other options.
So what happens in an inversion is the spine is aligned here. The legs go up toward the ceiling, and then you usually roll up and over going into either a plow or a shoulder stand. And then most of the weight is gonna be exactly where you have the most risk of fracture in someone with low bone density in the spine. So right here in that T678 area is exactly where you're bearing weight. And going into that, what we call extreme flexion. If you're in a shoulder stand, you're getting the pelvis over that area, which could be even more compression through that area.
And so that's why at our physical therapy community and medical community, the national osteoporosis Foundation, which is now known as the Bone Health And osteoporosis Foundation, have made the precautions to avoid these kind of activities. Alright. So let's find out what we can do to keep our spine healthy. I'm always interested in what we can do, not focusing on what we can't do. Okay. So first, we're gonna come on to the mat, and I'm gonna take a round object you can use a ball like one of these special balls, which is a massage type ball that's about 8 inches in diameter and fill it up as firmly as you, you know, not super firm at first if you're new to this. You wanna fill it up firm, but not full, full, full, because when it is very full, it's like a basketball or a soccer ball. It's very, very full.
If you have a gertie ball, something like a ball that's like a toy that you can blow up with a straw. Those are often really good for starting this exercise. And then, Another option is to roll up bath towels, and another option would be to maybe use a yoga bolster. If you have a foam roller, that can also be an option too. But I usually tell people to put, like, a blanket over it or a yoga mat over top of the foam roller to cushion it a little bit before you do the extension that we're gonna do on the bottom.
Alright. So placing the object that has a rounded surface behind you, place your hands behind your thighs, length and back. So you're kind of planking down onto the ball. And you wanna put the ball somewhere between your shoulder blades, and above your waist band. You don't want it down in your lumbar area. You want it in the mid back area. And the lower the ball goes toward your waistline, the more abdominal work you have to do to hold yourself up. So if you feel like you're shaky or something like that, just lift your hips up and you can roll back and forth.
On the ball. And then you can also support your head with at least one hand as you're doing this exercise. And then I'm gonna take both hands behind the head, put the thumbs under the skull, lengthen back And then I always think of having eyes under my collar bones so that the eyes of my head are as the eyes under my collar bones. I'm gonna take it back and then look up at the ceiling straight up. Breathe in.
And then breathe out ribs to the pelvis and inhale to take it back. And then exhale ribs to the pelvis. And then so it's a small movement. You're not pulling your head all the way forward. It's not a crunch. I like to think of this as the anti crunch. Right?
And then taking it back wrapping around the ball. And on this first variation, you could have your elbows wide to stretch your chest a little bit. But as you move upward on your back, the ball is gonna be between the shoulder blades, and you'll actually push yourself up off of it. So You'll wanna be wide on this first one, inhaling, and gradually wrapping your spine around the ball. Then you'll lift your hips up, move your hips towards your feet, put your hips down, bring your elbows forward, wrap your spine around the ball.
And notice that I'm lengthening my neck. I'm actually giving myself a little bit of traction, and I'm putting my thumbs on my sub occipital area and making sure those muscles aren't tensing up, or I'm not lifting my chin. Think of having elbows, that have eyes on them, and now they're gonna look in the see at the ceiling. So your elbow eyes the eyes of your head, and the eyes under your collar bones are all looking in the same direction. What I'm trying to do is move my breastbone and the spine opposite the breastbone for an improved thoracic mobility.
Lift the hips, move the buttocks toward the feet, put the hips back down. Now the ball is more at the upper thoracic area, and you'll find that you have the least mobility here. We always have a really hard time getting to this area. So I like to put my hand on my chin and try to facilitate a cervical retraction. And so now my spine on the ball is still and my neck is moving back.
So I love this for correcting forward head posture and bringing that head back over the body. Inhale to do, like, the chicken position and then the swan position. I like to think of it like a chicken. And a swan. Looking for that swan neck. Right?
Now lift the hips Move the hips toward the feet and allow the ball to roll into the nape of your neck. This is the cookie at the end. That you can relax onto the ball and allow the muscles to release. This is where you can do a myofascial release for your neck, if you have neck tension, allowing the musculature and the myofascial tissue to change from more of a dry crackly crystalline like quality to a gelatinous quality. Allowing fluids and nutrients to move through the tissues.
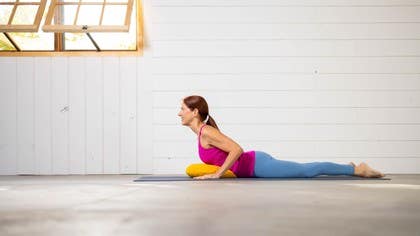
Now we'll roll to the side carefully push yourself up to sitting And then we'll start to work on prone extension. So what we just did was mobilizing the spine And now here, we're gonna work on thoracic extension after we have improved the mobility of the thoracic spine so that we can start to improve the strength and the bone density in the spine. So you'll need a pillow that is like a a sofa pillow that is just a a throw pillow. And placing your ribs onto the pillow, and your pubic bone should not be on the pillow. You want that slope downward from the ribs to the pillow, The pillow is very important because it's going to protect your ribs from excessive compression on the mat or a hard surface.
Anytime you're in prone and you allow those ribs to be in a kind of a loaded or fully weight bearing position, you'll wanna have a cushion underneath because there have been some reports of people who have had fractures from too much compression on the rib cage. So we're gonna keep our ribs happy. And place the hands under the forehead. I want you to walk your elbows wide. Draw the shoulders away from the ears.
Keep the pubic bone pressing into the mat and create some length in the spine by wiggling your pelvis away from the ribs. And then allow those shoulder blades to drop down and wide. Breathe in. As you breathe out, lift your head off your hands. Keep coming up until you can no longer go any further without moving your arms.
A lot of times when I ask people to lift their head off the floor, this will happen. And then what that does is that actually increases thoracic selection and compresses the neck and the suboccipital area. So what I want you to think about is keeping your eyes on your thumbs as you lift your head off your hands, keep your forearms glued to the floor, and then start to press your pubic bone into the mat. That's gonna be important to make sure that you don't overarch your back as you lift, then lift the back of your hand to your forehead. And let's see if we can lift up keeping the elbow lower than the hand.
The reason for that is if you lift your elbow, it usually makes the scapula increase its elevation toward your neck and then compresses the neck. So what you want is to keep the elbow lower than the hand. Press into the bottom hand to help you come up and then change sides. See if you could do that on the other side. Pressing into the bottom hand, avoiding that shoulder coming up by your ear.
So you always wanna think of your armpits being your shoulders and your neck, best friend. And then now take both hands to the forehead. Now this one's gonna require a little bit more strength of that upper thoracic area, keeping your elbows low, hands high. Shoulders down and neck lengthened. So then you're really targeting that upper thoracic area.
Now we're gonna move into the mid thoracic area by changing my our hands to a goalpost position so that your elbows are bent to 90 degrees. You have a straight line from your elbow through your collar bones to the opposite elbow. Plant your hands on the ground, lift up, until you can no longer move further without your arms shifting inward. So you don't let your elbows move, stay here. Keep your pubic bone connected to the mat, and then lift your hands.
Keep your elbows down as your hands lift. And here we are using our rotator cuff just like we did in our neck and shoulder function class. Alright. Now, hands lifted holding here. And then let's see if we can lift up without lifting the elbows, without raising the shoulders so that you're really using your mid back I feel like so often my patients and students tend to lift their neck when they're trying to do these things. And so that's increasing the compression in the neck and not doing anything to strengthen that mid back. Place the hands now in your cobra position, like to think of this as being like a pre cobra movement.
Wanna pull the elbows toward the feet, lift the chest, And now this pillow is gonna come in really handy so that you can lift your hands and you don't have too much compression on your lower ribs. Because you're basically balancing on the lower ribs like little feet pressing up. So here, this is an arm movement with a little bit of thoracic mobility, but once you lift your hands off the ground, then your lower thoracic musculature is really working here to hold you up. And then you can lower yourself down a little bit and up just exploring your strength and your range of motion. And remember, elbows lower than hands is always gonna be helpful for reducing neck tension. If you try to lift your elbows up, your shoulders slide up towards your ears, your neck gets compressed.
Think of looking at the front of your yoga mat as you're doing this. And then placing your hands down on the mat. And then let's place the hands behind the hips, clasp the hands together, I love this one for mobilizing the upper back and opening the chest and then see if you can keep your fist right on your buttocks. Slide your hands towards your feet and lift the chest. Alright. Now placing your hands on the mat, draw your elbows down.
Breathe in. Breathe out. Press up into your push up or your quadruped position, and let's send the hips back. So one of my favorite stretches for the lumbar spine, keeping your elbows straight and not letting your head rest. Is gonna be important for maintaining the position of your thoracic spine as you stretch your lumbar. You can move your hands to the left. To stretch into a little bit of a side bend, and then move your hands to the right to stretch.
Alright. Now coming up, let's go on to our side first. So practicing our transition, whether you're getting into bed, or getting onto your mat, you lie down first, and then roll to your back. We're gonna review bridging similarly to our class where we reviewed bridging on the mat in our core on the mat class. We're gonna focus on that pelvic tilt back and forth, also known as the pelvic clock, inspired by Fulton Christ's work, rolling from the 12 o'clock to the 6 o'clock position, And then moving from 3 o'clock to 9 o'clock position. This one can be a little tricky.
And so if you wanna start by side to side motion swaying the knees right and left, What you wanna see if you can do is anchor your rib cage to the mat to isolate the lumbar spine a little bit more. And provide some mobility to that lumbar region. Let's bring the feet together and your heel will actually come off the mat as you do this one because if you keep it down, it's gonna make that knee and hips slide down and back. So if you keep your knees glued together, let the he'll come off the mat. That's gonna be an easier way to get more motion in your lumbar.
And then we can take our hands a little wider, bring the legs up to a tabletop position, Keep the knees and feet glued together, rotate to one side, and back to center. Rotate to the other side and back to center. So you'll only go usually about maybe 45 degrees, and then that rib cage will start coming off. So you wanna make sure that you notice if your rib cage is coming if your shoulder blades coming off and anchor those down. And one more each side, inhaling as you rotate, exhale back to center. Inhale to rotate, and then exhale back to center.
Place the feet down the mat, and feet wide is gonna be better for this position. I'm gonna place your hands by your side. Breathe in to lengthen the spine. Read out to let's peel the spine up as if we're peeling a piece of tape off the mat, lengthening up, your articulating bridge and then rolling back down. Just so great to really try to get each lumbar vertebra to move into that flexed position is a safe position to do, safe movement to do for your bones.
Lengthening up. Now, when we get to the top, stay there for a moment. Take a breath in. Breathe out to lower the right hip to the mat. And then take it up.
And then the left hip to the mat and take it up. So you're adding that rotation. With the lift, and then rolling all the way back down. Alright. Now we'll roll to the side and prepare for an exercise called book opening. It's best if you bring your back to even with the mat so that you can imagine that your head, your mid back, and your sacrum are lined up with the mat.
And then I want you to grab your pillow. Place it under your head. Allows your neck to relax a little bit with this one. And it can provide a little more mobility and ease through your neck. So finding that sense of length first, Take your hand, reach it up toward the sky.
Imagine that your hand, your arm, and your collarbone are all in one line. And we're gonna take the arm back and follow the hand with the eyes. So make sure your pillow is under the back of your head, and your head is not kinda falling off the pillow. You wanna make sure you have good enough support for your neck that you don't feel like you're having to hold your head up. And what happens a lot of times is everyone wants to reach toward the floor, right, because that becomes a shoulder motion, which is not that great for your shoulder.
You wanna keep that shoulder plugged into the socket and let it be about the spine moving. Let's bring it back up to vertical. Breathe in here, and then breathe out. Look at your hand first. And follow your hand with your eyes.
And I want you to think of your breastbone having a light on it, and it's gonna shine toward the ceiling. Now that's as far as I can go with my spine motion. And if I go any further, it's all about my shoulder, and this is about the spine moving. So let's take it back up. Breathe in.
Breathe out. Look at the hand. Rotate. And let the spine move. It's the star. The arm is just the lever arm that's assisting with the motion. Another way to do this move is to take your hand behind your head, and it sometimes eliminates that kind of feeling that you wanna reach all the way to the floor with your with your shoulder, and it's also great for somebody that has pain in their shoulder.
So keeping your elbow pointing toward the ceiling, are you gonna look up toward the ceiling and look toward the elbow, keep your elbow and your peripheral vision, and also keep your knees and your hips stacked up. Your pelvis should be stacked up. You don't wanna let your knees slide back. You wanna keep those knees glued together. And there's always a lot less motion than you think there should be. Right? So it seems sometimes very unsatisfying.
It's like, oh, I'm not going very far. Right? But just honor your body enjoy the motion and try to think about getting that shoulder blade to the mat and then take it back up. Some of you may be able to get there. If you have a lot of spine mobility, others may have a harder time with it. And so my shoulder blade is definitely not touching the mat when I reach back. Let's try that on the other side.
Taking it up with that linkedin position, switch your pillow around, mindfully change your leg position, with your spine vertical and then bring yourself to the mat, snugging the pillow under your neck and above your shoulder. This is also a great position to sleep in so that you have support for your neck instead of having your shoulder on the pillow and letting your neck be in a side bent position all night. If you snug the pillow up under your neck and head, and have your shoulder under the pillow. That's a really comfortable position for your neck. Oftentimes. Alright.
Now Take the arm up, we're gonna lengthen the spine, stack the knees up, look at your hand, and follow it as it goes behind you. Remember to make this about the spine and not so much about the arm. Exhale to take it up. Inhale to prepare. Plug the shoulder into the socket.
Exhale. Allowing the ribs to drop down because that's gonna create more ability for your spine to rotate. If you inhale, the ribs lift up like bucket handles, and they'll limit your rotation. So now we can take the hand and keep it back there. Experience that by inhaling.
Feeling the bucket handle action and seeing your arm lift a little bit. So you lose a little bit of rotation with the inhalation. And then as you exhale, notice how the arm drops down. Inhale, take it back up. One more time like that. Exhale.
Reach it back. Remember, the arm stays in alignment with your collar bones. Breast bone shines like a light toward the ceiling. Knees stay stacked up and then take it back up. Place the hand behind your head for this variation. Breathe in.
Breathe out to rotate open. Feeling the armpit lengthening open. Elbow reaching back behind and make sure that shoulder blade is what's trying to aim toward the mat. For even to bring it forward. Exhale rotate open.
Look at the ceiling with your eyes and the eyes of your collar bones. Inhale to take it up. And exhale one more time. Feeling like you're isolating the rotation more so in your thoracic spine and less in your lumbar. Now place your hand on the mat.
Press yourself up, push into the elbow, keeping that spine elongated as you come to sitting. I hope you enjoyed the precautions and some opportunities for safe movement and healthy movement for your bone density. Thank you for joining me.
Empowered Aging: Bone Health


Mention
 |
Sherri B (Teacher) |
|
|
Elizabeth C |
Comments

You need to be a subscriber to post a comment.
Please Log In or Create an Account to start your free trial.
