Description
Transcript
Read Full Transcript
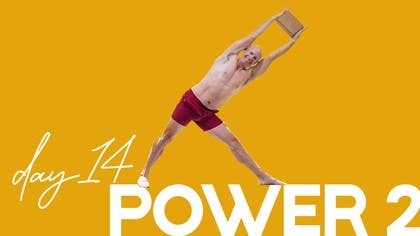
Welcome back. Day 14 of our 30-day challenge. This is day two in the theme of power. We're going to continue working into our backbends. I want to make sure you have a strap today, a linkable strap where you have it set at about shoulder width, about that wide. We'll get into that in just a minute, just so you have that ready. We're going to start again in sun salutations. So let's step to the front end of the mat, and we'll get started. Feet about hip width apart, pause here, palms together, or any position with the hands that helps you draw your attention in. You can close your eyes if you like, starting to pay attention to the breath, the feel of the body. And let's get started. Release your hands to your sides. Exhale, arms up, lift the chest. Bend the knees, folding forward, release the arms, head, neck, and shoulders. Hands to the floor. Step back to a plank. Let's just hold here for a brief moment. Big breath in. Exhale, halfway down is Chaturanga. Squeeze the arms into your sides. Upward dog, go easy on this first one. Let's warm up the spine. You could even leave the knees on the ground if you like. Downward dog pressing back. Let's do a little movement of the heels, the knees, a little pedaling. Head and neck soft, active arms to help open up the chest. And we'll do a full dog with heels reaching toward the ground. And then raise the heels, inhale, looking forward. Big step to the front of the mat. We'll take the feet hip width again, soft knees, and hang down. And then inhale coming up, arms overhead. And exhale your hands to your sides. Inhale, arms. Your choice. Great or bent legs as we work towards Uttanasana, forward fold. Active legs. Lift those kneecaps, strong thighs. Hands on the floor. Step back to your plank. Breath in. And exhaling halfway down. Inhale, up dog. Exhaling to down dog. If you'd like to pedal your legs again, please do. Otherwise, you can hold your pose working on that spinal length. Active arms helping to open up the chest, elongating the spine. And raise the heels, look forward. Step into the front of the mat. Inhale, long spine. Exhale, forward fold. Inhale, come all the way up, arms overhead. Exhale, hands to your sides. Surya Namaskar B, second sun salutation. We'll bring the feet together. Inhale, squat down, arms up, chair pose. Exhale, forward fold. We're moving a little bit more quickly now. Inhale, look forward. Exhale, jump or step back to your plank. Bending the elbows into Chaturanga. Upward dog, inhale. Downward dog, exhale. Right foot forward to the hands. Roll the left heel down. Warrior one, arms up. Breath in. Exhale, hands to the floor. Step back to your plank. Again, inhale, exhale. Chaturanga. Upward dog, strong lift. Downward dog, take a breath. Inhale, look forward.
Exhale, left foot between the hands. Roll the right heel down to the mat. We're coming up. Warrior one, take a nice big breath. And exhaling, hands down. Bend the elbows. Up dog, inhale. Down dog, exhale. Let's take a few breaths in this downward facing dog. Firmly pressing the palms. Reaching back, hips high up into the air. Then inhale, raise the heels, look forward. Exhale, jump or step to the hands. Feet together. Nice long spine breath in. Exhale, forward fold. Inhale, squat down, arms up. Exhale, come all the way out. Rest your arms to your sides. One more time through. Inhale, squat down, arms up. Exhale, forward fold. Inhale to look forward. Exhale, jump back. Bend the elbows. Up dog, inhale. Down dog, exhale. Lift the heels, look forward. Right foot between the hands. Inhale, up. Then exhale, hands to the floor. Bend the elbows. Here comes that heat. Inhale, up dog.
Down dog, exhale. Raise the heels, look forward, inhale. Exhale, the left foot forward. Roll the right heel down. Inhale, the arms up. Exhale, hands down. Step back, bend the elbows. Up dog, inhale. Down dog, exhale. Take a few breaths here. Again, press the palms firmly into the floor. Elongate the arms, long spine. And we're moving that sternum a little closer to the knees to help open the chest. And then raise the heels. Inhale, look forward. Exhale, jump or step forward. Inhale, long spine. Exhale, forward fold. Inhale, squat down, arms up. Exhale, come all the way out. Take a pause in Tadasana. Recover your breath. And then we'll start working with the strap to begin opening up the chest. We're going to start by taking a nice wide grip on the strap. Wider than shoulder width, I call it arms out to about 45 degrees. Feet can be a little bit apart and this will be all about opening up the chest. Straight elbows. Inhale the strap overhead. Getting a nice big chest stretch. And here we want to engage the shoulder blades into the upper back to help open up the rib cage. Bring the hands down. Let's do it again. Inhale, lifting the arms overhead. Remember to anchor down through the legs. We learned a lot about this in our strength theme. Connecting well to the earth to help open and lift the inner body. And release. And last one. Arms overhead. All the work we've been doing in the previous themes helps us have the strength and confidence to move deeper into these more challenging poses.
Backbends. And then release. Next we'll take a wide stance. And this is where we'll be using the strap at shoulder width. We'll take a wide stance for triangle pose. I'm going to place my hands through the strap, shoulder width apart, palms facing together. And then I press my arms outward on the strap, which helps me again to roll the shoulder blades backward and together. Nice open chest. We'll turn the left toes in, right leg out. Again for triangle pose, two straight legs. Big breath in. And exhale over the right leg. Here we pause to make sure the shoulders are staying back. And then any further that you can come into the pose, go for it. Powerful pose. We don't have the arm support here. So we've got to use the legs and the core to hold. Inhale, come up. Turn the feet in. Walk the legs together. Take a little rest. I'm going to turn around the other way to show you what it looks like from behind. Once again, wide legs. We'll be going to the left side now. I push out against the strap to roll the shoulder blades together. Right toes in, left leg out. Take a nice big breath in. Exhaling over the left leg. And we take a pause about halfway into the pose. Re-engage the arms and shoulder action. Chest turning up and opening. And you're holding at your depth. Take a couple more breaths. Definitely feel the work in this pose. And then coming up. Turn the feet in. Walk the legs together. And you can take the strap off. We'll put the strap off to the side for just a second.
And now we'll pick up the block for another challenging triangle pose. We'll start with wide legs. Holding the block here in what I call kind of the vertical way with the whole palm against the block. We don't want it to be half on, half off, fully on. Going to the right side first. We'll bring the block up. Turn the left toes in, right leg out. Big breath in. And exhaling over the right leg. Here we try our best to keep the arms squeezed in towards the ears. Very challenging pose. Core is working strongly. That's why we did a lot of that work earlier in our early themes. And then inhale, come up. Bring the block down. Turn the legs. Take a breath. Challenging pose. Right toes in. Block first. Bring the block up. Right toes in, left leg out. And to the left side. Big breath in. Exhaling. Use the ears with the arms and you go to where you can go and hold. Reach that block away from your head. Holding. Three, two, one. Coming up. Release the block down. Legs together. Take a breath. Let's put the block down. And once again, grab the strap. This is going to be for what's known as Gomukhasana arms to further help open the chest. We'll start with a strap in the right hand, palm up. Take the strap behind you and catch with the left hand. I'm going to turn off to the left here so you can get a good view of how I'm using my arms. We're going to start by pulling down with the lower hand, the left hand toward the floor. The top hand follows and take a quick look at how I'm pointing my top hand, my right hand. The palm or the fist is facing the back of my body. Then I pulled down with that bottom hand to help draw that right elbow up and any amount behind. And what you can see is that side chest getting an opening there. We're pumping this, teaching that chest area to lift. So important to open this area well before backbends. Let's just do a few more and hold it now. Final cue is to bring the hands any amount you can away from your back and then release and let it down. We'll change sides. The left hand is holding the strap, palm up. We bring the strap behind the body, catch with the right and we'll set it up. The palm of the left hand faces the back. The lower right arm is doing the pulling. Here we go, pulling down with the right hand. We create that little tension between the two hands and we start to pump, teaching the left elbow to go up and behind any amount. Everybody's shoulders are built a little differently. So don't expect your arm to make it any particular distance. You're just working with what you can there. And our main goal is to get that chest space. One more pull and hold and then we try to take the arms away from the body any amount. Chest opening and then release. Alright. We can put the strap down for a while.
Let's just pause in Tadasana and see how the chest is starting to feel. Alright, let's keep going. We'll step to the head of the mat, feet together and we'll work on a vinyasa towards downward facing dog. Start by anchoring, rooting the feet and legs down to the ground to get that internal lift and stretch the arms up. Here we want to take the mid and upper back in deeper into the body to open up the chest and take advantage of the space we built in Gomukhasana. A big breath in. Exhale, fold forward, hands to shins and here we're creating a concave back. The back is dipping toward the floor rather than going into a forward fold. Then hands to the floor. Step back to a plank. Take a breath in. Exhale, chaturanga, squeezing the arms against the body. Chest is open. Inhale, upward dog and working with that Gomukhasana chest, bringing the mid back in and downward facing dog. Then bend the knees down to the floor. Here we're going to take a supported plank pose to work with the shoulder actions. We'll start with a right leg straight, left leg bent. We've done this pose before. We worked on this. Now we're going to use actions within the pose that we learned. Let's start by inhaling, push down on that left foot, energize and straighten your right leg. So we have the support of the legs, now the arm. Turn that right bicep around until you feel the shoulder blade pressing into the chest. Open the chest, up to the ceiling. Let's complete the pose. Holding here. Keep that right shoulder blade well engaged into that mid and upper back. And then release. See it from the backside. Turn around the other way. This time our right leg is the supporter. Left arm down and left leg straight. Inhale, come up. Make sure you keep that supporting leg heel well anchored to the ground. Then the left arm, the supporting arm. I turn that bicep in a headward direction and take the shoulder blade deeper into the upper back. That helps expand and open the chest. Right arm up into the sky and we're holding. Some breaths here. Still working that shoulder blade action and then coming down. First side one more time. This is the full pose now. We'll come up in the supported fashion and stack the top leg. Left leg on right. All right. Turning the right bicep in a headward pointing direction. Right shoulder blade in. Vasisthasana. And then coming down. And one more view from the backside. Starting in the supported position. Come up. Inhale. Turning out that left bicep. Stack the legs. Top arm up. Left shoulder blade action. Pressing the shoulder blade into the upper back. And then bend the knees and come down. Let's take an easy child's pose to rest from those very strong powerful poses. And from your child's pose, we'll set up a downward facing dog. High heels in this downward facing dog. This helps us free up easier hip motion so that we can work the chest of downward dog a bit better. And then come down to the knees. Let's grab the block and we're going to work again in dolphin pose as it's commonly called or pinch mayarasana, elbow balance. Taking the hands around either edge of the block, forearms down shoulder width apart. Curl the toes under and lift the knees. Bring the feet together. And like before, you're deciding if straight or bent legs works best for you. Our goal is to keep the shoulders up and back away from the block. Walk in a little. Working that shoulder strength. Today we work on a little bit of bouncing. Right leg up. Left leg is our hopping leg. So I'm bouncing lightly off that left leg. Four, five, come down.
Powerful pose. We're working towards a full arm balance. Forearms down. Tuck the toes under, lift the knees, strongly supporting the shoulders as you walk in slightly. Left leg up. I'm bending the right leg a little and making a little hop away from the floor. Four and five. Feet down. Walk back. A brief child's pose. We'll do one more time each. Let's do it. Hands on either side of the block. Toes curl under, lift your knees. Support those shoulders and walk in a little. Right leg up. Left leg a little bent. Doing some hopping. Reaching up as though we're going for that full arm balance. One more. Lower the feet. A little child's pose rest. And final side. Get right back into it. Curl under the toes, lift the knees. Feet together, walk in. Shoulders strongly supported. Left leg up. Right leg bent. And easy little hops. Three, four, and five. Child's pose. Rest those arms. Let the head down on folded arms. Take a few breaths. And then coming up, we'll put the block off to the side and lie tummy down. Take a moment to lift and lengthen the front of each thigh. So the front of the hip is long. Point the toes back. We're going to bring the arms, forearm down, right in front like a baby cobra. Working towards half frog pose. Bring the right forearm flat in front of you and lift the chest. Sacrum and tailbone rolls toward the heels. You'll see that there. I bend the left knee and reach with the left hand to come from the inside of the foot. Fingers point outside. And we're working here. In this pose, I work to keep the front of the hip joint wide open and down into the floor. We're just going to try a little bit of pumping action. Working that sacrum and tailbone still towards the back of the knee and opening the front of the thigh. We're building towards full wheel or what's known as Urdva Dhanurasana. A full back bend. And then release. Left forearm down, horizontal across the mat. Bending up the right leg, I take the right hand on the inside edge of the leg. So the fingers point toward the outside.
Squaring the chest, sacrum and tailbone toward the back of the right knee and some pumping work. Bending the elbow and trying to bring the right heel a little closer to the right buttock. All while keeping the sacrum and tailbone rolling towards the foot and the back of the knee. And then rest. From here, press up for just a moment. A little sway of the spine right and left to get rid of any undue tension there. And then here, from here we're going to go into a prep for Urdva Dhanurasana. We're going to bring the strap into play again and we want it shoulder width apart or shoulder width. There we are right there. And what I'm going to recommend is you watch me on this first one and I'll show you how we'll do the prep and then we'll do a few more together. So I'm going to start sitting and then lie down with knees bent and we'll put the strap around the upper elbow area. Then I'm going to take my hands right next door to my ears with the fingers pointing roughly toward the shoulders. A little out to the sides is fine. Feet about hip width. I'll take a breath in and lift to the top of the head. Here I pause, reorganize my hands for just a moment and I work to lift my mid-back up toward the ceiling. And then gently press the hands to lift the head, come down and rest for a second. Now why don't you join me, lie down on your back, set the feet about hip width and with the strap around the upper elbow area, we'll place the hands roughly right alongside the ears. Fingers pointing a bit toward the shoulders or slightly out to the sides. And then inhale, press the floor to come up onto the crown of the head. Reorganize the hands and lift the mid-back toward the ceiling. We're creating that nice deep arc needed for full bow pose. A little lift of the head, tuck and come down, rest the arms on your chest and then we'll do one more. Place the hands alongside the head. If you find that you're not getting up into the pose, that's okay, just practicing being in this pose with a strap is helpful to build the strength and power we need. Take a breath in, press the floor, lift to the crown of the head, reorganize the hands as needed. And then pressing with the feet, legs parallel hip width, lifting that mid-back. And then a little lift of the head, coming down. You can take the strap off, that's the last one we'll do for this round. And just for a moment, resting on the floor. And you can lightly rock the legs, a little left and right. Great job on attempting those. Full wheel is a challenging pose. So we're going to build towards that through our first few power sessions, making sure the body's ready to open at that depth. You can always come back and revisit these practices and build at your pace. Then pause in the middle. We'll bring the knees up and into the chest. Take a nice breath in and exhale up, nose to knees. Letting that mid-back release, holding three, two, one, head down, feet down. Next, we'll take a little bit of a shoulder stand and karnapudasana recovery pose. Hands alongside you on the mat. Take a breath in, exhale, lifting the knees and hips. Place the hands behind your back and gently tuck the shoulders under a little bit. Allow your knees to fall towards your face, rounding your back. If you like, it's sometimes nice to cross the ankles a little. If your body permits and your neck is very comfortable with this, you might even be able to rest the knees to your forehead. No worries if that's not available to you. Just having your body in this rounded shape is nice as a counter pose. As your body allows, you might be bringing the hips a little bit higher, a little bit more over the head. No strain in the neck though, please. Okay. And then using your hands, unfurling the legs a little, you can set your body back down and we'll get ready for shavasana. Start by just gently lengthening the hips and buttocks a little away from the lower back so the low back is long. You can lengthen the legs out one by one. Gently tuck the shoulders a little under the upper back and toward the spine so the chest is well opened. Relax any tension in your legs. Make the legs and the feet quiet, hands, wrists, forearms nice and passive. All your breath to settle.
And just resting. Exhale. Thank you. Stay as long as you like in your shavasana. If you're ready to come up, one knee at a time, bend the legs.
Rest your hands on your tummy as you turn over onto your right side. Rest there for a breath or two. And then use your hands to push your way up into a sitting position. Find a comfortable seat. As always, great to have you here for this beautiful theme of power.
And as we're working into these backbends, if you have any questions about how we're doing these things, maybe modifications that you're needing, please do leave a comment so that we can connect and work on it together. I look forward to seeing you in number three of our power theme. Have a fantastic day. Namaste.
Align with Freedom: 30-Day Yoga Challenge
Comments
You need to be a subscriber to post a comment.
Please Log In or Create an Account to start your free trial.


