Description
About This Video
Transcript
Read Full Transcript
Welcome. We are in day 10 of our 30-day challenge. We're a third of the way through. It's been some strong classes. How are you feeling? What's going on in your body? Would love to hear from you. Please leave a comment on the routine today. Let me know how you're doing. We've got some strong poses coming up, some new poses to introduce. We're going to start lying down with some core work. Yep, we're bringing back the core work to prepare for some of the challenging balances we have coming up in this and the next practice. We'll start lying down on the back. Just take a moment to check in. Adjust your back. Adjust your pelvis if needed so you're in a comfortable position. The ribs should not be popping up forward here but be settled. Let's grab hold of the mat for some extra stability and just pause there as you hold ready for action. Walk the feet close to your tail and then bring the knees in. We'll start by stretching one of the legs straight up. Hold the pelvis, abdomen, and ribs in their position and we'll stretch that leg straight down. Inhale to bring it up. Exhale to bring it down. As we lower the leg there's a tendency, you can see me doing it now, for the ribs and back to pop up so we need to use that abdominal strength to hold everything still. Let's do two more and one more. Bring that leg in. Second leg up and here we go. Exhale down. Inhale up. Exhale. Working with that breath, the air element. Exhale. Reaching down. Last two. And last one. Bend both knees. Let them rest in the chest. You can wrap your hands around for a minute to give those muscles a little rest. Let's add to the challenge. Once again, grab hold of the mat. Two legs straight up. If your flexibility does not allow for the straight up legs, you can bend the legs a little and or keep one leg in close like the last round. We're going to do five. We'll pause and do one more set of five. Here we go. Big breath in. Exhale and reach the legs long, long, long and then back up. You reach only as far as you can maintain that mountain pose shape in the body. Inhale back up. Three and up. Two and up. And last one. Bend the knees and rest. So this will give an opportunity if you did one leg at a time again to switch legs. Legs back up. And using the opposite leg, if you're doing single sided, inhale, exhale and reach. Exhale to reach. This is going to prepare us for some of the balancing poses. Crow pose coming up today. Coming up in the next session. And then one more. Bend the knees. Give yourself a hug. I can already feel that leg energy warming up and then release the legs. Let's now turn to the side onto our right side. Bend the knees to about 90 degrees and stretch the two arms straight out in front of you. We'll start with the left hand, raising up to the ceiling and then allowing it to fall back behind you onto the floor. Hold there. Take a few breaths. And then close the twist. We're going to add to it by bringing the top knee left leg toward the chest. See if you can rest the foot in the hand. You may need a strap to get there or you can just work in the bent leg position. Here we go. Challenge that straightening of that leg one more time.
Up and open. Nice, long, deep breaths. And close your twist. From here, a brief quad stretch. You can support your head with the lower arm. Grab hold of the leg and pull back. Left hand, holding the left leg, quad stretch. We try to bring that left knee behind the line of the body. And release. Second side, turning over onto the left side. Two arms straight out in front, legs bent at about 90 degrees. We'll start with just the twist first. Follow that hand with your eyes. And then close your twist. Top foot coming into the hand. Straighten out that leg. And again open up into your twist. Couple deep breaths. And then closing your twist. We'll go for the quad stretch now. Support your head with the lower arm. Right hand grabs the right ankle and we sweep that leg behind. We use the hip muscles, the glutes, the deep hip muscles to draw that right leg back behind the line of the body. And then release. From here, onto hands and knees. A few cat and cow just to free up the spine. Inhaling spine goes down. Exhaling spine goes up. Two more. Last one. To a down dog. Walk the hands forward. Tuck under the toes and lift the knees. If you'd like to pedal out your legs for a moment, just warming up into today's practice, please do. And then let's take and hold the dog pose. Take one more breath in your dog pose. And then for a brief moment come down to your knees. This is a good opportunity to grab a couple of blocks for the next few poses that we'll be doing. So if you have those nearby, grab them and we'll put them at the upper corners of the mat. Let's find that down dog again for just a moment. Bring the feet together and step the right foot in between the hands. Left heel can be off of the mat. No problem at all. Left heel off the mat. Both legs straight.
This is a version of parsvottanasana. Nice long straight spine. What we're working on here is the mobility of the right hip, back of the right leg, and the length of the spine. In this pose we're looking for a little bit of a concave back shape. Long spine here. From this position, from parsvottanasana, we introduce for the first time, here we go into rotated triangle pose. We'll leave the left hand on the block. Right arm up into the air. It's kind of a preparatory version of rotated triangle pose. Remember that left heel is still lifting high. That gives us a lot of freedom to move into this pose. And then hand down. Set the blocks up out of your way for a moment. Hands to the mat. Dog pose. Take a moment there. Feel into your body the space that you may feel in the right hip compared to the left. We'll bring the feet together. Now left foot through. Right heel can be up off the mat. It really helps actually. The higher you lift, the easier it is to enter this pose. Hands on the blocks and we'll pause here. Both legs straight.
Listen hips balanced and level. And the spine in a slight concave rolled toward the floor. Arc toward the floor position. Moving into rotated triangle pose, we can bring that right block in just a little bit. Push down on the right arm and lift up the left. We're not trying to go for super depth here. We're just practicing a little bit of balance and learning to create that rotation in the spine. And then release the pose. We can set the blocks up again out of the way. Dog pose. Take a few breaths. We're getting ready now for the strong balance challenge. Now we'll start with the right leg forward first. Big step forward into a lunge. All the things that we've been practicing. We can put the blocks a little further out of the mat. We're going to need them. Holding your lunge. Bring it up into a crescent warrior to start. Strong lift of the arms. Deep into the pose. Couple criteria for us to think about. If you cannot straighten your leg, you're probably too deep and the hip isn't allowing it. So you just come up a little bit. We'll challenge the depth that we can reach today. Then big breath in. Exhale the arms to 45 degrees. We're looking for a straight line of energy from the left heel to both fingertips. Both hands. Big balancing challenge. We'll start by bringing the hands together in a prayer in front of the chest. A little hop in with the back leg. So you feel most of your weight is on that front right leg. Then reach the arms forward. Create inner reach. And we lift up into warrior three. We're challenging to come down with the chest up with the leg to make one horizontal line across the mat. Across the floor. Release your hands to the blocks. Touch down that left foot. We have one more pose in this balancing challenge. We'll take the left hand behind the right heel. Lean the body weight onto that right leg. Lift your left. If you can place your right hand to the floor, please do. Or you could use the block or even both blocks. Whatever you need to take this challenge. Standing splits. And then release. Two hands to the blocks. Let's come up for just a minute. Let the blood flow into that right leg. We've got a special release pose that we challenged a little earlier. Figure four. Cross the right leg over the left. Take the two hands to the block. And this is going to be just a little bit of a peek into crow pose prep. The challenge here is to bend the standing leg, the left leg, and touch your right shin to the back of your arms. Lift a little. You'll probably feel the stretch in that outer right hip. Bend into it again. Lift a little. If you want a little bit more space, you could try without blocks. Last one. Touch in. And come out. Let's come up. Release the foot. Just pause there for a second. Arms up. Exhale. Hands to the floor and step it back. Dog pose for a moment. Inhale plank. Exhale halfway down. Up dog. Down dog. Getting ready for the left side. Let's do it. Left foot through.
Pause in the lunge. Get that nice strong lift of the back leg and we'll find our crescent. Check in with your depth. Can you keep the support of the back leg? Make any adjustments you need to make. To 45 degrees, we tip the trunk forward and we look to make one line of powerful energy. Balancing the front and back sides so we don't over arc the back. Each side working evenly. Breath. Air moving in and out. And we'll bring the palms together in front of the chest. Take a little hop in. From there, reach the arms forward, balancing all of the weight on that left leg. Reach, reach, reach, reach from inside the body and lifting up. Going for that challenge of leveling the body. Caught it. Good. Three, two and one. Bring the foot down. We'll bring the blocks into play just for a little bit of help here. Start by straightening the left leg. You can bring the right hand behind the right heel or the left heel, excuse me, and bring the right leg up. You may or may not need the block support. If you don't, you can bring the hand to the floor. Standing splits. Balance.
Strength and courage to work deeper into this pose. And then release. Touch down. We'll bring the blocks in to help us for galavasana prep. Shake it out for just a moment and we'll take a little relief for that left leg. Coming down, we'll figure four. Left leg over right. Take the hands to the block for just a minute. And this prep is to bend the right knee and try to touch the left shin to the back of the arms. Breath in, breath out. Breath in, coming up. If you need the blocks, keep them. If not, put them out of the way a little. Maybe we could come further. Leaning a little weight into the back of the arms. And then come out. Two feet on the ground. We'll go arms up. Flow a little. Inhale and exhale. Knees down. Step back. Dog pose. Take a few breaths. Then lower the knees to the ground. Take a minute to put your blocks away. We won't need them. And rest back into a child's pose. Let the sitting bones aim down towards the heels. Sacrum and tailbone relaxing down toward the floor. Lumbar long. Hip joint soft. And then come up again. Let's find dog pose to prepare for. Pigeon pose. High heels. Inhale, look forward. Left foot forward. Left shin forward. And come into the pose. As we've mentioned before, if you can't sit comfortably down on the floor for whatever reason, structure, flexibility, whatever it may be, having a folded blanket, bolster, block, something under there so you feel like you can actually rest. You're not fighting your own body. Pick whatever you need to be comfortable. We're bringing the energy down just a little bit now so we don't want to work too hard. We're going to start in a bit more of a backbended version of pigeon pose. Taking some nice long breaths. When we talk about balance, it doesn't just mean standing on one leg, but it can also mean how we compare one side of the body to the other. One side of a leg to another. So we start to use our ability to feel the physical body and notice how it's doing its thing. Often the inside of the leg feels short, outside of the leg feels long so you can make adjustments. And then curl under the back toes, lift up. Let's send that left leg up into the air and just get a nice long stretch to that leg. Raise up your right heel, give you a little freedom to open a bit further. Tighten that knee and bring it down to dog pose. Your second side. We'll bring the right leg forward. All of the same ideas for support apply here. So you can start to scan through your body. Right side, trunk, left side, trunk. Inside edge of the left leg, outside edge of the left leg. What do you feel? Are any parts or joints, muscles complaining or feeling excessive sensation? Maybe a support somewhere would be a right choice for you. I will quickly mention that I often see people pull the foot, forward foot here, way out ahead. And if your hips don't allow a lot of range of motion, it puts too much stress on your knee joint.
So sometimes bringing the foot back could be a good solution to take pressure out of your knee. And let's tuck under the back toes. Use the strength of the hands and core to come out. Lifting the right leg. Squeeze those right leg muscles. You can lift your left heel and touch dog pose. Lift the heels, look forward, plank pose, Chaturanga, exhale. Soft dog. Breathing. Down dog. Press back. Walk the feet forward. Come down to your knees. Let's take a seat. Stretch the legs out in front. We're going to work a little further into the hips and take advantage of all the space we've created so far. Bring the right leg back and we'll bring the foot, shin and knee toward the chest. You're going to cradle that leg, wrapping around the outside of the left knee, wrapping around the outside of the left foot. And holding here. You can gently, with your exhales, draw that leg in a little closer to your chest. Exhaling and drawing. On a pose like this, we can't keep the back rigid, straight and lifted. So there's going to be some rounding to the lower back in this pose, especially depending on how your hip structure is built. Holding here. And then releasing. This mobility that we're creating in this practice is going to be invaluable for the balancing work and the deep work that we'll do in our next practice. Once again, holding around the foot, around the outside of the right knee, with your exhales. Pulling the leg in a little closer to the chest. One more. And then release. Take the hands behind you for just a moment. Strong legs and lift your chest. You can look up a little. We'll start to take the body the other way. Tiny bit of back bending here. And then place your hands fully on the floor. Bend both knees. Feet about hip width. Tabletop pose. A breath in and lift the hips up high. You can look at the ceiling. Challenge yourself to lift not only the hips, but the low back, the mid back. Strong, straight arms. Come down and rest. Let's do one more. Inhale coming up. By the way, if the wrists don't tolerate this position well, you can turn the hands out to the side. Gives a little bit more freedom to the wrists. Three, two, and one. Stepping a little bit deeper into this pose, I'm going to turn my fingers back toward the front again. We'll bring the legs together in tabletop. And now into Purvatanasana. We'll straighten just one leg. I press that left foot into the floor, right foot into the floor, and work the back body muscles. And then coming down. Second side, tabletop. Lift up. Right leg. Use the backs of the legs to lift up your spine and come down. Nice job. Let's turn toward the back or turn toward the floor and lie down. I'm going to ask you to reach for one of your blocks for a supported pose called Viparita Karani. We've gone through a little of this before and we're talking about block position where you can place the block either flattest way underneath your sacrum and pelvis or a little bit up like this. This is the one I'm going to choose. Slide the block underneath, right underneath the back of the pelvis. We don't want the block in the low back and we don't want it underneath the lower tailbone, right in the middle. With the support of the block, we're looking to create just a mild little arc in the spine, a little back bend. We want the abdomen to be nice and soft, long here, as opposed to flattened or dropped in to the floor. So some might have to gently take the tailbone downward toward the block a little. Let the arms rest out to the sides. In these more restorative poses, the idea is to not really have an agenda. If the position is done well, the mind starts to quiet on its own. A quiet mind can sometimes be challenging because it's so used to filling that space. To take this pose a little further, one leg at a time, you can draw the knees toward the chest while maintaining that low back, mid back arch. When you draw your legs up here, the abdomen should actually get softer, flatter toward the floor, the abdomen, not the lumbar spine. It should just feel like it becomes more passive. For those who feel comfortable to stay here, please do. If you'd like to take it a little deeper, we're going to remove the block and come down to the mat and explore a variation of shoulder stand again, hands along beside you on the mat, curl the knees into your chest, big breath in, exhale, lift your hips, bring the hands behind the back and tuck the shoulders a little. Just a reminder that this is not meant to be full shoulder stand because we don't have the blankets to support the neck. So my torso is angled away from my face. Hang here for a little bit, let the body adapt to this pose, to this inversion.
We can take one leg up, find that nice balancing point for the leg. Let that leg rest, take the second side and again, let that leg rest. You can then take both knees toward your face, just a little bit of extra curl in the body and then slowly let the body come down, two feet on the mat and make your way into Shavasana, two legs stretch out, gentle tuck of the shoulders. You can really feel the benefit of those inversions cooling and calming down the body. It's a beautiful way to finish a strong practice. Settle into that inner quiet and stillness feel the breath, the air move in and out. And if you'd like to stay longer, please do. If you're ready to come out, rest your hands and your tummy, bend your knees one by one and turn onto your right side. Rest your head for just a moment and then pressing up to a seated position. Thank you, thank you once again for coming to your mat and practicing with me. Strong balance challenge today and I've got some great poses to introduce to you in our next practice. If you again have some time to leave a comment, let me know how you're feeling, any questions you may have, would love to hear from you and I will see you in the next balance challenge. Have a great day. Namaste.
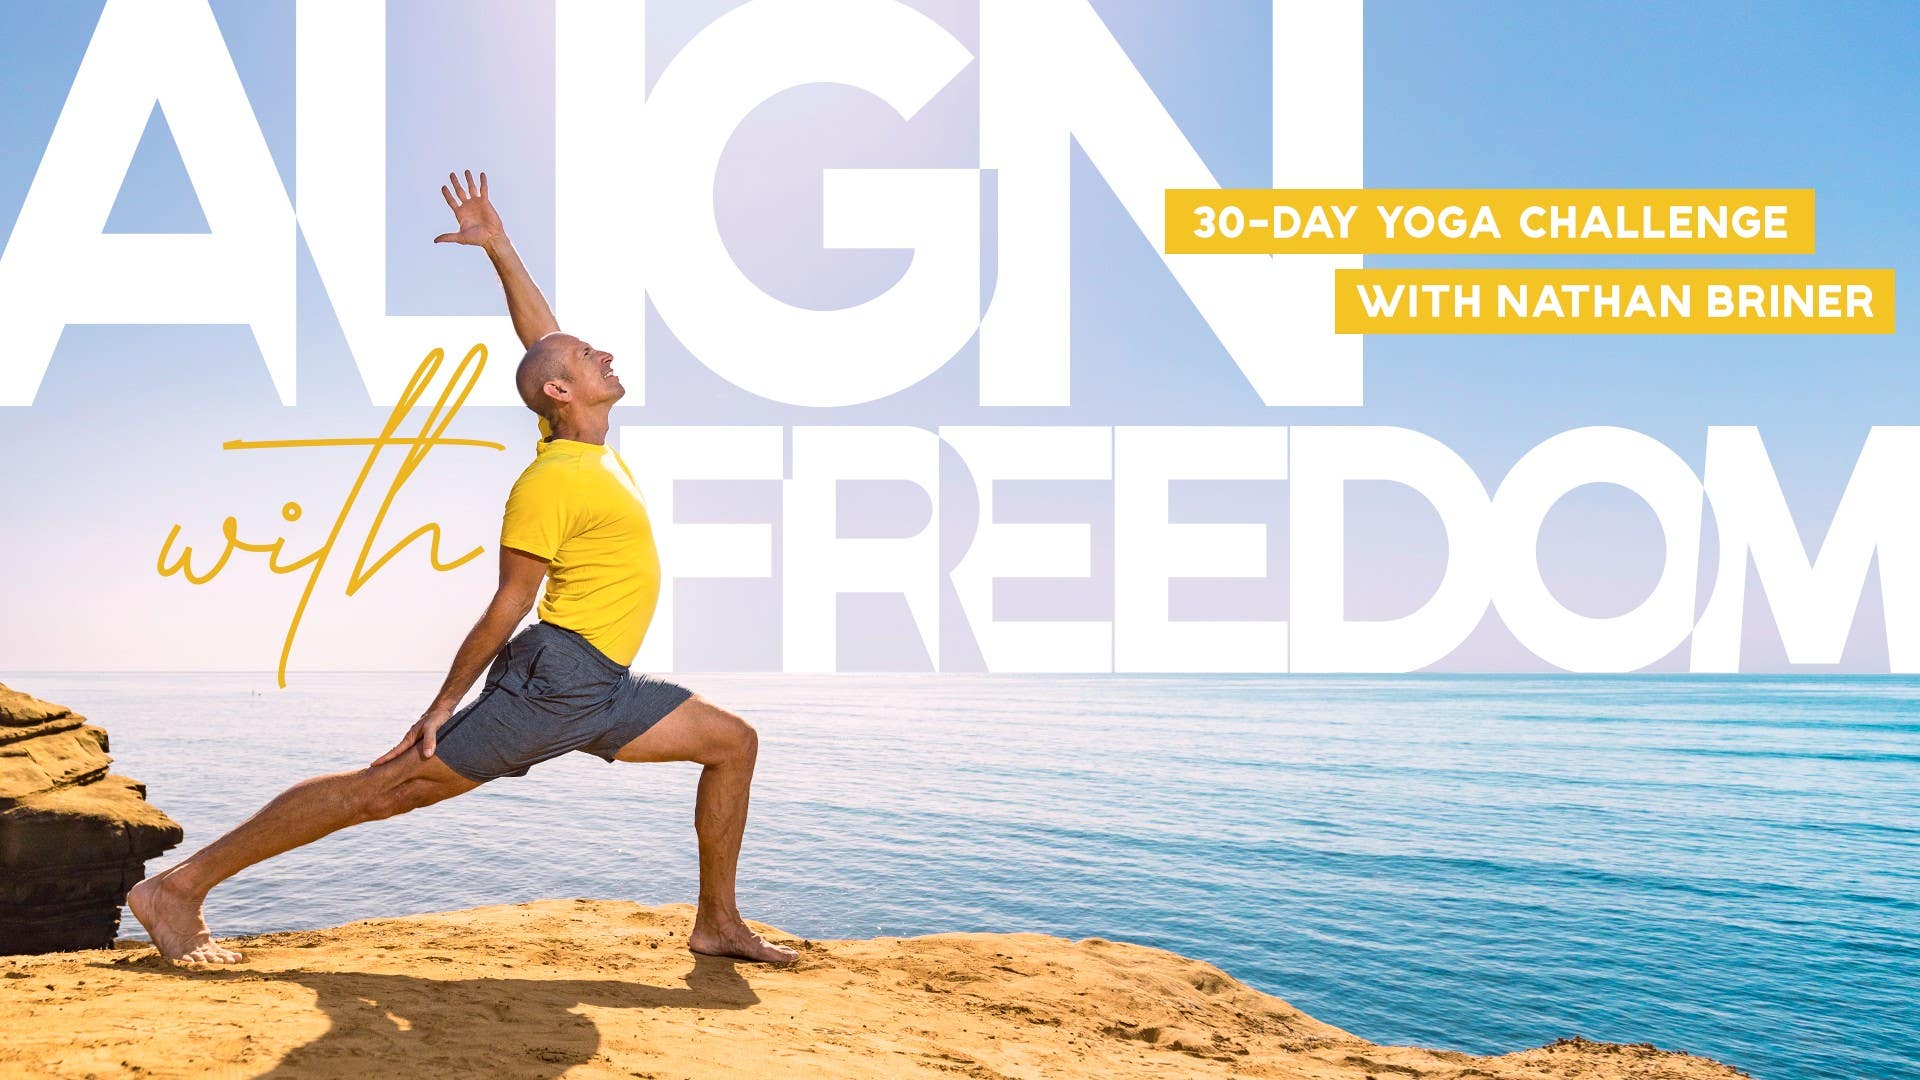
Align with Freedom: 30-Day Yoga Challenge: with Nathan Briner


Comments


Otherwise, I feel great and it's really wonderful to practice daily. Thank you!

You need to be a subscriber to post a comment.
Please Log In or Create an Account to start your free trial.
