Description
About This Video
Transcript
Read Full Transcript
Hello, thanks for joining me. Today's practice is just really short what I usually practice in the morning. Pretty simple strengthening practice that also just prepares me for my day. Just to let you know that this practice will end in Tadasana. It's a great starting point if you want to continue there for the back bending practice or to do some more core work.
Often times in my morning practice I sit for meditation for 10 or 15 minutes and then I do a practice similar to this one and I end centered and standing and then walk into my day from there. So regardless of what you choose to do at the end I hope you enjoy it. We're going to start off lying on a right side. So we'll do a little bit of work to strengthen our hips before we begin with some other poses. So I'm going to have you lie on your side and just look down and see that your thighs are in line with your belly and you have kind of a gentle tuck of your tailbone so you're not doing a back bend.
Flex your feet, keep your heels together and then take your left knee up towards the ceiling. This is called a clamshell, we're going to do five, so that was two. And as you move you can definitely use your top arm for stability, we'll do two more. And then we'll go into the reverse variation. So here you'll keep your knees together, keep your feet flexed and then take your left heel up towards the ceiling.
And as you're doing these exercises you're working a lot with your abdominal support, just kind of maintaining just circumference around your torso, it feels like you're hugging in. All right, go ahead and switch sides. So we'll start with the regular clamshells, just look down and make sure that you're fairly well aligned with your torso to your thighs and then feet stay flexed and top knee lifts up towards the ceiling, heels together for three, two and one. And then the reverse clamshells, you'll keep your knees together and then top foot stays flexed and lift your shin up, two and one. And then from here you can come onto your back and lie with your feet about hips with distance apart, heels pretty close to your body so you can touch the backs of them with your arms long.
I'd like you to press down evenly between your heels, toes, inner and outer feet and then lift your hips up towards the ceiling and lengthen your knees forwards. And then at the very top of your bridge you want to feel that the upper back hamstrings firm towards the bone, then you'll keep them firm and roll your spine back down. We're going to add in arms, so press into your feet, lift your pelvis up, keep your hamstrings toned and then take your arms up and back, keep the reach of your arms back and roll your spine down onto the ground and arms come alongside your body. Three more, press down into your feet, pelvis lifts and then arms come up and back, keep the reach of your arms and roll down. Arms come down, two more, press down into your feet, lift the arms up and back.
Imagine you're holding something way back behind you as you roll your spine down. And last time, press into your feet, pelvis lifts, arms come up and back, keep the reach of your arms and roll your spine all the way down onto the ground. From here you can bring the soles of your feet together, your knees to the sides, grab ahold of the little toe sides of your feet or your shins and just take a couple of breaths here. I'm going to send your breath down into the deepest part of your belly. And then bring your hands around your knees, draw your knees towards one another and on an exhale lift your forehead towards your knees.
One option is to stay here, second option is to bring your arms forwards and third option is to extend your legs forwards for a canoe pose. We'll take five breaths. Feel free to use your hands behind your thighs, we're going to come from here up into boat pose. And in boat pose, definitely grab behind your thighs if it's supportive to you. These can also be bent here, and then we're going to go back down to the first pose, whatever it was that you chose, and back up and back down and back up.
From here go ahead and bring your feet to the floor and we'll transition here into a forearm plank pose. So when you set up here, you want your elbows below your shoulders. I like to bring my hands together and then take one foot back at a time so your feet are flexed. And in forearm plank, bring your weight just in front of your elbows, so you're pressing into the widest part of your forearm. And it's almost like little balloons are getting inflated in the front of your pelvis and helping you lift up.
And here, I know it's tempting to drop your head, it's going to make it a lot harder though. So keep your gaze forwards and spread your shoulders apart, you can breathe into the back of your lungs like they're floating up. Let's just commit to five full breaths here. And take that last full inhale. And with your exhale, you can bring your knees to the floor and go ahead and place your hands now on your mat so that they're shoulder width distance apart.
Press evenly between your inner and your outer fingers, tuck your toes, take an inhale breath. And with your exhale, lift your hips up and back for downward facing dog. I know after forearm plank, downward facing dog is always so welcome, such a welcome pose after holding plank. So we'll just take a couple of breaths here and do whatever you need to do in down dog. You can walk your heels out or shift your weight around when I feel that your arms grow long from your side bodies and that you have an even press into all 10 of your finger pads.
There's buoyancy and lightness in your upper back and chest. And you can imagine someone holding your pelvis and lifting it up and back. And then when you're ready, go ahead and walk your feet into your hands and you can separate your feet so that they're hips width distance apart. Feel free to bend your knees if you need. Let your head rest down.
Right, so from your forward fold, go ahead and start to bend your knees forwards over your toes. You can keep your heels rooted down. And I want you to imagine that you have a band around your knees and you're gently pressing the band out. And then go ahead and bring your arms forwards. Take a full breath in.
Full exhale out. One more inhale. And then exhale and re-release into your forward fold. Okay, again inhale, you can lift your gaze forwards. Bend your knees, keeping a little bit of abduction, so pressing out through your knees and take your hands forward this time, press your palms together and bring your thumbs in towards your chest.
From here we'll twist and so I want you to keep pressing your knees as if they're pressing apart and place your right elbow on top of your left knee. And then from just behind your belly button, start to twist as you press your right elbow down into your left knee and both knees keep pressing out into invisible resistance. Okay, and then we'll inhale and come back to the center. Stay low. We're gonna go to the other side, left knee over the right, excuse me, left elbow over the right knee.
And then press the knees apart, keep pressing your left elbow down and from just behind your belly button twisting. And then we'll inhale and come back to the center and now with your exhale, forward fold and release your hands down and take a full breath in. And on your exhale, come all the way up to stand, bringing your arms out and up. Arms stay up, take a deep breath in and exhale your arms down. Go ahead and step your feet so that they're wide apart.
A good measure for space is ankles below your wrists if you bring your arms out. So take an inhale breath here and then with your exhale, just come down about halfway. So halfway, arms spreading out. Here you want to press evenly into your heels, into your toes and the inner and the outer feet. So for a lot of you, you might find that it's easier to press into maybe your outer feet and you want to feel here that from your outer hip, you could push down into your inner foot.
And keep reaching your arms out to the sides. And then we'll inhale and come all the way back up. From here, angle your left heel towards the edge of your mat about 10 degrees and turn your right toes to the top of your mat. Now notice when I did that that my pelvis shifted, I'll show you again. So my right toes turn out and my left heel turns back and my pelvis shifts.
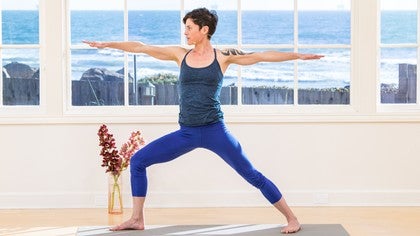
And it's important that I allow my pelvis to shift here and don't try and square my hips to the front of the mat. So I want to keep the integrity of my limbs. Really important for the knee joints and for the inner hips. So from here, bring your hands to your hips, feel that your pelvis stays level as you bring your right knee forward over the right ankle and then from your belly button, open your torso to the long edge of your mat and we'll inhale the arms out, gaze over the front hand and take five breaths in warrior two. And then inhale and straighten your right leg.
To come into triangle pose, you might want to shorten your stance a little bit. So especially if you're really limber, have a little bit of a shorter stance. Important for the front knee as well. And when you come into the pose, once again, allow your pelvis to shift. And then from here, take the weight of your pelvis and move it towards the back leg and you can bring your front hands down to the floor, to your ankle, to your shin and the top hand up.
And now on the front leg side, I want to make sure that I'm not hyper extending the front knee. So I'm actively reaching the inner and the outer knee towards my foot and I'm kind of firming through the back of my thigh and calf muscles. Like I'm going to push my leg bones forwards, even though they're not going anywhere. The weight of my pelvis continues to move towards the back leg. Reach with your top arm to inhale and come up and then we'll turn our toes for the second side.
Okay, so again, allowing the pelvis to shift, maintaining integrity with the feet, slide the left shin forwards, inhale the arms long and turning from the waist to open into the pose, gazing over the front hand. So in your Warrior II, if you have watched the pelvic floor video, you want to feel that the circumference of your pelvic bowl is even between right and left. You can feel a strong root of support from the base of your pelvic floor up through your spine. We'll inhale and straighten the front leg, readjust the back foot, take a slightly shorter stance and then allowing the pelvis to shift and the weight of the pelvis to travel towards the back foot. So the top hip on this side, it's my right side, is releasing forwards.
The left hip is releasing towards the right. The back of the left knee is lengthening between the inner and the outer knee at the same speed. And I feel that my hamstring and calf are engaged. And then reaching with your top hand, inhale and come all the way up, turn your feet so that they're parallel, bring your hands to your hips and take a breath in. And then with your exhale, forward fold.
You can bring your hands to the floor just underneath your shoulders, getting the weight even between your inner and your outer feet, the heels and the balls of the feet and then relaxing your head, letting your lower belly soften and release towards your back, relaxing the weight of your spine from your hips, the weight of your head from your neck. With your inhale, bring your hands to your hips and with your exhale, stand all the way up. And then go ahead and hop your feet together and stand with both feet together and bring your hands to touch. We'll interlace the fingers and press the palms forwards and up. So from the pit of your abdomen, from the root of your belly, reach down into both legs.
Feel that you have an even balance between the front and the back of your pelvis and the front and the back of your ribs. The outer corners of your neck and shoulders are softening and from your lungs and your side bodies, you're reaching your arms up. Release your hands and take an inhale and look up. With your exhale, spread your arms to the sides and forward fold and bring your hands to your shins and inhale, lift your torso so that it's parallel to the floor. And then as you exhale, re-release into your forward fold.
On your inhale breath, lengthen your spine, take your arms to the sides and come all the way up, looking up. And then as you exhale, bring your arms to the sides. Let's just do those three movements again, linking with breath. Inhale the arms out and up. Exhale in forward fold.
Inhale come halfway up. Exhale back into the fold. And with your inhale, come all the way up to stand, arms rise, gaze follows. Exhale your arms down along your sides. So this is where I'll end for this practice and I like to end centering into dasana with one hand over the other, just at my lower belly and I'll close my eyes and take a moment to feel my body supported and connected to the earth.
Take a moment to feel all of the space around me, that my back body is just as open and receptive as the front, that my legs can reach down and I might even imagine roots growing from them into the earth, that my heart and my head are supported and lifting easily. So if you're continuing on from here in your practice, I hope you have a great practice. If it's time to move off into your day, I wish you the best day. Thanks so much for sharing these moments with me.
Anatomy for Yogis: Renee Sills
Comments
You need to be a subscriber to post a comment.
Please Log In or Create an Account to start your free trial.


