Learn Handstand
Description
About This Video
Transcript
Read Full Transcript
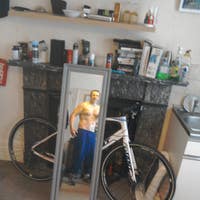
Welcome, everyone. Today we're going to be looking at the practice of handstand. When I was a new yoga teacher, I actually refused to do handstand at all, like never, and people would be like, and now we're going to do handstand and I would go to the bathroom, or just be like, no, thank you, with no real reason. And I began to realize as I was practicing, really practicing being afraid and handing the keys to the bus that was driving my life to fear, that fear was then in control. And so what we're going to work on today are progressive ways to be able to work with being uncomfortable, going upside down. There'll be practices for people new to yoga and new to handstand, and also practices for people who are moving along the handstand spectrum. I really like the quote from Hafiz who says that fear is the cheapest room in the house, and I would like to see you living in better conditions. And so that's what we're moving today. Let's start on our backs. So you're going to want to grab a block and have it nearby. And for this practice, we're actually going to want two blocks and a bolster. And you can also use a couch cushion if you're at home. And you can also use, at least for this ab work, a book or something like that. But for now, just set the block to the side so you can reach it. And then bring your hands down by your sides. Take the soles of your feet on the floor. Palms can be facing down. And then bring your knees up towards your chest. But be careful not to bring the knees too close to your chest. Make sure that your femurs are coming right out of the hip socket. And then you're going to draw the navel back. Take an exhale and slowly start to lower your right heel down towards the floor. And lift it back up. And breathe in. So inhaling. And then exhaling, starting to lower the left heel down towards the floor. Inhaling back up. And keep doing that, lowering with the exhale right side. Inhale, drawing the right side back up. And notice if your hips are starting to shift side to side. Or if you're able to keep the hips nice and still. And one thing that really helps me is unfurrowing the eyebrow. And if my belly starts to pooch out as if I have had pod tie, I just gently draw my navel back. And you keep going. And this is a sneaky one. The burn will start to happen. You'll feel that deep core engagement over time. And for those of you who are a little bit more practiced with your ab work, you can start to straighten the legs a little bit more. And we'll just keep going like this for another 20 seconds or so. Good. Switching sides each time. Imagine that if there was a video being taken of your upper body right now that it would look like you were just relaxing on the beach. Nothing is happening. And that your core is allowing your femurs to move in the hip sockets freely. Good. We're going to do one more on the right. Exhaling to lower down. Inhaling to come back up. And then one more on the left. Exhaling to come down. Inhaling to come back up. And then go ahead and place the soles of your feet on the floor. Just take a couple sets of windshield wipers letting the knees shift side to side. And then grab your block. And take your block above your head. So fingertips are pointing towards the heavens. And then find a reach through your arms so that your upper arm bones come out of the shoulder socket a little bit and you feel your shoulder blades spread wide on your back. So that's an action that we're going to want to use in our handstand practice. And then let's take a couple reaches just with the arms. So soles of the feet stay on the floor. You're going to inhale, stretch up, and then keep reaching as you exhale, exhale, exhale. Reach all the way back and tap. Inhale, come on back up. And then exhale, come all the way back. And you can feel if you squeeze your pinky finger on the block, your triceps starting to tone, and even the biceps toning here. And we'll do one more like that. Reaching the block, back, back, back, back. Some of you might hit the floor. Some of you might not. But you stop at that place where the reaching is still happening.
And then lift the block back up to the sky. And take your heels up towards the sky as well. And this is where it gets interesting. For many of us, as we start to lower the legs and the arms, we won't be able to lower the feet all the way towards the floor. Usually I cannot. But you'll do your best. And you're going to keep the navel drawing back. Take an inhale. And then exhale, reach the hands and the feet apart from one another. So you're making kind of this reclined Navasana shape. And then inhale, come on back up. Exhale, release back. Inhale, come on back up. Exhale, release back. Inhale, come on back up. Do two more. Exhale, release back. Really reach the legs and the toes apart from the legs and the fingers apart from one another. Last one. Reaching, reaching, reaching, reaching, maybe hold and pause for a moment. And then inhale, come on back up. And exhale, release, set down. Good. Set the block to the side. And then again, take another set of windshield wipers, letting the knees rock side to side. And then we're going to come up to standing at the wall. Okay, friends. We're going to take our right foot forward and place your hands in Anjali Mudra and lift them so that your shoulders and your elbows are lined up. And then you're going to lean forward, bend into your right knee and point your left toe, not like warrior one, but more like pointing straight forward. So you get a calf stretch here. And then with your pinky finger at the wall, you're going to press your elbows into the wall and just kind of let the head be sort of free gazing between the upper arm bones there and get a big calf stretch. Soften your right hip crease a little bit. Feel that gentle engagement of the belly lifting you up and out of your pelvis. And keep pressing so you feel the side chest engage as you reach your elbows into the wall. And your whole forearms really. Good. And then you'll release and switch sides. So keep your forearms at the wall. Let your left foot point straight towards the wall, reach the right leg back, point the right toes forward, not like warrior one, but pointing straight forward. And then let the left knee bend. Press your forearms into the wall until you feel a little bit of a rounding come between your shoulder blades. Your triceps engage and your side chest is engaged here. Big side stretch. Good. Just another couple of breaths. Inhaling and exhaling. Nice. And then release. Come on out of it. Take your hands to the wall. You're going to do your best to try and line up so that you can come to an Ardhu Uttanasana with your hands in the wall about shoulder width distance apart. So this is half forward fold. Make the legs strong. Let the hips be over the heels or even maybe a tiny little bit back behind. That's fine. Press into the wall. Draw your low ribs towards your pubic bone so that you fill up the backside of your heart and then reach, broadening the shoulder blades apart from one another. Keep that engagement of the triceps that we've been working on like you did when you had the block between your hands and stretch here. Good. Legs are strong and straight, opening the back of the knee joint. It's harder than it looks. So if you're starting to get a little bit of a glowy sweat, so am I. And take one more big breath. Inhale. Push. Exhale. Draw your ribs in your pubic bone towards one another, filling up the back of your heart and then step forward and release. You're going to grab your two blocks now and you're going to place your two blocks right on the floor in front of you. And we're going to line ourselves up to take a warrior three at the wall with our right foot at the wall to start. So place your hands on the blocks. You can also just use hands on the floor. That's totally fine. And then you're going to place your left foot between the blocks. So it's kind of centered between the blocks or your hands and then take your right leg up. And for me, I always do it too short. So you got to hop out and then straighten your right leg, straight, strong left leg with your hips over your left hip over your left heel. And then with your hands on your blocks, I symmetrically draw your hands towards the wall as you reach your heart forward, giving a little bit of traction for the upper back here. And then on your left big toe, reach energetically out forward. So from the root of the big toe on the left side out through the tip to start to open the hips. And you've got some hamstring engagement, some core engagement, and really reach through that right leg. So you're starting to engage the psoas as well. Inhale fully. Exhale completely.
One more. Inhale, traction the chest forward. Keep reaching out through that left big toe, pressing the right heel into the wall. And then exhale, right foot meets left and place the left foot on the wall, adjusting as needed your feet and hand position. So with your hips right over your right heel, again, palms are pressing onto the blocks, reaching out through the inner thigh on that left leg and then pull the hands back towards the wall isometrically. So that means fake. And then reach out through the, from the base of the right big toe out energetically through the whole big toe to open the hips. Beautiful. And you can feel that you might want to sink into the right hip. See if you can gently tone the right inner thigh. Two more big breaths. Inhale. Exhale. Inhale. And then as you exhale, place the left foot next to the right. Set your blocks to the side. Neatly. And then fold in. Make sure your feet are separated two fist distances apart. Catch your first two fingers around your big toe and then press your thumb against the nail of your first two fingers. And we're coming to Padangustasana, but with your arms strong and straight. So using the hamstring opening we've gotten here and then broaden the upper back here. So pull the back of the heart up towards the sky and make strong, straight arms. And then you can find that same action in the big toe that we did in warrior three. Reaching from the base of the big toe out through the tip of the big toe to open the hips. Letting the shoulder blades broaden. Good. Breathing. Inhaling. Exhaling. One more big one. Inhaling. Holy calf stretch. Exhaling. Good. And then release. Bring your hands to your hips. Point your elbows to the sky and inhale to stand all the way up. Good. Okay. Grab your bolster or your couch cushion and you're going to place it against the wall. So there's an important head placement that has to happen here for you folks who are learning, just learning how to get up and to handstand. So you're going to take your hands on either side of the bolster and step one leg back and then the other. So I'm not framing the bolster with my hands, but my fingertips are just sort of in line with the front of the bolster or your couch cushion. And then take your downward facing dog. Good. From this place shift forward so that your wrists and your shoulders are lined on top of one another and look right between your thumbs. And you'll see that the top of my head is hitting the bolster. You should look if you've never done this before. And then you're going to step one leg in and lift whatever leg feels most comfortable. And my teacher, Christina, calls this dinging the bell. So we're not trying to come to stay up in the handstand. We're simply trying to see if we can get the heel of this foot that is lifted to hit the wall. So you shift forward so your shoulders are over your wrists, push. And then from there, see about dinging the bell. Shift forward, push, kick, ending. Shift forward, push, kick, ending. And then it's really important as we start practicing handstand to switch legs. So this is the leg that will feel like it's somebody else's leg when it's up there and you do the same work. Shift forward, push, ending. Shift forward, push, ending. Shift forward, push, ending. Good. And then go ahead and fold in. Shake out the arms for a second. Shake out the head. Bring hands to the hips, point elbows to the sky, and stand all the way up. So once you've got that, you can set the bolster to the side neatly. And then we're going to do it without the bolster. So it's going to be the same sort of practice. You'll be dinging the bell, but without the bolster, which actually, um, once you start getting your heel to the wall with the bolster, it's time to remove the bolster, which is kind of sad news because the bolster helps us to feel really safe when we have our head touching something. I don't know why, but it just does. So bring hands to the floor. I like to be about a ham print away from the wall. Turn the hands out slightly. Find your downward facing dog. And then you're going to step one foot in. Start with the leg you like.
Lift that leg, shift forward so that your shoulders have a wrist broadened the shoulder sides. And then on the exhale, take one kick, ding, and ding. Good. One more, ding, and then come down. And then the other leg, lift the leg, push, shift forward, keep pushing the whole time and see about dinging the bell three times. Good. And then walk forward fold, shake it out. You can take opposite elbows, swing for a moment, and then release hands on hips, elbows to the sky and inhale to come all the way up. Okay. So those are the first two steps. The next thing we're going to do is work once you're able to start to get into handstand. First you do ding, and then you do ding dong. That's how it works. And this is not my joke. This is Christina's joke, but it's totally effective. So we're going to do it without the bolster. It's going to be the same entrance. You're going to place the hands about a hand print away from the wall. Find your down dog. Soften the shoulder blades away from one another. Step one leg and lift the leg that you like. And then it's going to be swinging the top leg up and then letting the other leg come to meet it so that both heels might hit the wall. So it's ding dong, and then you come down. And it's kind of nice to switch legs in the sky so that you land with the leg that you don't like as much up in the sky. So push, ding dong, and then come down. And one more time like that. Ding dong, and come down. Bring hands to hips, point elbows to the sky, and inhale to come all the way up. Good. Okay. We've got a couple more things to do here, friends. We're going to, once we've been doing handstand for a little while, there tends to be a habit that is developed where we kick up with a leg that we prefer like I've been talking about all of the time. And this can cause, well, it happens for a lot of reasons. For me, I notice that my leg that is more open than my left leg tends to be the leg I don't like to kick up with. And that's because the psoas on that side is a little bit more loose and free. And then on my right side, the leg I like to kick up with is pretty tight. So I've been doing this practice at home, and actually it's been very revolutionary. It's called the scissor kick, switching the legs like we did in the air. You can watch me and then try. You're on video, so you can always pause it and do it as much as you like. You should do this every day, though, in my opinion. It feels really good. And we're going to move a little bit farther away from the wall. So if you're not ready to move away from the wall, then you come back to the bolster step, or you come back and you do without the bolster and just do the ding or the ding dong. Okay. So moving a little bit further away from the wall, starting to really engage with that feeling of being uncomfortable. We don't want fear driving the bus. We want to be in charge. And so we're engaging with these practices to be in discomfort because right on the edge is where growth occurs. So step whatever foot you like in to start. Look between your hands, move your shoulders forward over your wrist, push around your shoulder blades apart from one another. And then we're going to come up and switch legs in the air. Good. And the effort here is to start to slow it down. And there might be, for that moment, that feeling of flying in the sky, which is really fantastic. We'll do one more. Good. And then pause, fold in, catch your breath. We're doing like 75 handstands here. Take opposite elbows. You can pull the skin of your triceps down towards the floor. Good. And then bring hands to the hips, elbows to the sky, inhale to rise all the way up. And we're going to grab the bolster again. So take the bolster and put it against the wall. We're going to practice some hopping in the handstand with both feet. And this is, um, this takes a lot of strength and it also takes a lot of like gumption and really being like fear, I've got you. Let's have a relationship together. So bring hands on either side of the bolster. So your fingertips are lined up, um, with the part of the bolster that's facing you and then walk the feet in until the top of your head sits on the bolster. And the feet are about two fists distance apart, like we did in that forward fold. And we'll just do a couple of these. So you're pushing, lifting the belly, and then you're going to hop up and take your heels towards your seat. And some of us might find a little bit of a hover there, but just keep the heels in towards the seat, engaging the hamstrings. Good. One more. So head hits the bolster, push down, think, push the whole time. That's kind of our mantra. And then you come down. Good. Fold. Mm-hmm. And then this is the bad news. Hands to hips, elbows to the sky, inhale to come all the way up. All right, friends, we're going to take some crow hops. And this is the hardest one. We've gotten rid of the bolster, which is kind of like the safety net. And so it feels a little bit more scary.
You're going to want to take that handprint away from the wall and just do your best. And remember that it's not about the outcome. It's about the journey to get there. And if you need to back up and take one of the other variations, then back up. And we'll just do three of these before we start to stretch our arms out and take a little rest. Okay? So again, find yourself about a handprint away from the wall. Come to your normal down dog to start. And then start to walk the feet in. Look between your hands. That's really important. Don't ever look at your crazy legs when you're doing handstand. You'll never come up. Push, bend the knees, and then it's a little hop and come down. And there's this moment where you might catch it or you might not shift forward, push, hop. And it feels really fantastic when you finally get it. And if you need to stay with the bolster, stay with the bolster. Last one. Push and hop. Good. Fold in last time. Take the outer tips to the elbows. Pull the skin down towards the floor. Big, deep inhale. Exhale out your mouth. And then hands to hips, elbows to the sky, inhale to rise all the way up. Great. So we're going to stretch out our shoulders. Bring, we're going to do a pec minor stretch. Our pec muscles are our hugging muscles. And so this takes them the opposite way. You're going to bring your pinky finger towards the wall. And you're going to be about, I don't know, half of you distance away from the wall. And bring your other hand towards your belly.
And then as your pinky fingers on the wall, let your shoulder sort of soften down towards the floor. Take an inhale here. And then as you exhale, as if you're serving someone a cocktail, reach the hand back behind you and your pinky finger will be on the wall and your palm will still be up to the sky. And then make the belly really strong. Push your pinky finger into the wall and then walk your feet. Oh my gosh, this is awesome. I hope you're doing this away from the wall to stretch out your shoulder and the front of your chest. And I'm pretty active here, pushing the pinky finger into the wall. So you do that too. And it wants to kind of turn, but keep reaching the thumb into the middle of the room. If your ribs play when you get excited, like mine do, gently draw them in. Good. And then release, set the feet forward and inhale the arm all the way back up and around. And you might notice sometimes when I teach this to people, one shoulder might be actually higher than the shoulder that was just stretched. It's really cool. And then turn. You can see me from the back now. My feet are together. I'm reaching my left arm up, finding a comfortable distance away from the wall. My right hand is going to rest on my belly. My pinky finger is pressing into the wall, but I'm letting that left upper arm bone move down into the shoulder socket, releasing the fascia. And then breathe in. And then as you exhale, release the hand back behind you, press the pinky finger into the wall, palm of the hand stays pointed towards the sky. And then some of us might turn and walk the feet and point them into the middle of the room. And you get this big stretch across the front of the shoulder. We often see this pose with the palm pressing on the wall, and that is good for the pec major. This is a pec minor stretch, so it's a little bit different. Good. One more big breath. Breathing in. Exhale, start to release the feet so that they're pointing back towards the straight direction and then inhale, come on back up with the arm and exhale hands by your sides. All right, friends, let's come down to the floor and take legs up the wall and rest a little bit. So you're going to grab your bolster or your couch cushion, and you're going to place it right next to the wall. And then bring your left hip so that it's against the wall and your feet are sort of facing over towards what will end up being the right side of your body. And then you lean back and you turn so that you reach your left leg up the wall and your right leg up the wall. And then you've got to adjust and press your elbows into the floor until your booty's all the way at the wall here. And then you're going to take cactus arms and snuggle your shoulder blades underneath you so that again you're getting this big chest stretch while you rest here. So you're going to just lay here, dear hearts, for the next couple of minutes. This pose legs up the wall is really good for anxiety, for our immune system, and is said to be if we can stay in it for a couple of minutes as restful and as potent as an hour long nap. So there's your pep talk. Just rest. All right.
All right. Ahh. Ahh. Ahh. Ahh.
Ahh. Ahh. Ahh. Ahh. Ahh.
Ahh. Ahh. Ahh. Ahh. Ahh.
Ahh. Ahh. Breathe. Go ahead and bring your hands to your belly. Start to tune your senses back in.
Bend your knees. Place the soles of your feet against the wall. And then you're just going to wiggle yourself backward onto your mat until your pelvis rests off of your bolster or your cushion. Feel that center channel of your body. And as you feel ready, roll on over to your side body.
Cradle your head in your hands. And then using your hands on the floor, keeping your head really, really still, not shaking your brain fluid around a lot, start to push yourself all the way up towards seated. Come to a cross-legged seat and bring your hands to your heart center. Let your head bow in for a moment, honoring all the work, all of this engagement with a practice of fear, a practice of being uncomfortable, and doing it anyway. Good day, everyone.
Comments


 !
!


You need to be a subscriber to post a comment.
Please Log In or Create an Account to start your free trial.
