Description
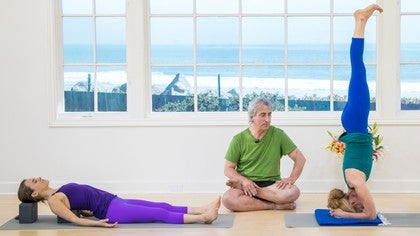
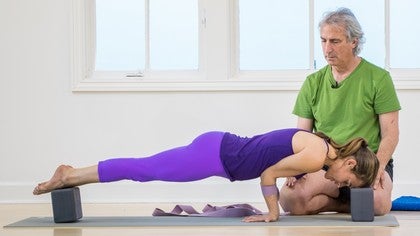
Once referred to as Viparita Karani Mudra, headstand was rumored to extend life. Betsy demonstrates a full expression of the posture while Richard guides Alana into a reclined version on two blocks.
About This Video
Transcript
Read Full Transcript
Hi, we're here with our friends, Betsy and Ilana, and we're about to demonstrate headstand, but only Betsy will be doing it. Ilana will be doing a reclining position. We don't really feel that it's appropriate for a more beginning and experienced student to be doing headstand unsupervised through our video. So she'll just be reclining on a brick in preparation for shoulderstand, which is coming up soon. Now, headstand and shoulderstand are poses that started out with the name of Viparitakarani Mudra, which means the reverse action seal. And it was done originally, 350 or more years ago, to preserve what's called the amrita, or the soma, which is the elixir of immortality. When people, average people, not these two, but average people who don't go to yoga classes, are sitting upright, it was believed that this very precious fluid would drip from the base of the brain into the solar plexus where it would be burned up and wasted. And so the yogis devised a very simple way to preserve the liquid because they were very interested in extending their lives. One of the purposes originally of Hatha Yoga was to extend life beyond the normal span of years. And so they did something very simple, and they just flipped themselves upside down, which prevented the fluid from dripping out of their head into their belly. Nowadays, we do the pose not very long, usually five or 10 or 15 minutes at the most, I would imagine. But in the old days, they held the pose quite a long time. In fact, they held it for three hours, which seems like a very long time indeed. Although there is a record of a modern yogi doing that, his name is Theos Bernard, and you can read about that in a book called Hatha Yoga that he wrote in the 1950s. Anyway, nowadays, the poses have been repurposed and given different reasons for doing them rather than the preserve of the amrita. Most of the reasons given are purely anecdotal and have no basis in scientific fact. So let's have Ilana start by lying on the brick. Now you want the long axis of the block across the shoulder blades. And you want to start a little bit higher on the block than you want to end up. So that you can push over the block and have it slide down your back a bit to draw the shoulder blades toward the tail and that this second block will be for the back of your head. You want to present and preserve the length in the back of the neck. So she'll exhale lie down, knees bend feet on the floor as you can see. And she'll just give a little shove and she'll slide over the brick a bit, which she'll use that to draw the scapulas down and then the head on the second block. And then I'm going to ask her to reach her arms up, inhale toward the ceiling so the arms are perpendicular to the floor and just rock back and forth a bit on the block very slowly and use that rocking action to create some space between the inner borders of the shoulder blades. And then having done that, she can lay the arms down on the floor to the sides. Again, about 45 degrees angle relative to the torso. Now it's possible to keep the knees bent if you want to work with the heads of the thigh bones dropping deeper into the pelvis. But if you do this, it's preferable the way I see it to keep the thighs parallel to one another rather than to let the knees drop in toward each other. But you can also stretch the legs out, which I believe Alana is going to do, reach out one at a time, pressing through the heels. And then you can let the legs just rest on the floor. And we'll leave her do that now for a while. She's already smiling. Now it's Betsy's turn to show the headstand. Sureshasana, also known as kapalasana, which means kapala is the head. And she's going to, I noticed when she showed me this earlier, she did a little test to measure the distance between her elbows by bringing her forearms on the floor first and holding the forearms shoulder width. And that's a pretty good way to do it. It doesn't always work for everyone, but it is a very useful way to start. Now for more beginning headstanders, not necessarily beginning students, but beginning headstanders, you don't want to open the hands up. You want to bring the bases of the palms together, which creates more strength in the arms. A more experienced person doing the headstand can begin to open the palms up a little bit and then snuggle the head, usually into the palms, although it's not necessarily always done that way. You have to look at the shape of the neck once you're in the pose and it may be necessary to move the head a little bit away from the palms and put something between the head and the palms, such as a rolled up washcloth. In any case, you want to make sure the inner wrists are very firmly pressed into the floor and perpendicular to the floor at all times. And also the inner elbows are very firmly pressed down into the floor. And then she can inhale to come up straightening the knees and walk the feet in. Now she's very adept at doing this and she can very smoothly come up on the inhalation, firming the tail into the back of the pelvis as she takes the legs up. Very nice. And then she wants to press through the heels and the bases of the big toes again to keep the soles more or less parallel to a flat ceiling. Now the shoulders lift and open across the upper back as you press down through the inner wrists and inner elbows. And you have to be very careful that the tailbone lengthens up toward the heels to avoid collapsing onto the lumbar spine. She's doing a terrific job with that.
The front ribs stay in. The legs are very firm. We did a block exercise earlier for the tree pose. It would apply very, very, very appropriately now to squeeze the outer thighs in as firmly as possible. Keep the legs very active. It's very important that when you come out of the pose, your legs feel as if you've done a little bit of work. The legs have to be very active to keep the weight from collapsing down onto the neck. And this looks very nice. You also want to periodically check the shape of your neck to make sure that you're preserving the cervical curve. And I can see right from where I'm sitting that her cervical curve is very well preserved. So let's have her draw the inner groins very deeply into the pelvis and with an exhalation start to bring the feet lightly down on the floor. Now you may need to bend your knees to do this, but it is preferable to bring the legs down at the same time rather than dropping one leg down at a time and that you can bend the knees and come in the child's pose. Now you can stay in this pose a little bit longer than we've held Betsy. I think initially if you're just starting headstand you don't want to stay more than about 30 seconds or so. And you want to make sure that most of your weight is being borne on your arms and shoulders and not on your neck. And over time as you get more adept at doing this, then you can start to transfer more weight onto the neck. But you want to do that very slowly. And of course the thing about headstand is that it's an everyday pose. It's not something you want to do once a week. So that if you're not prepared to practice every day or most every day, then it's certainly not a pose that's appropriate for you to try in this way. There are other ways to do it. Now for our recliner, who's had a big smile on her face as usual, I'll ask you to bend your knees with an exhalation, bring your feet onto the floor, and then very carefully tilt yourself over to the right, off the bricks, and lay yourself out on the floor for a bit. Take a few breaths. And we'll leave her there for a while, take a little rest. And she can, Alana can push herself up with an exhalation away from the floor. And she can come and sit and be happy. Thank you. This is formally called salamba shirshas, and the one that means the shirshas in the position with support, salamba. There are further exercises that do without support. We won't be showing any of those today though. Thank you very much.


You need to be a subscriber to post a comment.
Please Log In or Create an Account to start your free trial.