Description
About This Video
Transcript
Read Full Transcript
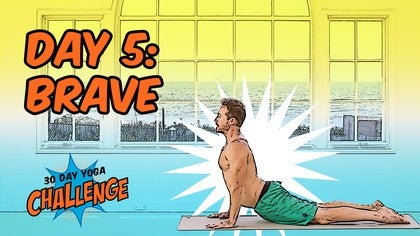
(waves crashing) Hey what's up? Welcome back. Day five, wooo day five. So, I don't know how you're feeling but I'm assuming you're feeling pretty good. You might have a little bit of a, you know, sore muscles here and there.
That's totally normal. You may even have those moments where you're like, "ah should I continue this?" Yes. You totally should continue this for every reason, every reason you've already sort of convinced yourself of. Okay? So stick with me.
I'm showing up, so I'm expecting you. All right, I don't want to be talkin' to nobody on the other side, so we're together, we're doin' this. So, day five. Let's start. Now a lot of these we've been starting standing, working on some salutes, adding lunges.
We're gonna do that again, but today we're going to incorporate crow pose. It's a fun pose. It requires a little bit of balance, a little bit of strength and effort. And definitely the willingness to play and have fun and not be afraid to fall on your face, cuz that might happen. No pressure though.
So, front of the mat as always. Feet grounded, legs strong. A little bit of an ah breath, a little bit of yes, yes. How lucky I am to be able to breathe and move and feel. Kind of ground yourself for a moment.
Inhale. Circle the arms high. Take a deep breath, right? Take a deep breath. Feel the entire body, maybe a little tip back, a little side to side.
And then exhale, come on down. Forward bend. Inhale, lift half way. Exhale, bring the right foot back. Set the knee down.
Finish that exhale. Inhale, rise up. Find that nice, comfortable yet somewhat challenging lunge. Breathe in. Nice! Breathe out, hands down.
Step the right foot up, fold exhale. Inhale, lift halfway. Exhale, fold, left foot back, knee down. Finish the exhale, rise up on the inhale for lunge. Good.
Hands down, step the left foot up to meet your right. Fold exhale. Inhale, lift halfway. Exhale chair we did this before. Add a little heat.
Immediately, feet strong. Rip the newspaper apart. Long spine, core braced. Good, every time you come here make it worth your while. Now press into the feet.
Rise up, breathe in. And breathe out, palms to the chest. Now think of this as warm up, right? You're warming up the different body parts. So here we go, breathe in.
And breathe out. Breathe in, lift halfway. Breathe out, left foot back, lunge. So knee down, look up and rise up on the breath in. The breath out, hands down, step the left foot up to meet your right.
Exhale, fold. Inhale, lift halfway. Exhale, right foot back, knee down, look up, rise up on the breath in. Good, exhale, hands down. Step the right foot up to meet your left.
Forward bend. Inhale, lift halfway. Exhale, chair pose. You can bring the arms straight out in front of you or up a little bit higher. Good.
Press through the feet. Rise up, breathe in. And breathe out, palms to the chest, palms to your heart, standing strong. Tons of gratitude, yes. It's to the point sometimes, when you can get out of your own way, of feeling like all of the poses have to be right.
It's more like, you're just pumped to be doing it. It's pleasurable, it's exciting, you know, to be in your body. I don't know, that's me. Maybe it's not you, I don't know, we'll see. We're building to that possibly.
One more round. Breathe in, come on up. Breathe out, forward bend. Breathe in, come up halfway. Breathe out, right foot back, knee down.
Look forward and up you go. Breathe in. Low crescent lunge. As you breathe out, hands come down. Step the right foot up to meet your left.
Exhale completely. Inhale, lift halfway. Exhale fold. Step that left foot back. Knee down, start to look forward and as you look forward, you begin to rise up, head in line with the spine, arms long.
Tip back a little bit. Breathe in. Exhale, hands down. Step the left foot up to meet your right. Forward bend, exhale, head long.
Inhale, lift halfway, and exhale, fold. Sit low for this one. So bend your knees like your trying to bring your knees into your armpits, so low, low, low. Now arms out in front of you, lift the chest. Sit a little lower than you have been.
Low ribs in, long spine, committed to the breath. Press through the feet. Rise up, breathe in. Breathe out, palms to the heart. Good job, okay.
So I'll face you now. We're gonna work, pretty similar to tree pose. It's basically, standing on one leg. We'll start by standing on the right leg. Okay?
Palms at the chest, at the heart. Lean to the right just a little bit. Make sure the breath is calm, relaxed, present. Begin to lift the left foot, maybe even lift the left heel. And then the lift, then the lift left.
Lift the left foot completely. Stand tall. So your left thigh eventually is parallel with the floor. So no angles, but if you feel like this is about it, keep it there. Good.
Right leg is super long and strong. If you don't want to lock it out, keep a tiny little bend in the right leg. Arms up, palms facing forward. I actually personally find this one more difficult because I don't really get to rely on having that left leg, in this case, stabilizing and supporting the right leg. So the right leg is kind of all alone.
Good, breathe in. Get taller, taller, taller. Breathe out. Nicely done. Okay so you leaned to the left a little bit.
Create the stabilization and strength in the left leg. Lift the right heel. Maybe that's it, maybe you're like, "no way I can lift that foot up." That's cool. It'll get better over time with practice. Maybe you can lift those toes up.
Belly in. Find the hand position. Steady gaze. I call that a drishti. Steady gaze.
So you find one small little object to stare at comfortably. So you don't want to stare at it and make a funny face, right? Well you can make a funny face all you want, but steady, calm, relaxed. See it's really hard to hold this pose. Okay breathe in.
Exhale, relax that right foot down. Palms back to the chest, back to the heart. Okay. Im gonna step back up to the front of the mat. We're gonna work down into a squat, okay so.
From this position, feet hip width. Okay, I like to go a little bit wider for the malasana squat version. So your feet are about as wide as the mat. You bring the feet off of the mat, keep the heels on. Some of you need to lift those heels and that's fine.
The mobility just isn't there yet. Maybe it will never get there. But you can always roll up a blanket. Roll up the mat, something that helps the heels lift more so you have support, okay. We're not gonna get into that now.
That's an option though. Take an exhale. Lower down. Take a few breaths. Sometimes what's nice here is if you, you let your left knee draw in a little bit, toward, release the pressure of the elbow of the knee.
Draw it in on the breath in, and then exhale, push away. So it's like that same concept of kind of cycling in and out of the pose. So left in, breathe in. And breathe out. (breathes) Same with the right.
Breathe in. (breathes) What you're doing in those situations, that I believe in fully, is creating a really nice, intimate relationship with your body. It's like your communicating. You notice where you are, and you send the breath, (breathes) right to that space. It's kind of cool.
If you're overwhelmed right now and you don't feel it, totally get it, it's cool. All right, so transition forward and onto those hands and knees. (breathes) Take a breath in. Release any of the tension in the hips as you move back into child's pose. From child's pose, you're gonna stretch those arms out as we have been doing.
Keep the hands there. What you're gonna do is you're gonna inhale, come up to a table top. And then this is a new thing right. On the exhale, what I want you to do is, watch my arms. Keep the arms as they are.
Send the hips forward. And as soon as you start to kinda feel, that's your max range of mobility, start to bend those elbows. Shoulders back, chest up. Bend the elbows, kind of release down. So that's like a upward dog, moving then through cobra and all the way down, finishing the exhale.
Now inhale, push, reverse it. Cobra, a little gentle kind of updog, keeping the knees down, and exhale all the way back into child's pose. (breathes) Inhale. And exhale. (breathes) Inhale, cobra, a little gentle updog, through table, exhale, child's pose.
Inhale, table. Exhale. That modified kind of updog, through cobra, pulling the elbows back and in. Nice, really well done. Now inhale, come up through cobra, that little updog, table top.
So we're gonna work a little bit with the knee to elbow, okay from table top. Build some core strength. So from here, extend the right leg back. Maintain table top. You may even as you bring the knee in, push the ground away and get a little cat pose in the upper back.
So breathe in and now exhale. Knee to the elbow on the inside. Maybe even a little bit higher. Hold it, inhale send it back. Exhale, knee to the inside of the right elbow, or higher.
Inhale, send it back. Exhale. (breathes) Two more, breathe in. Exhale, belly in, belly in. Inhale.
Exhale. (breathes) Inhale, send it back, and bring the knee down. Exhale, good job. Let's do the other side. Inhale, send the left foot back and exhale, bring it in.
Inhale, send it high. Exhale. Inhale. Exhale. Core strong, left knee inside of that left arm.
Two more. Breathe in. Breathe out. Breathe in. Breathe out.
Good, set the knee down. Take a moment to turn the left wrist over. If you can do both at the same time, do that. If not, one at a time and lean back a little bit. Get a counter stretch in those wrists.
Okay once you've had enough of that, bring it back. Hands ready for downward facing dog. We'll grow that knee to elbow a little bit more. So we'll take it in downward dog, move through plank, knee to elbow, five times on each side. Here we go.
Come on up. Take the left foot, bring it more towards the center of the mat. Bring your right leg up. You don't have to bring it up wildly high. Keep the hips square.
Right leg can be up; it can also stay kinda bent here. Breathe in, extend. Breathe out, shoulders over the wrist, belly nice and braced. Knee as high as you can, good. Inhale, send it back.
Exhale. Breathe it in, extend back. Exhale, core strong, knee to elbow. Two more. Breathe in and breathe out.
Breathe in. Breathe out. Breathe in, extend it back. Place the foot down, pause, take a breath in. Breath out.
Right foot to the right center of the mat, left leg up, breathe in. Exhale, knee to elbow. Inhale Ex, hale. Good job, three more. Breathe in.
Breathe out. Breathe in. Breathe out. Last one. Make it count.
Bring it up, high, high, high. Yes. Inhale, send it high. Exhale, foot down. Downward dog, get the knees bent, extend.
Arms are maybe a little fatigued, that's okay. Bring the knees on down. Good. Send the hips to the right. Maybe look over the left shoulder.
Take a wrist stretch again if you like. This time try this one, finger tips back. Maybe one at a time, maybe both. Okay. Now from here, here's where we get to play a little bit.
This is where you, genuinely, I'm not messin' with you. Grab a pillow, if you're at home. Grab a pillow, if you've never done crow before, a seat cover and put it out in front of you. A hardwood floor might not be the best, might not be your best friend, if you come forward. So, hop forward or step forward into like a, kind of like a squat, with the heels lifted.
So, maybe it's about mat width, and you can sit back as far as you can. The idea here is to balance on your hands, right? Balancing on your hands, creating a shelf with the back of your arm or even your elbow. So the way that I like to teach more of a sort of beginner level, is to, place the knees, not so much up high but kind of down low near the elbow. Push the elbow into the knee and the knee into the elbow, like your kind of fighting them off.
And that will naturally kind of grip and kind of brace through the core. Kay, same thing with the other side. Hands, you know shoulder width, thumbs maybe six inches apart. Kay, now push the elbows into the knees, knees into the elbows, look forward a little bit. And then just flirt with leaning forward.
Lift one foot up. Maybe lift two, or one. Want to go one at a time. And then maybe you bounce up for just a second. Just a little baby crow.
And if you feel confident and you want to hold it, hold it. Big toes to touch. Good, bring it down. Ooh, all right. Good job.
Those are not easy. Come on down to your seat. That pose is not easy. It wasn't easy for me in the beginning, but it took practice and now I enjoy it. So hopefully you had some fun with that.
Left hand, bring it out to the side and take the right arm up, a little side stretch. You can bring the hand all the way up, or behind your head, reaching through the elbow. Roll the wrist, any kinda pain or discomfort in the wrist, you can kinda work that out. Up and over to the other side. Roll the wrists.
Back over to center, maybe a twist. Over to the left, right hand on the left thigh, left hand back behind you. Long spine. Good, other side. Take one moment here to see what it feels like to fold over your lot, walk your hands out.
Good bring it back up and as always, we close with an acknowledgment of your efforts, your showing up, and hey, my effort as well, my showing up. So, thank you. Thank you, that's number five. Oh my God, it's going by so fast. That's not cool.
I'll see ya for number six. Let's do this. Namaste, peace. Have a beautiful, beautiful, blessed day. Thank you.
30 Day Yoga Challenge: with Robert Sidoti
Mention
 |
Robert Sidoti (Teacher) |
 |
Vanessa C |
|
|
Jason T |
 |
Sandra Židan |
|
|
Sarah J |
 |
Ch Marie d’I |
 |
FanRodgers |
|
|
Sofia F |
 |
Joan J |
 |
Matthew |
|
|
Karen H |
 |
Glenford N |
|
|
Mike H |
 |
Danielle J |
 |
Chrissy |
 |
Scuba Chick |
|
|
Debra D |
 |
Louisa G |
 |
Sylvia H |
|
|
Miriam M |
|
|
Maria Elena D |
 |
Sam |
 |
Elle H |
 |
Avril D |
|
|
Rachel C |
 |
Elaine Fox |
|
|
Dannette W |
 |
Paige G |
|
|
Luisa C |
 |
Astrid U |
Comments


thank you Robert, see you tomorrow.


Crow pose is hard on the wrists! Ugh, it just is for a few reasons.
Your entire bodies weight is on your wrists/hands for one.
One thing to consider before trying again and for future is to strengthen and stretch your wrists more, this over time will help, maybe not resolve crow issue, but help in general for sure.
To minimize the severity of wrist flexion you can roll up a mat, blanket or towel so to elevate the heel of your palms, thus minimizing the intensity and bend at wrist crease.
Pressing more deliberately into the finger pads at base of your fingers is a helpful habit to get into in crow, down dog etc.
Hope this is helpful!!
You need to be a subscriber to post a comment.
Please Log In or Create an Account to start your free trial.
