Description
About This Video
Transcript
Read Full Transcript
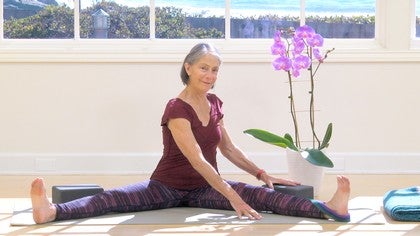
Hello, welcome back. Today I thought we would work kind of multi-level. We're going to be doing some physical work with respect to getting the pelvis juiced up, get a little synovial fluid running in there, etc. And also plan to just kind of coach you through some awareness flows that can be applied when you're doing anything really. And we're going to be working with some prasarita parottanasana, which is a wide leg stance pose, and some variations on that, and then we'll be playing around some squats. So here we go with prasarita. Prasarita. And it's a wide leg standing up pose, and the first thing that you want to think about is whether or not you will be able to get all the way to the ground keeping a straight spine, and if not you will need two blocks, which I happen to have right here. So I will get those to demonstrate with in case you're in that category. And with the wide stance, if you put your hands at the tops of your thighs, not really the hips themselves, but down where the thigh crease, the thigh joins the pelvis, and you just push down, you can feel a sense of connecting downward. You just imagine, take your awareness all the way down the outsides of the legs, and maybe even a bit towards the front of the leg, and connect into your feet. It's sort of like, you know, if you're a little bit spacey, someone comes along and they might just hold you down. So it's like, oh yeah, now I'm on the ground. I feel it. And then let your awareness come around to the inner ankle, and draw your awareness gradually up. You don't need to bend over here, but you can if you want to just drag your hands up the inner legs, to get the feeling of awareness. So do, instead of the awareness being attached to your fingers, to your legs, just let the awareness come up the inner legs, and see if you can feel that continuing to rise up through your torso, through the front and then down the back. Down the outside, up the inside, up the front, down the back. And then to come into the forward bend here, imagine you can use your hands even pushing the thighs back as you tilt your pelvis, and even the creases here, nice wide smiling thigh crease, and that goes back, and your thigh bones go back, and you're, the firmness of your legs that comes from pressing down and drawing up, that's helpful. And then perhaps this is the best place for you to put your hands. How do we determine that? We determine that by the roundedness or the straightness of your spine. So I'm going to just turn to the side, and I'm not as narrow as I was, wide as I was, but if you, by the time you get down here, you're having to reach from your spine to get your hands down any further, let's just say that for today, we're really going for this straighter spine, and actually even being able to drop the lower back towards the floor. So if you can do that on this height successfully, do it here. If you can do it successfully, and with some sense of connection to being able to bring your shoulder blades down your back, and to all of you reaching forward from the sternum, and back from the tail, and then perhaps you can do it with your hands all the way on the floor. So with that still straight spine, if I drop my head, you can see that, that my spine is still elongated and not rounded. Bending of the knees is a key, you can tell. So for the sideways movement, I'm gonna turn my left foot out as I go to the left, and I'm gonna demonstrate with the blocks. So you can walk your hands or your blocks over to the left, and keep your, let your left arm lift, and you can use the forearm to help open the knee, not forcefully, just support it from from collapsing in. And think about lengthening from where the thigh joins your pelvis all the way out to your knee. And still there's that sense of, oh yeah, I'm reaching down, coming up, and then inhale, come back up to center, and then walk over with your blocks, if you're using blocks, and then your hand, your elbow, forearm comes to the right knee. You can see I've turned my foot out.
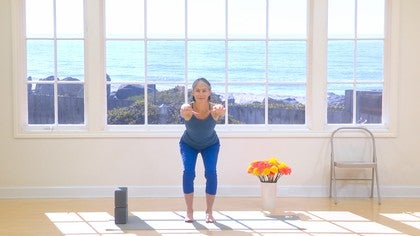
Lengthening the spine forward primarily, rather than coming way over to the side on this, although there's no problem with doing that either. And then inhale up to center, so I'm gonna do a few without the blocks, over to the side, so you can see what that might look like. And inhale up, so use your breath, breathe into your belly, exhale, turn the other foot out, and bend your knee. So you're cultivating a longer breath here. Inhale, exhale. And you're lengthening the back of your neck so that really it's more like the crown is pointing straight ahead. Your eyes are softly down, rather than always having to have the head up, and contracting the back of the neck, and creating tension there. You can release a lot of tension by just looking at the floor. Inhale, back up to center, so that is probably enough times with that. And then, depending on your ability to go down further, you could put your head on a block, and that same thing of keeping the front and back of the neck equally long, and perhaps you would be able to put the very top of your head on the block, and some of you might be able to go to the floor. But you can see I'm only going to the floor because it's not a strain for me. I have had times when I've had an injury or something, and I'm up here. Okay, and many of my students stay high like that too. There's no shame in that, it's just where you are, and that's where the journey begins, is right where you are. So we'll come up now, take a deep breath, you can use the block, and then with your deep breath, you're halfway up on the inhale, and then exhale, come up heel, toe, together until you can step together, and then just pause and feel what that first movement has done for you. So as I said, we're working on getting some of it, some looseness and openness, connectivity into the hips, and that's the first one. Now we're going to move into a little series of squats, and squats also can be useful sometimes to have props, so this can be done at the wall, but it's fine to do it this way. You'll start with a stance that's maybe half as wide as we were doing before, and the feet are going to be turned out, and as you imagine lengthening down the outsides of your legs towards your knees, and back in here, you can let your hips move back, and then you can rest your forearms on your knees, and this could be the position of your squat, but you can also bring your bottom onto the squat, onto the blocks, and just hold it like this. Okay, now I'm having to work a little bit to keep my knees out, and I would sort of like to get a little deeper in the squat. If you can, you can drop down a little bit lower, and lean forward just a little bit, and now your arms can be on the inside of your legs, and there's this nice connection between arms and legs that helps. All the while I'm keeping my back straight, and just sitting here, and of course any woman who's ever had a baby may indeed know how wonderful it is to be able to do this, and it can be done, of course, even lower. You might have to narrow your stance, so just because you have you start with your legs a certain distance apart, it doesn't mean that you have to keep them exactly there. You adjust according to your sensory feedback. So here I am with my feet a little closer than I started, and I'm down in the deeper squat. And then the final piece that I like to do with this one, going a little wider again, is to go a little bit left, a little bit right. You can see I have my elbows, arms into my thighs to help support this. I'm not moving fast, I'm just working back and forth. And the sacrum, the pelvis, and the thighs, they all sort of get hugged in towards each other with this in a way that can help to sort of almost just realign a bit. Okay, so to come up you're gonna just lift your hips and then make your feet parallel again. We're not as wide as we were for the previous standing forward bend, but we're just on our way up. Some of you might like to go deeply down one more time. Even in this deeply down, you don't have to force to try to get yourself down. Just release the shoulders back towards your waist, lengthen down through your sternum, inhale, come up, exhale, you can bend the knees, stand up the rest of the way. If you ever feel dizzy, coming up from having your head down, you just go back part way down, take a couple of breaths, and then back up. Okay, so that's squat number one with variations. And our second squat is the last two squats are a bit higher. And legs about as wide as before, and again you're experimenting with that. As you come down, you are gonna endeavor not to have the knees come in front of the ankles. So I think this is where I'm gonna want to turn so you can see the angle. I'm pretending that there's a barrier in front of my knees so that I don't take the knees way out in front as I come into this squat. So it's going to be like this. And again I look down, if I see my knees starting to come over my toes, I bring the knees back. Well how do I bring the knees back? Let the buttocks go back, let your hips go back. So that's your ballast back there, and then this counterbalances the hips behind you. And you're still imagining lengthening down the outsides of the legs and drawing the energy back from the insides. Shoulder blades down. Usually about a minute of this is plenty. 30 seconds might do at any given time. Even 10. You should be able to see that my back, along with having this little box here, I'm actually a robot. My back has a little bit of lumbar curve and I'm not over doing the chest curve to try to get the lumbar curve, softening the ribs back, holding the pose, and then come up. What you'll probably notice when you keep your knees back, and don't let them come in front of the toes, is a lot more work in hips and the buttock. So we're stretching as well as working them. Third squat, more narrow. So in this third squat, your feet are parallel to each other, and they're center of the knees and center of the ankles and the center of the hips, two parallel lines, as best as you can determine. I'll show you from the front and then I'll turn to the side. Very similar to the one we just did. Inhale, exhale, reach forward, reach back through the hips, reach forward through the arms, and keep glancing down to the knees and see if you can keep yourself from taking the knees over. Now there's a well-known yoga pose called utkatasan, in which the knees do go in front of the ankles, and that's great. That strengthens the quads and the knees and all that, but I'm kind of aiming for this. So arms go forward, go back, trying to keep yourself from coming in front and then holding this for anywhere from five seconds, ten, twenty, you know, a minute. Just when your body says, whoa, then that's what you come up with. Maybe it's quiet or about telling you, but listen. And I've discovered this is a great place to work with a squat, so you can turn your torso and come down and hook your elbow across your knee take the other hand back, and there you have a little high malasana, standing twist, you know, it's done deeper. Hmm, feels nice on the upper back, and then you can come out of that, and I'll show you from the other side. The one thing I'd like to play with here on this one is not taking my hips back to do the squat. See how I rotate my pelvis back to do the squat twist? That's fine actually, but I'm going for a little core strength and more upper body flexibility. When I take my hip back to do the twist, I'm primarily doing the twist for my hips, and I'm not really rotating the upper back very much at all. So then having gotten here, or even on the way down, I start to push from this hip towards the knee and undo a little bit or a lot of the turn from the pelvis, which requires that I turn more from the torso. So you might, you might do that partway, or you might just see where you can go with that. And of course you feel some instantaneous result. You feel, hmm, and then over time you also feel and notice more. Okay, so those are very warming. Those are great things to do at the beginning of a practice on a winter morning. And so the final one that I thought I would show you with respect to squatting is how helpful this kind of squatting can be for getting up and down off of a chair and in and out of a car.
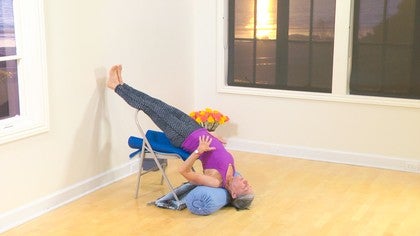
And believe me, I've been in a place where it's hard for me to get out of a car in my life and hard to get up and down off of a chair. And it was like me, a yogi, it's hard for me to get off of a chair and in and out of a car. So anyway, this has been one of the things that's helped me a lot. I'm gonna get the chair. The longer I practice and teach yoga, the more humble I become because just there's so much that can happen. So with this chair here, I'm gonna do the chair pose now. In order to make my legs a little bit stronger, I'm gonna put a block between them because that'll strengthen my adductors and it'll also help me to line up my legs. So how far do you stand from this chair? Do you stand this far? I don't think so. Or do you stand like right next to the chair? Here's a way to set this up. Be not on the edge of the chair. I think I'm about halfway into the chair here right now. And so that I'm gonna make my starting point. Legs are parallel and then I'm gonna come up. And the first few times I come down, I'm gonna have my arms out like this because this gives a good counterbalance. So don't just plop down, keeping your knees back away from your toes, not over the toes. It helps you to get your bottom closer to the chair and then keep sitting. You may have to bring the torso down a little more, but do that as little as you can. And then just at some point let yourself come on to the chair. So that's why you want to make sure that you don't start at the edge and you don't have your feet too far apart, too far away. So straight down with the feet and in the middle of the chair. So coming up again, lean forward as little as you can. Really stand firmly on the feet. Push down on the feet. Didn't make it up. Forward again. Now the legs are carrying me. Down, back through your hips. Widen the thighs in the hip socket. Press on the block. Reach with your arms and sit. And up and down.
Now you could always pile up some blankets, something, pillows to make this higher. And you can also start a little further back on the chair. So start from where you are. If you start from here and you can't get up, you need more height here. And within a week you will be able to lower some of that height. When that gets easy, you're going to put your hands behind your head. And that's a week or two away. Not right away. Depending on, you know, where you're at. Okay. And then your elbows are wide, as wide as you can make them, which might only be here. Might be that you can get them all the way back. And then same thing. Reaching back with your hips. I'm standing on the back room of my heels practically. And then I let myself come down. There's the moment of truth. Like is there still a chair there? And then leaning forward as little as possible in order to get back up as smoothly as you can. Okay. And then at one point it might take a week, might take a little more, a little less. You'll find yourself coming up to a seat and you won't plop down as you had been. You will sit down. And when you stand up, you will just rise up. It's, to me, thrilling to know that that's possible. Okay. Having done all of that flexion and strengthening, I think just to close, we're gonna, we're gonna open here a little bit. And we'll, we'll do a little opening and closing. So closing as you round your spine this way. You're gonna take the backs of your hands together and just look slightly down. You're not all the way down, but look out at your fingers. Back of the neck is a little longer. And then inhale. Let the pelvis come a little forward. Exhale. Rounding, especially through the hips and tailbone. Inhale. Rounding as you exhale. Opening, especially this space right here. As you inhale, back into the heels. Forward onto the toes. Opening the front. And then lengthen a little bit. You can take one leg back again. Just by taking that leg back and, and lifting your hips, you're gonna get a little bit of length out of that space that you just, that you just opened. We worked with this on another one. Nuryavasana. And around, the foot is back. You can either be on the tiptoes or turn the back toes under, but the thing is really lift across and up away from the thigh to allow that space to open. Remember the gesture, the possibility of what? Giving, receiving. If you're receiving, truly receive, bring it in. Then give it back. So that's just a gesture of back to the earth. Thank you very much.
Practice with Patricia
Mention
 |
Patricia Sullivan (Teacher) |
 |
Nina G |
|
|
Roslyn G |
|
|
Cicero C |
 |
Kelly Sunrose |
 |
Marleen R |
|
|
Christy M |
|
|
Angela D |
Comments


Stacking and tracking the joints of the legs is definitely a key to moving with more ease. So glad you're using these sequences so wisely.
You need to be a subscriber to post a comment.
Please Log In or Create an Account to start your free trial.
