Description
About This Video
Transcript
Read Full Transcript
Hi, I'd like welcome my friend, Kristina who's gonna be model for today's session. We're gonna do another series for low back discomfort, low back pain. Again with the movements that we do today remember that you're the one inside your body, and you can do these movements as small, as slow or as big as feels really comfortable. Let your own sensation guide your practice. Would you lay flat on the mat please with your head on the blankey?
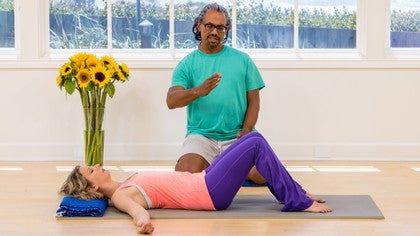
So we're gonna start face up, a comfortable head pillow, and then you can draw your right knee in towards your chest. So taking a hold of the right knee and take the right knee and especially the right hip through an exploration of movement. Start off with the movement that feels really good, really full of ease. And you can gradually explore expanding that movement. And as you get into the tight spots, you can pause there.
Take a few breaths and see if you can soften from the inside. And if you've been circling in one direction, pause and go the other direction. And feeling for what's really easy and gradually expanding out into the edges where you might have some speed bumps in the movement, some tight spots some great opportunities to breathe and soften. Great. And then come back to the center with that right knee.
And release the right foot down. Straighten the leg out, and take a pause at center and just notice the changes in sensation between the right side and the left side. Then as you're ready you can slowly draw the left knee in towards your chest and bring your hands to the left knee. And take that left knee and hip through the same sort of exploration starting really easy, really small always checking in with the quality of your breath again as you start to expand into slightly bigger movement where you might have those tight spots places that invite a pause and a few breaths to soften into the inner hip in the case when the knee is coming out to the outside and as you take the knee across the body getting into the outer hip. If you've been circling in one direction, make sure you circle in both directions.
Breathing. Softening. Moaning and groaning is absolutely appropriate. Sometimes with the hip discomfort especially and low back discomfort a good (sighing) can be helpful. And come back to the center.
And then releasing that left foot down. Straightening the leg out, and take a pause. For this next part you'll want a ball of some sort. You can use a tennis ball. This is a soft weight ball.
It's about a two pound soft weight. You can also use a lacrosse ball, but they're very hard and very intense. Tennis ball or a squishy ball like this can be really great. And we're gonna take the ball into... Can you move this hand please?
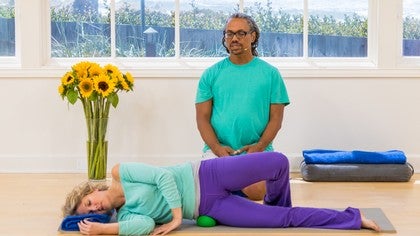
Into the side of the hip, the very side of the hip below the crest of the pelvis but above this hipbone that sticks out to the side. And what I'd like you to do, Tina, is to hold that and then slowly roll onto your side facing this way right onto the ball. You're gonna keep this foot on the mat, and let your weight sink into the ball. Is that pressure comfortable for you? Yeah.
This can be quite sensational. You wanna gradually melt into the ball. Breathe into the ball. If she wants to lighten the pressure, you can lighten the pressure by pressing down with this top foot. In this case the left foot can press down to lift a little bit of weight out of the ball.
If you want more weight into the ball, you could straighten the top leg out and stack it on top of the bottom leg. But you can stay right like that. Breathing and checking the quality of the breath and about every five breaths or so gonna release pressure from the ball, so go ahead and roll off of it a little bit. We want to let the blood flow back into that area. You can re-position it.
It's a small neighborhood, but there's a lot going on. And sink into another point. Sometimes you might even wanna sink into the same point a couple of times in a row. Breathing. Melting.
(man sighing) One more big breath. And then as you're ready slowly rolling onto your back. Come all the way onto your back, and take a rest with your legs out straight or your knees bent whatever is more comfortable and just feel into the changes that have happened there. If you're laying with your legs out straight, you might feel like that right leg is now longer than the left leg. It probably is.
And then let's switch over to the other side. So right there. You can hold the ball into the left hip rolling right onto your side so you're all the way. Your heart is facing the wall in front of you, and your pelvis facing the wall in front of you. And then sinking in to the ball.
Melting into the ball. Letting the ball melt into your hip. And breathing. Four or five slow deep breaths. Sometimes the tendency when working with the ball is to rock in and out of the ball that can actually make the muscles tighter in response.
It's good to just melt for about five breaths. Let's go ahead and have you re-position rolling back. Taking the weight off. Letting the blood flow back in. And then re-positioning a little finding something else, another spot very close in that neighborhood.
Yeah, I see her eyes rolling back up into our head. It's a good spot. Breathing into that outer hip. This area Janet Travell, who is one of the pioneers of trigger point therapy called the muscles right here the hidden pranksters of low back pain. That's why I always like to work on these with my students.
Couple more breaths. Good. And then slowly rolling onto your back and taking a pause on your back with your legs out straight or your knees bent. For this next pose you'll need a blanket. And let's take the blanket over on the right side and place it just off the mat.
This is harder to do on carpet easier to do on a wood or tile floor, so it's just off the side of the mat. And then, Tina, I'd like you to scoot a little bit over to the side. Good. And then bend your right knee and place your right foot on the blanket. Great.
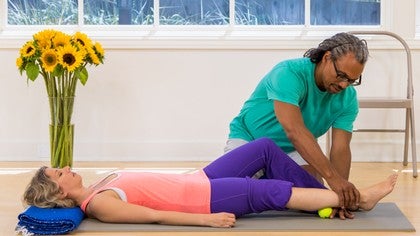
So from here I'd like you to press down just a little bit with the sole of your foot into the blanket, and then you're gonna slowly with a lot of control slide the leg out. Your toes will eventually come up. You still slide it out with the heel. And then relax in that position. Take a breath in.
As you exhale press down with your heel and start to draw the blanket back in. Good, and then pause there and start to slide the blanket out. She's pressing down. You wanna press down with your foot as you slide the blanket out. That helps release these hip flexors, the psoas the hip straighten.
Take a pause and then slide it back in. Good, and pause. And then I'd like you to bend your left knee and you're gonna scoot this way to the other side of the mat. Scooting over to the left side of your mat and bring the blanket around, it's gonna go off the mat just by your left foot. The right leg straightens out.
Press the sole of your left foot down, and then slide it slowly out. Wanna try to have quite a bit of control so it goes smoothly. That's right. Leg all the way straight and then rest. Let's pause for a breath.
Inhale. As you exhale draw it back in. That's right. And slide it back out. Consistent pressure with the sole of the foot and then with the heel as the leg straightens out.
Nice and relax for a breath. And then draw it back in pressing the left heel down sliding it back up. And rest there. Good, and I'm gonna slide this out from underneath your foot. You can scoot a little more to the center of your mat again.
Take a rest. For the next pose you'll need a bolster with a blanket on top. And we're gonna bring the bolster to the left side of your mat. Would you bend your knees one at a time placing the feet on the floor? And we're gonna bring a little corner of the bolster onto the mat right where your left foot is.
And then, Tina, I'd like for you to bring your left foot onto the corner of the bolster. There we go. And from here I'd like you to slowly roll onto your right side. The inside of your left foot is gonna come onto the bolster. And then slide your left foot back along the bolster until you get a nice stretch on the front side of the left hip.
The bottom knee, the right knee can be in this position with the knee up towards the chest. And sometimes you might need to make a little support on the inside of the inside of the shin here to support the leg a little bit more. You wanna feel a very gentle stretch in the front side of this left hip the top hip, a gentle stretch that we can hang out and breathe in for a long time. Is that comfortable for you? One nice thing you can add here is to take the top arm...
So, Tina, I'd like you to reach the top arm up over head. As you reach the arm up over head you'll feel how that the arm fascia is connected to the hip fascia, the connective tissue is a continuous substance. So reaching the arm enhances the hip and low back stretch here. And we'll stay in this pose for about two minutes on each side. Still comfortable?
Taking slow easy breaths. And as you're in the pose for about a minute, you may feel like the stretchy sensation on the front of the hip is eased off. You can either enjoy that easing off or if you wanna go back to that stretch feeling a little bit more you can slide the left foot back on the bolster just a little uch more. Yeah, is that comfortable? Again checking in with the quality of your breath.
Since we're staying in the possesses a really long time we don't need to be at the edge. Actually being away from the edge is more beneficial. You'll get more length through the side of the body through the front of the hip. Good, and then to transition out I'd like you to bring your left arm back down in front of you slowly. And very slowly start to slide your left knee a little towards your chest.
The foot can stay on the bolster just slide it in a little bit. And roll slowly onto your back. You might need to press your hips down to recenter your body on your mat. You can bring your foot down onto the mat and take a pause either with the legs out straight or the knees bent. And then we'll move the bolster to the other side.
When you're doing this on your own you can kind of do this with your feet, but I'm gonna be nice and slide this over to her right side. And bring your knee your right knee a little towards your chest. Bring the sole of the foot onto the edge of that bolster and slowly roll your way onto your left side. And as you come onto your side you can start to slide this right foot back along the bolster until the inside of the right leg is supported by the bolster and blanket. Does that feel comfortable?
The bottom leg her left knee is a little bit in towards her chest, and her knee is bent. And then take this top arm and find a place that enhances the sensation of stretch. So maybe reaching that arm up over head. Great. Wanna get that gentle sensation of lengthening through the front side of the right hip and then let the leg relax into the support of the bolster.
Once you're in position you let time do the work. Time in this gentle stretch is the big factor in getting the length. Time and breath. Staying comfortable in that right hip. After about a minute if you feel like this lengthening sensation on the front side of the hip is eased off you can either stay there and enjoy that or you can slightly scoot that right foot back another tiny bit which ever feels better for you.
Breathing. Melting. Just resting into the pose. Letting time do the lengthening through the hip, through the psoas. (man sighing) I'd like you to take that top arm and slide it slowly back down in front of you.
Slide the right knee a little forward bring it a little towards the chest and then you can roll slowly onto your back. Slide this out of the way and take a rest either with the knees bent or the legs out straight. And as you're resting in the pose, feel into the changes from the practice. Hopefully feeling more freedom in the outer hips, more space and length through the front of the hips. You're welcome to stay here in final relaxation for 10 minutes, 15 minutes.
And if it's not comfortable to lay in final relaxation with the legs straight you can use the bolster and blanket underneath your knees or you can join us coming out of the pose. So bend one knee at a time placing the feet flat on the floor and then slowly rolling onto your side. And pausing on your side with your knees up towards your chest for a couple of breaths. And as you go to sit up let your head stay heavy, your neck relaxed. Roll a little more forward and press the hand down and slowly roll up your spine one vertebrae at a time coming up to find a comfortable seated position.
And bring your palms together hands in front of your heart Namaste.
The Happy Back Show: Low, Mid, and Upper Back Relief
Comments
You need to be a subscriber to post a comment.
Please Log In or Create an Account to start your free trial.


