Description
About This Video
Transcript
Read Full Transcript
Hi there. So in this sequence, we're gonna work with a couple more pieces that really develop integrity and connection in the relationship between the thighs and the pelvis, and the pelvis and the spine, and we're gonna start with releasing the tendons behind the knee, the hamstring tendons, in a really yummy way, so I'm gonna lie down with my pelvis on this bolster, turning the body. Getting down first, then lifting pelvis and resting so that the lower back is also on the bolster, as well as the bottom, and then I'm gonna bring both legs up and just feel if I'm in the right position. I do like that lower back support. I like to be able to allow the back to flex and drop a little bit with support, and so right now, I'm gonna leave the right leg up here and not do anything with it and because I'm on this bolster, it's really easy to reach behind the knee with the hands, and I'm lifting the foot a little bit, and as I squeeze and release, I can feel two very big tendons behind the knee, right at the bottom of the thigh muscles, so what we're gonna be doing is squeezing the muscles and the tendons there, and then moving towards a straight leg by lifting the foot, and then release the foot down, and you'll feel that the muscles soften, as do the tendons, and then squeeze them.
You're squeezing them towards the bone and lifting the foot up. So do this in a slow and rhythmic way and... (sighs) And I'm also kind of tugging the skin of the muscle away from the knee as I lift the foot up. Don't force the leg to straight. Just see how straight it will become. Now, I'm beginning to move my hand away from the knee and working my hand down into more the thigh muscle.
Okay, and again, sometimes you can hold it there for a few moments, but this is more about teaching those tissues to soften. Up and down, up and down. Now, notice, with your hands and with your leg muscles as well, how soft the leg muscles can get when you release the knee and the foot down. That's when you apply the pressure, and then you stretch up and you'll feel the tension come in, but you can also feel how much the muscle appreciates that little bit of pressure. Now, I'm about the middle of the thigh and lifting the leg a couple times there.
If you're other leg gets tired of being in the up position, you can always put the foot on the floor. Okay, so doing this with each hand position two or three times, but always releasing the foot down enough that the thigh releases. You can feel the fingers probe deeper. Sometimes, you find a really good spot, and I don't come all the way up to the top where the hamstring connects, about three quarters of the way up seems really good enough. Most of the tension is either in the middle of the muscle or close to the knee joint.
So I'm back to the area where the knee joint is and then I'm gonna put that foot down. Both feet are on the floor now. Just tuning in for a few seconds. Yes, it would be worthwhile to do the other side. Okay, so both legs up at first.
Hands behind the knee. You're not actually interlacing the fingers. The fingers are close together and squeezing and pressing. Breathing rhythmically, lifting and releasing. I'm also pressing on the front of the thigh muscle with my thumbs, but I don't wanna overwork the hands and I want you to be careful about that too.
Don't overwork the hands. So sometimes when you come down and fold the knee down, just kind of release the grip on your hands for a few moments and then go back to up and down, up and down, smooth and rhythmic. Feel how the muscle softens beneath your fingers as you let the leg come down. Feel the stretch and the pull, and it's kind of a delicious tension, even if it is a bit achy. It's really nice for the body to receive this attention from your very own hands.
I'm gonna put the other foot down. One or two more. I've worked my way up to the middle and a little bit beyond the middle of the thigh, to more towards the hamstring. Sometimes, I'll slip in a little circle or two, but I think that's about enough on that leg. Putting it down again.
And again, just feeling into... It isn't just the hamstring muscles that feels this. I feel it around the hips, more spaciousness, releasing the lower back. Okay, so I'm lifting the pelvis, moving the bolster out of the way. Rolling over to my side and coming up to standing.
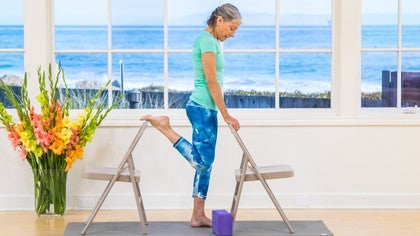
Rocking a little bit to push off and back up to standing. So the second half of this requires a couple of chairs and a block. We're gonna stretch the front of the legs in a very particular way. This chair is gonna be my support. I'll be facing this chair, and this is gonna be to put the foot.
Now, this looks like a standing quad stretch and indeed, you may feel a standing quad stretch. But it's really about repositioning the leg in the socket through the use of the pelvic muscles to straighten out the groin here. Okay, so I don't feel any stretch at all. You wanna feel some quad stretch when you're doing this. You could also have any support here.
You could have your hands at the wall, but you want the wall pretty close, just like this is close. Some people, myself included sometimes, feel like this height is more appropriate for this stretch. Yeah, that would be about right for me right now, but maybe that first demonstration that I did with the block on the chair, which could be either in this position or this position, that might be just enough for you, or here, so that's still lower than the back of the chair. Let's try that, and you might be the little bear that says, nope, I need it lower. Well, you can take it lower.
Less likely to cramp the hamstring if you lift the leg up first and then bring it around. You're facing the chair or the wall, whatever your support is. You look down. You wanna have the two thighs parallel to the wall. You want your two hips parallel to the wall.
No turning, no lifting, and then you proceed to rotate the pelvis down and back and up and front and you can feel the belly muscles working a little bit. You might feel the glutes and the hamstrings working a little bit, and I see people, when I watch people do this, if they get it just right, which is not all that hard to do, I see people really line up. If you've got this lined up and you're really getting the hips lifting and the descent here, it seems to float the lower ribs back where they should be. You can't really tilt the pelvis up and have those ribs poked forward. You just can't do it, so as the front hip comes up and you go down in the back, these ribs just seem to soften and float backward in a lovely way, and I've noticed that for the most part, the skull also releases back, so if you look at my alignment, it's probably quite vertical here.
So you do that for about a minute. Take the leg down, and then kinda bring the second leg up. Bring your leg up. Lay it down. Align the two thighs with the wall in front of you, chair, and then proceed again, the same thing of up the front and down the back, and finding your alignment and oftentimes, when you find that vertical alignment, you'll realize that you don't need to be supporting yourself on the chair.
Now that might not happen the very first time you do this. It might take a while before your body really finds that center line. It's just this mysterious, mystical, almost ungraspable until you feel it, gravity line, center line, and when you're there, it's like, oh, yeah. The other thing that happens with the standing leg is it might want to shoot out to the sides, so you're keeping that standing leg moving towards the middle. So a minute, approximately, bring the leg down.
Turn around, stand on both feet, both legs. I feel, at the moment, almost like I'm on stilts. I feel so tall and so grounded, like those stilts go deep into the center of the earth. So how do you feel? Let me know.
I'd love to hear. Thank you so much.
Yoga Rx: Patricia Sullivan
Comments
that quad stretch can really help with evening the pelvis over the thigh bones and many other benefits. I'm glad you felt the stilts! Love...!
You need to be a subscriber to post a comment.
Please Log In or Create an Account to start your free trial.
