Description
About This Video
Transcript
Read Full Transcript
Hi, and welcome to this toy and tool tutorial. We could just call it your toolkit, all of these props that you'll use for these practices, but I like calling them toys as well because they're super fun to use and travel with. And I don't know if you know anything about me, but I am on a year-long road trip, a climbing road trip with my family right now, with my two children, and I have very little space, so I can only have very minimal props. And in this seven-day yoga challenge, I want to share with you two of my favorite travel props that don't take up much room and that are highly, highly effective for all this therapeutic pressure work that we'll be doing in this active recovery challenge. And I'll start with showing you the wooden dowel, which is the most unique of the props that we'll be using likely, and you may have not seen it before, as a yoga prop.
So I'll show you mine. It's smaller than the one that we use in this series because it's my travel prop and I don't have much space in a 76-square-foot trailer. So this is what I got. It's an inch and a half thick about, and it's a little over one and a half feet long. So I just got this at my home hardware store, and one feature that I wanted to show you if you are going to go get your own is that it's really nice to get them to router the edges so that the edges aren't sharp.
So if you're going to use this as a prop, then having rounded edges, if you want to place it anywhere along the spine is just so much nicer. So that's a hot tip for you if you're going to get one of these. I love this prop, and I hope that you fall in love with it in this series. But if you don't have one of these lying around and you don't want to make the trip to your hardware store and grab one and take that 20 minutes, which I totally understand, then you can use a household item that you might have like a broomstick. This is actually perfect.
So this will work just as well for a lot of the work that we're doing. And I've also had people use like a part of a vacuum cleaner attachment. Just keep in mind that the thicker the diameter of the prop that you're using, likely the more sensation it's going to bring in the shapes. So if you have like a thicker vacuum cleaner attachment and it's also really hard, then it's going to be a lot more pressure. And if that's the case, you can always do things like blanket it to make it softer and just add a little bit of padding between the prop and your body.
I hope that's clear on the dowel. And if you use a broomstick, you can always fly away with it as well. So the ball. Most people have a tennis ball lying around and a lot of people are familiar with rolling on a ball. And you might have even already invested in one of those nice massage balls that are really lovely consistency.
But I've found that a tennis ball also works really well. Sorry to those people who think otherwise. A lacrosse ball is also a great option, but the lacrosse ball is too hard for me. So I like to have something with a little bit more softness. It's just going to be a little bit more forgiving.
So in any of this pressure work, just keep in mind that the softer the prop or the more you pad it, the more forgiving the sensation is going to be. So if you want to have a really pinpoint, strong sensation, you can have a harder surface and a harder prop like a lacrosse ball or not padding the dowel. So there we go. We'll do some rolling on this and some pinpoint pressure work. We also will be using a blanket.
And I'm sure you have that lying around in most of the practices. And in a lot of the practices that we're doing, we will be sitting and working on neck and shoulders, et cetera. So when we're sitting for longer periods of time, I would really recommend elevating yourself a little bit so that I'll show you this way. This might be redundant, but I'll say it again, that your knees are not too much higher than your hip joints. So if they are when you're seated and that can just cut off circulation in the hip joints and it can make your legs fall asleep and can cause discomfort in your lower back.
So I would highly recommend sitting up. You can also use the blanket for kneeling. So a lot of us, that deep flexion of the knee joint is painful or just not happening at all. So give yourself that space, make space in the joints and you can sit on the blanket like this. I think there's a couple of practices where we do some kneeling work blocks.
So in these practices, just because we're already using a bunch of props. And I'm just not sure if you need or have these thick blocks at home, but if you do have them and you have invested in thicker foam or cork blocks like this, then I would recommend that you bring them on board with all your other props and keep them at the top of your mat. Because in these practices, we do a fair bit, I think almost in every practice, we go from downward dog into a lunge. And if it feels straining to have your hands on the floor when you come into the low lunge, which I'll show you in a sec here, these blocks really come in handy to create some space in the hip joints and give you some relief and give you some space. So I'll show you that.
They also have three different heights. So I'll put them on the high height and if you're in downward dog like so, you're bringing one leg up, you're bringing that foot forwards. Some people can come up onto the fingertips, but if there's a lot of congestion here in this area and it feels tight and bunched up and you feel like that tissue is not happy, then if you give yourself a little bit of height, that can have a breath of fresh air and create more space to potentially work with the hips a little bit more, align everything. And so if you have these, bring them on board with everything else. I would highly recommend that.
One more thing, kneeling, if the blanket is not enough height for you, then these blocks, if you have them kicking around, will give you a little bit more height, even too. So you can get a little bit more space and a little bit more height in the shapes. Most importantly, I want you to be comfortable so that you like it. Because if you like it, you'll stay with me for the seven days and you'll have a better chance of creating that habit of self-care through the amazing and vast practice of yoga. So I'll so look forward to this.
I hope you watched this tutorial and I will see you in the challenge. Namaste.
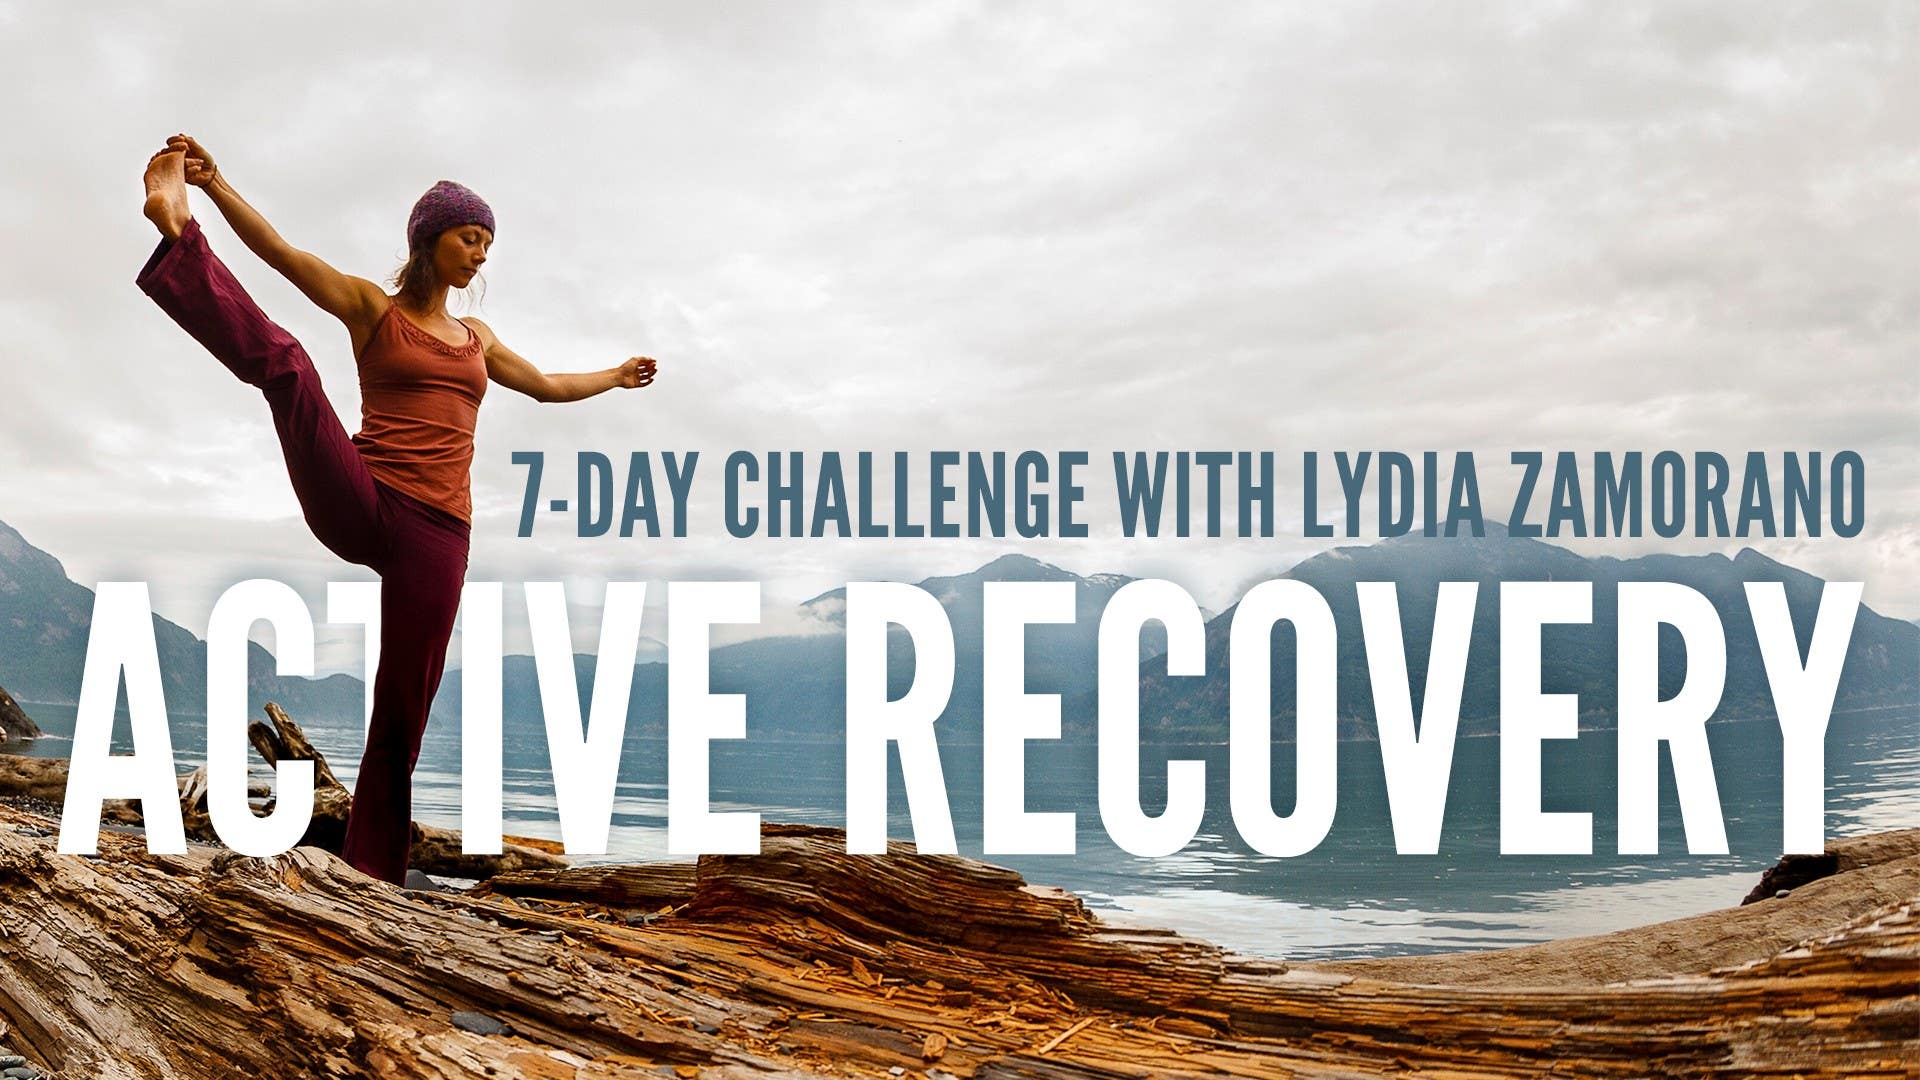
Active Recovery Yoga Challenge: with Lydia Zamorano


Comments


You need to be a subscriber to post a comment.
Please Log In or Create an Account to start your free trial.
