Description
About This Video
Transcript
Read Full Transcript
Welcome. In this episode, I'm going to show some variations on how to approach Surya Namaskar A and B. These are some of the most common sun salutations we experience in yoga, and I just want to show you some ways that I approach it. Traditionally, Surya Namaskar A, feet are together, and the arms come up with the inhale. And on the exhale, the arms are going to come out and down as you fold. And then you inhale, you bend the knees, hands flat, and you step back.
So one of the things we want to avoid is over-projecting the ribs and hyper-extending the knees. Inhale, we come up, and if you're taking the arms down, this is a more clearing action, but just watch, you want to be very careful that you're not throwing the knees back and over-projecting the ribs. And then as you see, my neck is also starting to shorten. And then we come down, and a lot of times, especially beginners will meet the floor, and the navel doesn't engage in the move, and we kind of just hump the back. So to avoid that, what we're going to do, find your balance in the feet, the arms come up, they're very light.
The shoulders relax, the arms come overhead, and as I inhale, the palms touch overhead. On the exhale, the hands draw downward towards the navel, and you exhale fully, navel in, head in. Inhale, bend the knees, hands flat. We're just going to carry on with surinamaskar A. You step back. Now, a more advanced version is to jump back, but in the beginning, I like to just teach people to step back.
On the exhale, as you go to chaturanga, if you tend to have neck tension, be careful of this move. A lot of times, the neck will close up here, and then we press in the up dog, and it still stays fairly closed, and it doesn't feel too good. So what we want to prevent is the jamming of the cervical spine. So how I like to share this is as you exhale, as you bend the elbows, look to the floor. You'll keep length in the back of the neck.
The one thing you want to avoid is collapsing the shoulders here. A real chaturanga, a true chaturanga is the elbows are over the hands, and your upper body and lower body are parallel to the floor. This is difficult. In the beginning, if you find that you're collapsing in the shoulders, keep the elbows slightly behind the wrists. Check in with your navel, but over time, you'll find that you'll be able to support yourself more and more.
As you exhale, though, the main point I'm making is I'm looking to the floor. I'm going to let my knees touch. I'm okay with letting the knees touch. And then, as you come into up dog, you slide the hips forward. As you notice, I'm still looking to the floor. I have length in the back of the neck, my arms straighten, I flip onto the tops of my feet, and then slowly, as my arms support me, they're like pillars, I can release my hips into this, and then the neck and head adjust.
As I make my way back into a plank position, take the weight into the palms, and then I pull back into down dog, and I pull back from my center. That means I pull back from my lower abdomen. That takes me back. And then once I'm in down dog, things I want to prevent in down dog is over collapsing the ribs. The way I like to approach down dog is it's a nice clean line from the palms to the hips, as opposed to collapsing. If you notice, as I come out of this, if I'm collapsing, I don't have a lot of space to breathe.
I'm in like a back pin position. I actually want this to be softer, and I want to be able to contact my center. So my hands are flat, I tuck my toes, I come back into down dog, I broaden the tops of my shoulders, I have a good balance in the hands. Another little secret is, notice how your ankles are. If this area in the front ankle is creased and closed up, create a little more space here in the front ankle, and this will actually trigger the entire leg bone and thigh bone. So if I'm collapsed, everything kind of falls in.
But if I adjust the front of the ankle, all I do is adjust the front of the ankle and make space there. I can get more and the legs more involved, thigh bones back and heels will make their way closer to the floor. Now the next key technique that really helps to open the body in down dog is breathing to the navel, as I've mentioned already. Although we're breathing to the navel and the breath enters through the nose, I want you to think as if you're breathing through your hands. When you inhale in down dog, the palms merge with the floor.
And as you're inhaling, let the palms merge with the floor. And as they merge with the floor, there's a rebounding action that will take through the skeletal structure. It'll run through the arm bones, it'll run along the spine to the navel. And on the exhale, once the breath has met the navel, you exhale from the navel, you lengthen the waistline, and then you feed the legs on the exhale. And that'll start to open up the back of the body, the legs, in a real nice way.
So the idea is from the hands, you inhale up to the hips, and then on the exhale, let the energy descend down the back of the legs. So it looks something like so. It's very subtle, but it's a very powerful way to open up your body into this position. Especially if you're like this. If your heels are up, if you just inhale to the navel, and you exhale out, and you inhale, and you exhale, and you're not directing the exhale into the legs, a lot of times we just stay stuck here for a long time. So the idea is palms merge with the floor, inhale, navel takes it in, and then as you exhale, the navel goes back, and then think legs, lengthen the waist, legs. We'll do one more breath here, inhale from the palms to the navel.
This is great for the bones, it really gets your bones involved. Exhale from the navel, legs down to the heels. When we exit from down dog, we always exit on the empty, we step the feet to the hands, feet together. As you lengthen out, I like to keep the tips of the middle fingers touching, at least the tips of the middle fingers. I lengthen out, and all I do is I find balance in my feet, watch the back of your neck.
If you do this, again, you'll start to close the cervical spine. You want to find length in the neck, and you allow your center, your navel to take you in. To uttanasana, exhale. When you come out of this, you don't just release the abdomen fully, you release it just about halfway. So as you have a little slight bandha, udiyana, slight udiyana, and you come up, and all you do is apply a little pressure through the feet, and your bones become like levers, and you rise up, it's real easy, and you inhale up, and when I'm inhaling, my attention is going, although it may seem like my attention is going up to the hands, I'm actually breathing all the way down to the feet, I'm driving my awareness and my breath all the way down to the soles of the feet, deep into the earth, and then on the exhale, the hands come down, the center line.
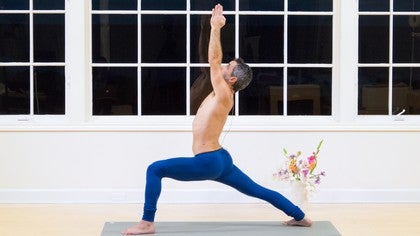
Now as we inhale, when we inhale and we come up, and we take the arms out, this is more clearing in nature, and it really has its place in clearing blocked energy, this position where we inhale up and bring it down, it has more of a grounding action, and both have a purpose, clearing is good, grounding is good, work with a variation that works for you. The main thing I'd like to leave you with is, if you do tend to go out, pay attention to your center and avoid letting the knees hyper-extend and the ribs hyper-extend. Watch those points, and as you come down, all you do is you let the navel take you in, navel takes you in, navel, head. So that's Surya Namaskar A. Surya Namaskar B, a lot of these principles, same things apply, but I'm going to break down one other transition, it's just the transition into Virabhadrasana 1. As you inhale into Uthkatasana and Surya Namaskar B, the arms come up, root those heels, hands touch.
If your shoulders are up at the ears, drop the shoulders, reach through the elbows. Again, instead of going out and down, I prefer to bring the hands towards your center, and this will keep you on your center point. And as your legs straighten, the head goes in, navel in. And then, one of the arts of the Surya Namaskar is to match the breath of the movement. The breath isn't equal in all the positions.
This is a short little inhale, it's a little move. You inhale, you take just what you need. Then you step, eventually you jump back, and it's a short exhale. And again, approaching that up dog, I like to look down, I won't leave the knees back. I'll slide the knees and the hips into this, I'll come onto the tops of the feet, arching the spine.
Inhale. Now as you exhale, pull back, right foot comes up on that exhale. And the first thing I like to do, as soon as this right foot steps up, I look to that back foot. And I just want to make sure that there's a thin line that divides the inner right foot and that back inner left heel. Left foot turns in.
I don't want to be walking a tightrope here, because that will close the space in the sacrum. You want that thin line. Now when I come up, this is key. I don't want to lead with my head. Again, we're very head oriented, upper body oriented.
We want in the yoga, in the internal arts, we want to come up from the legs, from your root, from your base. So when I come up, I don't lead with the head. I keep the chin in, and as I rise up, you can see I still have space in the back of my neck. I'm coming up, I feel my stance taking, I'm getting more rooted in my stance. And then I come right about here and I adjust the shoulders.
If my shoulders are up at the ears, I drop my shoulders. And then, as the arms go vertical, then I have space to tip the head back, and the palms touch. Inhale. That's one inhale. When I come down, I don't just collapse to the floor. You lose so much power that way.
You've just picked up some energy. Inhale, inhale, inhale. Now when you come down, there's a little resistance. It keeps you in your bones. It's very therapeutic for the body.
It's very strengthening. So I'm resisting. I'm not just falling to the floor. I can also learn how to control my breath with the movement. I exhale, I step back.
Lower down. Keep that space, lengthen the back of the neck. Upward dog. Shift a little into it. The feet flip together.
Inhale, arch. Again, the head's the last to adjust. Tuck your toes. Exhale back. Left foot steps up.
Now you can see I just lifted my left hand just a little bit. Sometimes people will step up, and they won't step up enough because they don't lift that hand. You've got to give a little space so you can get that foot a little higher. And then as soon as that foot is up near the hands, you land that heel. And then you can see I have space.
My traps, my neck has length. My legs are already supporting me before I come up. That's key. And as I grow into this pose, the power comes from the ground up. It comes from the feet, the legs, the waist, the spine.
And then it's fed into the arms. As I'm coming up, now I have space to drop my shoulders, my palms meet, inhaling. And then as I exhale, a little resistance. Exhale all the way down. Now you can see I took the arms down a little differently.
I didn't go out and down. I changed it up slightly by coming down the center line. This is the quickest pathway. I come down, exhale. As the hands land, I straighten the right leg.
I step back. Chaturanga. Upward dog. Again, don't leave the knees behind or the hips. You slide into this.
This opens up the growing. And then you make a connection from your elbows to your palms. Inhale. Head and neck are the last to adjust. Dip back into Chaturanga if you like.
Exhale, back to down dog. And then you make the necessary adjustments. You broaden the shoulders. Keep the hands planted evenly. Watch the front of the ankles.
Watch your ribs. Thigh bones back. And when that's all set, it can all happen really quickly. You inhale to the navel. And you exhale from the navel.
And the outcome of the exhale is always it's udiyana. You draw back. As you draw the navel back, you're not drawing up, though. You draw back towards the spine and then back towards the hips. And then knees bend.
Eventually, you hold the bandha and you lightly hop. You lengthen, inhale. Remember, there's length in the back of my neck. As I exhale, I fold a little deeper, navel in. I stay balanced in the feet, abdomen off the thighs.
Arms are always light. Inhale. And as I exhale, I straighten the legs. Hands come down. The last thing I would like to say is just to touch on that transition to up dog.
In the yoga, we get really sometimes attached that the knees shouldn't touch the floor. I don't necessarily completely agree with that. I think it's quite all right if the knees touch the floor. Because a lot of people sacrifice their wrists, their neck, and their lower back to get into that position. And what you want to avoid, sometimes what happens, because it takes time.
As my body warms up in each practice, I always let the knees touch, but as I warm up, once I'm warm, my knees won't touch the floor. But I ease my way into it. What can happen, as you exhale, what you want to avoid doing, this happens sometimes, is we'll do the double. You do one flip, and then the other flip. And then you'll crank up.
That's one tendency, is the feet won't flip together. Because we want to avoid letting the knees touch. So you want to avoid this, this, cranking up. You want to go up evenly. If you go one foot and the other foot, what it does is it distorts the weight in the wrist.
And one wrist will take more weight, and the other wrist will take more weight, and then we crank up, and we start to muscle it. So the idea is to move into up dog nice and evenly. So that's why I'm quite all right with letting the knees touch lightly. I don't let them go heavy to the floor. It's just a very light connection.
And then when I come forward, as I slide into this, the feet lightly flip onto the tops of the feet together. And then I start to straighten. And if I really want to, as I get warmed up, the knees will come up, and then I'm there. And if I want to come back without the knees touching, it's quite all right. But sometimes when you come out of that up dog, the knees will bend, you take the weight into the palms, keep the knees down, and then you pull back from your center, and you pull back to down dog.
So those are some tips on how to approach Surya Namaskar A and B a little differently. And mainly the reason I like to share these is because it's safer on the body for those of you that are learning how to build strength to come into the traditional Surya Namaskar A and B. Hope you enjoyed.
Yoga Chi
Comments
You need to be a subscriber to post a comment.
Please Log In or Create an Account to start your free trial.


