What's a Course?
You can now make seasons of select shows into courses!
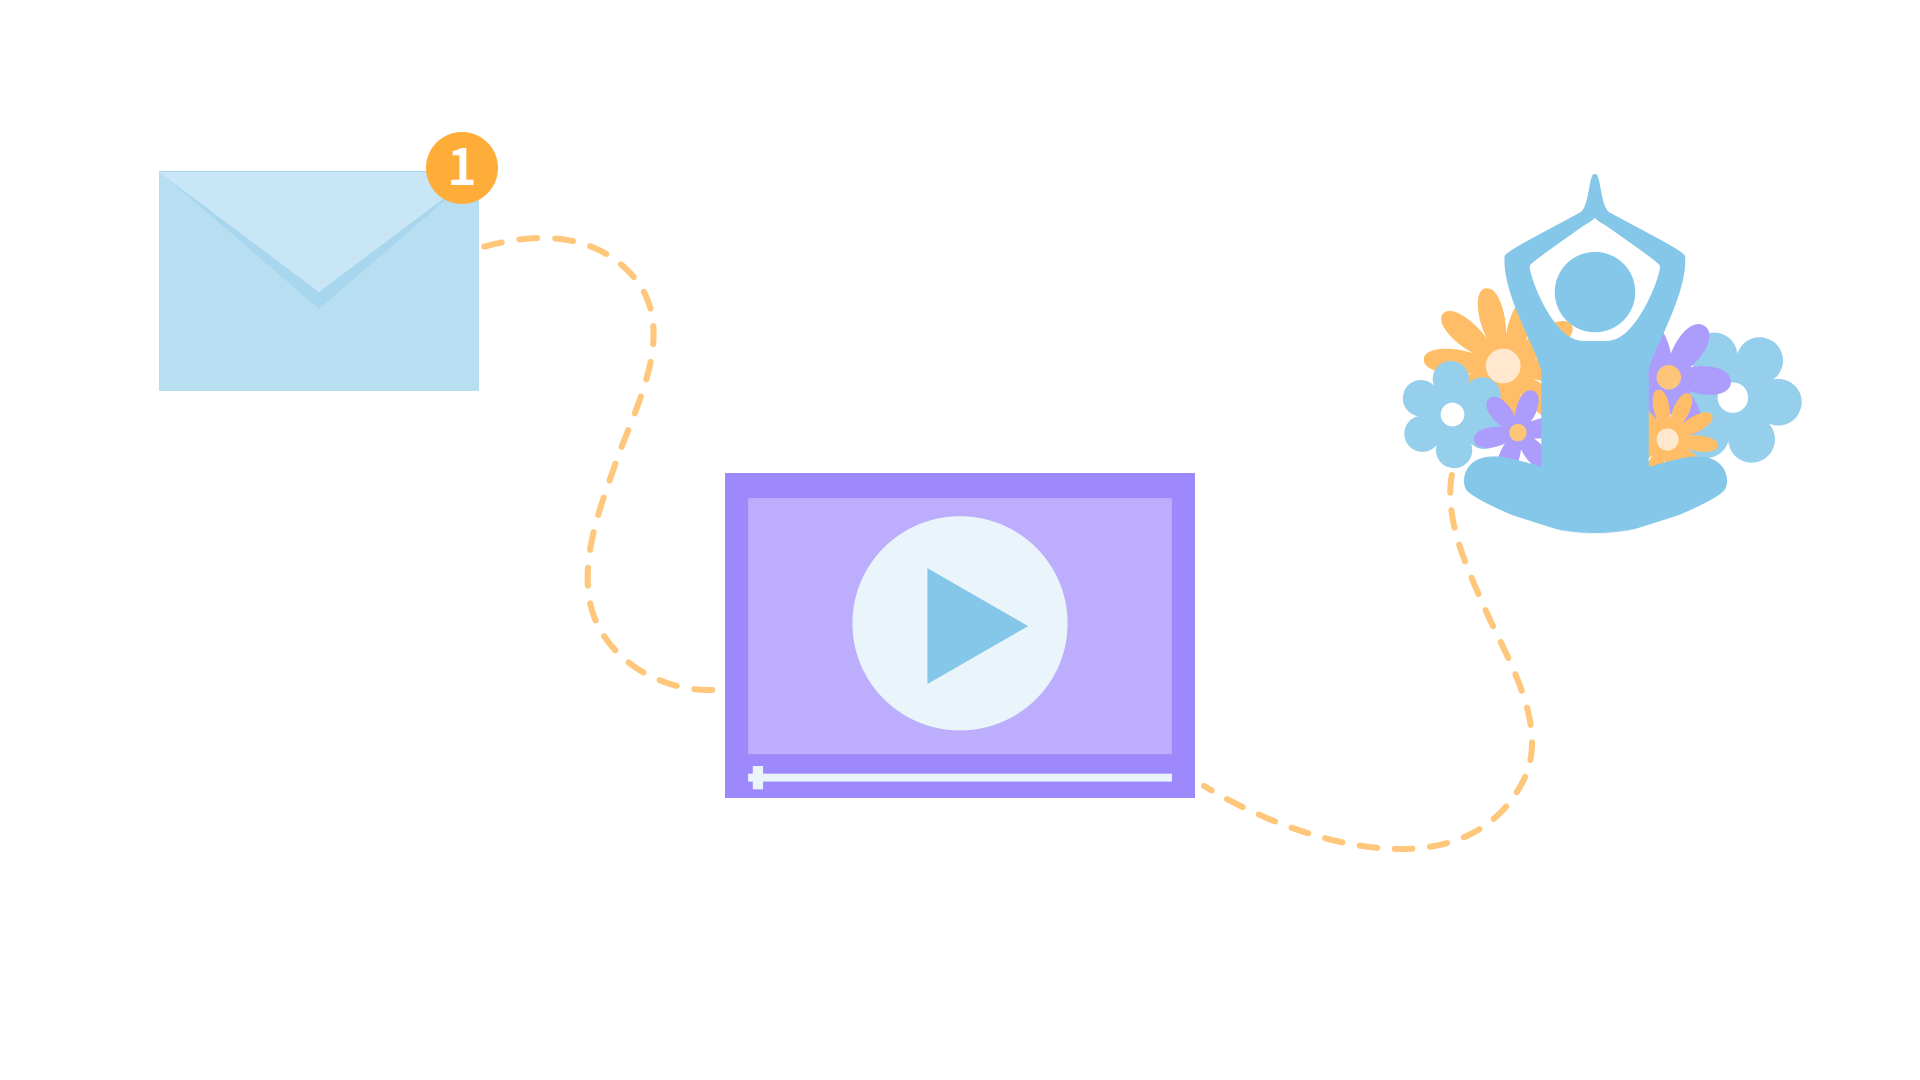
1. Schedule regular emails to deliver the content direct to you.
2. Watch your assigned videos to focus on the course goals.
To take a course for this show, first select a season and then click the "Take as Course" button for that season.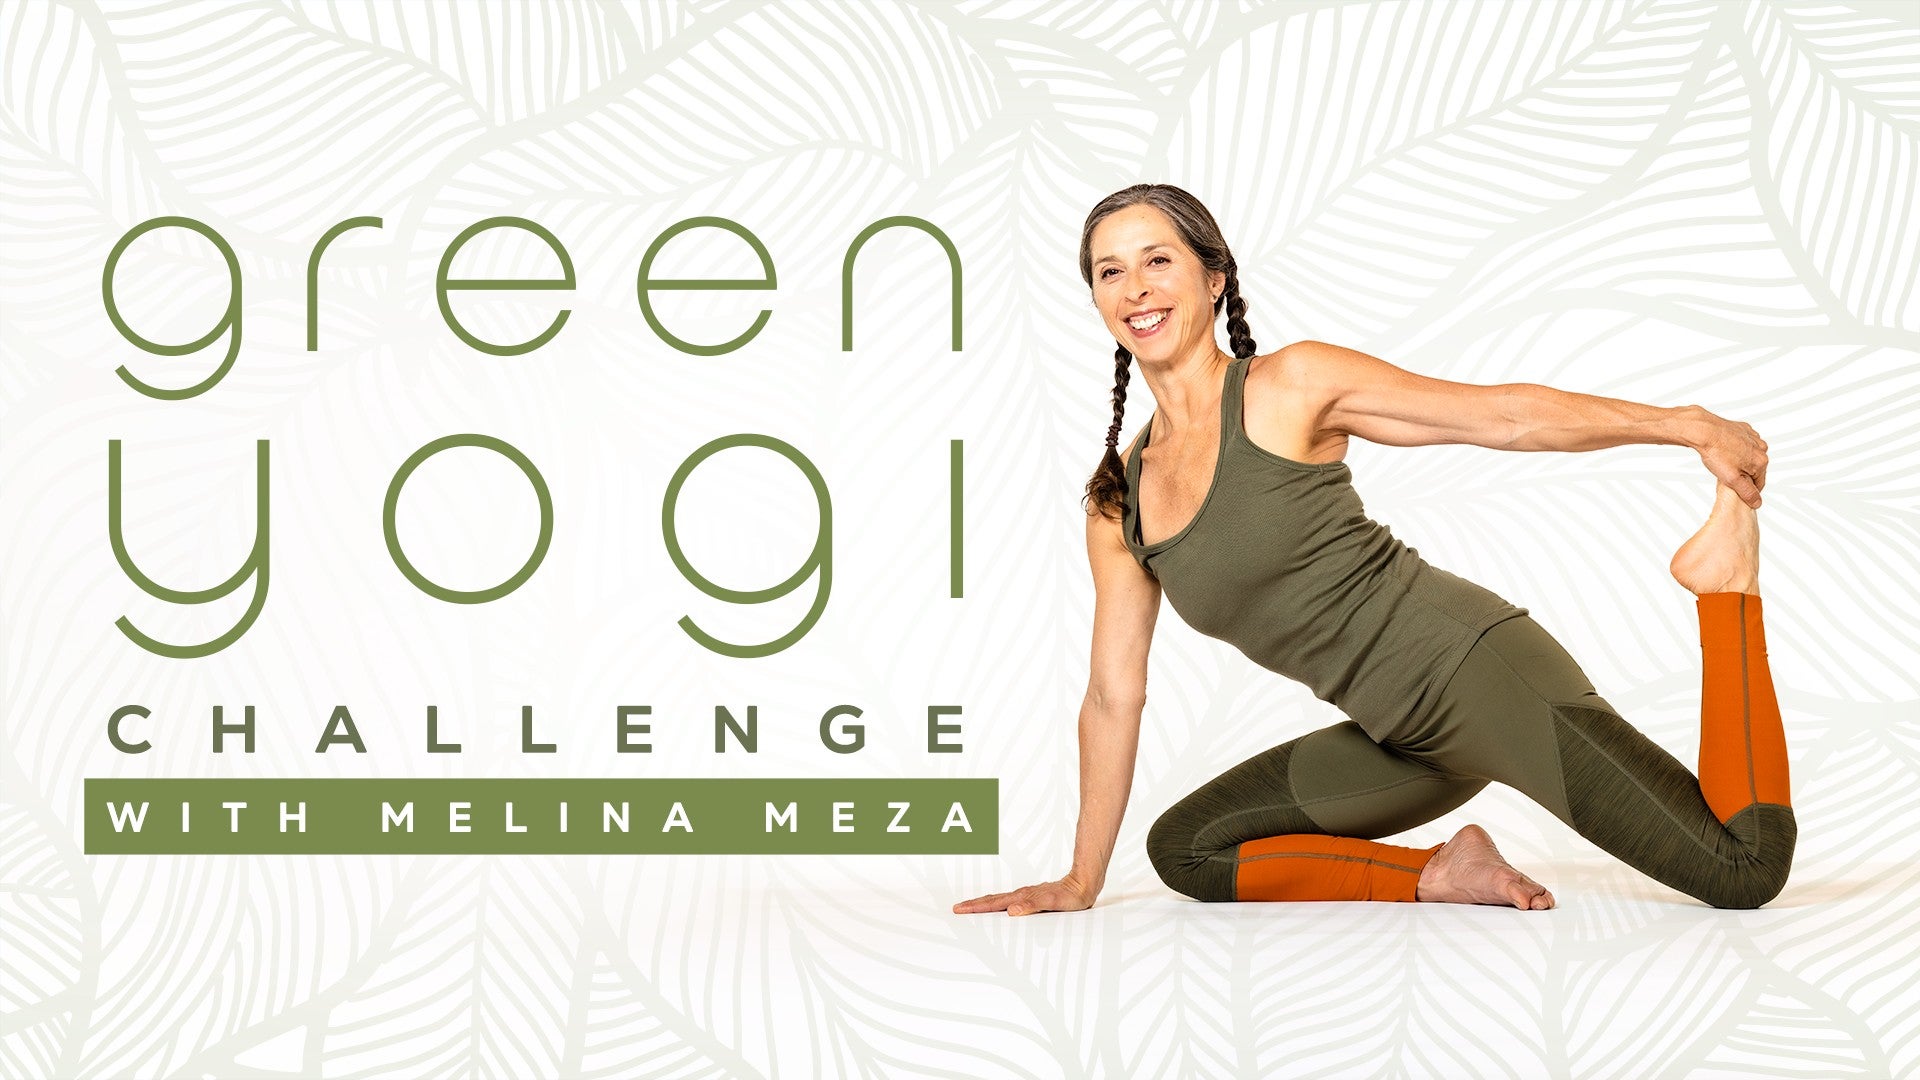
Description
More lasting change is possible when we are in community with others. In Week 3, Melina offers a self-care practice to get ready to take our energy out into service of our local communities. We spend some time waking up the hands, wrists, and forearms and cultivate warmth and heat in the core and shoulders for the work done in gardening, and move through squats, lunges, and balancing poses get the legs, ankles, and hips ready for any heavy lifting or outdoor adventures. You will feel calm, intentional, and hopeful.
Your Homework Challenge for Week 3:
- Shop locally: Support and get acquainted with your community by committing to only shop where you can meet the owner.
- Become a "locavore": Commit to eating only foods that are grown or harvested within a 100 mile radius of where you live.
- Collaborate with others: Invite others to cook and garden together, creating opportunities to meet and help others in your community and learn about their projects.
See attached pdf for more ideas.
About This Video
Transcript
Read Full Transcript
Hello everyone, welcome to week three of the Green Yogi Challenge. It's lovely to have you back and I hope you've been celebrating some of your accomplishments over the past few weeks. I feel like it might be a good time midpoint to do a little inventory on the things you've incorporated into your practice. Perhaps you're drinking more water, perhaps you're enjoying organic foods and products, using all the ingredients in your refrigerator and decreasing waste. Maybe you're celebrating reusing your plastic bags, repurposing your water.
What are the things that you've been celebrating and incorporating? I hope you continue doing that and may it bring you also some pleasure in making these small steps as we expand our Earth Day practice maybe into the year. For our new practice, we'll be adding some new pieces today and you might appreciate having two blocks, a strap, and a blanket for practice. I would encourage you at the start here to use your blanket for a little bit of padding for the knees, the shins, and either one or two blocks if you like for Virasana, this pose where we have the knees on the blanket, shins on the blanket, and whatever height of the block helps you feel more comfortable in your ankles, knees, and lower back. Hopefully at the same time helps you feel grounded.
We're going to add a new hand mudra, again, to continue to add a little more focus into our practice. Today's is Bhu Mudra, where we fold the ring finger and index finger into the palm, the thumbs press ring finger and pinky down, and we've got our index and middle fingers to play with. We're going to try to stretch them down towards the floor. Depending on how high you're sitting, you may or may not actually make contact with the ground. Our intention is to be reaching down and maybe some of us will be touching the floor.
If not, you just imagine you're contacting the earth and literally putting your fingertips on the pulse of the earth. Maybe look to the horizon at the start of your practice and get a sense of your environment, amount of light that's coming in, the objects sharing the space with you. If you're comfortable with your eyes closed, maybe we start to turn our attention more to our inner landscape. With this gesture of our hands reaching down to touch the earth, we try to grow a little taller through the sides of your body. Like the size of the body was more the size of a mountain, and coming into a mountain shape as we sit with the crown of the head being our peak.
Then as we sit here, grounded to the earth, open to the sky, feeling this life force energy pouring into you. Perhaps helping you each breath get a little bit more stable, a little bit more calm, a little bit more embodied in this moment, in this breath. As we sit, maybe for a moment we acknowledge all the people who have been on this land before us. Just kind of feel the energy of the people who have been here before us, taking care of this land. All the way maybe to this moment where we are here individually now taking a little more care of this land.
Our body, this earth. You're noticing how that feels in your body. To be part of this ever widening circle of earth care. All right, and maybe carry on with the rest of the day. All right, and maybe carry some of this vital energy with us as we let the eyes maybe slowly open to let in a little bit of light, soft focus, and then more light.
Let's open your palms up and as your arms go out to the side, perhaps do just a simple shaking vigorously your hands out. Bring a little more energy out towards your hands and also the arms. For all that they do for us, just give them a little shake out and bring a little more sensation out to them and maybe this is the season where we spend more time putting our hands actually in the earth in the garden. So let's warm them up now, open and close, open and close. Getting the hands ready maybe for some gardening this time of the year, tending to the soil.
Now if you make a fist and tuck your thumbs into your palms and all the other fingers wrap over your thumbs, we're going to start to make some circles with your wrist, letting those arms feel long, stretching out away from your chest. And after removing that direction just a few more times getting the wrist and maybe you feel the muscles of your forearms working. And then let's go the opposite direction a few times. Warming up the wrist. Let the arms come down and let the left arm reach up towards the ceiling and we know when we're in the garden outside we have to reach up to grab whatever fruits might be available.
Take that left arm down and then that right arm down. Maybe it's time to do some pruning. Got to reach up those higher branches, let that left arm for a moment to stretch way up, the shoulder blade lifts with the arm and then that right arm is warming up for maybe some time out in the gardening, reaching up into the trees. One more maybe to each side. Now if we lean forward and if you were sitting on a block, set that to the side.
I'm going to slide the knees now a little bit wider and see if you can lean forward enough that you take your hands and turn your fingers towards the blanket, towards your feet. And some of you might need to lean a little more forward if we notice that the wrist and the forearms are tight. So you would have your hips away from your feet and you're leaning forward. So tune into the wrists. It probably is pretty obvious if you have tension there.
If it's not a place where you have a lot of tension, you might notice your butt can go back a little bit more towards your feet. Just so that we're waking up all these different parts of our body, including the wrist. Give yourself time to settle into that stretch. Maybe one more moment. And then let's lean forward, turn your hands to face straight ahead, and then bring your knees parallel.
Now with your blanket underneath your knees, let's come to tabletop position. And when you're in tabletop, do a basic cat-cow for a moment to move pelvis, spine, shoulders. Just to loosen up any stiffness that we have here, and then we'll come back to tabletop. And we're going to now turn just your right hand back, like you did a moment ago, and feel what it's like in tabletop to turn just your right hand back. And then right hand forward.
And then slide your left hand maybe a little bit more towards your knee and have your left hand be on the ground with your fingers facing your knee. Check out how that feels. And then both hands forward. Now from here, let your hips tip back towards your heels, head down for just a moment, stretching through the arms, and letting the forehead come down towards the ground. Or maybe for some of you, we get to put the forehead on the earth, which is often quite cooling and calming when we get to put our forehead on the earth.
Let's go ahead and tip forward back into tabletop. From tabletop, let your knees get a little closer together than where they were just a moment ago. Send your hips now one more time back towards your heels. We're going to let your left hand walk a little forward as we sweep your right hand back towards your right ankle, your right foot. So your arms now are reaching in opposite directions as we again try to bring your forehead in the direction of the floor.
If it felt more supportive grounding to have a block under your forehead, you could always put a block under your forehead. And take a moment again with our forehead and eyes facing the earth. See if this creates a little bit more calming. The palms pressing into the ground to stabilize us as we stretch open our back body. And now swing your right hand forward and reach as far out as you can and then take that left hand back by your ankle, by your foot.
Drop the head down. I know if I'm thinking about doing some gardening, I like to stretch my back a little bit as well. So this can be a nice stretch for the back. I hope you feel that. Round the buttocks.
And again, just that sort of grounding at the start of the practice with the forehead near the earth or forehead on a block. Big breath into the back of your body. Let's bring your left hand forward and as we tilt a little bit forward, let's bring your elbows to the floor instead of having your hands on the floor. And maybe the knees go just a little bit wider so they're hip distance apart. Let's cat cow here with our elbows on the ground.
So cat cow, maybe a little bit more movement up through the chest and neck, meaning that we look back towards the feet as we round and look towards the wrist or fingers as you look forward. Try to be kind to the neck as you're going back and forth so you're not crunching up the neck to look all the way forward. Now let's come to a little bit more neutral spine. And as you come to neutral spine, now lift your hands and forearms and point your fingertips more towards the sky. As you one more time, let your head drop between your arms.
And maybe the eyes are closed or we're looking towards the knees and noticing how our shoulders are responding, side chest responding to this stretch. That might, again, help your shoulders spread wide and get you more prepared maybe for being out in the garden or being of service. We do a little self-care before we take care of others. Some simple stretches might be that first step of self-care today. Let's tip forward, put your forearms and wrists back down and now bring your knees again a little closer together.
Let's stretch your right leg straight back behind you. So let's wake up that right hamstring and glute as you strongly kick back through your right leg. When you swing your right leg over to the left, look over that left shoulder and maybe we start to feel that stretch through your outer right side body and float your right leg straight behind you. Again, kick that leg over to the left, look over that left shoulder and then bring your leg back behind you, look down. Two more times, look to the left as your toes touch the floor, float your leg straight behind you and as that leg goes back, take one extra second here, push your toes down, round your back like you would in cat pose and look over as best as you can your left shoulder.
Let's take that right leg straight behind you, put your toes on the floor, lift your left knee for a moment now and we're in forearm plank just to get the knees off the ground. So when we garden a lot or have the knees on the floor in that way, you might appreciate again being off the ground and we work a little bit more through the core muscle so we're staying warm as we're perhaps gardening or doing our self-care. The knees come to the blanket. Now let's go for your second side where we take your left leg straight back behind you, swing it to the right, look over your right shoulder and then swing your left leg again behind you. Swing the leg again to the right, look over that shoulder and leg straight behind you.
A couple more times kind of feeling how your outer left side body responds. It could be from the ribs, the waist, the outer hip that we most likely feel the stretch. I hope you feel the stretch. Rest the left foot on the floor and try to spread your shoulders wider as you lift up a little more in the back of the heart as best as you can look over your right shoulder. And then we'll come back to a leg behind you and then one more time coming through that forearm plank just a little touchstone, a moment to warm up and engage your whole body.
Be connected to your hands, forearms, torso, legs. One more moment cultivating a little bit of warmth and heat. And then we'll slowly drop your knees to the ground. Let your pelvis rest on the blanket for a little patting as you point your toes straight back. Now see if we can bring your elbows in front of your chest area and let your front ribs touch the ground so you come into the version we sometimes call the sphinx pose.
And when you're in the sphinx, try to feel as your elbows press into the floor that the crown of the head lifts up towards the sky. And notice again how your spine and body responds to that gentle stretch through the natural curves. Can we let the belly press into the earth on inhale and belly in towards your back on exhale? Right, now let's go ahead from here and let more of the chest come towards the floor as you bend your right leg and reach your right hand back for your foot. Let's lower the forehead towards your left forearm as you squeeze your right foot towards the right buttock.
And as much as you have access to pulling that heel, encouraging that heel to move towards the buttock, we press the front of the pelvis into the blanket and deepen that quadriceps stretch, all the while being kind to the right knee. And let that right leg go and we'll bring the right arm in front of you. Bend your left leg and maybe you lift your head up to reach back for that left foot, but lower your forehead to your forearm as you squeeze your left heel towards your left buttock. Notice if this side feels different and maybe we start to enjoy the experience of stretching this left quadricep. And maybe we more clearly feel that if you press your pelvis towards the blanket.
Pretty awesome stretch. And then let's go ahead and let that go. Okay, now if you bring your hands to grab opposite elbow, so both forearms down and the head comes up, let's take a moment to point your toes towards the sky. So with both legs up, we do a little press the pelvis into the floor and pause. And then lower the forehead and lower the feet.
If you slide your elbows wider, stack your hands now and slide that right knee out to the right so it's like you're doing tree pose on your belly. And just see what that feels like with that right knee out to the side. Sometimes we can get a lovely stretch from that right inner leg out towards the right knee. Maybe this is a familiar position that some of you might even sleep in this type of position. For some of us, it might be that comfortable.
Let's take a moment letting that right leg, right hip area open. If you feel that's not super interesting, you might try the other shape that's more of what we call the frog pose where your right leg would be more of a 90 degree angle. So that big toe side of your foot would be on the floor. And maybe just a couple of deep belly breaths here. Create a little more space in that right inner leg and groin area.
We'll slide that right leg straight back and then let's treat the left side to the same shape. So start with the tree pose and see how that feels to slide your left leg into tree pose. So it's kind of like that fallen tree forehead on your stacked hands. Does this side feel different than your other side? Maybe we do a little clearing in that low abdomen, inner groin.
If that's not interesting for you, go to the frog shape where your left leg is like at a 90 degree angle and see if that's more interesting. Just an area we haven't opened up yet in our sequence in the green yogi challenge. So give this area a little love. And then let's slide that left leg when we're ready straight back. All right, hands beside the chest.
Press yourself away from the ground and then slide those knees right out to the edge of your blanket. And as your hips move back, we're doing that wide knee child's pose with your arms in front of you, elbows off the floor like you're doing downward dog and the forehead towards the earth. Enjoying again now that even stretch in the hips and length through the torso and arms. Let's tip a little bit forward now and raise the knees up and come into downward facing dog with your feet moving back away from the wrist and finding the right width through your feet and hands so that you start to feel a little bit of ease in stretching your legs, shoulders and arms. You might bend one knee and then the opposite, shake out a little bit in downward dog.
And then enjoy that full stretch as you push the earth away with your hands. Press into the ball of the feet. Now let's go ahead and walk your feet forward towards the back of your wrist and turn your toes out as you come into a little bit of that squat where you're touching the earth. Your squat might be higher hips or lower hips. Be willing to adjust your feet so you can sink down.
If it's helpful, you could even slide your blanket in and put your heels there and sink down and then pause. Let your feet settle into the earth, fingertips reaching down into the earth, letting that stable, solid energy move through your feet, into your legs, hips, torso, creating that mountain-like feeling in your torso. And then let's come up to stand and really kind of embody that mountain feeling as we stand in mountain pose. And I want to encourage you when you're here to let your feet be maybe hip distance apart. Whatever width works for you to be stable.
All right, now as we get ready to kind of start opening up to this new season and maybe more time in the garden, let's reach again both arms up towards the ears. And then we'll do a little crescent moon where we tip to the sides. Maybe some of you even plants by the cycle of the moon of an old tradition. Come up to center, plant your new intentions by the moon phase. Come back to center and then to the other side.
Noticing your sleep patterns as they might change depending on the cycle of the moon. Emotional state, how that might change with the cycle of the moon. How your technology works or doesn't work maybe based on the cycle of the moon. One more time. And now let's go ahead and grab the opposite elbow and let your elbows lift a little bit up into your hands.
And we'll do a little bit of tilting to the side. Slight bend of the knees as we drop the shoulders down, elbows down and up and around. Just kind of feel like you're drawing some circles holding your elbows and your knees can bend. Kind of what feels right for you. There's no right or wrong way to do that.
Just more clearing of the shoulders and hydrating them, fertilizing them with movement. Okay, now let's stay with your arms up in that way and let your left arm, right arm drop to your side. As you bend your left knee, let's sway the hips a little bit to the left and arch a little more to your right. And then come to neutral with your left arm at your side and bend your right knee as you sway your hips to the right and let that right arm reach to the left. Come back to neutral.
Again, left arm reaches over to the right and we bend that left leg so you're shifting your hips. And left arm down, shift your hips to the right, bend your right knee and reach over to the sides. Just lovely big side body stretch. One more time, left knee bends, reach over to your right. Come back to neutral, bend your right knee and reach over to your left.
And come back around to center. Maybe a few little simple shoulder shrugs and then we'll turn and face the long side, short side of your mat and maybe your blanket is about the middle of your mat. It's a place that we'll use that in a moment. Okay, let's have your hands sort of at the back of the buttock area and take a moment to circle your hips. Now if you think about taking breaks from kneeling or gardening or doing your desk work, whatever it might be, how great it feels to do little hip circles.
You feel how your pelvis moves over the bones of the legs. It releases tension in the back. Let's go the opposite direction. As much as we're focusing on hydrating with water, I hope you can hydrate with this type of movement on a regular basis. See if your body feels a little bit more awake.
Okay, now let's bring your feet a little closer together. Hold the top of the knee area and just a couple little circles of knees and ankles. Just getting the legs just a little bit more warmed up for our adventure today or this week that might include maybe more gardening. Let's go the other way. All right, now from here, let's go ahead and come up to standing.
And with your hands around your hip area, take your right leg and step it back beyond the blanket. So it's kind of a good landmark to have there. So we're stepping beyond the blanket. As you look forward, lower your right knee to the blanket. So you got a little padding.
With your hands at your hips, let your hips go forward and back. Let the hips come forward and back. And one more time, forward and back. Okay, now this is where our blocks will be handy to be medium or tall. And we can have our hands on a block at your side with your back, right toes curled under.
Now please lift your right knee up, float the pelvis as high as your left knee, and then lower your right knee lightly to touch the blanket. Keep looking down as you lift your right knee off the blanket and then lower your right knee to the blanket. Lift the knee up and bring that left right knee down. This last time, we'll lift that right knee and transfer that right hand block, left hand block to the inside of your foot. And see here, if you might start to wiggle your left foot more to the left and turn your toes out several degrees and we let our hips sink maybe a little bit towards the blanket.
Some of you might even put an elbow on a block as you lean a little forward. In the back, right thighs engaged. We're pressing deeply into the ball of your back foot. Left knee might be tipping a little bit away from the left shoulder. Kind of like you're doing a floating version of pigeon.
Let's bring the hands back to the blocks. Take that left hand block to the outside of that foot and maybe you transfer to plank and then put your knees on the blankets, hands off the blocks as you rise up to the kneeling position. Let's do our second side and bring your right foot forward, hands to your hips with a nice tall spine. Let your hips go forward and back as you bend your right leg. Hips go forward and back.
Maybe one more time, forward and back. With them a little bit more warmed up, hands now on your blocks, medium, tall or flat. Curl your back toes under and now lift up your left knee. So you're in that high lunge, looking down. Bring your left knee lightly to touch the blankets and then lift your knee up.
Bring your left knee lightly to touch the blanket and you're going up. One more time, knee down and then we'll keep that knee up and take that right hand block to the inside of your right foot. Move your right foot more to the right. Hello, little bird. And then come down to maybe some of you elbows as we let that right knee maybe drop away from the shoulder or keep it in.
Press firmly into the ball of your back foot. So it might feel like you're doing an active floating pigeon. Nice long spine. One more moment here. And then we come back to hands on blocks.
Take that right block to the outside of your foot and then let's transfer that right leg back into our push-up of plank pose. And then bring your knees down to the floor and as your hips move back, move those blocks out of the way. Come up to kneeling position and then let's bring one foot and then the other forward. Fold over your legs so your feet are on the ground rather than the blanket. And then roll up or come up the best way to stand.
Rolling your shoulders back and down. From our mountain pose, press your feet into the earth, raise your arms up, reach for the sky. Bend those legs, fold over and touch the earth. Step one leg at a time back beyond your blankets into your plank pose. And then from your plank pose, bring your knees down to the blanket and slide your right knee a little bit more forward now towards the back of your wrist.
I'm going to move this block out of the way so you can see. The back toes please curl under and lift your left knee off the floor. We're going to look a little bit more forward in front of you so you're inviting a little bit of back bend shape like you would if you were going into kind of a pigeon pose but our right knee is pointing straight ahead. Now after stretching that left side, put your left knee down. Put your right hand at the center of your mat.
We're going to revisit the quadriceps as you bend your left knee and reach back for your foot. Perhaps turn a little bit to look to the left as you lift your head towards the sky. So you're trying to move your hips and lift your hips away from the earth as you engage your inner legs. Bring your left foot down, left hand down and hands again are under the shoulders as we send the right leg back to plank. And then bring your left knee forward so it's pointing straight ahead and your back right knee is lifted.
So back leg is strong, the legs are engaged, our back is engaged and we're trying to avoid putting too much weight on our hands as we look forwards. So let the legs do more work. And then we put the right knee down on the floor, left hand to the center of your mat. As you bend your right leg, reach back and maybe grab your foot and as you perhaps bring your foot towards your pelvis, lift the pelvis away from the floor. Maybe look a little bit over that right shoulder.
That feels good to open that right chest. Take one more moment here. And then let that go. With your hands under your shoulders, step back into your plank position. From plank, knees on blanket, walk the hands to the knees, lift your torso.
One more time, we're going to step one foot and then the other forwards. Use your legs to do that work. From mountain, arms up in the air, fold forward, bent knees, touch the earth. And then one leg at a time, we step back to the push-up pose of plank. Now from our plank, let's slide your right knee straight ahead to the back of the wrist.
See if you might swing your right foot a little bit more to the right and find what would be like an early version of pigeon, the left knee still off the floor. Then from here, keep, again, activating your legs, long spine. Let's drop the left knee to the floor. And in this new position, if it's difficult in that knee, right knee, put a block under your hip or keep that space free. And we'll center as we did before, your right hand center of the mat, lift your left foot and reach your left hand for that foot.
Perhaps a little squeeze of the heel toward the buttock, either look at right hand, look out to the side or a little bit over that left shoulder, which one brings you more joy. And then release. Hands under shoulder line, step back through your plank pose. Start with your left knee going straight forward. That might be better for your knee.
So where can we swing the foot to the right? Keep the back knee up. So we're asking more of our legs, little back bend, strong arms. Again, this could be the side that wants the block under your left thigh or maybe we're without. At some point, let's put your right knee now for ready on the floor, left hand, the center of your mat.
Put your right leg, grab your foot. See if you like to look at your left hands. Squeeze the heel toward the buttock. Do you look out to the right or even a little bit behind you? Which one actually brings you more joy?
Come back to hands under shoulder line and come back into your push-up of plank position. From plank, lower your knees to the blanket. Walk your hands back to the knees. Come up to that kneeling position. And now without using your hands, again, one foot forward and then the other, we're standing in mountain pose.
All right. So now we can get our blanket off the yoga mat for a moment. And from here, come into a standing position with your feet maybe about hip distance apart. Let's slide your hands to the side of your waist and let's try to look straight ahead to your horizon as you shift your weight to your right and have your left knee come up. Our challenge would be so incomplete without a tree.
So let's go ahead and open that left leg to the side and slide your left foot somewhere along your right leg line. If you need to, you touch the earth again and then come back. Okay, now let's grow those branches out to the side and I'm not sure what kind of trees are around you, but I always love thinking of those big oak trees, those long arms. And we'll eventually work together towards our big sequoia tree as we take the arms higher and higher up, that giant foundation and these branches growing taller, reaching higher and higher into the sky until maybe we start to ground enough and grow enough that our hands might touch above our heads or perhaps even a bit in front of you. Okay, celebrate the unique shape of your tree and the environment that might be more windy or perhaps it's just calm and quiet.
One more moment, just growing even more appreciation for trees and their ability to hold still. My God, how incredible is that? And then arms down and that left foot on the floor. As you shift your weight, getting ready, perhaps hands on your hips. As you lift your right leg, do that external rotation and just sense where to slide that right foot and you might have to go down and back, down and back a few times.
Okay, getting more confident in your standing position and then how helpful are those arms or branches to stabilize us as we navigate through the wind, through time and all that beauty with those extra branches, the textured bark, so much beauty in the trees. Now growing from that sort of young tree or full tree and imagining we're going to the tall sequoia kind of tree with your arms coming in towards your ears, palms perhaps coming together and then together the hands might lift the shoulders. The hands squeeze together that helps to lift the shoulders, give them some direction. And again, appreciation for trees. Oh my gosh, how do they stay so still for so long?
One more moment and then letting those arms come down and feet come down. Okay, now with your feet just a little bit separated, toes pointing out to the side, we'll start to hold your thighs, slide your hands towards your knees and then when we bring the hands down to touch the floor, turn your hands back similar to what we did in tabletop at the start of class and then we're going to lift the left heel and put your left hand under your left heel and you're going to put your heel on the top of that left hand. Lift your right heel, put your right palm down and then put your heel on the top of your right palm. Let's see if that little lift under your heel makes it a little easier for you to lower your hips down. Okay, so that little bit of squat, we feel sinking into squat with long strong arms, open chest and feel that the crown of the head here is trying to lift up towards the ceiling.
And then let's release the hands and then have a seat. Now when you sit with your legs in front of you, you might for a moment turn your fingers to face away from you and lean a little bit back and the feet might wander a little bit forward. We'll have your left ankle on top of that right knee and kind of revisit that pigeon shape where this might be a great place for you to open that left hip and then makes it a little easier in your left knee. If you want more stretch, walk your hands in a little closer towards your hips and your fingers might still be facing out to the sides as you push down into your hands and lift up through your chest. As you find that extra length in your spine, you might find it's a little easier to tip forward in your hips.
And be patient, be kind and just wait for your body to open to give you that green light to move forward. Some of you that last moment might catch the front of your right shin and pull that right heel in if you want a different shape where you're pulling a little bit with your arms forward, kind of hugging that right leg a little bit more towards your body. So some variation of that. Hopefully that works for you. And then we're going to lean back again and put your left foot down and let's see what the right leg's like.
Maybe you lean back more, right ankle over that left knee area. Stay back if that hip is more tight. We want to avoid feeling this in the knee. This is your more open side. Maybe your hands come in closer to your hips and you first start by literally pushing your palms and hands down like you're going to lift your butt off the floor, like your arms are that strong.
And then maybe you lean forward as you lift the spine. Some of you, again, from here might stay there and enjoy that sensation or you grab a hold of your left shin area and then with the strength of your arms, you pull yourself a little bit forward. Like your ribs, again, are trying to hug in a little more towards your left leg. One more moment here. And then let's go ahead and lean back.
And as you do, bring the bottoms of your feet now together and then let yourself, as you sit in this upright position, grab a hold of your ankles and try to tilt to the front of your pelvis and sit tall. Some of you might be able to slide your hands out towards your feet and try to squeeze your feet together. It's also nice and warming. And then see if you can press your heels together. And when you press your heels together, if you feel like you get a little more energy going through inner legs towards your pelvis.
Let's try to create a little lift of that root lock as we lift the chest, as we lengthen through our spine. And then perhaps just feel into some sensation as you tilt your torso forward with the intention to try to keep the chest lifted away from the belly. And with time and gravity, we might feel a little bit of legs releasing towards the ground. We're not in a rush, moving more at earth speed here in our forward bends. And maybe taking one or two bigger, fuller belly breaths as you are here.
And then let's go ahead and lift your torso up. Use your hands to help you bring your knees together. Let's find our way onto your back. And this is where a strap might be handy to have close by. All right, so I know if I'm going to do some gardening, it's nice to stretch before or maybe you've had a big day out in the community.
It's great to take a few moments for yourself on your back. So let's start here with your right knee in towards your chest. And even if you did this yesterday, how great it can feel to stretch your right hamstrings and see what's changed overnight. Perhaps before you commit to that hamstring stretch, you might point and flex your right foot, the ankle, calf moving. And then we'll keep a little bit of pressure of the strap against the foot as you work toward a straight right leg when you are on your back.
And then just check that the lower back ribs, lower back area is softening towards the earth, letting go of whatever tension we can in that lower back area. Put the strap into your right hands and then tilt your left knee into your chest area as you tilt that left leg in. Open the left knee to the left and your right leg to the right. See if you can feel your shoulders evenly pressed back towards the floor here. And after a day of gardening or anticipating gardening, how lovely to relax shoulders, get a little leg stretch.
Come back to your center area. Now slide your left foot into the strap and take your right foot out. And again, before we commit too much for the hamstring stretch, please point and flex your left foot. See if we can get that calf moving better on the back of your leg. And then when you're ready, let's hold the stretch and pull the strap a little bit against your foot.
Even if you did this yesterday, how does this side feel now? The sensations are clear. Take the strap into your left hand and then tip your right knee into your chest. And as you open your right knee a little bit to the right, open your left leg to the left. And then try to evenly press the shoulder blades back towards the floor.
Notice what you're noticing. Where are sensations? Where is there ease? Is there any challenge? What part of your body wants more of your attention? As we tip on back to center, let's go ahead from here and hold up your strap and set that to the side as we hug the knees in towards your chest. Let's hold on specifically now to your left knee and stretch your right leg down to the floor.
Maybe a couple of times we curl up, bringing your forehead to your knee and then bring your head back down. Bring your forehead to the left knee and then down. And one more time, forehead to knee. As you come down, let's switch and grab a hold of your right knee and treat that left leg to land on the ground and stretch long. While holding your right knee, lift your forehead to knee.
Go back down. Forehead to knee. Go down. One last time, bring your forehead to your knee. Drop down. Let's tilt both legs in and as you bring your forehead to meet both knees, move your knees forward. So you have straight arms holding a knee. Tilt in, curl into a ball. Move your legs forward.
Two more times, curl into a little ball, little seed, and then move your legs forward. Again, bringing yourself into that ball and move forward. Now keep your hands on your knees and let's finish maybe this moving part or close to finishing with some circles. Holding the knee and maybe use this to massage your back. Have that little release in that lower back or stretch around the buttock area.
And see what feels different when you go the opposite direction a few times with your circles. After a day of standing, being of service or gardening, it feels so great to be on your back and do this releasing work. Now arms at your side, plant your hands here and we'll invite the legs to circle around without your hands on your knees as a way to get a little bit more connected to our core. I also feel like this massage the organs, the organs of the body. See if you can feel as your knees move away from your chest, you get a little more information.
What's going on in that belly area? Let's go the other direction feeling to the tone and feeling of the belly when we move in that new direction. And then we'll finish with a little supine twist here as you hold your left knee drop your right leg one more time to the ground. And we might keep this left foot floating as your left hand grab right hand grabs your left knee. Open your left arm out to the side and just do a little simple twist where your left leg may not even touch the ground.
The left knee is just moving to the left. Give yourself time to feel your left foot touch the floor. Maybe as that left knee might come closer to the ground. See if you want to slide your left arm further up by your ear. And then sweep the arm down to your side roll onto your back and we'll switch out.
Grab your right knee and just a little simple twist left leg down. Float your right foot and chin as you roll to your left as your right arm goes out to the sides. With time you might feel that leg comes more towards the ground. Maybe your right arm sweeps more up towards your ear. When you're ready arm down at your side and let's roll onto your back.
And if there's any last movement you'd like to do before Shavasana please treat yourself to that movement. Otherwise grab your blanket and as a grounding gesture I want to invite you to have your blanket be at least over your feet and your legs. At least over your feet and your legs. For a little bit of grounding and support you in taking just a little bit of extra self-care. At some point as you separate your heels, separate your arms, let the weight of your back body drop into the ground as we try to create a really soft front body here.
And then if you were looking out at the environment around you and your eyes are open maybe this is the time to close the eyes and let them drop back into the face. Grateful for all that you were able to do today in this time to practice. Maybe as we're more checking into how we feel after the practice we'll be more inspired again to do this again tomorrow and the next day. We'll remember how great it feels to move and stretch, breathe. And the mindful ways that we do in yoga and how this mindful practice might be now expanding out into our daily choices, into our relations, into our communities.
So keep kindly dropping into your body. The breath which brings us a little more into the present moment. And feeling our sense of belonging in this landscape wherever we are that we belong here. Maybe as we see the beauty around us we start to fall more in love with the beauty around us and we often protect that which we love. So perhaps this expands our circle and we fall more in love with the earth and we wish to care for it more each day, each week, each season.
So take a few minutes together here in silence and just appreciating the benefits of the practice. And perhaps some calm that we've tapped into. Okay. Without hurrying, without rushing. Just give yourself time to turn more awareness back to the breath.
Perhaps a slightly fuller inhale and exhale. After appreciating a few deep full breaths the movement in your fingers and toes maybe helps you move your arms and your legs. And as we often do a curl over into your fetal pose whatever side is easiest for you to turn towards. Take that pause. And then when you're ready, bring yourself up towards sitting.
You might grab whatever props for useful maybe even got your blanket around you to help keep you a little bit warmer. And also again to ground you. Let's bring back our mudra of our hands where we have your index, sorry the pinky, your ring finger curled in your thumbs or over your ring finger and pinky so you've got your index and middle fingers to root down and once again tap into the pulse of the earth. Create your mountain like torso, the peak, the crown of the head. And visualizing again the stability of your body, helping you stabilize your mind and clearly see and perhaps what intention you might have for this new week.
Vision we might have for a little more earth care. And then closing this phase of our practice maybe we open the hands if we like our hands in front of the heart and may others continue to be nourished from our practice. Namaste. Thanks for being here. Alright so in addition to the asana practice we have a few suggested homework practices for you.
These are some of my favorites. So we have this idea that we are better together, that more change, lasting change really happens when we're in community. So we've got our self-care and when we are feeling well we're able to take care of other people and then as the people multiply as communities we make real change. So this homework assignment number one is to get to know your community and consider shopping locally all week so that you're maybe only visiting places where you can still talk to an owner. It's kind of fun rule that we're walking around your neighborhood and supporting local businesses for all of your needs this week unless your business relies on Amazon.
It's sort of like zero Amazon shopping kind of a week and get to know what's around you. And then secondly is to consider creating a day, a week, or a 30 day challenge of eating locally and the term is locavore. So the idea is you're trying to eat foods that are grown or harvested within sort of a hundred mile radius from where you live. And if you're going to take on this challenge it means you'll be reading all the signs at the grocery store where your food has come from. Or maybe you get to look for farmers markets this week and which will most likely have food that's grown in your region.
So I hope you have fun with that discovering what's the food that's in season and oftentimes that's going to taste really good. It's going to be really fresh and I hope you'll enjoy meeting some of the farmers and people who are growing the food that you're enjoying. The third piece to our homework assignments is to consider collaborating with others on meals or garden projects. So one idea to be more in community is maybe to invite others over for a meal and you get to share cooking together. Another idea of being more with other people is let's say you've got a garden project that you want to work on and you know it'll be really difficult to do by yourself.
It's great with help that maybe you invite someone over to help you with a project in your garden and see how quickly it gets done. And then you get to go help somebody else in exchange do a little work in their garden or a project that needs to be done. And some of the benefits might be that you're learning about other plants and trees and things by helping somebody else in their yard that might have different things that are in your yard. So you get to learn a little bit more about nature and your environment perhaps by being in other people's space. So those are just some fun suggestions to be a little bit more in community this week.
And I hope you enjoy making some new connections with those around you. We are better together. Have fun everyone.
Green Yogi Challenge: with Melina Meza


Comments


You need to be a subscriber to post a comment.
Please Log In or Create an Account to start your free trial.
