Description
About This Video
Transcript
Read Full Transcript
Hi. I'm Sherry Betts, and I'm excited to be here at yoga Anytime to teach a bone healthy yoga series. We're gonna start with the feet today in our 1st class, really looking at the foundational principles of support from the foot to the top of your head. So let's get a couple of props. You'll need a tennis ball. It can be a dead one or a live one, and a dowel that's about 48 inches long by 1 inch thick.
A broomstick works great. You can just take the broom or the mop off the handle and use that today for your support. So let's stand with the feet about hip width apart, which is generally about 3 inches or so. So you're gonna take your focus down to your feet and look to see where are you putting weight on your feet? What do your toes look like? How much space is between your toes? Then what you wanna do is shift your weight forward and backward and notice what happens to your toes when you do that.
Generally, when we carry too much weight in the front of our foot, we'll end up with a gripping or creating kind of a hammer toe effect so that your toes kind of clench together or clench up and give that hammer toe shape. And sometimes your toes can get really stiff like that if you tend to carry your feet like that all the time. So then if you lean back, your feet will tend to fly up, your arches will lift, and then your toes lift to try to help you maintain your balance. So that is when we end up with more of a stiff arch. So what we wanna do is try to find that happy place where our foot is in more of a tripod.
So let's start by lifting the toes, spread the toes out as much as you can, And then place them down starting with your pinky toe, 4th toe, 3rd toe, second toe, and then the 5th toe. Let's do that one more time. We're gonna inhale as we do that and then exhale placing the toes down, feeling them to to be long on the mat and space between as much of weight across the front and the back of your foot. Alright. Next, we're gonna need the tennis ball. So place a tennis ball under your foot.
Now you might notice that this challenges your balance a little bit. So if you do feel challenged by your balance, go ahead and hold something like a kitchen counter, your broomstick, or you can place your hand on the back of a sturdy chair. So let's place the tennis ball under the toes and notice what happens there, it's gonna be best if you place the tennis ball under the arch of your foot a little bit to the front of it. And now have your toes kinda hanging over the edge of the tennis ball, wrapping your toes around. You're gonna notice that you're 5 knuckles here, the metatarso phalangeal joint, the MTP joint because that's a mouthful, right? And then wrapping the toes around and seeing if you can flex through those knuckles really helpful for a toe mobility and strengthening your arch. Let's try that on the other side.
Make sure you're lengthened and strong in your posture, wrapping your toes around, and lifting up and wrap around and lift up. Now noticing where the knuckles are showing or not showing. Sometimes you'll have a couple of knuckles that don't show. Place the ball under that particular knuckle. And then wrap it around and see if you can get more movement at that particular joint. So remember, your toes are not on the ball, the arch of foot is on the ball.
Your heel is down on the ground. Okay. Now we're gonna put that aside for a moment. And let's practice lifting the toes. So there's a really unique phenomenon in the foot where the toes will lift up, and this creates an arch which is kind of counterintuitive. A lot of people think that your art should flatten when you lift your toes. But what that does is it puts the foot into what we call supination.
And that's a lifting of the arch, making the arch strong and like a spring, especially when we walk. So lifting the toes will often put your foot in a more neutral position. And then notice if you've got more weight on the big toe, or the pinky toe side of your foot. And then lift and lower. Feel that arch lift as you lift your toes and lower. It's exactly what happens when we push off as we walk.
So when we push off that foot gets strong, it creates a spring action to propel us forward. Alright. Now roll the ankles in toward each other, and then away from each other. So, you know, when you're a little kid, you kind of stand like this with your feet on the outside or your weight on the outside of your feet. You ever noticed that little kids stand tend to stand like this all the time? I always think that they're lifting the arches of the feet and they're working on their, what's called the Dorothy queue. Right? There's no place like home, clicking those heels together and apart, and then rolling in and rolling out.
So you're basically rolling from pronation, which is more of a flattened arch to supination. We all are born with a flat arch. And then as we walk and put weight on our feet and our feet get stronger, those pulley systems start to work in the feet. The arch is developed. So people talk about having a flat arch, well, we all started out with a flat arch, and it's what we do with it in the future that determines whether our arch stays lifted or not.
And that's one of the focal points that I'll be referring to in the whole series because it's so important how you put your weight on your feet. So let's notice if you have a a pronated foot, you're gonna tend to put weight more toward the inside of your foot. And I like to talk about the 6040 principle or you're rolling to the outside of the foot, rolling to the inside. Now this time, we're gonna keep the toes down. So keep your big toe down without pushing into the floor, just let it rest on the mat, and roll your ankles apart as far as you can without letting your big toe come up.
You're gonna have about maybe 70% of the weight on the outside of your your foot, big toe is still in contact with the mat. Now roll in, and you're gonna notice that your knees come closer together, your arch flattens. In this way, you have, like, maybe 60 or 70% on the inside of the foot. So what we want is to get that symmetry through the foot, which is actually not really symmetrical. So we wanna be about 60% on the outside of the foot, 40% of the inside.
And that's for most people who have a flat arch or pronated foot. There's a very few people out there that will have a high arch. It's much more rare than a flat arch. So you might be doing the opposite where you're putting 60% of the weight on the inside of the foot 40% to the outside. So if you look closely at my feet, you'll see that one of my feet has a flat arch and has a lot less stability in the joint structure because of an injury I had as a gymnast when I was very young. And what I'm doing now is mindfully supporting that foot which is so good for my knee, my hip, the rest of my body, where I had difficulty with sacroiliac problems, knee problems due to poor control of that arch.
But guess what? Once I started working on my feet, and noticing my foot placement in every exercise that I did where I was in weight bearing, I don't have those problems more. It actually translated all the way up that kinetic chain and gave me support. Alright. So now Now that you've got your weight centered over both feet, let's try putting the feet together. Some of you may not be able to get your feet together because of knee alignment, and some people are born with what we call vagus or knee alignment where the knees come in towards each other. So you might wanna put a tennis ball in between your heels. And then that way, that gives you that space or that separation of your feet.
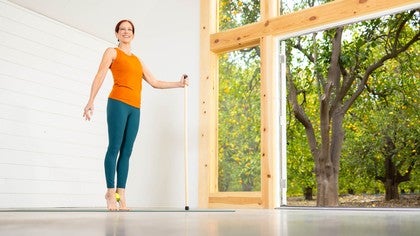
And if it's even more that you need, you could try a larger ball or even a yoga block between the the feet would work. Now, we're gonna rise up on tiptoes and this is where your dowel might come in handy. So I'm gonna grab that dowel. So I get a little support for my balance. And then I'm gonna place that tennis ball between the heels and pick it up as I rise up and down.
And you're gonna notice that this actually puts that ankle in perfect alignment so that you can do heel raises. Keeping your toes relaxed and your ankle joints in the proper alignment. Alright. Now the good news is that when we've practiced the right alignment, we can then put weight on our foot in a single leg. Right? So this is gonna where we're gonna work on balance and then maybe start working on tree pose eventually. So then we're gonna lift one leg up.
Notice if your foot is collapsing when you do that, because sometimes when our foot collapses, we tend to make ourselves smaller when we stand on one leg because we're nervous about it or confident. So what I want you to do is shift your weight over toward that leg. You always wanna put the dowel on the same side of the leg that you're standing on, so that in it encourages your weight shift to that side. So now I'm gonna put my other hand on my pelvis, lift the leg. And see if I can maintain that foot position. One way to check to see if your foot is in the right alignment is to lift your toes.
Can you stay in that position with the toes lifted and now place them back down without letting the arch collapse? Lift the toes and place the toes down. Excellent. Alright. Let's switch sides. Switch the dial to the other side.
Remember to hold it on the same side of the leg that you're standing on, and then shift that weight over. You want that pubic bone right over the foot You have to allow that weight to shift because sometimes if you're not confident, it'll look like that. So we wanna have pelvic alignment so that we're not hiking, and we're not dropping, and we're centering that pubic bone right over the foot. So if you're looking in a mirror, then you can see that at home and make sure that you're shifting your weight enough. Alright. Now let's list the toes, place the toes down.
This is gonna help lift that arch, keep you from flattening the arch or collapsing and lift and lower. Alright. Now bring your feet back together. Shift your weight side to side. Just a little bit.
You can't shift quite as much when you're feeder together. And then we're gonna rise up and down a couple of times. And then Let's try to separate the feet, rise up and down again. And let's see if we can hold that. And then lift the dowel off the floor just 1 inch and see if you can hold that balance and then take it down.
Alright. Now, feet back together. Let's bend the knees. Sometimes this is when the trouble starts. Right? The knees bend, and lots of things might happen. So with your feet together, it usually is gonna prevent you from collapsing through the arches and pressing the knees together or allowing the knees come together.
This is what we call a pattern of aging. And so as we age, if the legs are not staying strong and well aligned, we will tend to brace the knees together to stand up out of chairs. So we wanna practice with the knees apart, knees going toward at least the middle of your foot may be the outside of your foot and as we do our knee bend. So we think of it in dance as a plie, right, which a plie might look like this. So that no matter where your knee is going, foot goes, the knee has to go. So no matter what direction that foot is pointing, my knee has to follow.
Because if I plant my foot and turn my knee, or plant my foot and turn my knee, then the foot collapses, the knee rotates in, and then we stress the medial collateral ligament on the inside of the knee. The meniscus is not happy about that, and so we wanna keep our structures aligned as we do our movements. Alright. So bending the knees, notice also what happens to your pelvis. We'll be looking at the pelvis more specifically in an upcoming class. So I'm gonna turn to the side and then you if you tuck your tail under, it really shoves the femur forward and creates pressure on your patellofemoral joint.
That's your joint right behind your kneecap. So if we tuck under that's not gonna be a great thing. Right? We wanna stay vertical in our posture. Stay neutral in the pelvis as we bend and straighten. And then the other thing that can happen for some of you might be your tailbone kinda lifts and you arch your back.
And that usually helps the glutes work a little bit more. The knee's happier about that, but your low back might not be so happy about that. So basically we wanna just be completely vertical. So standing against a wall, sometimes is a good way to do this. You can go to a door frame or a door that has a glossy paint surface so you are able to slide up and down and just practice with your torso alignment and then you can focus more on your knees, your feet so that your back is supported and you have that feedback. It would be just like if I had my dowel behind my back here, and I'm going up and down. Right? And I have that vertical surface to slide on.
Okay. Now, one foot. Let's see. Can you lift one leg? And then bend the standing leg without letting it collapse in or rolling in through that foot. Can you maintain that tripod of your foot Remember that sixty, forty relationship as you bend and straighten. And I just think that's such a great thing to be able to do for strengthening your foot, strengthening your knee, and especially preparing for some of the bone building exercises that you'll need to be doing to keep your bone strong. Alright.
Now next, we're gonna start to prepare to get down on the mat. So you'll stand at the back edge of your mat If your mat is a typical yoga mat that is 6 feet long, you're gonna put your heels at the back edge of the mat, and then you're gonna step forward about halfway on the mat. Some of you may not be able to step all the way forward. That's okay. Just see if you can take that long stride. One of the things that's important to notice about your stride length is if you're 5 feet tall or taller Your stride length is usually gonna be about 36 inches.
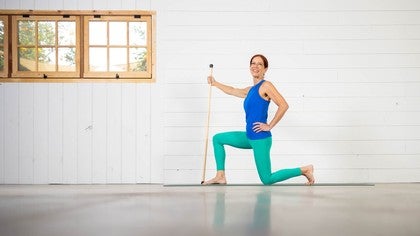
So I'm just gonna demonstrate something here. You don't need to do it, but if I were to to check my own stride length, It should be that my back knee is at a ninety degree angle. My toes are tucked under, which is gonna create a lot of stress through the toes and they need to be focused on extension of that great toe, especially. So if you're limited in extension of the great toe, this might be a position for you. And then it's gonna limit your ability to do your warrior poses and things like that in the future. So your front knee is gonna be bent to a ninety degree angle right over your ankle.
You're gonna be vertical. So here I am here. I'm just checking my vertical posture with my dowel. And now I'm gonna see, can I stand up from that position? Right? So again, you don't have to do this right now, but what I want you to see is how to measure your stride length because your stride length is when you are down on the ground, one knee bent to 90 degrees, back knee bent to 90 degrees, torso vertical.
And then sometimes you can't get up from here because you might not have enough strength in that back leg to be able to push yourself to vertical. So From here, remember to take that long stride length and then stretch the heel down and back, keeping your knees straight. This is gonna help you extend your hip. This will help you extend through that ankle joint, and stretch the calf. It's a great preparation for going for a walk and wonderful preparation for many of the yoga poses we'll be doing coming up.
Alright. Let's step together and step back with the other foot. Rising up and down with both feet pointed straight ahead. Very important that you look at that back foot and make sure that it is pointed straight ahead if it's turned out then your likelihood when you get down to the mat is you're gonna twist through that knee. So we wanna keep that foot so that the heel is right over the top of the foot, through the middle of the foot, weight through that second and third and 4th metatarsal, and then stepping together. And now we're ready to go into the next sequence where we transition ourselves to the mat.
Empowered Aging: Bone Health
Comments
You need to be a subscriber to post a comment.
Please Log In or Create an Account to start your free trial.


