Description
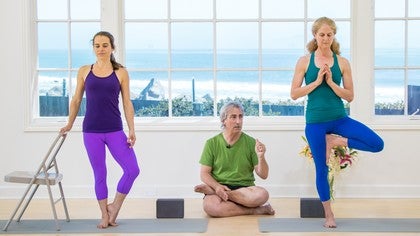
Richard begins with an exercise designed to prepare us for the actions of Tree Pose before leading us into the posture step-by-step. Alana and Betsy demonstrate versions of Vrikshasana that are appropriate for all skill levels.
About This Video
Transcript
Read Full Transcript
Hi, we're here, as always, with Betsy and Alana. And we're going to demonstrate the tree pose, rikshasana, which is the second of the two standing poses in this sequence. But before we do that, we're going to demonstrate an exercise that I like to do before I do tree, which I always find very helpful. So if my yoginis would please stand and put the blocks between your thighs, you want the blocks on their sides, but you don't. You want to have them about midway between the perineum and the knees.
So there's a little bit of space between the top side of the block and the bottom of the pelvis. Toes, you can have your feet parallel to one another, or you can turn them in slightly as you prefer, slightly pigeon-toed. And then with an exhalation, tip your torso forward down into uttanasana. Now, this is an imaginary exercise. I'm going to ask you to do what you have to pretend to do.
So you start out by bringing your hands up onto the back of your pelvis on your sacred bone. And as always, you want the bone to spread across the back of the pelvis toward the hips. And then you slide your hands across the back of the pelvis to the outer hips. And as always, you want the outer hips to be nice and soft. Then you come down to the outer thighs.
Now it all begins to change. Now, physically, we know that we're squeezing the block with the inner thigh muscles called the adductors, the adductors. But, imaginatively, I want you to pretend that you're squeezing the block with your outer thighs, with your adductors, your abductor muscles. So the feeling is that the outer legs are pressing in very firmly against the block. One of the effects that has is to bring the inner feet down very firmly onto the floor, in particular the bases of the big toes.
And when that happens, you have to be sure that you draw very strongly up on the inner ankles. So the inner ankles are then equidistant from the floor. So we'll let them just press a little bit more on the outer legs just to get that feeling of containing the block with the outer legs. And then I'll ask them to slide their hands down along their outer legs toward their outer ankles, pressing in all the way as they as you descend. Very nicely done.
Good. And then bring your hands back up onto your hips and lengthen the front of the torso. Draw down on the tail and inhale, come up. Very good. And then take the block and lay it down on the floor.
Okay, blocks away. And then you can turn and face forward. Now, as always, Ilana is going to do the more basic version of the pose. And Betsy will show the more advanced or more challenging position. And as you can see, Ilana is going to help have a chair to use to help her balance.
So the first thing I want both of them to do is to shift their weight over onto their right foot. And when you do that, you have to shift the entire torso to the right so that when you look down the midline of your torso through the sternum and belly button, that line that extends down toward the floor cuts right through the center of the foot. So if you could see yourself from the front, what you'd see is that the standing leg is a little bit angled relative to the floor. In other words, the heel is directly below the perineum, not below the same side hip. And then I'll ask Ilana just to bend the left knee just a little bit and bring the heel up against the inner ankle with the toes on the floor.
We'll start her this way, make it nice and easy. And I'll ask Betsy to bend the left knee and begin to draw the heel up toward the groin. Now, when you bring the foot into place in tree pose, you want to touch the ball of the foot first and then drill the heel into the groin. Now, I want to make sure that Betsy doesn't push that knee back so the left knee comes a little bit forward. The left knee is the baddha konasana knee.
So you want to push the knee away from the pelvis but not back toward the wall. What goes back toward the wall is the groin, not the knee. Very nice. Now, here's where the block exercise comes in. Can Betsy find that imaginary block?
She used the sole this time and firm the outer thigh against the left sole as she continues to press the left sole against the inner thigh. So she makes that leg very strong and contained, inner foot firm to the floor, base of the big pressing down, and then she draws up from the inner ankle along the inner leg into the torso and lifts the top of the sternum bone up toward the ceiling. Alana is doing very well on that one leg. Let's see if she can bring the left foot a little higher up onto the inner calf. And we don't want to push against the knee exactly, but on the inner calf is good.
Now, can you let the left knee come a little bit forward, please? Yes, that's right. Very good. Now, can you balance in that position with the hands and anjali again? Very nice.
Spread the palms and firm the palms against each other. The thumbs rest very lightly on the sternum. Well done. Now, when you come out of this pose, you want the foot to touch the floor as your hands touch the hips at the same time. Exhale, release, and come down.
Well done. And then you can shift over onto your left foot. And again, remember that when you shift, you want to let the torso move over to the side. And again, you want to be over the center of the foot, the center of the torso over the center of the foot. And again, you can start to bend the knee and bring the heel up.
And let's just start again in the easy position with the balls of the feet on the floor. Very good. Bring your hands onto your hips. Oftentimes now the raised leg hip is a little bit higher than the standing leg hip. So again, you want the outer standing hip nice and soft.
Release it out to the side. Drop the head of the right thigh bone deeper into the pelvis. Again, the bent knee is the bada konosana knee. As you drill the right heel into the inner left groin, you want to push the right knee strongly out to the side away from the pelvis. Very nice.
Can you bring the hands up? Well done. And Ilana, can you raise the foot up a little bit more? Yes, you can. Very good.
Nicely done. Tailbone long, stretching down toward the standing heel. Hands again in the gesture of supplication, anjali mudra. Very nicely done. Beautiful, both.
Vriksha is a tree or a vegetation in general. Exhale again as the foot touches the floor, the hands come down and rest on the hips. Beautifully done. And this is Vrikshastha, the tree pose. Thank you.


You need to be a subscriber to post a comment.
Please Log In or Create an Account to start your free trial.