Description
About This Video
Transcript
Read Full Transcript
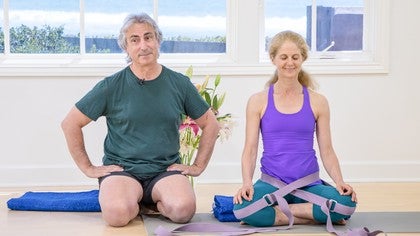
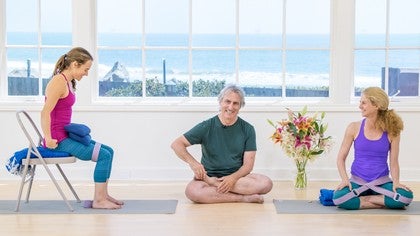
Hi we're here with our friends Betsy and Ilana and we're going to do a very brief tutorial on how to sit in preparation for breathing and pranayama and meditation sorry. Sitting is a very important part of the practice it's oftentimes people don't pay much attention to it but without a proper sitting position the breathing and the meditation become very very much more difficult in fact proper sitting is a precursor to meditation it leads directly into a meditative state and we're going to demonstrate two different ways to sit. Ilana to my right is going to sit in a chair as you can see and she'll represent more of a beginning student who's not perhaps capable of sitting on the floor comfortably quite yet and Betsy to my left will represent the more advanced or more adept student that's sitting on the floor anyway. So you want to sit on the front edge of the chair what you see what we've done is we've we put a blanket underneath Ilana's buttocks in order to tilt the pelvis just a little bit forward you you want to be sure that when you sit whether it's on the floor or in a chair that your pelvis is brought into a neutral position that's very important typically what happens with with many people is that when they sit their pelvis drops backwards into their tailbone and that creates a disturbance in the spine if the spine can't lengthen upward then the breathing it it's much more difficult so we put a little blanket under her sit bones to help her bring her pelvis to a more upright position and we're going to make sure also that her thighs stay parallel to each other we don't want the thighs to to either drop in or drop out so in order to help that we have a strap at the ready and we're going to bring the strap over her thighs just a little bit above the knees here you are now it's very important when you have the strap in place to be sure that you don't let the knees push out into the strap you've got to try to keep the thighs as as neutral as possible belt here and then we have some weight for her thighs these sandbags and we're going to put them right on the heads of her femur bones right where the thighs join the pelvis and we have two if you only have one that's fine that'll work quite well but if you have a little bit more weight it helps even more the grounding of the femur bones here really helps the spine to lengthen upwards in this position you want to be sure that the sacrum bone at the back of the pelvis and the shoulder blades and the upper back are very firm against the torso and at the base of the skull is lifting very lightly away from the back of the neck so the chin will dip down just a little bit toward the top of the sternum bone shoulders release away from the ears elbows heavy and hang down toward the floor and this looks pretty good I think she's all ready to sit and be happy we'll go over to to Betsy now and she's gonna use two straps to bind her thighs so let's take this one first bring it over the hip and then what you do is you make a loop of the belt and you bring it over one hip and the opposite knee and you always have to be sure when you use the belt that you're pulling the belt across the front of your torso you'll see what I mean in just a moment so she slides the belt down onto her sacrum bone a little bit lower in the back if you don't mind let's have a little bit more bigger yeah yes and then she wants to make sure the belt is right on the kneecap now to tighten the belt here's what you do you lift in the upper lip not too much a little bit just a little bit up off the floor and now snug the belt and you see that she's pulling the belt away from the knee toward the opposite hip and now rather than bringing the knee straight down toward the floor push out into the belt and lengthen the thigh bone away from the pelvis that's exactly right and now let's get the other belt in place so again it's very important when you when you pull on the belt that you pull the knees closer to each other that's why you want the belt to be pulled across the front of your torso to the opposite side remember it has to be very low down near the tailbone and then she'll bring it over the left hip and the right knee again there's a little hollow spot in the patella in the kneecap and the snap and the strap snugs in there very nicely and then again firm it lift the knee then pull on the strap tighten it and then again to bring the knee down push out away from the pelvis just like that very nice this is this is a very old problem it's often thought that props are 20th century invention but they're really not yogis have been using props for several hundred years this one originally was just a single belt wrapped around the back of the pelvis and the knees together and it was called a yoga pata which means a yoga girdle now the instructions are the same for Betsy that they were for Ilan and that is the sacrum is firm to the back of the pelvis which is helped by the straps and the shoulder blades are firm to the back of the torso the shoulder blades firm to the back helps to keep the sternum bone lifted and again it's very important to get that little bit of a release at the base of the skull it's not so much a physical movement that you don't want to just tip your head down like this you want to try to feel an energetic or an imaginative lift at the at the occiput away from the back of the neck and what that does is it creates a draw or a pull on the crook of the throat and that brings a the hyoid bone at the root of the tongue deeper into the head and it also helps to lift the sternum bone the lift of the base of the skull is very important part of the practice in the sitting practice that is now just to be clear about the belts you want to be sure that the belt crosses from one hip to the opposite knee and remember always when you tighten the strap that you want to be able to pull the free end of the strap across the front of your torso to the opposite side that brings the knees closer together which is what you want to have for any sitting position and I think she's also ready to go into the into into her breathing practice or into meditation you can tell by the smile on her face thank you
Pranayama & Meditation: Meet Your Breath
Comments
Namaste
You need to be a subscriber to post a comment.
Please Log In or Create an Account to start your free trial.


