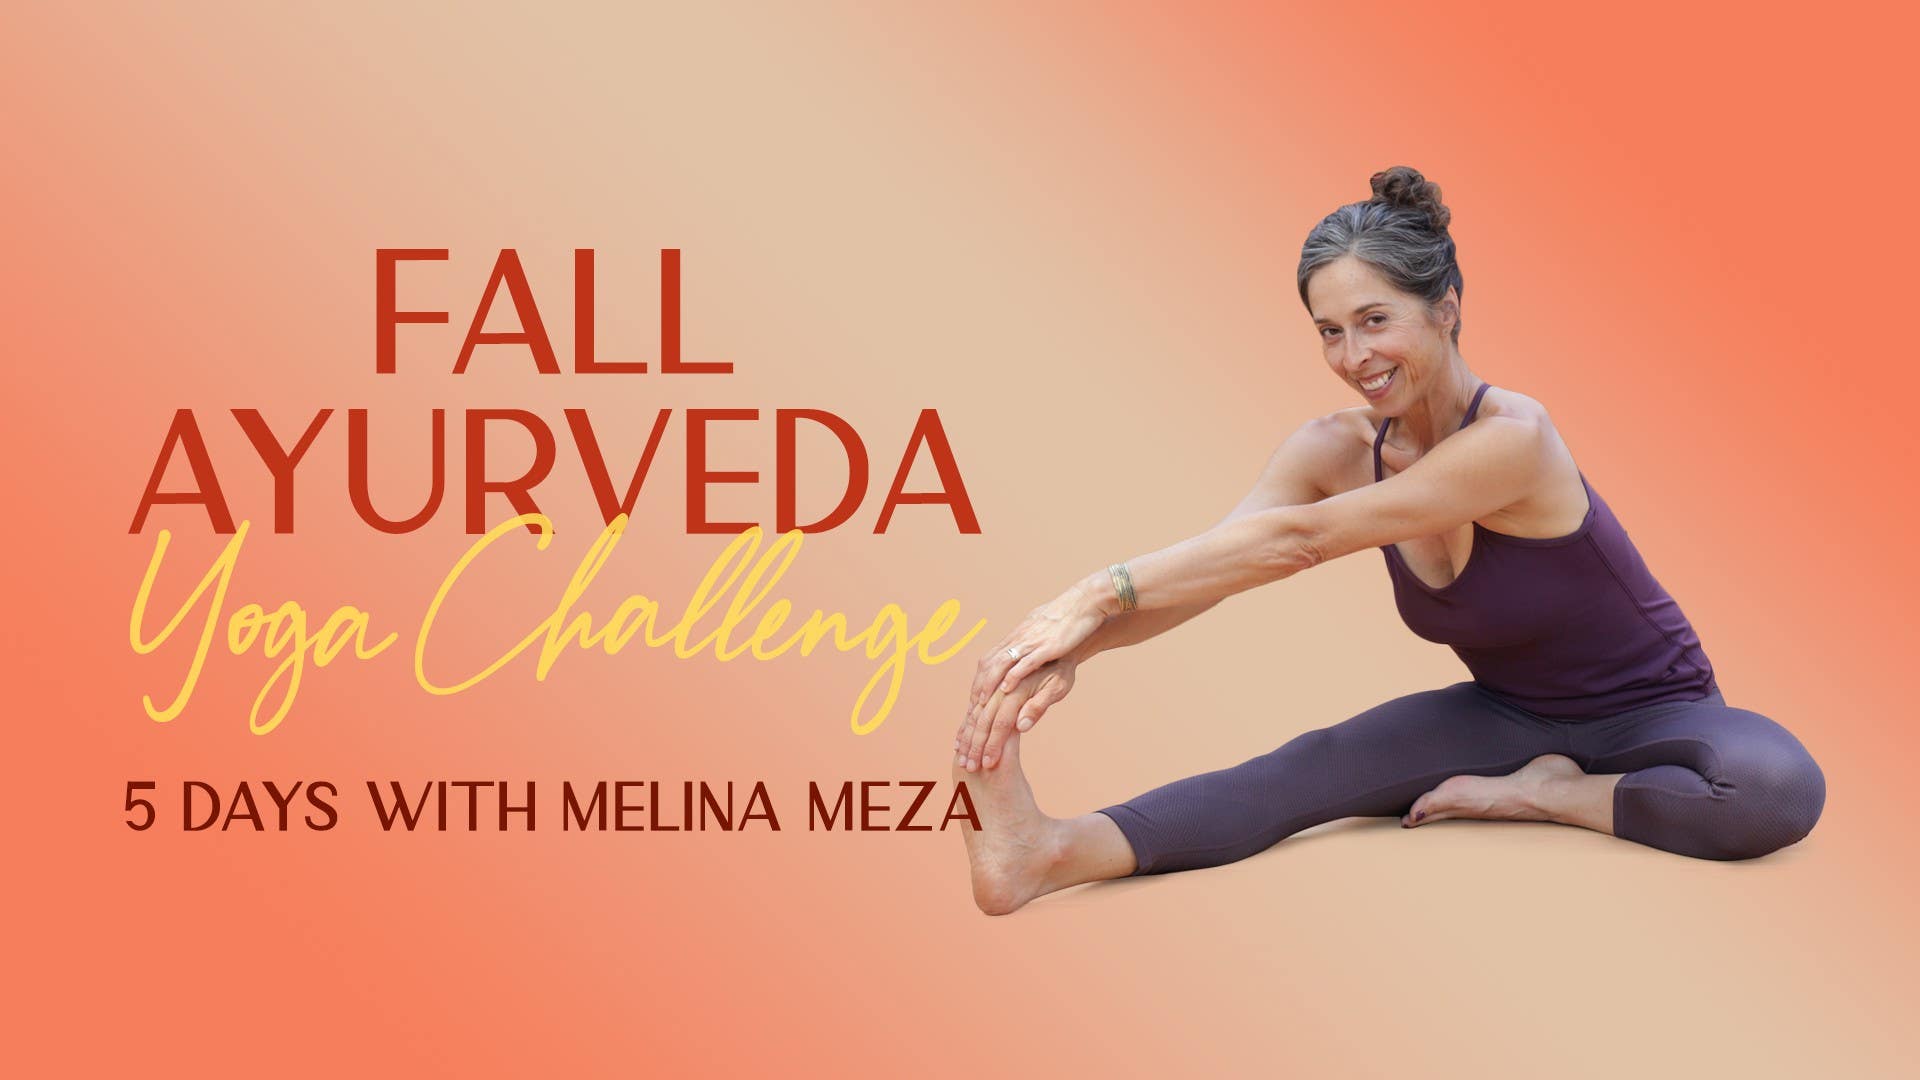
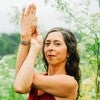
Description
Your Self Care Homework:
Initiate your self care routine by starting the day with these simple steps:- Move your joints: Exercise the joints of the body to improve overall circulation, decrease the stress that builds up during the day, and get better sleep.
- Drink water: Drink room temperature or warm water in the morning with lemon or apple cider vinegar to increase the digestive fire.
- Oil the skin: Apply coconut or olive oil to the skin to calm the nervous system, combat dryness, and protect you from the external environment. Add a drop of your favorite calming essential oil (lavender, vetiver, rose) for added enjoyment.
About This Video
Transcript
Read Full Transcript
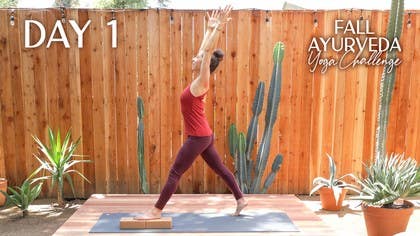
Hello, everybody, welcome to day one of the Fall Ayurveda Challenge. I'm so excited to be here with you today, and we're streaming here from Ojai, California. And I'm going to offer you a practice today that will hopefully help your joints feel really happy, thus our class is called Happy Joints. And I believe all we'll need for class today are two blocks, and I want to start with a practice where we're sitting and using the blocks right away. I like to have mine flat and wide, and I want to suggest if you have yours tucked towards the back corner of your mat where your feet are, and if you slide the wide blocks between your feet, have a seat on your stacked blocks so that your ankles and your knees are okay with this shape.
And if the seat doesn't work for you, please choose an alternative, have a chair or sit in a bed, whatever helps your knees be comfortable here. So if you find your place to begin, palms on your thigh as an actual grounding gesture, and then whether your eyes are open or closed, if your eyes are open, perhaps you find a focal point somewhere down beyond your nose, and that becomes the one place you try to keep your eyes for the practice, or close your eyes and maybe you find an inner focal point, the heart, the navel, something where you're decreasing the external distractions. And then refining your posture, little last minute adjustments here so that your ankles, your knees feel safe, pelvis feels like it's in a good spot for your lower back to lengthen. And then sense your way up through the natural curves of your spine, creating some space along the joints of the spine, eventually feeling the top of the head lifted towards the sky above you. And I want to start this autumn practice with a little more awareness of your breath and a practice that's hoping to even out the four parts of your breath.
Maybe you've done the Samav Riti before. And what's it like today if we begin just paying attention to a comfortable inhale length? So as you breathe in, counting how long that is, and see if you can do the similar amount of time as you exhale. And if you don't like counting your breath, just sense that you breathe in and fill up your lungs three quarters of the way. And when you exhale that you're exhaling three quarters of the way out.
If you like to count, maybe it's a two or three second inhale, and see if you can orient now towards an exhale that's two or three seconds long. And we get comfortable first just with the inhale-exhale part. And we know as easy it is to focus on the breath, the thought of focusing the breath sounds easy, but we know it takes practice, it takes a certain amount of effort to stay oriented towards your breath. Just a few more now, and noticing now the pause at the end of your inhales, see if you're able to pause for maybe three or four seconds here. Then you exhale three or four seconds out.
So we're just practicing paying attention to three parts of your breath, inhale, a pause, and then exhale. Just another round getting comfortable with the three parts of the breath. And then what's it like now if we layer in the pause at the end of your exhale? So we're inhaling a certain number, exhaling that same amount of time. Now let's add in the pauses, inhale your certain number, we pause, exhale that same number, and we pause and settle in.
A couple more in that same way, your breath is four seconds, breathe in, pause four seconds, exhale four seconds, pause four seconds. So what I like of that practice is how it helps to give your mind something specific to do as we settle. Now I want to add a little bit of sound into your breath. And perhaps you let your eyes open if your eyes have been closed, look out to the horizon line. And we're going to do four movements for your neck and move these joints of the spine.
We'll turn your head to your left, turn your nose to the left, that's one move, back to center, turn the nose to the right, move number two, back to center, chin up is third, and then chin down will be fourth. Now we're going to add in those sounds that make up our om and we're just going to break it into different parts. So as we turn our nose to the left, we're going to come back and make an ah sound. Turn the nose to the right, come back to center, we're going to make an oh sound. Chin up, as we come down, we're going to make an e sound.
From chin down to up, mmm, that wonderful buzzing sound. Okay, so let's sit tall and let's try that all together. Turn your nose as you inhale to your left, ah, to the right, oh, chin up, ee, chin down, mmm, to your left, ah, to the right, oh, chin up, ee, and chin down, mmm. One more, nose to the left, ah, to the right, oh, chin up, ee, and chin down, mmm, let your eyes open. Alright, thanks for working with me on some sound and movement for the neck.
Let's go ahead and come off the blocks that you might be sitting on and we'll set them aside for a little bit of time. Come on up to stand and as you come up to stand, separate your feet, if you will, about hip distance apart. Bring your palms together for a moment in front of your chest and lift your elbows a little bit out away from your chest. We're going to stretch your left arm out to the side as if you're holding a door open with your left hand. You might feel a little nervy stretch down that left arm.
Okay, turn your nose here to the right as you press out through that left arm. Bring your hands back to center. Press out through your right arm and you might feel that little nervy stretch. Turn your nose to the left. Come back to center, chin again tilts up, we look towards the sky, and then bring your chin back down towards your chest.
One more time, look straight ahead and with your left arm out to the side, go further back about another inch to open through the chest more. Again, you might feel that nervy stretch through that inner arm or chest. Turn your nose to the right. Turn your nose back to center. Bring your palms together and one more time, bring your right arm out to the right and take your arm back another inch or two.
Really turn your nose to the left, keep pressing out through that right wrist. Hands back to center, last time chin up, chest up, and then bring your chin back down towards your chest. Okay, now look straight ahead, bring your feet out wider and we're going to come into this place where we're going to stay in the legs in our famous horse seed or straddle pose, lots of different names for the legs here. And what I'd like you to do is let your arms come down and we're going to do this little tapping and twist where you let your arm, one taps in front, one in back. So we're going to tap low, down by your thighs and outer hips.
And I'd like you to notice as you're turning side to side that there's different joints of your spine that you're moving, not the knees, just joints of the spine. Now tap up a little higher towards the lower waist, actually tapping against my body. Tap up above the chest and behind the back of the rib cage. So elbows are bent, turning to look over to the side. Okay, now tap again lower, down towards your waist, different movements for the spine, down by your hips, just tapping.
Okay, so as we're moving again, lots of different joints of the spine moving. Come back up to your waist, go back above your chest and to the upper mid-back of the ribs as far as you can reach, up behind you, turning your neck. Now we'll come back to center through these moves for the spine and pause like you're holding trays in your hands and just for a moment settle here. And then move your arms straight forward and like you're holding a ball between your hands. Bring your thumbs down to the left and then up and over to the right like you're drawing big figure eight.
And I'd like you to follow your thumbs with your eyes and notice the legs aren't moving at all. We're not bouncing, we're just following the hands, in particular your thumbs. And feeling all those different joints of the spine that you're moving as you make those big figure eights. Next time you come to the left, we're going to pause and reverse and go up and follow your pinkies. Let your brain turn on here as we do some movements now the opposite direction.
Some movement patterns I learned from some dear friends at Breitenbrusch Hot Springs who do this edu system. Really great movements for the spine, carving out your figure eights. Now let's come back around to center position. Pull your elbows in and if you felt a little dizzy you come back into that centered place here. Now keep your right elbow where it is and we're going to let that left hand reach out in front of you with the wrist flex.
Look out towards your palm, pull your elbow back in and sweep out with your right hand. And as you alternate and you sweep out in front of you like you're clearing your windshield all the way around this unique shaped windshield, clearing our vision, see if you can feel those muscles and joints that you're working in your upper mid-back as you sweep across the center line. And ideally you start to feel like there's better glide and move of the shoulder blade, easier movement for your neck. Starting, clearing your vision with right hand, left hand, right hand, and left hand. Let's come back to your center.
All right, now from your center place let your arms reach up all the way up towards the sky and we're going to take the left arm down but keep that right arm up and we'll turn the belly and chest to the right, look to the right. Right arm down, left arm up, turn yourself slightly to the left. And then you go a little faster, right arm up, turn to the right, left arm up, turn to the left. So it's kind of an organic movement of going back and forth through your rotation, turning to look back behind you. Legs aren't moving.
I suspect the legs right now are starting to feel a little bit warmer. So you can continue to sink into your legs and working these different joints of your spine. Do a couple more, side to side, getting those lungs lifted and then come back around to center. Okay, now if you put your left hand on your left leg, imagine when you reach out with your right hand like you're picking up a scarf out of a hat and flex the wrist and you lean over to your left and keep flexing that wrist, right wrist. Bring your right hand down and pick up that invisible scarf on that left side and flex the left wrist as you lean to your right.
Bring that left hand back down. Feel this through your wrist on the right side as you lean to your left. Right hand down, pick up that scarf with that left fingertips and arch to your right. Come all the way back to center. Okay, last piece, bring your fingertips to the upper corners of your chest.
Raise your elbows up and we're going to do a little rotation side to side without moving your legs. It might not be the biggest movement, but just a little bit of movement for these different joints in your spine. Turn, turn, turn. As you come back around to center, pause. Arms out straight with your palms facing forward, tuck your thumbs into your palm.
All your fingers curl around those thumbs. We're going to roll the wrist joints and we're going to try to get into every single joint at some point in class, let your wrist go the opposite direction a few times. Okay, still working with the legs. All right, now go ahead and let your arms drop down, straighten your legs and turn your toes in, heel toe, your legs and feet towards each other. Hopefully your legs feel a little bit different, give them a shake out.
I know if you find your hip feet under your hips, hands up to the sides of your waist and shift your weight to the left, please, as you take your right knee up and circle your right ankle. Still working, making that left leg a little stronger, go the opposite direction with your right ankle rolls. And now let that right knee and thigh move. As you stand, try to look straight ahead at your horizon line and falling is just part of the practice. So might happen a little bit or not at all today, just every day is a little difference.
Little circles here. All right, let's step into that right foot, shift your weight and good posture, lift your left knee up and let's circle that left ankle around a few times. All those popping, cracking sounds out, go the opposite direction. Okay, noticing the lower leg without judging is a lower leg solid today, wobbly, still really good, working lots of little muscles in that standing leg. Let's move that left knee and thigh around and again, wobbly, really great.
So no judgments on today's it's stable. Are we moving a lot? All right, now let's go ahead and put your feet down on the floor. Now we're going to do a little section that requires blocks. And what I'd like you to do is stack your blocks in a line.
And if you have them in a line, it's basically so you can have a foot on front part and also the back part, it should work for a small foot to a really large foot. So if you're standing, let's say on your left leg to begin with, let yourself hold onto your hips for a moment and then come up to stand on that left block and then put your right foot down. So you're lower, you touch the ground, you lift off the ground so you know how high you are and then come down. Now we're going to stay up on the block, bring your right knee up slightly towards your chest and stretch your right leg straight in front of you. Going to swing the leg out to the right, a little bit behind you and then back out to the right and in front of you.
See if you can do this without your left knee twisting. Right leg to the right, right leg behind you. Now your arms out to the side can help you balance, right leg to the side in front of you. So you're kind of drawing a half circle with your right leg while trying to keep your left knee from moving. So your circle might be small, draw that line around you with your right toes, working at bringing a little more strength and stability to the joints of that left leg as we bring a little more mobility into your right side.
Next time please bring your right knee up towards your chest and hug the knee up towards your chest before you step it back into what would be your Warrior I footprint. Raise your arms up in the air by your ears as you wiggle your front foot far enough forward that you feel like you're settling into both feet and then what I'd like you to do is to push into your right foot, sorry, your front left foot to bring the front of your abdomen and pelvis up away from that left thigh so you make more space in that joint. Kind of sink forward into your left thigh so you feel what the difference is like versus when you move yourself back and you make space in that left hip engaging that lower abdomen. Okay, we're going to play that from that Warrior I shape. Go ahead and lift your back heel up.
Now you're in that high lunge and from the high lunge bend your right knee towards the ground a few inches. Press into both feet and come up to straight legs, stretch up tall. Bend both knees, lower your right knee towards the ground, really pushing that left foot straighten both legs and come all the way up as high as you can reach. One more time coming down slowly to that lower lunge. Press yourself all the way up and then from here let your arms reach out to the side as you step that right foot in again for your Warrior I footprint.
Hold your hips with your hands. Move your hips back in space as you fold slightly forward. Maybe your body's parallel to the ground. Now do we feel a deeper stretch in that left hamstring area? I hope so.
Keeping a nice long spine. Let's tip all the way back up to center, take that left arm around to the small of your lower back and your right arm up by your ear. Let's come halfway forward as you press into your left foot, pause, inhale all the way back up. Remember that breathing technique we started with? Inhale four seconds.
Reach out in front of you and pause. And then inhale again, come up four seconds to find the top of the pose, pause, exhale maybe four seconds and then a short pause. One more time, inhale maybe four seconds to come up to the top, pause, exhale as you come parallel to the floor, pause. Inhale all the way back up. Arms down at your sides.
And step that back right foot forward and then step off the blocks, stand back and maybe shake out your legs. We're going to switch the blocks to the other sides and put your feet on the block, maybe some part of your foot's on the front, some is on the back. And then let's go ahead when you're here and do that little stepping off and on just so you're aware of what that feels like on this new side. Hands to the hips when you're even and ready, slightly bend that right leg as you stretch your left toes forward, swing it out to the left, a little bit behind you and then again out to your left and then in front. Try to draw that circle with your left toes without moving your right leg.
And as best as you can, see if you can imagine that you're not moving much of your upper body, really trying to get the movement down in the hips, all those different muscles you're waking up in that left leg as you stand on your right foot. Couple more, not being in any particular rush, just feeling that concentration as you balance. Let's swing that left knee up into your hands and hug that in towards your chest. And nice and tall on that right leg and then arms up, step back into your warrior one footprint and it might take you a moment to inch your front foot more forward or step out wider so that you feel stable and like you can sink into both feet here. Press into your right foot more to help lift that lower abdomen up away from your front right thigh.
See if you can feel like you get more space in the joints of the lower back here, more space in your shoulders to lift up here as you press into your right foot. One more moment in that warrior one shape, getting more length. Before you lift up your back heel and discover again, do you need to adjust your feet the distance to come up to the ball of your back foot, straighten your front leg and now let's lower the left knee towards the ground. Push into the blocks to initiate that lift back up to straight legs. Left knee drops towards the ground, we're in that low lunge.
Press into your right foot, come up straight legs. Low lunge, push into your right foot to get you up. One more time, coming down slowly, long spine, push into the block, come on back up. All right, let your arms lower, parallel to the floor, step in, hands to your hips and now let your hips go back in space as we bring our body parallel to the floor or some version of that. So we're hinging from the hips, long spine as you press into both feet.
Just kind of feel what that's like. Now let's take your right arm around your back, left arm is going to lift you all the way back up to vertical. Let's reach out now halfway forward, get used to the movement, long spine and then come all the way back up. Now let's take a big inhale here, maybe three, four seconds. A pause, exhale three or four seconds, reach out, pause, inhale three or four seconds, come up, pause, exhale come forward three or four seconds, pause, inhale come up, three or four seconds, pause, exhaling, we take our pause, inhale all the way up, arms down at your sides, step that back foot in and then put both feet on the ground.
We're going to transfer your blocks and let's go ahead and set them maybe to about the middle of your mat, still that long format. Let's simply put your left foot on the block, we're going to come to what would be your normal warrior two position. So separating that right foot further back away from your left foot and see what happens when you bend your left knee towards your 90 degree angle, go in and out, so your knee is more or less over that ankle and then when you feel like your feet are in the right position to balance your pelvis, take your arms out to the sides and turn your palms to face up towards the sky, get wider across your chest and please press into your left foot, into the blocks to see if that's helping those hamstrings lift up towards that femur. Keep that leg completely engaged as you reach over to your left side and reach your forearm down and then reach your right arm above your ear or cheek. You're going to have this right arm drop down in front of you and circle up and around and then again reach forward, down and around and getting that shoulder joint area working here.
You need to press into your left foot, we'll do one more loop around, all the way around. Keep that right hand towards the sky, press your left arm into your left leg to keep that left leg in more external rotation. Open the front of the chest. Press into your left foot to help you come back out, all the way out. With your foot still in the block, slide your left hand to your knee, take your right arm back up towards your ear for your triangle and feel here if you unlock your left knee.
Does it feel different to go down towards your ankle when your left foot is elevated? See if you might wake up a new part of your hamstring or the back of your left leg that you haven't really felt before in triangle pose. I think a fall is a time we go back to school, a time we maybe start to learn something new in your awesomeness, something new in an old familiar friend like triangle. Press into your left foot please as you slide your hand up your leg, we exit, wiggle your right foot closer to the center and then off we go. Shake out your legs, see what feels different here and let's transfer over to your right side, the foot straddles the blocks, bring that left leg back into your warrior two stance and you might go in and out a few times to make sure your knees feel happy, arms up to the side with palms up and a sense of pushing into your right foot to literally create space in this hip crease, firming those hamstrings up towards the femur bone.
Keep working that right leg as you reach to your right, left arm above your head and then we'll let this left arm go into movement as we try to feel greater range of motion in this joint and follow that arm around that doesn't make you dizzy and get more movement through the neck or just continue to look straight ahead. One more circle and we'll keep that right arm straight up in the air, refresh your commitment to pressing into your blocks and then go ahead and start to straighten your right leg and now try your triangle pose and kind of slide right into that as you press your right foot into your blocks and can you feel there's some new part of your right leg that wakes up when you're pressing firmly into the blocks, can you open your chest a little more, reach towards the sky a little bit better and take one more moment as you are here and then slide your hand up your leg, the left arm down at your side, bring your left foot a little bit closer both feet to the ground and go ahead and shake that out. Okay, we can get rid of your blocks now for a little bit, let's come back now to the top of your mat. If you're here with your feet about hip distance apart, we'll make our transition by sweeping the arms up and look up and try to lift out of that lower back waist, bend your knees maybe in an audible exhale as you come forward and down. Step into your plank and as you settle into your plank, try to shift your weight right left, right left and then come into a downward dog as you exhale getting a little energy back to your legs and then now let's come down to the knees.
Okay, so pull your hands in under your shoulder line, relax your toes and we're gonna do something for the wrist first, we're gonna turn your fingertips so they point back towards your left knee and then turn that hand back forward. Do the same now with your right hand, it turns in towards your right knee and then come back to center. So let's see if we can alternate, we're gonna turn your left fingertips back towards your knee and then do that with your right hand. Put your left hand forward and then turn your right hand forward. Again, turn your left fingertips back towards your knee, then your right fingertips and release that left hand and then your right hand.
Okay, so it gives a little stretch to the wrist. Now bring your knees a little closer together, swing your left leg out to the side, I always think of the little dog at the fire hydrants and from there stretch your left leg straight and lower the big toe side of the foot to the floor. Arms are straight, as we lift that left leg back up, bend your knee and bring your knees back together. Again, a little mini fire hydrant action, left leg straight, drop your foot to the floor, raise your left leg, bend your knee and knees circle back together. Two more, little fire hydrants, left leg straight, foot down, foot comes up, bend that knee, circle legs back together.
Last one, fire hydrants, legs straight, toes touch down, bend your knee and we're back together. Okay, now the second side and if you need to circle your wrist or twinkle your fingers in between, keep yourself healthy here and now shift your weight slightly to your left as you take your right leg out. Stretch your legs straight, toes drop down, lift that leg, bend your knee, circle back in. Again, fire hydrants, leg goes straight from there, foot down, lift that right leg, knees circle back together. Two more, fire hydrant, leg out straight, lift that leg, bring your knees back together.
Last one, fire hydrants, leg out straight, drop your toes, lift your leg back in, knees come back together. Now curl your toes under, walk your hands towards your knees and get that little stretch in your feet for a moment. Alright, now we're going to walk the hands if it's okay for you a little further back with your toes still curled under and then let yourself look towards the sky here, towards the ceiling with your fingertips on the floor. Open up the front of the spine, look straight up towards the ceiling. Let's go ahead and walk your hands back in and then shift your feet out from under your, we're going to come down and have a seat.
So if you start with your legs bent and adjust yourself, so when you're sitting now we can keep your legs straight, I'm going to have you bring this right leg in first, tip your knee a little bit to the side and we're going to pick up that right foot with your hands and let that leg swing in front of you to the right and left, kind of zig zagging kind of across the front line or maybe zig zag up higher towards the height of your chest. Okay, so just feeling what movement exists here. After zig zagging across multiple times, then we're going to pause, hang your right foot over this left knee area and lean back so you can reach your hands as you bring this left leg to this position that's almost like pigeon when we're doing this on our back or forward. So now if you're hanging your right ankle to the side here, some of you might stay here and if you do, turn your fingers away from each other. Lean slightly forward with your upper body or try today catching a hold of your left shin with your left hand, reach under your leg, potentially grab the shin with your right hand and then maybe you pull yourself forward or maybe you were in the perfect spot.
See if you might find just a place again that gives you a deeper fuller stretch in that right hip, kind of a healthy version of that stretch that relaxes your eyeballs and your jaw, easy to breathe into. Maybe we let that lower jaw release from the upper pallets. Okay, now let's go ahead and release your hands and as you take your hands back, we're going to press into your right foot, keep your right leg where it is, press into your left foot, sorry, and lift yourself up until you have straight arms. Bend your elbows and come down to have your seats. Push back up, come up to straight arms, bend your elbows.
Now you might find coming up a little higher, work through your body, lift your hips, look straight above you, come back down, do the little low push up or one more time, come up to that bigger push up, look towards the sky and come back down. Switch out the legs, your right leg is straight now, let's drop the left knee to the left and catch your foot with both hands and we're going to let that foot move back and forth across that center line. Kind of feel, does this hip move more smoothly or is this the tighter hip, does it zig zag up towards your chest or your forehead line, how can we create some space? Let's go ahead and drop that left ankle to the top of that right knee area, lean a little bit back so when we bend this right leg we've got some time and some space for that left hip to open before we try to move maybe the body forward and go deeper into that stretch. If you're going to stay here, recommend turning your hands away from the midline or lean forward and today maybe catch your shin, your right shin with your hands and maybe holding here allows you to lean slightly more forward and find what helps you take that big exhale, find that position that brings you maybe to some place in that left hip that would appreciate a little bit more of your prana, your focused energy, just another second to release any stiffness here before we release back and fingertips face the pelvis and now with bent elbows we're going to come up to straight arms so you lift maybe an inch or two, bend those elbows again, do that little push up, come up a few inches, lower back down or lift yourself up, maybe your pelvis comes towards the height of the knee, look straight up, perhaps lower back down, let's do one more and that way going up and then coming down.
Let's stretch your legs straight out in front of you now, have some space so that you can turn your toes in and out and we're going to go really quick, we're going to shake out the legs in this way, moving these different joints, just going back and forth really fast. Now we'll let the legs settle, keep your legs that wide now and from here I'm going to reach your left hand to your right foot, the right hand is going to be a bit of an anchor for a moment now we're going to reach over to the right, we're going to end up rolling onto our back and looking towards the sky with your left arm by your ear. Here's the fun part, press into your right hand, reach forward with that left hand back to touch your right toes, again reach out to the right and that left arm is taking you back down to the floor, look up, press into your right hand to help you lift up and reach again to your right toes, just feel all these different places in your spine that you engage as you roll to the floor and all those different joints you're engaging as you roll forward to touch your right foot, last time inhale roll down, now stay here and take your left arm down to your side, swing your right arm up by your ear and roll to your left and reach forward to touch your left toes with your right hand, right arm is the one that's going to take you down to the floor, look towards the ceiling, press into that left hand to help you reach forward to your left toes, pay attention to all those different joints of the spine you're using to come down and to lift yourself forward and up. Next time let's go down to the floor and take your right arm up and left arm both back by your ears, please bend your legs so your feet are on the ground, now knees point to the sky and let your legs drop over to the right side, their little windshield wiper, stay here and palms start facing the ceiling, I'd like you to explore turning your left hand so that your left pinky side of your palm turns in towards your head, towards the midline and that moves that left shoulder blade in that special way that might get you a slightly deeper stretch down through your lower back, down to the base of the shoulder blade and then continue reaching that left knee away from your shoulder, let's turn both palms back towards the sky, knees back to neutral, when your legs drop over to your left sides, now consciously turn your palm in towards your midline so your pinky rolls in towards your head, stretch your arm a little further away from your chest and feel that helps you get into a subdue spot in that right shoulder just by turning your palm a new direction, right knee stretching away from the chest, away from the waist, alright let's go ahead and tip back to center, both palms face up, bring both knees in towards your chest, lift both legs up in the air and now both arms up in the air, create some space between your feet and we're going to roll the ankles and the knees in our little inversion here, rolling ankles and knees, okay let's go ahead and roll the opposite direction a few times, okay so hopefully you feel like we got into most of the joints of the body here, I hope we did and we'll finish with the knees hugging in towards your chest and make a few circles with your legs to massage that lower back area and then from here if we keep the knees together and separate the knees out to the sides then move your knees forward, join them together and bring your knees back in towards your belly, knees wide, move your knees forward all the way back together, okay let's do one more of those little circles and as we finish this moving part and again the relaxation will be relatively short for this practice, your feet on the ground or drop your legs down to make contact with the floor, the earth for our little Shavasana to end day one of our fall challenge really to get a bunch of joints moving in the body and in doing so hopefully feeling like there's a little bit of improved circulation or mobility in your body that you could feel parts of your body moving as you're breathing in, there's some expansion and as you exhale that you are aware of your essence, your attention dropping in towards your center line, if you imagine that tube of your spine is the center when you inhale you're expanding away from that tube of your spine as you exhale you're moving into that center and now adding in that layer of Sama Vritti the even breath inhaling for three to four seconds if that number works for you there's a pause exhale three or four seconds a pause inhale three or four seconds so pause exhale three or four seconds pause two more cycles in that way count of your breath acknowledge each part of the breath as a way to focus the mind just feel a little deeper into this very moment and then trying to keep yourself oriented towards that center line just noticing what it feels like to be present in this moment and the next and the next may we choose this place of presence you Thank you very much. Thank you.
While you continue to receive the support of the ground, so we can take a few deeper fuller breaths right here. Feel the movement of your body as you breathe in and the movement in your body as you breathe out. Little circles through the wrists and the ankles here to inspire movement up through the thighs, the arms. There's ways to prepare you for the movement onto your sides and to that reclined fetal pose or side fetal pose. Turn over to your side whenever you're ready.
And then let's come up to sit and maybe recruit the same props whether you like sitting in the cross-legged seat or if you like sitting on your blocks. Please grab what you like for that lift to drop your knees lower than your hips. And then let's come back into that way of sitting for a moment that lengthens the spine. And then take a big breath in, a big breath out either through your nose or your mouth. And again, big breath in through your nose, big breath out through the nose or the mouth.
One more in that way, inhale and exhale through the nose or mouth. With the palms in front of the heart center, may our practice benefit not only ourselves but all beings everywhere. Namaste. So thank you for being with us. And as part of our practice this week, we're hoping to expand your yoga practice beyond the yoga mat and into your life, your daily life with a few simple things from the world of Ayurveda.
And my hope is that these little sets of things I introduce now will be things that you can fold in throughout the rest of this week or continue doing them for longer periods of time, maybe for the next three months. Each of these things are oriented toward the fall season, which generally means that there's an increase of air and space elements. And for some people that can create a little bit more dryness, a little bit more constipation, a little bit more disruption with our sleep. So some of the things I'm going to suggest are ways that you stay hydrated and that might help you sleep a little bit better and decrease that creakiness that comes in with the fall. So one thing that we did today was a lot of movements for the joints.
And the joints are places that are really vulnerable in your body. And so we think of the season we're in of fall as a transition time that we're vulnerable to potentially getting sick. So moving the joints regularly throughout the day, maybe taking breaks to do one or two joint rotation movements in the morning or later afternoon would be a nice idea to help increase overall circulation and get rid of some stress that might be building up over the course of a day. Because sometimes if we don't decrease stress later in the afternoon, it's sometimes hard for us to fall asleep because we still have that stress stored within us. So simple joint movements actually can really help us release some stress.
And then one of the things I want to recommend is having water in the morning or now maybe water after your yoga class as part of your ritual. And in particular, in the morning, we suggest room temperature or a cup of warm water. With lemon in the morning, lemon is a sour taste and it tends to increase the strength of your digestive fire. If you don't like lemon, you can use apple cider vinegar. A little shot of that is also another way to kind of boost the agni, the digestive fire, to prepare you for taking your first meal in.
And the point of having that extra water in the morning and mindful of having water maybe after you exercise and then throughout the day is to avoid constipation. So this wonderful saying is that you've got to have water in the canal for the ship to float out. So just making sure that you have sufficient hydration to have that morning elimination before you bring new things into your system and see if that helps you. So we've got water for hydration and to eliminate constipation, hopefully. We've got joint movements to increase circulation.
And one of the last things I want to introduce for today is to consider whether you go to your kitchen after class and you grab some coconut oil that you might have or olive oil that you might have that you would apply to the top of your skin. And so since fall tends to be a drier time of the year, we've been baked by the sun all summer and maybe your climate where you live is much drier, that we coat the skin and you actually rub it into your body as a way to calm the nervous system. And then the more that we do this, either in the morning or before you go to bed, if you struggle with any sleep disturbances, that this will tend to relax the nervous system a little bit more. So the idea is you would coat your whole body wherever you can reach and then leave the oil on to make that even a more pleasant experience. You might add a drop of some essential oil that you like.
It could be lavender or vetiver, sandalwood, rose, whatever you enjoy, something that's calming and mix a drop in, rub it in and take the time to put it on your body. Let it stay on your skin if you can. And then you would take a warm shower as a way without soap on the limbs so the oil soaks into your skin a little bit more. That leaves a nice coating for the day to protect you against the environment which is dry or helps you kind of have that extra coating layer of skin to help you sleep better. And what's nice if you're doing that in the evening, if your sleep is interrupted more, is that a hot shower in the evening will tend to increase your core temperature a little bit.
And then what happens when your core temperature increases is when you go to bed you'll start to cool down. And so as you start then to cool down, you will typically sleep better when your room is cold versus when your room is warm. So the hot shower pulls that heat out to the surface and then it'll quickly come back down to your center where you want it to go for you to have a good night's sleep. All right, so I wanted to just start with these few things to get you rolling for the start of our fall program. Water in the morning, we'll do some joint movements each class but maybe you add one more joint rotation move in your day and consider the application of oil with or without essential oil in the morning or the evening as a way to help protect you from the external environment or to help you have a better night's sleep.
And I hope those serve you well for today and for the rest of our challenge together. Have a great rest of the day and look forward to seeing you tomorrow. Namaste.
Fall Ayurveda Yoga Challenge
Mention
 |
Melina Meza (Teacher) |
 |
Lynn-Marie M |
 |
Nanci S |
 |
David G- |
 |
Diane C |
|
|
Jeanette C |
 |
Astrid U |
|
|
Christine C |
|
|
Rita C |
 |
Katrin |
 |
Melissa B |
|
|
Marianne T |
 |
mamarudd |
|
|
Megan K |
 |
Leah K |
 |
Pat Pao |
 |
Jenny S |
|
|
Martha K |
 |
Kate M |
Comments


You need to be a subscriber to post a comment.
Please Log In or Create an Account to start your free trial.
