Description
About This Video
Transcript
Read Full Transcript
(waves splashing) Hi everyone, welcome to YogaAnytime. This is the Yummy Series. Why is it the Yummy Series? Because it's a restorative yoga practice, which brings all of the props to us, which means that all of the poses come to us. But the other unique piece about this is that every single practice, and there's three of them, every single practice is sequenced in a way that is totally and deliberately taking you to Shavasana.
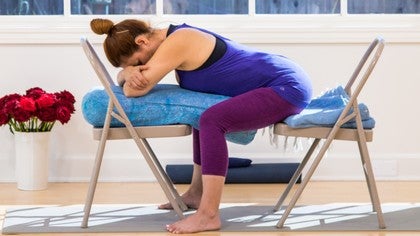
I don't know if you've ever had a yummy Shavasana before, but most people have had one, and that one seems to be the one that we chase. So there won't be any chasing. Hopefully this sequence will just take you right there. The props that you need for this practice is one mat, one bolster, one blanket, two chairs, and one eye bag. And the first pose that we're starting with is a modified Child's Pose, sitting in a chair.
I have two chairs facing each other. I have a blanket folded underneath me. If you're short, you might want to have a little support underneath you like this. If not, you can just push that out of the way. I place the bolster right on top of the chair.
I'm gonna sit toward the edge of the chair. Take my feet and bring 'em to the outsides of the outer legs of the chair, and then just draw this bolster all the way in. The most important piece of this is that the belly hits right on top of the bolster, so you don't want space there. So I open my legs wide enough in order to achieve that, and then press down in to the bolster with your hands as you lean, just so you can feel that belly hit, and then lower, and let's start by turning our head to the left. Here's the great part, we'll just release our arms completely and let 'em hang down.
Once you get yourself settled and it feels like you're in a good place, we'll start for one minute on both sides of the face. Let's start that now. Remember that there's no deep stretch you need to go for. If you find yourself with space or distance between your torso and the bolster, then just put another blanket on top of the bolster so that your belly hits it. So listen to the breath that you're on right now and follow it with three more breaths.
And then we're gonna turn our head in the opposite direction. To do that, place your palms on top of the bolster. Push down a little. Tuck the chin. Slide the bolster a little closer if it got away from you.
Turn your head in the opposite direction. And then lower the arms again. And let's start that minute now. Those arms go loose and limp. That chest be heavy.
So notice the breath that you're taking right now, and follow it up with two more breaths. And then when you finish that second breath, you'll place your hands on the bolster once again. Press down, tuck your chin. Bring your head to the center. Fold your arms and rest your forehead on the top forearm.
Pause. And then slowly lift the head. Walk the hands toward you. You can just sit back in your chair a little bit. Rest your hands anywhere on your legs or between them.
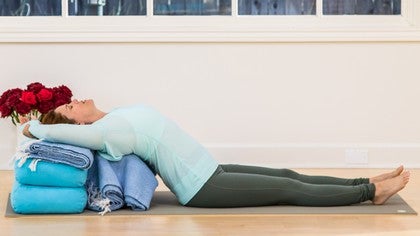
Close the eyes and pause. And then gently open the eyes. So we don't need the two chairs for the next pose, so we're gonna remove the chairs and then set up for the next pose, which is Matsyasana, and we will need the yoga mat. And we're gonna roll it up into a tight tube, so let's get started with that. So all you need for the next pose, which is Matsyasana, Fish Pose, is just a rolled up mat.
You can use any mat. I actually prefer the thinner mats, just because you don't want to be up super high. These particular backbends are quieter backbends, softer backbends, so nothing that's too stimulating. I've rolled it up pretty tightly, and then I'm just gonna place it on my other mat so that my hips come here to the front end. Slide myself really close to it.
Push down with my hands. Lift the chest and begin to lower. Then I slide my buttock flesh toward my feet to eliminate any crunch in the lower back. Lower my head. Release the shoulders a little.
And let the arms and the legs go. So hopefully when you get there, you have that understanding of just a quiet, soft, gradual backbend, as opposed to one that's too stimulating. Remember all these poses that we've chosen are ones that head us specifically to Shavasana. We do a little bit of the stronger ones up front like this, and then the next variation is Shavasana, and then we just drop it down so that we can fall right into the Shavasana. We're gonna count off about two minutes now.
You can close your eyes. And let the breath just move in and out. Settle the weight of the body in to gravity. Feel free to adjust the position of your arms in any way. If you were to play with your arm position, bringing them closer to your legs or bending the elbows and bringing the arms more in the 90 degree shape, you may notice how the mat then presses up against the spine and the muscles alongside the spine a little more.
If you feel that, just make sure that you're with a level of sensation that you can be with that doesn't bring too much stimulation with the sensation. And go ahead and notice the breath that you're taking right now and follow it up with two more. And when you finish with that second breath, go ahead and bend the left leg and just set that foot flat to the floor. Bring your left arm in toward your chest, and then just use your left foot to push off to the right. Draw your thighs a little closer in towards you and you can rest your head on the top arm.
Let the shoulders relax. Let your chest melt into the ground. Then go ahead and lean your chest in to the floor and push with your palms. And slowly come up. I know I've mentioned before that drooling happens.
I know it happens in the twists a lot, but it can happen in these soft backbends as well, so note to self. Take the mat now and slide it toward the back end of your mat a little more. This edge right now is gonna go right at the base of the shoulder blades. And I also wanted to mention that in that first variation, if you find that your head falls off the top end of the mat, then just get a longer mat or put two mats together, just so that you have some head support. So we're gonna go ahead and come down now for this second variation.
And you may not know exactly where it is so just kind of guide yourself down. As soon as you feel that right at the base of the blades, then you can lower. And I take my shoulder blades down my back again. Adjust the top of the buttock flesh toward the feet. And then stretch the legs out.
And just float your arms out wherever it feels good. I like to put mine out to the sides. So now once you get settled into this, let's be here for the two minutes. And of course if you feel as though you want to come out before you hear the instruction, then just go ahead and do that, and roll to the side like you did after the first one. Now this one is maybe a little more stimulating for you, because it's hitting that spot, and accentuating that area right in the middle of the shoulder blades.
So if you carry any tension around your neck and your shoulders like most of us do, see if you can let go on that exhalation, like really let them melt. Once again, if you want to explore different arm positions, feel free to do that. Just make sure that it doesn't increase the sensation much. Go ahead and pay attention to that breath that you're taking right now. And follow it up with two more breaths.
And when you finish that second breath, you'll bend the left knee again and set that foot flat on the floor, and bring your left arm in towards your chest. Then push off that left foot so that you roll yourself to the side. Your head rests on the arm. And your knees come in. You just relax.
You may feel a lot of blood circulating around that area. This is normal, just relax. So then we can go ahead and just lean our weight in toward the floor and push through the palm. Slowly come up. And just pause when you get there.
Let the effects of the pose take place a little bit longer. K, it's interesting how everything just slows down even just after the first pose. Gets slower and slower and slower, and feels better and better. So we don't need this yoga mat anymore. We'll go ahead and remove it, but we do need a bolster and a blanket, so I'm gonna bring those over.
And this is the supine single leg twist. And the good news is that you don't have to be good to practice yoga, and you just have to be able to breathe. (laughing) And more than that, this particular series was really designed to be an easy series for you, and you and you and you and you, it's designed for everybody. Everybody can do this. So, I'm gonna place this blanket on top of the bolster just to give myself a little more height.
And this is the thing about restorative yoga, is may be too much height for you, may not be enough, so you can figure that out when you get into the pose. Come down on our back. And I'm gonna bring the bolster right up against my hip. Slide my hips over to the left side, not my shoulders, right. You want to keep your shoulders very steady, just the hips.
And then stretch the right leg out in front and then roll over so that that left leg comes right on top of that support. And, bring your hand behind your head and just look up, just take a little peek to see that the top hip is right in line. It's stacked with the top chest. And if it's not, you can kind of move your pelvis a little bit in order to get that. And then, I like to press the elbows in to the floor and lift my shoulder blade.
In this case, it'll be the right shoulder blade, and that's helping my spine to rotate some. So I'm keeping the rotation in the mid-back and a lot less, hardly any in the lower back. And then we can just stretch those arms out to the sides. The shoulders hitting the floor. The weight of that leg heavy on the support.
The head can be right in the middle. Relax the weight of the body. And breathe your way in to the twist. Again, once you're there, you don't need to try to put yourself more into it. Just let some time go by.
Let the breath and gravity talk to one another and see and feel the kinds of effects that that's having of you in this rotation, and you'll know when you need to adjust a little bit. Let's hold it now for a minute and a half. And notice the breath that you're taking right now. Complete two more. When you finish that second one, bend the left elbow and bring that arm in towards your chest.
And then you're gonna roll right in to the bolster. Let your head rest on that arm. Now you're in this sort of supported, floppy fetal position. And your spine now in the neutral position. Just let go.
(deep breathing) And there's no hurry to get to the next side. Right, so really try to feel your way in to the moment where the body says to you, "Okay, let's go." Rather than you saying, "Okay, gotta go to the next side now, d-d-d-duh-duh." It's okay if you have a little bit more time on one side than the other. You're not creating yoga crucification. It's all gonna be okay. You'll just stay until you feel like you're ready to go.
And when you do feel that way, then you'll roll over on to your back. Bend both your knees. Shift your hips back in the center. Pause. And then all we have to do is just pick our support up.
You can probably get it right from here. And just bring it over to the other side. Close to you. You can bring your arms back out again. And shift your hips this time over to the right side.
Straighten the left leg. Pick up your right leg, and roll over to that left side. The arms come out. Both shoulders remain on the floor. And I pick up that left shoulder blade again and kind of move it away from my spine.
Right, this a wringing out twist. There are some twists that are more spiral, where you have the shoulder blades both moving in toward the body. Right, this is a wringing out twist, so one shoulder blade moves away from the spine, while the other one moves in to the spine. And you may feel this urge to grab ahold of right your knee with your left hand and weight it, right, but resist that urge. You could put a sandbag on it if you wanted to, but here we just let the tiny muscle groups let go.
It's the larger muscle groups that are so used to when we get into these poses, releasing, but here we're gonna just really drop the weight of the body. Let it go at its own pace. Not force it, not push it. So let's start these two minutes here. Keep softening through those shoulders.
So, go ahead and feel that breath that you're taking right now, and follow it with two more. And then you'll bring the right arm in towards your chest, and roll all the way to your left. When you feel ready to move, roll yourself back to your spine. You're in a neutral position on your mat and let your arms go. Keep your knees bent so your feet are just flat on the floor.
And then you'll just roll over, tip over on to one side. And then you can push and come on up. Pause for just a couple of moments. (sighing breath) So the next pose is Supta Adho Mukha Virasana, that's a big name. It's really just Supine Child's Pose.
So it's Child Pose on your back. All you need is the blanket. So I'm gonna remove the bolster that we have. Push it to the side. And the blanket is really already folded.
There are two different ways that you could use it. You can unfold it like this and use it like that, and create a little bit more of a hammock. Or you can fold it twice. So let's do the two fold, the double fold, and see how you like it. You can always just when you're in it, flip it out.
So, it's so simple. Easy is the word. You'll lower. You'll bring your legs in. You take the long, clean fold.
Sneak it right behind the knees. Lower. Lower your legs. Pull in just a little bit, and try to grow your tailbone toward the end of your mat. And then relax.
Let the shoulders go. Let's be here for a minute and a half. Every exhalation, the thighs get heavy. The lower back and pelvis gets heavy. There's no holding here, that's why you don't need to draw your legs in with your arms.
In fact, let me invite you to even just remove the idea itself of holding. Instead, consider that you're being held. Being held by gravity. So, listen to the breath that you're taking right now, and follow it up with three more breaths. And when you finish that third breath, you can remove the blanket.
Put it to the side. Set the feet flat on the floor, and pause. (exhaling sigh) Then roll yourself over to the side. And just wait. And what you're waiting for is the little voice that says, "Okay, I'm ready for Shavasana." Okay, I'm ready.
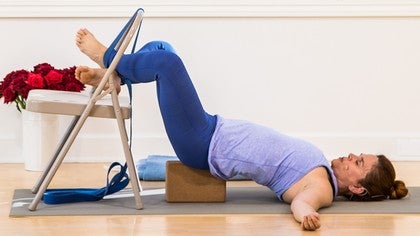
So, I'm gonna use the bolster, the blanket, and an eye bag. I'm placing the bolster so that it comes underneath my knees and thighs, and I'm placing the blanket underneath my ankle. So, I've just roll this blanket up. Place it in front. You'll play with the measurement.
Figure out where it's right. Slide over until you get the heels to come right at the bottom and the roll is right underneath those ankles. Behind the ankles. Grab my bag. Just bring it to the side for now.
Lower down. Move around until it feels like, "Okay, I can be here." Take the bag. Even out the contents. On the top of the forehead, slide down toward the bridge of the nose. Rest the weight of the bag down toward the eyelashes.
And release the arms. (deep breathing) Let's drop in to quiet, peaceful, restful, yummy Shavasana for the next six minutes. Start to bring your awareness back to your breath. Let a little movement start to stir throughout your body. And then slide your right arm out to the side.
Instead of taking the bag off, we're just gonna let it slide off on its own pace. Bend the left knee and set your foot flat on the support. Just pause when you get there. Bend the left elbow. Bring it in towards your chest.
Push off your left foot. Roll yourself to the right and just let that bag slide off of you, resting your head on your arm. Lean your chest into the floor. Use your palm to push and come up. And come sit in any comfortable seated position.
Be upright now. And let your mind sit up just a little bit more so that you still take a little bit of the relaxation, or a lot of the relaxation with you, but your mind is upright, focused, clear. Now join your palms to your chest. Thank you for sharing this practice with me today. Namaste.


You need to be a subscriber to post a comment.
Please Log In or Create an Account to start your free trial.