Description
About This Video
Transcript
Read Full Transcript
(ocean wave washing) Hi, I'm Margie. Welcome. This is a practice about feet. I was recently in the market to buy a house, and one of the main things we would always talk about is how is the foundation of the house. If it didn't have a solid foundation, it went off the list of the house that we wanted to purchase, so foundation is fundamental.
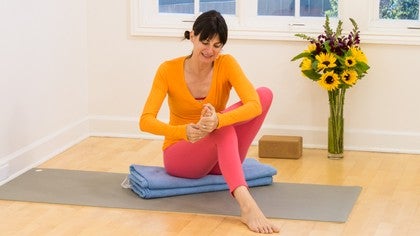
It's so important in building a structure, so if we don't have our feet placed well, then the legs, the pelvis, everything could get misaligned on top, so I'm gonna start having my feet forward, and take your right ankle and cross it over your left knee. If it's hard to do this with the leg bent, you can also straighten the left leg. And then, take your left hand, and put the left palm of your hand onto the sole of your right foot. And then, put your other hand on top, and just give your foot a good squeeze. So you can get your foot to feel more, and more, and more fluid, and mobile, like if you ever make, pull pastry dough out of the freezer, and then, you work it until the butter gets soft, and more malleable.
We want our feet to be strong, but also mobile. You have 26 bones in your foot, so there's a lot to deal with. There are only two bones in your shin, and one bone in your thigh, so our feet are quite complex creatures. Okay, put your left hand back right onto the sole of your right foot, and then, weave your fingers in between your toes. The index finger comes in between the big toe and the second toe, middle finger in between the next two.
Make sure you don't miss a toe, and see if you can get your fingers well woven in there. If possible, pull your hand up so that the finger, the base of the fingers are right into the base of the toes, but for some of you, especially if you're a shoe wearer, most people, you can maybe just get the tips of your toes, but whatever you can do is fine, and then, once you get the weave in, use your hands to help you circle around your ankle, once again, going for that mobile feeling in the foot. And then, the opposite direction. Around and around. Try to make your range of motion quite large.
And then, stop the twirling, and with your hand, squeeze your foot, and then, with your toes, squeeze your hand, like you're picking up a pencil with your toes, and go back and forth a couple of times. Hand squeezing foot. Toes squeezing hand. Hand squeezing foot. Toes squeezing hand.
And then, pause, and see if you can get your fingers out. And then, extend your legs, and just look at your two feet. Mine look very different, one from the other. The color is different. The texture looks different.
I want to do the other one. I want to start by putting my hand onto the foot, and just massaging it. I was bragging about my career to my seven year old son, saying that I don't have to wear shoes to work. Helps keep my feet a little bit more maybe mobile and open. Sometimes I get a bally, and for people who don't wear shoes very much, their feet are just so spread and wide, their foundation looks radical.
Stable. Okay, hand, right hand, left foot. Do your weaving, getting the fingers as enmeshed into the toes as possible. Once you have it, don't worry if it's just the tips of your fingers into the toes. Don't beat yourself up.
It's good that you're doing this at all. Squeeze, foot to hand. Oh, first, we circle, so circle around. You can look at your foot. Try to avoid any harsh judgement of toenails, any such thing.
Go in the opposite direction. Again, you're working with your range of motion, getting all those 26 bones, many joints, tendons, ligaments of the foot moving, as well as each toe. And then, pause the circles and grip. Foot to hand. Hand to foot, and go back and forth a couple of times, just working those muscles of the feet, opening them, strengthening them, waking them up, getting them prepared to create a very solid foundation for your, both your standing yoga practice, as well as your standing life practice.
Okay, and then, fingers emerge. And again, just take a little peek at your feet. So, we talk, in yoga, about grounding the feet in a pretty specific way. Just look at the sole of my foot. We're going to articulate some points of the foot.
One is the ball of the big toe, right here. Other is the ball of the little toe, so you have these two points, which go on either side of the arch, the ball of the foot. And then, just feel the very center of the heel, so, the sole of the foot has a tripod that roots down when we stand, ball of the big toe, ball of the little toe, center of the heel. And then, I'm going to reference, when we stand up, also the arch, and we want there to be a feeling of lifting in the arch. Even if you think you have flat feet, there's still a muscular engagement that happens in yoga, and that arch will create a length up through the inner legs.
So, we'll come to stand now. So, the first thing I'd like for you to do is just take a little walk around your space, and just, not thinking too much about your feet, just your normal walk around, and then, come to your mat and just pause. You can kind of stand however you would normally stand. And just notice how the weight is on your feet. Are you on one foot?
Are you on the other foot? Do you feel the weight more on the ball of the feet, or the heel? Inner foot. Outer foot. And then, we'll organize the feet, and we'll bring the feet to parallel.
And rock a little towards the balls of your feet, and then, back towards your heels. Forward, towards the balls of the feet. And back towards your heels. And then, balance those arches and heels. And notice if you feel more weight on the ball of the big toes, on the outer side of the foot, or the inner side of the foot.
See if you can balance the weight right across the balls of your feet. And then, feel the center of your heels dropping down into the ground. A little tripod on each foot. Ball of the big toe, ball of the little toe, center of the heel, right, ball of the big toe, little toe, center of the heel, left, and then, lift your toes up and spread them wide. Notice if your hands are doing something funny.
They tend to. Let your hands relax, and then, bring your toes back down to the ground. Find the arches of your feet, and lift the arches of the feet up strongly. It can be a subtle action. Don't lift so much that you lose the ball of the big toe, so when the arch is lifted, ball of the big toe still roots, center of the heel still roots.
And then, just feel how your feet are rooting down. Notice how that feels up through your legs, your pelvis, your spine, your head. And then, let your feet just do their normal thing. When I do that, my arches fall. I can fall a little bit into my low back.
When I organize my feet, I get more life through my legs, more energy through my spine, and the lightness right up through the crown of the head. And now, as a foot strengthener, I'm gonna give you the option, it's not required at all, but the option, just for, it'll help the legs and the feet be more clear, put a block right up in between your upper, inner thighs, and have the feet parallel to each other. You are welcome to rest a hand onto the wall, 'cause this will take a little balance. We're gonna rise up onto the balls of the feet, squeezing the block, keeping big toe, baby toe balanced, and then, lower your heels down to the ground. Let's do that with the breath.
As you inhale, rise up, and as you exhale, reach the center of the heel back down to the ground. Inhale, you rise up. Exhale, as you drop your heels. It also has a little weight to the tail bone. Inhale, rise up, squeezing the block, rising high, feeling the muscles of the legs firm, and then exhale the heels back.
The center of the heel drops into the ground. Three more times. Inhale. Exhale. It's good for the muscles to get tired, a worked feeling.
It means they're waking up and getting stronger. Okay, right where the block is right now, we are going to put a foot for a tree pose, so you can move the block, and stand in your mountain pose. Let's start with the feet together, so there's a feeling of the base of the pose, the foundation really clearly underneath the structure of the body. Root into the three corners, the three points of the right foot. Keep your right, outer hip firm.
Bring your left knee forward, and open it to the side. Reach down, find your shin, and pull you left foot into your right, inner thigh. If this is too much for your hip, or your knee, you can have the foot lower. You could even have the toes resting down onto the ground. Wherever your left foot is, push it firmly into your right leg.
Push the right leg back into the left foot. See if you can have the ball of the baby toe pressing. That one sometimes gets light in this pose. The big toe and the center of the heel. You can bring your hands to prayer.
It's perfectly fine to keep one hand onto the wall, and then, be aware of your right foot. Ball of the big toe, ball of the little toe, center of the heel, arch of the foot lifts up. It creates a big, bubbly, like ginger ale, bubble lift all the way up through the crown of the head. We'll pause here so you can find your balance, maybe. And then, bring the knee forward.
Step it down, and we'll do Vic Shasanetry pose on the second side. First mountain. Rooting down through the two feet. Finding the three points on each foot. Arches lifting, and then, right knee up.
Widens to the side, to the diagonal. And then, put the foot into the left leg. Find inner right heel, outer right heel, center of the right heel. Ball of the big toe, ball of the baby toe. And there still can be that feeling of the arch lifting off the leg and moving towards the inner knee.
Right hand to prayer. Left hand can stay on the wall, or come in to prayer. Feel the feet fueling the pose. And then, bring your knee forward, and lower your foot down. This practice comes with two pieces of homework.
One piece is to go look at your shoes, and see if they look more worn out on the inner part or the outer part of the heel. That will give you some indication about how you use your feet, and the other part of the homework is to go take a walk around the block at some point today, or in the mountains, or wherever you walk, and see if you can have a real, keen awareness on how you place your feet as you walk on this earth. Thank you so much for joining me. Namaste.
Welcome to Yoga: Explore the Fundamentals
Comments
You need to be a subscriber to post a comment.
Please Log In or Create an Account to start your free trial.


