Description
About This Video
Transcript
Read Full Transcript
(waves splashing) Welcome back, day 10. Whew, day 10, we're a third of the way through almost. I'm really curious, I wanna know how you're feeling, you know, what are your thoughts? I can kind of assume, but anyway, I'll just assume you're doing awesome and we can move on from here. So a lot of cool, exciting things on the horizon, right, but number 10, there are definitely a few new poses.
We're doin' Warrior I with humble warrior, triangle pose, we're gonna challenge you with a little bit of strength, we're gonna do a forward bend seated, and then some pigeon, but a different style maybe. So anyway, you're amazing, remind yourself of that, I know you are, right. Don't get all negative here on me when you're practicing. It's all good, it's all good, just breathe and move. So anyway, let's get started.
So we're gonna start as we've been doing in front of the mat, front of the mat. Take a couple breaths (exhales). What a pleasure it is, right, and what have we been doing? We've been, every once in awhile, to start, we take our palms to our chest, to our heart, and we take one breath together, all right, so let's do this. Take a breath in (inhales) and exhale (exhales).
Just feels good. All right, let's go. Breathe in, reach up, stretch, arms overhead pose, exhale into a forward bend. Stretch those legs. Inhale, lift up halfway (inhales), and exhale, step back into downward dog.
Three breaths, pedal it out, walk it out. Yeah, sometimes it feels good to press your right heel down, bend your left leg a lot, then tip your hips over to the left. Getting a big side stretch up through the right side. And then to the other side, so you bend your right, straighten the left, send the hips way over to the left. Get a lotta length and stretch up through the left side of your body.
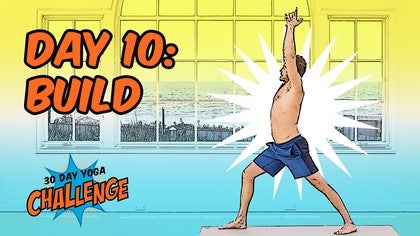
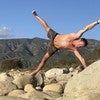
Good job, bring your knees down and we'll transition, we're gonna build Warrior I from the ground up. So we're gonna take that right foot, step it up to the right center of the mat, and begin to lift the back knee, place the back heel down, walk your foot up a little closer, and look back at the back foot. You wanna put like a 45 degree angle on it or so. Right knee is bent, come up onto the fingertips, bring the palms together right out in front of your gaze, and now press through the feet, your legs, use your core strength, and rise up. (breathes deeply) Keep this in mind.
If building that from the ground up doesn't quite feel right for you, you can always step back into it, okay. All right, so Warrior I, hips, your left hip kinda drawing forward. Don't force it, it doesn't have to be square. Take the arms up, interlace your fingers, index finger long, cross those thumbs. Get nice and long through the torso, spread your toes, ground your feet.
Now you can stay here or we can try these little things, it's almost like a dive down. What you're gonna do is you're gonna keep pulling your right hip back, pull your belly in, stay strong in the midsection, reach out, on the breath in you're reaching out and down, and on the breath out (exhales), all the way up. Breathe in, lower, breathe out, (exhales) good job, one more time. Breathe in, from the belly pull the belly in as you exhale and rise up. (breathes deeply) Good, let the arms come down.
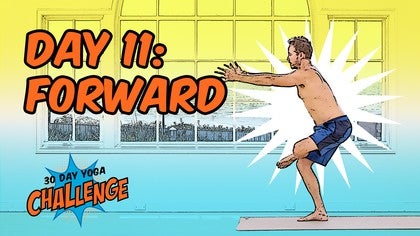
Straighten the front leg. Keep the right hip pulling back. You can keep the same distance you have here. This is triangle pose. So pull the right hip back.
Don't lock the front knee out. Keep a slight little bend, slight little bend. Now from here with the right hip back, I've said it three times now I know, but it's important, right hip back, now take the right hand and reach long, right hip back, reach long, extension and length up the right side of the body, and now let the right hand come down to the calf of your right leg, somewhere around there. Don't feel like you need to reach down so far. Stay lifted.
Now from here, slide the left fingertips up the right arm, shoulder, collarbones, and all the way up. Good, triangle pose. Probably feel some good stretch or a deep stretch in the right leg. Pay attention to how the back foot is grounded as well. Take a few breaths.
Good, slight bend in the right leg and begin to hinge all the way up and back. You can bend the right leg or straighten it. Up and back for a reverse version. Big breath in here. Don't put too much weight on that back leg.
Little gentle pressing, little gentle resting with the left hand on the left leg. Good, one breath in. Good, now circle, windmill, arms down. Good job, lift the back heel, maybe stretch your stance out a little bit longer. Tent up on those left fingertips.
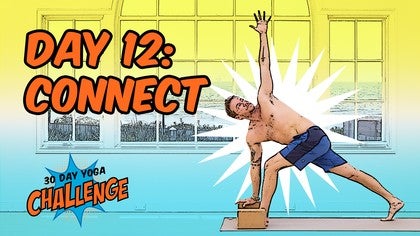
Right hand on the left side of your body, the rib cage. What I want you to do is actually turn and rotate the body, the trunk of the body. Once you've rotated to your max, reach the right arm high. Steady and strong in your foundation, open and free up top in the body. Good, right arm comes down, step back into push-up position, plank.
Now here's where I'm gonna challenge you a little bit. You're gonna bring those knees down. This is the combination. This is a push-up, and when we're done with a push-up, we come down to the forearm plank, okay, and we're gonna come up and pyramid up and then we'll pyramid down. So you choose.
We'll do the first push-up on our knees. So one push-up, strong push-up. Breathe in, lower down, breathe out, push up. Good, now come down to the forearms. Hold for three seconds, one, two, three.
Back down to the knees, back up to your hands, two push-ups. Inhale, lower, exhale. Inhale, exhale. Back down to the forearms, strong forearm plank for three, good, two, belly strong, legs strong, heels pressing back, one, knees down, back up onto your hands, two more push-ups. Inhale, lower, exhale.
Inhale, exhale. Back down to the forearms for three seconds, right. So push your heels back, keep your legs strong, belly tight, for two, and one, one push-up. Make this one the best one. I know it's difficult.
Lower down, breathe in, breathe out, good. Kick back for one child's pose, relieve all the pressure in the shoulders for a moment, take a breath here (breathes deeply). Nice, tabletop, step the left foot up, Warrior I, we're gonna build over here now, okay. So come up onto the fingertips, ground down through that left foot, curl the back toes, lift that knee, and set it up. Get your left heel in alignment with your back heel.
Try that. Make sure to put a big angle on that right leg, that right foot I mean. Take a breath, palms together, press into your feet, use your leg muscles, use your core muscles to rise up. Shorten your stance just a little bit, interlace your fingers, keep the index finger long. Now stay evenly grounded in both feet as you draw down on the breath in, pull that left hip back, and exhale, lift up.
Inhale, exhale (breathes deeply). Inhale, exhale. Let the arms come down on the exhale. Straighten your front leg, try not to lock it up, pull the left hip back, now reach for triangle, reach out with the left fingertips. Now hinge those left fingertips down toward the left calf.
Bring the right fingers and slide them up the forearm of the left arm to the bicep, shoulder, across your chest, and all the way up. Breathe (breathing deeply). The sensation is probably through the left hip, hamstring, maybe your inner left thigh, groin. Good, you can keep that left leg straight or softly bend it as you push through the feet, pull the belly in to lift up and back into reverse. So the idea with reverse is to stretch up through the left side of your body.
Rest the right hand gently on the right leg. Take one more breath here and now, like a windmill, bend the left leg, circle the arms down, lift the back heel, square up for lunge. Tent up on those fingertips, you come down to the knuckles, left hand on the body, rotating open. Keep the left knee tracking right down the midline, all right, and then the left foot, keep it fully grounded as you continue to open, open, open, right, good job. Breath (breaths deeply).
Now slide that left arm up. Take a moment to enjoy the posture. Well done, left arm comes down. Step the right foot up to meet your left. Forward bend, hamstrings nice and long.
Don't worry about touching the floor. It doesn't mean anything. Slide the hands up your shins, breathe in, breathe out, forward bend. Strong chair pose. Tailbone reaches back and down, arms out in front of you, belly strong, arms up alongside your ears.
Remember that newspaper thing I talked about. Press your feet down into the mat and pull the newspaper apart. Now press through the feet, rise up, breathe in, little tip back, and breathe out. Nice. Inhale, circle the arms up, get tall.
Exhale, come on down, forward bend. Inhale, get long, half lift. Exhale, downward dog. Good, let's try just one, this is just one time, no knees unless you absolutely 100% need them. Come into a plank position, one push-up.
Keep your heels firing back, keep your quads fully engaged, belly up, when you lower down, look at your elbows. Make sure those elbows are stacked right over the wrists. It's not easy. Lower down as far as you can, look out in front of your mat, breathing in as you lower, breathing out, push right back up into downward dog. Exhale everything there.
Child's pose, knees down, hips back, take this child's pose here, cross the arms, wrist over wrist, palm over palm, hand over hand, whatever you'd like to rest your forehead down comfortably. Okay, if you come on up, what we're gonna do now is you're gonna circle around, I'll face you, and you might just have your mat set up in that way as well, where we're facing one another, hello, how are ya. So this here, we're setting up for what's called like a lazy pigeon. It's the version that they teach in like a yin yoga class, all right, it's more accessible I think. So reach your hands back behind you, open up the chest, and begin to let the knees kind of windshield wiper from side to side.
So when you bring the knees over to the right, maybe look over the right shoulder, left shoulder, bring them over. This'll kinda release any tension you might have in the hips. Keep pulling that right shoulder open as your knees drop to the left, okay. Good, one more time. So bring it over to the left, all the way over.
Your body up like so, straight upright, left leg has a bit of an angle on it. It's not 90 degrees. Your left heel is drawn towards your right thigh, but then pull the right thigh back just a little bit, all right. Now the target area we're looking for for the stretch is, in this case, folding over the left leg is the outer left hip region, your glute, right, your bottom, up through the outer left thigh. So let's see how that works.
If you feel it through the right side inner thigh, hip flexor, that's normal too. So set yourself up, breathe, and as you exhale, let your body fold over your inner thigh, left thigh. So the sensation's gonna be different when you fold over the actual thigh versus maybe over the calf or even in the direction of the ankle. So here's where it's up to you. We'll be here just, you know, five breaths or so.
Feel free to explore and not get caught up in whether you're doing it right or wrong, right. The right or wrong doesn't really interest me. It's wrong if it's really uncomfortable and painful and you're not breathing. It's right if you're exploring, you feel the sensations, you connect your awareness to the sensations, the stretch. Breathe softly into those spaces.
You might find a spot that just feels so right, and that (clicks tongue), that's right. Mm-kay, stay here as long as you'd like, press pause, it's kind of one of my favorites, or join me in the other side, okay. So you push up, and maybe, you know, get in the habit also as you develop your practice, you come out of poses, feel that post-posture sensation. What did that just mean, how did that work, how did that feel? Sometimes you're in it and it's so overwhelming, you know, you don't feel it till when you're done.
So come on over to the other side. So you can transition just the way we've been doing this. Little bend in that left leg, scoop the left hip back a little bit to get a bit of a sensation, little stretch through that left thigh. Okay, now turn your body upright and then fold over the right thigh, that inner right thigh. Kinda wiggle into it (breathes deeply), have that exhale as your partner, that constant companion to help you out as you enter tough regions of the body.
Good, three breaths. And if ever you feel, like I said on the other side, if ever you feel like you wanna hang out a little bit longer you just press pause and catch, you know, when you're finished, then (clicks tongue) press play. Move to the next. Okay, slowly come back out, pause, how did that feel, okay, cool. Now we're gonna spin around onto the seat.
You're gonna sit upright as much as you can. Pull the flesh from your booty back, so you're kinda like sitting as upright on your sitbones as you can. Torso's long, legs are strong. This is kinda like the first, the beginning posture, of a forward bend, but we're not gonna bend forward. All we're gonna do is reach down and kinda press the palms down into the mat.
Pull your chest open, shoulder blades toward one another, belly in, press the thighs, like engage your thighs, press your femur, like your thighbones, down, very active, toes up, heels forward, close your eyes. The last moment here, take two more breaths, fully engaged, upright, core strong, legs strong. One more breath, breathe in, expand the belly, breathe out, contract. (breathing deeply) Good, bend the knees, set yourself up so that when you roll down, you roll down the length of your mat. Hug the knees in.
This is always that, it's like one of the safest things, right, at the end, safest meaning like go to at the very end of your practice before final relaxation, hug the knees in, rock side to side. Bring the feet down to the mat, bottoms of the feet together, hips open for that reclined, bound angle. Back of the neck is long. Take a deep breath in. Exhale everything (exhales).
We dabbled in final relaxation before, so I invite you to completely and fully relax every single muscle in your body, facial muscles, shoulders and neck. And as always, stay here, stay here for as long as you'd like, resting, enjoying, just enjoying soaking up and the work that you've done. If you'd like to come up, you can come on up. Just stay lying down and we'll close out. Day 10, day 10, a third of the way through.
Thank you, namaste.
30 Day Yoga Challenge: with Robert Sidoti
Mention
 |
Robert Sidoti (Teacher) |
 |
Sandra Židan |
 |
Ch Marie d’I |
 |
Angie P |
|
|
Zeynep Y |
 |
Matthew |
|
|
Corinne M |
|
|
Roxanne F |
|
|
Karen H |
 |
Glenford N |
 |
Ruth E |
|
|
Virginia M |
|
|
Debra D |
|
|
Louisa C |
|
|
Dannette W |
 |
Sam |
 |
Erika H |
 |
Janet S |
|
|
Lisa B |
 |
Michelle Hewitt |
 |
Elaine Fox |
|
|
Maria Elena D |
 |
Lianne M |
Comments


You need to be a subscriber to post a comment.
Please Log In or Create an Account to start your free trial.
