Description
About This Video
Transcript
Read Full Transcript
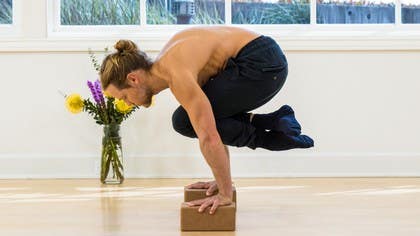
Hi guys, in today's tutorial we'll be looking at jump-back jump-throughs and for this one you don't need to mat, it's best if you have a hardwood floor, also you can work on tiles and some socks, it's time to get soxy, okay so let's come down onto the floor, okay so what the main pattern that you need to understand for these jump-backs and jump-throughs is the angry cat, so you can actually, if we start in a child's pose, stretching the hands out in front and then as you lift up curling the tailbone under, rounding the back and bring your shoulders over your wrists, your knees will be a little bit behind the hips and then from here I want you to curl the tailbone under, rounding the middle back, the upper back and make sure that you're pulling your shoulders towards your hips as you press up between the shoulder blades and the head just feel like you're lengthening out through the crown of the head, no need to have your head up like this, okay so again that pattern curling the tailbone under, ribs in, pressing up between the shoulder blades and shoulders towards the hips, so from there you can lift up to a high plank and the high plank, same thing, lifting the knees, curl the tailbone under, draw the ribs in, pull the shoulders towards the hips and we can just hold this one, keep pulling the shoulders to the hips, I like to keep the feet together for this exercise and then coming down and now we're going to do the same thing, we're going to slide the knees into the chest and then go back to the high plank and repeat, so we come into the high plank position, shoulders over the wrists, curl the tailbone under, strong legs, shoulders to the hips and then bending the knees, tuck the knees into the chest and then push it back to the high plank and you want to avoid collapsing in your lower back, also collapsing between the shoulder blades so really stabilise the shoulders, stabilise the lower back and bring it in and take it back and bring it in, take it back, bring it in, take it back, one more, bring it in and take it back and coming down and rest in the child's pose, so just take as much rest as you need in between these exercises, the next one you'll either repeat that same again or try to do it with straight legs, make sure that you've warmed up your hamstrings enough, if the hamstrings are not flexible enough then you'll have to do it with knees bent, so bring the hands out in front and then start to lift the hips as you lift rounding the back, so you come into that high plank position like with an angry cat shape and then start to pull in and then take it back to the high plank and then coming in, notice my shoulders have to go forward a little here, try to bring the knees to the chest and then take it back and again and two more and the last one coming down and resting in the child's pose, okay so this is a good way to develop more strength and power for your jump back, jump through, also if you want to start doing skills like pressing up into a handstand, another position that you'll need is in yoga we call it lola asana, it's also could be called a tuck plant position and for this you're going to need some yoga blocks, I've got four here, if you've only got two that's fine, you may not even need blocks, you could also bring two chairs or two benches together, so I'll just show you how we're going to do it, okay so basically the higher your blocks the easier it's going to be and you're going to place the hands a little wider than shoulder width apart and you're going to maybe even wider than that, so you're going to bring the knees in between the blocks and bring the shoulders over the wrist and create that depression so pulling the shoulders down and then lift your knees up to your chairs, shoulders down curl the tailbone under creating that angry cat shape and then lean forward a little and lift your feet off the floor, really tuck the knees into the chest as you press up between the shoulder blades, hold this at least 10 seconds and then coming down and then once that's easy then take the blocks off and you go lower, you can also do this one instead of having the feet parallel, we can cross the feet, okay so you set it up again make sure that when you set it up your knees are coming in front of the blocks and your knees are not behind the blocks here, okay so knees in, you're going to first lift the knees up depress the shoulders, press up between the shoulder blades and then lean forward a little and lift the feet and cross and hold 2, 3, 4, 5, 6, 7, 8, 9, 10 and come down, okay so the idea with this is that you try to build up your stamina, that you can hold it for 1 minute, if you need to like we do this 10 seconds so you do 6 times, okay then when you can build it up to 20 seconds then you do it 3 times, then you do 30 seconds twice eventually building up to 1 minute, so we'll do the other side meaning we'll cross the legs the other way and again lift the knees, depress the shoulders, press up between the shoulder blades and lean forward, lift the feet and hold 1, don't really squeeze it in 2, 3, 4, 5, 6, 7, 8, 9, 10 and come down, so to shake it out you can stretch the arms here so bring your left arm across, pull the shoulder down so it's important also to rest in between so that you give the body enough time to recover in between, for example if you find that you could do 20 seconds on 1 rep and then the next rep you could only do 10 seconds it means you didn't rest long enough so you need to have enough rest so that you can keep up the same amount of work, then cross the elbows bring the palms together, lift up, lift the elbows as you pull the shoulders down, lift the hands up and stretch the other arm, bring the right arm across, bring the right shoulder down and then cross the hands, lift up, the elbows in the hands as you pull the shoulders down feel like you're trying to pull your elbows apart and then release, okay so that was a straight arm lolasana or straight arm tuck planche, we also have a bent arm lolasana bent arm tuck planche so for this you're probably going to need a bit of extra height, okay this is the one most people have problem with so we're going to set it up in the same way so we bring the hands here, we do feet parallel to start with, bring the knees up so first you come into that straight arm position and then you're going to bend your elbows really squeeze the elbows in and try to hold 2, 3, 4, 5 and come down, okay so this is getting much harder here, we tried 2 other variations with the legs crossed either way right on top and left on top so what we can focus on here is just controlling the descends so going down slowly resisting resisting resisting until you touch the floor so we cross the ankles lift the knees up into that tuck position and then start to lower as you squeeze the elbows in, shoulders down 1, 2, 3, 4, 5 and come down keep it there and do the other side in a moment just take a short rest here and then crossing the legs the other way and lifting the knees up and then squeeze the elbows in, shoulders down and lower 2, 3, 4, 5 and coming down and so one more exercise is to combine the straight arm and the bent arm lolasana otherwise known as lolasana push ups so you're going to come into lolasana position straight arms then bend your elbows go down and then straighten up, down and up, down and up and come down and that's a killer okay so you might want to just open up the chest as well here so just take your hands back roll the shoulders out lift the chest and stretch the throat and then exhale so this is only half the story our lolasana position we also have tolasana because it takes its toll on you and that comes from this position here and we can call this and we call this tolasana but it's also known as a L-sit and also a V-sit so we're going to start first with the feet parallel then we'll do the legs crossed so for tolasana we're going to bring the knees in so you should be able to first balance like this sort of rocking back a little bit towards the sacrum then you're going to bring the hands forward you just need to find out what's going to be the right height for you then keep the knees to the chest and lift and hold and look straight ahead keep the knees in hold for 10 seconds keep pulling the shoulders down and slowly coming down if that's easy for you then take a block away and we try this time with the ankles crossed let's take a little rest here and so let's just hug the knees in to the chest you cross the ankles and you really want to try and get the chest and the thighs touching for now keep the feet flexed and ankles crossed and then engaging your abdominal muscles and hip flexors keep the knees and chest touching bring the hands forward or bring the blocks forward and then you're going to bring your shoulders over your wrists and lift up and pull the shoulders down hold two three four five six seven eight nine ten and come down and shake it out okay so you're going to feel your hip flexors firing here and your abdominal muscles so this is the same idea same theory that you're trying to build yourself up to a minute so if you need to you do six sets of ten or you break it down if you start building it up and then it's 20 it's 30 like that okay so I'll do the other side left leg on top this time so again hugging the knees in cross the ankles and then keep that compression bring the hands forward and lean forward and lift it up one two three four five six seven eight eight nine ten and come down good and we'll just roll onto our stomachs here come into seal stretch and just release the hip flexors because you'll be feeling them I am so the next one is to try and do L sit we do in the tuck position so not L sit V sit in the tuck position which means you're trying to it's like a pendulum basically we're trying to get this movement like a swing and we're trying to swing the hips up and forward like that while keeping the knees tucked into the chest okay so this one is definitely a killer and if you need you take have extra height I'm going to try it just on the one block so can start with the legs crossed and hug the knees into the chest so I'm going to be driving my hips up that way almost leaning back with my chest and shoulders okay so we hug it in tuck it in bring the hands in front and rock forward and lift it up and one two three four five six seven eight nine ten and come down okay and you might feel your triceps firing here so we can just stretch the triceps out changing sides and shake it out so this is definitely tough I'm finding this stuff see how you go at home do the other side luckily we only have two legs and so we cross the right on top this time or the left depending on which one you did hug it in try and keep it there and then rock forward hips forward and up one two three four five six seven eight nine ten and exhale and come down and we just stretch out the triceps and this way by bring the left elbow to the floor and just take the hand here just tuck under a little and change sides okay you ready let's do the last one this time if you can with feet parallel okay so hug the knees into the chest flex the feet we're going to bring the hands forward and lift it up and good two three four five six seven eight nine ten and exhale and come down and we're just going to let's seal stretch again we're just stretching out the hip flexors rocking side to side okay you ready to put it together I'm going to move these and I'm just going to work with two blocks feel free to work with more height if you need it or if you don't want to use you can just go straight to the floor so we'll start in our high plank position get a good high plank and then tucking the knees into the chest cross your feet and bring your feet out in front and then crossing the legs roll back and you can go to Tataranga and then up to a high plank again knees to chest cross and through and lift make sure you cross the other way and to Tataranga and then up and I'm going to try this time without the blocks just to challenge myself so we come to a high plank knees in cross and through up cross through and back to Tataranga and let's land the stomach for a moment and then just stretching it out in the seal stretch and we'll try that a few more times just stretch the shoulders out a little so bring the right arm across if you're working on building your strength like this you need to make sure you take the time to also just release the shoulders otherwise you will get tight and it will affect your back bending and your twists okay so let's start in the child's pose stretch the hands forward come into the high plank knees in cross and slide through and then cross slide back to Tataranga and then the high plank bring the knees in cross and through knees in and back to Tataranga back to the high plank knees in cross and through and pull it in and take it back and finishing there good hold on guys so we'll just stretch out the shoulders a little bit and bringing the left arm across pull the shoulder down and then crossing the elbows and lift the hands up and then bring the right arm over cross and lift and release okay so there's one more element we need to add in and that's jumping from downward dog and in order to approach that we'll just do a few frog jumps so if you can come into a squat position with the spine lifted if you can't keep the heels down you can have come up onto the balls of the feet and you bring the hands forward and then jump and come back into a squat position and down and go back the same way once you start feeling comfortable with that then you try to find the point of balance as you jump so bring the hands forward jump balance and down and then a little higher jump balance and down same on the way back jump up balance knees to armpits and down lift up knees to armpits and down okay so then we try to jump up to the point of balance cross the legs and slide through so if we're in a downward dog actually from let's go back to this frog position and jump up point of balance cross and slide through easy right and then on the way back we're going to try to pick it up into that V sit tall asana and then swing it back okay so if you need to use the blocks of this one I'm going to try it without the blocks so you lean back tuck it in and really keep the knees and the chest touching and lean forward pick it up and then slide back to your chaturanga and make sure you do both sides and keep practicing all of that and definitely at some point you're going to get it thank you very much
Practice with Mark Robberds
Comments
You need to be a subscriber to post a comment.
Please Log In or Create an Account to start your free trial.


