Description
About This Video
Transcript
Read Full Transcript
Welcome. For this practice, grab a couple of blankets or something to sit on. I have a couple of blankets here that I'm going to use as my lift for my seat. And you can come in to cross legs or really support your legs, come into any seat that works for you, just so that you can be comfortable and start to settle. So a couple of breaths, finding a neutral place in the pelvis, a place of freedom and ease in the spine, in the breath. If it feels right, you can take the gaze down or let the eyes close. And a couple of breaths here, just letting any dust from the day settle. So almost like a snow globe that's been shaken up. You're letting all of that swirling snow, all of those swirling things just start to get heavy and settle to the ground. After your next exhale, let the eyes blink open if they're shut, roll your shoulders a couple of times, maybe shake out your hands. And we're going to start practice with a little bit of foot massage. Since this is a foot based practice, it really helps to get in touch with the feet by looking at them and touching them. So let the knees come out wide. And if you need to support underneath the knees here in any way, do that. Feet can come together. And you'll use your hands, thumbs at the soles of the feet, along the arches or anywhere that feels good. And then your fingers kind of curled over the tops of the feet. And you're just going to kind of squeeze and knead like you would dough or any kind of massage in an effort to get in touch, to release, to soften, to love on. And there's no particular technique here. You can't get this wrong. You might press around the ankles, along the balls of the toes or even the toes themselves. So we're getting down into the feet to help us get really a little bit out of the head. The feet are the farthest point from the brain, from the eyes and the mouth and the nose and the ears. And it's really easy to get quite swirly in the head, right, to really have thoughts, rumination. So getting down in the feet can help get a little bit out of that head space. Okay. Rub your feet a couple of times. And now we're going to address each foot on its own. So using your hands at your outer knees, lift your knees. And then a couple of ways you could do this. Stretching your left leg forward. How would it be to take your right ankle across so that the foot is completely on the other side of the leg? That's one option. If that doesn't work and you have a block, you could have this left leg however it suits you best and use the block as your prop. So again, the ankle hangs completely off. And since I'm here, I'm just going to use the block version. So our practice here is going to be to hold hands with the foot. And you might need to use your free hand. It's opposite hand to foot. You might need to use your free hand to help separate the toes and get your fingers, maybe starting with just your fingertips in between all of the toes. And then see if you could even get a little higher up the fingers. Maybe even eventually getting more of a web-to-web interlace. Okay. So do what you can there. Little toe spacers. And then use your free hand to support the ankle. And we'll make some circles. So you're circling the ankle using the interlace of the fingers around the toes. Nice and slow. One direction. And the other direction. Even though really the primary circle is the ankle circle, change direction again, you're also making really kind of loose circles with the toes using your fingers too. So everything is just loose and easy. Okay. Now, keep that interlace wherever you have it. Spread your fingers apart, spreading your toes apart. And then squeeze. And give your toes and the balls of the toes a little hug. And then spread the fingers, spread the toes, and then squeeze. One more time, spread and squeeze. Okay. Let your fingers come off and rub the foot a couple of times. And then last thing, we're going to clap the foot. So you're just using your hands on either side of the foot, even on the sides of the foot, clapping the foot. Getting some circulation, waking up, sensitizing. Okay. So let's check this out. Stretch that leg forward. Stretch your other leg forward and look at your feet. So my feet are really different colors from each other. And actually the foot I haven't done yet, it almost looks a little puffy.
Just notice what your feet look like. If there's a difference, if they feel different. Okay. And then we'll switch sides. Let's do the other leg. So again, however, it's easiest for you to get to a place. Maybe I'll try this way on this side. So that ankle is completely hanging. And same as on the other side, we're going to interlace and hold hands with the foot. Your feet are probably different from one another. Some different things going on in the toes or just the way your foot feels. So if it's not the exact same as it was on the other side, that's totally okay. Get the interlace that feels good. Support your ankle with your free hand. And then we'll make some circles. So again, the intention here is mobility, but it's also circulation. It's also just plain old attention, giving ourselves some attention down here at this far, far away part of the body. Change direction. That is our primary connection to the earth. Change one more time. Five mini toe circles happening at the same time. And then come to a steady spot. Spread your fingers and then squeeze your toes. Spread, squeeze, spread, squeeze. Okay. Let your fingers come out, rub the foot and then clap. Celebrate your foot. Give it a clap. All the sides, the heel and the toes. Okay. Let's stretch that leg forward. Check it out. Now they're a little bit more the same color and they feel pretty good. Wiggle your toes around. See if you can make space among your toes like you would spread your fingers. Hmm. Okay. You can move the props off to the side. We're coming down to the back. Now you could actually do this next one from the forearms if you find that more comfortable or come all the way down onto the back of the body. You'll lift your left knee mostly over your hip with your shin and your calf parallel to the floor. And then we're going to use the top of the right foot to give some love taps to the left calf muscle. And you can go all the way down toward the heel with those taps and then come all the way up toward the knee. And you might be surprised already that there's a lot of sensitivity here. Really be intentional about the level of intensity. So you decide how lovey these taps are. They might be gentle. They might in some spots be more gentle but in other spots be a little bit more tenderizing. You can do a little bit of the outer leg or the inner calf by moving that left leg around. Okay. Now let's put both feet on the floor and pause. Notice what that left leg feels like. So we were starting that circulation and sensitization in the toes and the foot and the ankle and now we're coming up the leg to the lower leg calf. And yes, you might notice that the right leg, the one that was doing the tapping, got a little bit of a workout. So that was just a bonus. Let's try the other side now. So right knee comes over right hip.
Use the top and if you dare use the bony part of the top of the left foot and start some love taps. Up and down the calf. Don't be surprised by those tender sensitive spots. It's okay. This is good. Getting some juices flowing, getting some release, some massage. You can go a little bit of the outer calf, a little inner calf. Feeling the workout in the left leg and then releasing both feet to the floor. A couple of breaths here. Just feeling the sensations of the lower body. All right. So if you've been on your forearms, on your elbows propped up, come on down to your back and we'll bring the knees in for a little bit of a knee hug. You can hold behind the knees or over the shins. Just an easy rock side to side. Then we'll take the palms onto the kneecaps right on top of your knees. Keep your big toes together for this one. Bend your elbows and bring your knees toward your chest. Keep the big toes together as you separate the knees wide and then take the knees away until the elbows straighten and the knees come together. So go ahead and smooth out that big circle a few times one direction and then let's switch directions. So now the knees move away, they go wide, they come in at the sides and then together.
Smooth that out. Bringing that circulation from the feet all the way up now to the hips. And then pause. Let's roll all the way over onto one side. Press up and come around to hands and knees. So I'm going to get a blanket for underneath the knees for a little bit of padding. And then situate yourself. Fidget as much as you need to. Knees under the hips and hands either under the shoulders or a little bit forward of the shoulders if that's better for your wrists. Connect through all of your knuckles and your fingers. Let's check out the feet and the calves. So take your left toes, tuck the toes under and press back through the heel. This feeling, we've done a lot of opening already in the lower leg and foot. Just notice how it feels to get this little calf release. And then come back, change sides. Easy breath. Soft in the face. And then we'll come back. Okay. Now walk your hands just maybe an inch or two forward of the shoulders. Tuck all of your toes under. And using a little bit of push of the hands forward, pull your tail back towards your heels. So this isn't a like a destination place. We're not trying to get down to the heels. We're just going in the direction of so that we can actually start to feel a little push on the feet. Feel the solid ground under the feet and how you can give a press through the feet to move the body forward through the crown of the head. And then feel the press of the hands forward to take the tail back. Again, connect with your feet. Connect with that feeling of pressing off a really subtle launch forward and then pull the tail back as the arms reach forward. Do this a few times on your own and you can change where your hands are. You could have them further forward or a little back. Find a pace, a rhythm that works for you. Again, the intention is to connect with this sense of ground. One more. And then we'll untuck the toes, which will probably feel pretty good. You can lift your lower legs and circle your ankles a couple of times. And then we'll bring the big toes close together, the knees a little bit wide, hips again come back toward the heels for a child's pose. You can stack your forearms or hands if you want to make a pillow for your head or rest your head on the floor. A couple of soft, long releasing breaths here. After your next exhale, start to come up and you'll transition through all fours just enough to tuck your toes under and then use your hands on the ground to push yourself back off of your knees and onto your feet. Keep your knees really, really bent and prop your forearms on your thighs. So we're going to call this umpire pose. Really letting your weight, your trunk be supported by the legs, by your arms on the legs. And to come into a little more warmth in the legs, we're going to bring some movement in here. So dip the hips back, feel the weight in your heels and then lift the hips and tip the torso forward, maybe even letting the head go. And then dip the hips back and then tip forward, let the head go. One more time, dipping the hips back, getting those warm legs and then letting the head go. So we'll come back to that bent knee position and now we're going to gather the muscles and the support of the low deep belly as a little bit of a hoist, a little bit of a sling, so that we're supported from the underbelly and we can replace the forearms with the hands, nothing else changed. And then press down with your feet and with your hands and slowly stand all the way up. Just feel yourself for a moment on your two feet, upright. Again, letting any slow, snow globe swirling settle. Okay, you can move if you have a blanket, move it off of your mat and we'll come on up toward the front part of the mat and find mountain pose. So your feet are about what feels like about hip distance and we're going to explore living in your plumb, the plumb line of your skeleton. So sometimes it's helpful when we're trying to find something to first find its opposite where we're not in that quality. So have your hands on the fronts of your legs, the fronts of your thighs and just let your pelvis and thighs come forward and feel how that feels both how it maybe got a little firmer here at the front of the legs. Notice that your pelvis and low belly feel like they're kind of forward in space, maybe over your the tops of your feet, but also notice when you did that your shoulders and upper body had to go back a little bit as a counterbalance. So now we're going to take the palms again and give a little nudge at the tops of the thighs to take the thighs back. And as that counter movement you've got to bring the upper body slightly up and forward. It might feel like you're doing a total dodo bird, but I know you're not. You've just come into a little bit more of your plumb and if you sneak a peek, it's kind of tricky to do, but if you sneak a peek down the side of your body and imagine that you had on tuxedo pants and they have that stripe. So rather than the stripe being at a diagonal, the stripe is straight up and down. It's perfectly vertical. A little bit of softness in the knees, let your arms go. And even if this feels slightly unusual, if it feels new and unfamiliar, see if it's okay to be with through these next few movements. A little bit of weight in your heels, reach your arms forward as you sit back and really sit back like you are sitting on a third leg or a big kangaroo tail back there. And then easy, come back up. We're going to do this a few times. Sitting back, arms reach, and then coming back up. Again, you determine the degree of bend in the knees, what works for you today. Easy around the shoulders, soft through the face. Okay, this time pause and hover in this knee bend, in this powerful pose, utkatasana, powerful pose. Lean a little more forward, reach a little more forward through your fingers and see what it would be like to pick up your left leg and reach it back landing gently in a lunge and then take your arms out and just pause for a moment.
So through transitions and different points in practice or in our lives, we can have that snow globe stirring feeling, right? And it's really important. It's really great to let ourselves just like, have a moment, pause and let all of the dust settle. So let yourself land, let yourself really find your feet here before you make a move or a decision on something else. Okay, when you're ready, right hand, right hip, left arm up and we'll side bend to the right. Now this can create a little bit of wobble, right? Wobble is part of the pose. So if you wobble, just know you're doing it right. Another exhale with a reach through those left fingers to the right side and then come back up, reach the arms forward, lean a little forward. Now bend the back knee and here's this push that we were doing on all fours, this launch off of the balls of the left toes. Give either a hop or some little hops and come up to stand. So let's try the other side. Arms up, sitting back, powerful pose, Utkatasana. And we'll hover here, easy shoulders, soft through the jaw, weight is in the heels and then lean a little forward, reach forward. What would it be like to pick up that right leg and stream it back a little bit, land a little bit to the right and then let yourself settle. Let yourself really find the ground. Let yourself have that pause. Left hand, left hip, right arm up, side bend to the left. Wobble if it happens. Another reach through the right fingers and then come back up, arms forward, lean a little forward. Bend the back knee. Now here's again, this opportunity to really feel the support to trust the steadiness of the ground under that back foot. Let yourself have a little push off and then standing. Feel yourself here. And now we're going to bring even another layer of sensitivity to how it is to live in the feet, even what the relationship is with the feet to the earth. So this is a specific practice that I learned from one of my teachers, Amy Matthews. And it's about sitting in the saddle of your ankle. So the lower leg bone that bears weight comes down and sits in the ankle on a bone that is shaped like a saddle. And that lower leg bone straddles the saddle evenly left and right, just like you would sit in a saddle. And so if we land on the ankle a little on the left or a little more on the right, we can feel unstable. We're going to practice what it would be like to sit centered in that saddle. Okay. So here's the technique. Come to what feels like only the ball of the pinky toe. So, you know, whether you are specifically or not intend to be on the ball of the pinky toe. And then imagine that you could grow a root down through that pinky toe ball. And from that root, now you could spread and widen the balls of all of the other toes to the right, to the right, to the right. And then finally anchor all of them, including the big toe mound. So your heel is still up. All of the balls of the toes are connected to the ground. And here's where we're going to imagine sitting straight down in the saddle, even centered, straight down in the saddle of the ankle as you lower your heel. Now notice what it's like in that foot, in that ankle. Actually notice what it's like that whole left side of the body. And then let's try the other side. So lifting the right heel and coming onto what feels like only the pinky toe ball. And then like you could spread your fingers, you're spreading, you're intending to spread the balls of the toes to the left, widen, widen, widen, until all of them come down, including the big toe mound. And now look forward, feel balanced in your body, and imagine sitting evenly in the saddle of your right ankle as you lower that heel. Check your plumb, sides go back a little bit, soften into the knees, look forward. Standing on your own two feet here, what is it like to be connected? What is your relationship to the earth here? We'll go through the movements that we've explored with a little bit of variation again, so that we can kind of tell if there's a difference. Okay, so arms stretch forward, sit back, a little bit of powerful pose, and then come back up. And again, sitting back, arms reach, come back up. Last time, this time we'll hover. We'll step back with the left foot, so a little bit of lean, start to stream the left leg back, step a little bit to the left if you can. And then rather than the heel being up, just barely angle the heel in, so that you can get the heel to be on the ground. We'll let the arms come in and invite, coax your right thigh back slightly, reach the arms forward again, and if it feels right, the arms can even come up. So Virabhadrasana I, Warrior I. Couple of breaths here, feeling your entire body. Arms forward, reach a little forward. Okay, lift the back heel and turn it to the left, so you're on a neutral ankle again. We don't want to push off of a tilted or asymmetrical ankle. Come to that neutral ankle and find your little push off, step forward. Good. If you want to find the saddle on that left foot again, if you feel like you came out of your saddle, find the pinky ball, spread over to the big ball, and then set right down in the saddle centered in that ankle. We'll come back into powerful pose, and we'll explore with the right leg. Lean a little forward. See if you can step a little bit to the right side, and then give yourself that moment to let any swirling settle. Turn that right heel just slightly in so that you can get it to the ground, the outer heel if you can to the ground, and then encourage the left thigh bone back just slightly. If it feels better on your spine, you can lean forward here. Arms can come forward. Option for arms to come up. An option for the torso to come more upright if that feels good for you. Warrior one. Let your breath move through. Reach forward. Lean a little forward. Neutralize the back ankle. Bend the knee. Feel that solid ground. Give a little push off and come on up. If you want to find that right foot saddle, find your centered place there, and we'll take just a couple more moments to feel this quality of standing on the feet, being of the earth, and really experiencing being in your skin, being in your bones. What's it like to feel the support and structure of your bones here? Okay. Let the eyes blink open if they've been closed. Loosen your stance a little bit and separate your feet slightly. We're coming back into umpire. Sitting back, bending the knees, and sliding your forearms down to your thighs. We're going to come to the ground. Knowing that, you can just take the path of least resistance to get there, either through all fours or through a squat. Coming on down to a seat. After you've landed in the seat, feel free to sit again on a little something here. I'm going to get one blanket and prop myself up on that so I have a little bit of a lift. Take your right leg forward with your left knee bent, foot on the floor. It can be bent to any degree. It could be by the calf or up more toward the groin, wherever it's comfortable for you. Then hold the front of the shin and just give yourself a little bit of an uplift, not rocking back on the pelvis, really making sure that you are neutral in the pelvis. Then we'll come around right hand, outside of left knee, and left fingers just behind. A little bit of a tent post, not working hard back there. Just support. As you start to feel the unfoldment of this twist, actually reach forward with your right leg. Let that right leg get a little bit longer to inspire the spiral up through the center column of your body. If you want to turn the head a little bit to the left, you can, but keep the neck really, really soft. There's no destination here. It's just in the direction of, feel your breath expand and condense in this shape. Then on an exhale unwind, stretch that left leg out and scoop under the right knee to bring that foot in.
Then find that little bit of uplift, the back of the pelvis lifting, the heart lifting. With that uplift, we'll come around to the right left palm, to the outside of the right leg, and then right fingers just lightly behind you. As you start the spiral, actually lengthen your left leg forward a little bit. Let it grow forward. Then feel how the turning can be more natural. Maybe even all the way up through the neck, staying very, very easy in the neck muscles. Notice the breath here. On an exhale unwind. Feel how that left leg comes back towards you a little bit. Then coming off of your prop, if you're on one, moving it off to the side. We're going to come down onto our backs. Lowering down. We'll take a moment in constructive rest. Feet on the floor. Arms can relax down to the sides of the body. Your eyes could be soft or they could be closed. Again, any snow globe swirl, letting it settle here. You have just really honed, fine-tuned some attention. A lot of focus in that practice. Give yourself a moment. Then we'll do one more release for the legs. Fing the right ankle across the left knee for a figure four or sometimes called Reclined Pigeon. Pause here. It might feel good to take your right hand down by the right hip crease. Just give little nudges or even a little massage there. You can feel good to wing that knee out a little bit more. Feel free to stay right here. If it feels right, you could bring the whole thing in toward the torso. Support the legs by interlacing the fingers or holding onto your pants around that left thigh. Wherever you have the legs, let them sway a little bit left and right. It could be really interesting to feel what's on the edges of center here. Back to center. Let the left foot come down if it's lifted. Then take that right leg to the ceiling. A couple of ankle circles each direction. Make some space among your toes. Try to imagine your finger spacers in there again. Shake that leg out a little bit and then let the foot come down. We'll do that on the other side. Left ankle crossing. We pause here. Again, we let the stirring settle. We really let ourselves tune in before we make a decision or make a move. You might use your left hand. You might palm at the hip crease or even massage a little bit to help open and wing that left hip a little bit more. Feel free to stay right where you are. You could lift the whole thing in and then support that right leg. However you have the legs, feeling to the edges left and right. A little bit of rocking. Then back to center. Right foot to the ground. Left foot to the ceiling. You could hold behind the leg if that's better for you. Circling the ankle a couple times. You might get some pops in there. Then wiggling the toes. Giving a little shake. Then setting the foot down. Constructive rest. We'll take. We will receive a few moments of relaxation here. Shavasana. You could let that happen here in constructive rest. If you like, fan your heels out and let your inner knees touch.
You could also let the legs go out straight and long, floppy. Any other adjustments that you'd like to make for your comfort, warmth, feeling as undistracted as possible, let that happen. Then allow yourself to really sink in. Full physical release. Letting the breath be spontaneous and natural. Even though we're completely letting go of the body, effort, muscle, the mind still, the attention still stays here. Invite it back over and over if it wanders, which it will. Staying with the experience of being you. Pretty nice. Feel free to stay here as long as you like. If this feels like a good time, begin to let your senses awaken. Smelling, dealing on the skin, even through closed eyes, getting a sense of light and dark and shapes, smelling, tasting the space, the moment.
And then in a way that feels good to you, gathering the limbs in, especially if your legs are outstretched, and rolling onto a side. Pausing on the side for a moment, you can use your bottom arm as a pillow. And then keep rolling like you're rolling your chest and your face toward the floor as you use your arms to press yourself up. So coming back into a seat, I'm going to grab one blanket to sit on for comfort. Coming back similarly to how we started.
Thank you so much for your practice, for your attention, for this time that you take to care for your body. Please know that in this practice, in your efforts here, your intention to pay attention to this primary relationship of earth and body will help deepen your relationship to yourself, to your body, and to your life. Thank you so much. See you next time.
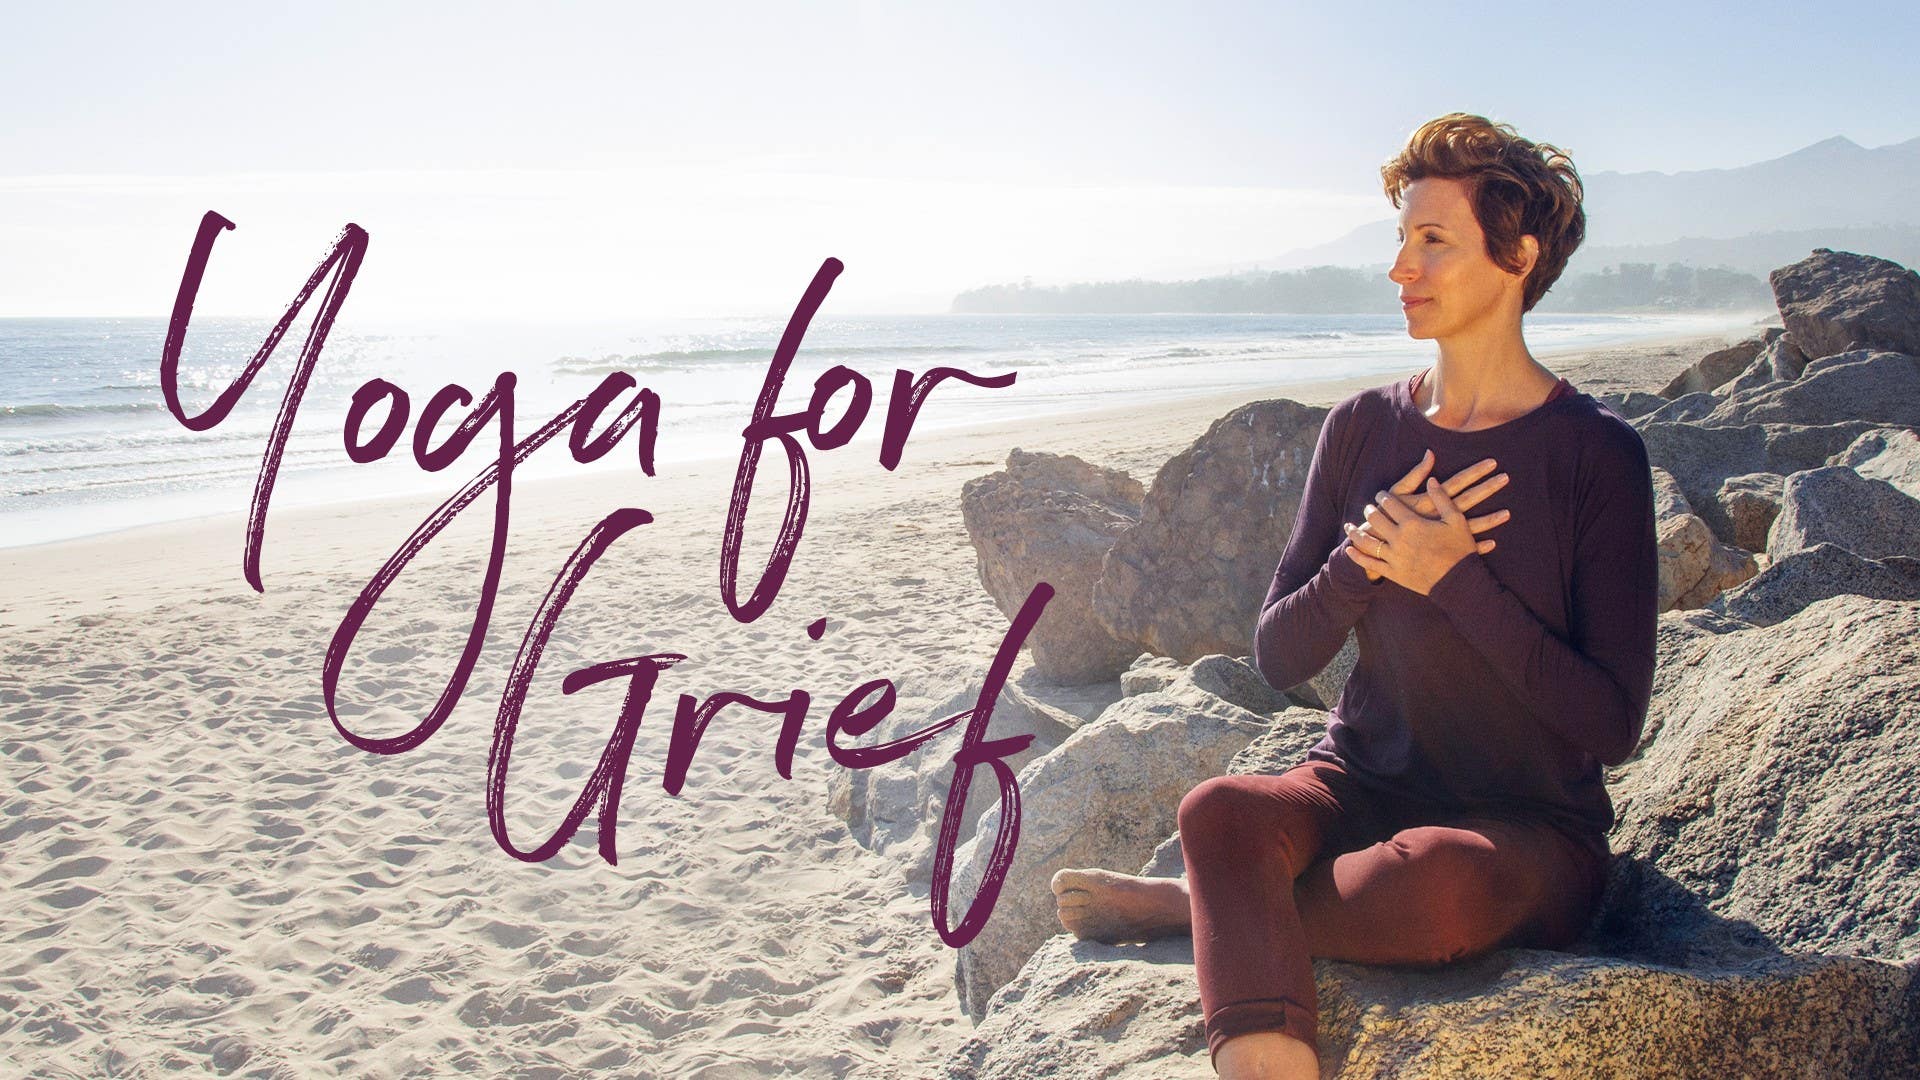
Yoga for Grief: Michelle Marlahan


Comments

You need to be a subscriber to post a comment.
Please Log In or Create an Account to start your free trial.
