Description
About This Video
Transcript
Read Full Transcript
Welcome back. For this session we're going to dive into Urdhva Mukha Spanaasana. Urdhva, upward. Mukha, facing or direction. Spahn, dog. Asana, posture, pose. Urdhva Mukha Spanaasana, upward facing dog pose. So this pose is one that we do over and over and over again in many flow classes in traditional ashtanga classes, but it can also be a pose that can be held and sustained for a long time. So we have the tendency to overdo it, so why not drop in, back it up and refine it. So for this practice you'll need two blocks and a mat. So some of the benefits to this pose is not only is it strengthening to our upper body, shoulders, chest, and back, and starting to lengthen and strengthen through the legs, is that we start to improve our posture. It starts to lift our chest, we can stand up a little bit taller, and it can be lightly stimulating. In terms of contraindications that why this might not be right for you today, wrist mischief, shoulder mischief, and low back pain feeling of too much congestion in the low back, right? There are things that you can do and offer if this is not for you today. So we're gonna go ahead and start on our backs. You're gonna take a block medium height just behind the shoulder blades, and then the other block start with it up high, and then come on down. So block right at the shoulder blades, and then take this one at its highest height and check in. So first palms up, right? If this feels like your head's a little too high, you can also come to medium height. But I don't want to go any lower just to start, but I want you to find a place that you can completely melt. So already you're feeling your chest opening, heart shining up, and then we're gonna take the palms up. So from here what naturally happens is we start to externally rotate the upper arms. The inner upper arms come forward, outer arms back, the heads of the shoulders slide in, and then the shoulders slide back. As we do this, the shoulder blades slide a little bit in towards each other and support the heart as it moves forward. So just taking a few breaths here without doing anything. You can just even let your feet kind of just go. You can let your eyes close down. Right, so as we move into upward facing dog, there's a lot of work through the shoulder girdle. Shoulders, shoulder blades, chest. We tend to open a lot easier from our lower spine, but this pose is gonna ask us to tap into our upper spine, to the thoracic spine. Let's see if you can just keep letting go a little more on each exhale. And your inhale, just feel that buoyant lift through the chest. When we're actually in the full pose, we can use our breath to accentuate these actions.
That inhale to lift, and the exhale we use to anchor through the tops of our feet. The shoulders go a little bit more. You can take the arms a little wider if you'd like. I know this feels so good that we could stay here forever. If you'd like to, feel free to hit pause and stay here, or come on up. So slowly just lift yourself up a bit, slide them out to your sides, and then come flat onto your back. Just turn palms up. So right here you start to feel the rotation again in the arms, inner upper arms forward, outer arms back. But I want you to bring your awareness to your spine, into the natural curvature of our spine. So take your right hand and slide it underneath. So you should feel a space between the mat and your low back. Your lumbar spine naturally curves forward anterior, towards your front of your body. So this is the area that we tend to be most flexible that we go to in our backbends. So I'm going to ask that as your hand travels up a little bit, that area that starts to touch the floor as we turn into our thoracic spine, the curve moves more posteriorly towards the back of our body. I'm going to ask that we start to get in there when we lift the chest open. So we move against the natural curvature of our spine sometimes, just to create space, mobility, flexibility. It's not that we want it to stay there forever, and it's not that we want to lose our natural curvature of our spine. It plays a very important role in stability and as a shock absorber. So go ahead and bring the knees in, take your right arm up, and then just roll off to the side, and come on up. So you're gonna come on to your shins, sit on to your heels. So you have the choice if you need a blocking, go ahead and sit there or sit on your blanket. Take your blocks by your side. So starting to move through the pose from the arms, from the hands. So when we actually move in, we're going to stack wrists over shoulders. One of the things I see a lot in this pose is shoulders way over wrists. So we're going to start right here and just sink it in, plant the seed. Press the palms down, right? So if you're sitting up on something and the palms don't press, remember your blocks have multiple levels, right? So you make it work for you. Press the palms down, slide back so wrists are right under the shoulders. So right here, start to find the rotation. Inner upper arms forward, outer arms back. Start to strengthen through the tricep, which will lengthen through the arm, right? Check in if you tend to hyperextend, put a little microbend. And from here you'll notice all of a sudden the heart starts to lift open a little bit more as you press the palms down. So your low chest muscles start to lift and then your upper start to spread and stretch. And then the rib cage starts to soften, finds neutral. But in this pose we are bringing the chest forward. Good. Press through the palms, feel the rotation, over exaggerate it, really get into it so you can feel it. Press the palms into the earth, right? So see if you start to spin the eyes of the elbows more forward, right? And as you do so, then start to spin the forearms back a bit. So the eyes of the elbow will start to be on a diagonal. So not totally facing in towards each other. And taking a few more breaths here.
Good. Exhale, release. Slide the blocks off to the side and then come on to all fours. Coming into a tabletop position. Take the time to line up the wrists, check equal distance from the sides of your mat, middle fingers forward. And you can take the tops of the feet down. So right here we're gonna move through a little bit of cat-cowl, just warming up the spine. And what I want you to do is to see if each time we inhale and we lift, see if you can tap in to the upper back, right? Because when we start to work the back bend again, this area down here, our lumbar spine, it's like, it's ready to go. But the upper back, we've got to coax it to play. So in an inhale, let the belly drop, let the chest lift, feel the rotation of the arms. And exhale, round, press. Spine towards the sky. And as you press, feel the wrapping here as well. Cerate is starting to activate. Inhale, belly drops, chest lifts. As the shoulder blades draw towards each other, the rhomboids are drawing the shoulder blades in. Exhale, round, press. Bring a little bit of energy and motion to the spine. Inhales. How long you can get here, right? So instead of just going into this back bend, see if you can create length. Exhale, round. And again, inhale. Notice as you start to press down, see if you can broaden through the low back. And that translates to broadening through the belly. Good. Exhale, round. Don't forget about the arms. So drawing inner upper arms forward, outer arms back, maybe a little micro bend through the elbows. Good. Exhale, round. One more. Inhale. Good. Exhale, back to a neutral spine. Take the feet out, hands out. Come on down onto your belly. Take the bottoms of the feet onto the floor. So playing with bhujagasana, cobra pose, also known as serpent pose. You bring your hands to your mid ribs, anchor down onto the tops of the feet, right? So that is what is going to give us, when we move into the full pose, a place to reach away from. So practice right now anchoring down and see if you can take the pinky toes down because they tend to want to lift. And through that, there's going to be a lift through the inner thigh to help that happen, right? But don't over exaggerate that action without forgetting the outer thigh drawing down. So it's an equal action. Forehead down. And on an inhale, lift the chest. Just peel up nice and light, right? Not worrying about how high you get up in this pose, but feeling the stretch, the lengthening. Good. Exhale, slowly roll it down. A few just like this. Inhale, lift up, take a pause. Take a few breaths in.
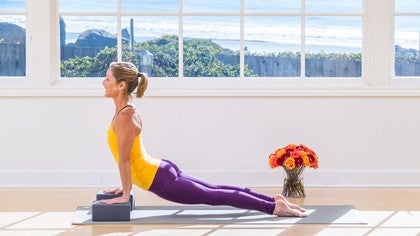
Exhale. Inhale, slowly lifting up. Maybe coming up a little higher, draw the outer arms in. Draw the inner thighs and outer inner thighs up, outer thighs down just a bit. Exhale, relax. Inhale, come on up again. Maybe pressing up a little higher, but in bhujangasana, we're keeping the pubic bone down, finding space, belly button to sternum, sternum to chin, back of the neck long. Exhale, release. Good. From here, as we move into upward facing dog, the feet will be about foot apart, more because it's the transition that we often see between plank pose, chaturanga, upward facing dog, downward facing dog. So if we're not fiddling with the feet, it can be also done feet together, right? That puts a little bit more strain in the low back. So I'm going to teach today feet about hip distance apart, or a foot or so. Good. Coming back, forehead down. From here, we're going to start to activate all the little muscles in our spine. So we've got this long muscle, erector spinae. We got the multi tifida that connect our vertebrae. So we're going to turn those on so you can start to feel what that's like a little bit more. On an inhale, lift up cobra pose, right? So we've already activated them in cobra pose. But from here, start to lift the hands. Good. So space. So notice here, we start to want to round in, see if you can still lift up. Tap into the upper thoracic. Exhale, release. Let's try that again. Anchor through the tops of the feet. Soften through the knees for a moment, and then as you straighten, lengthen the legs, they actually don't have to be all the way straight. Just engage. Inhale, lift up. Right, option to stay right here if there's any congestion in the low back, or lift the hands. Right, so we're creating space, creating volume. Exhale, release. Let's come back up. Low cobra, bhuzh and gusta. One more time, hands on the floor. Inhale. So from there, you might be able to gain a little bit more space and length. Exhale, release. Come down onto the forearms. Stack, wrists in line with elbows, shoulders right over elbows. Root down, base the thumb, base the pointer finger, inner wrists. If you have any shoulder mischief, you can also interlace the hands, press the outer wrists down. We're going to play with Sphinx Pose here, and more to focus on the chest and the upper back. So in an inhale, slide the chest forward almost like the heart is this swing coming through the arms. Like the arms where your tree is, your stability. The swing is the heart coming forward. Back of the neck long. Good, tops of the feet anchor. As you press the pubic bone down a bit, see if you can find a little bit more length, space, volume, expansion. Get bigger through your low back. Finding stability in the upper body. Good, exhale, release. Press on back. We're going to come into a variation of Urdhva Mukha Svanasana, upward facing dog, on blocks. So by lifting us up a little bit more, it gives more access to get into the upper body. So with the palms on the blocks, scoot the knees back and then let yourself come to the tops of the feet. Let the heart come forward. So one top, next top. Check in. Shoulders over wrists. Find the spin. Draw the heart forward. And then as if you're trying to drag almost your whole body through the legs. Good, back of the neck long. I prefer to keep my head neutral, right? And some variations they teach going up, but I like the back of the neck long. Check in that the feet aren't turning in or out. The tendency for going a little cattywampus. Good, exhale, come down the knees. Sit back for a moment. We're gonna do that one more time, right? Feel it peel open a bit. Feel yourself expand one more time through. Okay, coming on the knees, scoop forward. Let your vertebrae kind of roll out. Shoulders open. Tops of the feet down. Good. Root to rise. So planting, pressing, and then shooting the energy out the back of your feet, out the head. So here, right, we're playing with the back bend, but more about how long can we get? Spread a little wider through the collar bones. Good, exhale, come on back. So for this one, you're gonna take two blocks, right about where your hips and pubic bone would be. Actually, let's play with one block, and then bring the hands down. You're gonna slide forward. Just check the measurement here. So slide forward of where your hips will be. Okay, and then you can kind of just let yourself hang out there. Bring the tops of the feet down, slide the hands back underneath, and from here, left, right. So you may feel the top of the block, right, but I want you to see if you can stay lifted up. Heart forward, right. If you need to, you can let the pubic bone rest, almost like a variation, a modification of full pose. So heartless, slide the shoulders back, lift up. Good, exhale, release. Take the block away, and if you need it, you can keep it there. You can also play with the variation of keeping the shins on the floor for a bit, and then we're gonna come back forward. Slide the hips forward, take the tops of the feet down, roll the shoulders back, shine the heart forward. Good, so remember anchoring, feet down. Outer ankles draw land, right, so not to let them get lazy. Draw it in. Legs are engaged, the bum is micro engaged, just to create stability. Whole front body is stretching. Small little muscles of the back are active, but we're trying to tap in, get in a little deeper the upper back. Good, exhale. Knees down, come all the way on to the belly. Take a moment just to shake out the hips. Good. Bring the big toes to touch, and just press back into child's pose. Alright, so this is a counter pose. So go in nice and slow. Option of arms and front, or arms and back. And then slowly curling up. Alright, so that was urdvamukasmanasana. So this is the pose, one of the poses, that's part of the bread. I'm gonna say like the extra of our vinyasa classes, that sometimes in our flow classes gets too done too quickly and too many times, so we tend to breeze through it. So I want to encourage that if you're doing this pose often, that you take a sacred pause when you get in. You inhale, take that sacred pause before you transition to the next. And again, be willing to take those two steps back to make an inch forward. Thank you for joining me today. Namaste.
Step By Step
Comments
You need to be a subscriber to post a comment.
Please Log In or Create an Account to start your free trial.


