Description
Transcript
Read Full Transcript
Hello, everyone. Thanks so much for being here today. Glad you made it to the Mats. I'm excited to guide you through a practice, focused on the sew as today. So we'll work on, curvature of the spine and working on one of the hip flexors that helps us walk around, take big steps help us on all those adventures that we're gonna have today or for this week, for practice today, it'll be helpful to have a blanket and a couple of blocks.
And we're gonna go ahead and get started on your back. And so when you find your way to the floor, we'll begin with your legs bent. So we're gonna just start with a simple little warm up where we tipped the knees in towards your chest. And it's more just to help us arrive as we maybe hold the knees and rock a little bit side the sides. And then while holding the knees, a huge fan of circling them around, so we kinda orient ourselves in this area of our lower back and hips. Not much to do with the sew as just yet, but just arriving.
And star the circles the other direction, a couple moments, hopefully appreciating the ground underneath you. And now let's separate the knees and do that similar kind of circles, but move each femur independently and feel how we're moving in the ball and at joints? Does one feel more tight, or can we notice with repetition here? Are we increasing our range of motion? Sense of ease, circle your legs the opposite direction a couple times. And just thinking about that wonderful sew as muscle, our hip flexor, one of the hip flexors that starts in that lower thoracic spine and crosses over the pelvis into your inner femur.
Kinda cool. Let's keep your legs together and set your feet now on the floor and maybe just a little bit in front of your knees. And you might bring your fingertips to the front of your pelvis and try to tip the pelvic bowl where you lengthen the lower back and lift your tailbone. So we press the lower back to the floor and we'll opposite direction where you tip your bowl forward and create a little more arch in your lower back. So orienting ourselves here with a little pelvic rock and roll forward and back.
Feel when lower back lifts and when your lower back presses into the floor gently rock and roll, maybe 1 or 2 more times. Kinda waking up that area. And now let's keep a little bit more neutral back, not too press, not too arch, and tip your right knee into your hand as you slide your left leg all the way down to the floor. If your left shoulder permits, let's reach it all the way back towards ear. And take a moment to send a little energy into your left leg lengthening and your left hand reaching away from the shoulder.
It's kinda wait and feel how your back body might with a little bit more time, settle closer to the floor. Again, that so as muscle starts in that thoracic spine area and goes all the way to the inner femur. So if you can kinda imagine that muscle and it lengthening. Let's switch and hold your left knee and take your right leg straight down And then if you can, your right arm back by your ear, and just let your back body settle in towards the ground here. Kind of feel what's happening from that thoracic spine towards your pelvis to your inner right femur and imagine that muscle lengthening toward the direction of your right hand and also towards your right heel. K. And after that first deep dive, now let's go a little faster and put it more into motion as you hold your right knee, stretch your left leg and arm long, and then alternate right knee and arm long and find that pace that works for you where you really feel the end range of your movements and then go get going to the next side.
So we're trying to kinda warm up with repetition and all the while keeping your lower back pretty neutral. So we'll also be engaging some core abdominal muscles. K. Let's link them through each side one more time. Now we'll bring the legs parallel. Something I love to do now is do opposite arm and leg.
So if we have fingers facing up, shin's parallel, as you drop your left leg down, take your right arm back by your ear and then come back to neutral, right leg drops, left arm back by your ear, neutral, left leg, right arm combo, neutral, and lengthened through the right leg and left arm. Back to neutral. Let's do two more and feeling that leg through the front of that right leg when the right leg comes down that sew as and then feel the length through the left side of the sew as a left leg comes down k. Now let's go ahead and pause and tuck your hands under the back of your head. Let's keep those shins floating. The slips your head and shoulders a little bit and stretch that left leg parallel length and through that sew as as you twist to the right, and you're back to center.
Right leg goes forward, and we're twisting to the left center. And let's find that pace that works for you where we're taking long exhales and reaching all the way through that straight leg as it comes down. If you need to drop your shoulders down to the floor, take a rest, please do. We're gonna go at it a few more moments. See if we already feel a little bit more spacious and length through the front of the psoas as a leg is coming down.
So we're stretching as we come down and strengthening those or bringing the knees more towards the chest. Alright. Let's go ahead and drop your head to the floor and slide your hands from a bit more down under the back of the sacrum hips area with your palms facing down. So we'll swing the legs up towards the ceiling here And with your hands creating little wedge for your lower back, let's start to drop the legs down in front of you as much as you can and then bend your knees, bring them back to the chest, feet up in the air, and legs coming down in front of you. So a little more strengthening as we drop the legs down, up, legs coming down, trying to keep that lower back pretty neutral, keep your hips neutral, just a few more times noticing when you're doing this that your jaw and eyes aren't starting to get tight as the legs come down. K. What if we could keep the eyes soft and the back of the jaw relaxed?
Alright. Now this last time, let's put the feet on the floor and spread your arms now out to your side. Tip your right knee towards your chest. And then from here, we'll let the, left, sorry, right leg start to slide down towards the floor in front of you without the pelvis rocking forward or back. Tilt your right knee towards you. And then you can maybe even slide it kind of right above the yoga mat or on your yoga mat.
Pull the right knee in and slide that right leg forward. Try that a few more times at your own pace And we wanna play really close attention that the pelvis isn't moving as we're stretching that right leg forward. And that the lower back might have a little bit of an arch versus back flat on the floor. A little bit of an arch and we lengthen and stretch. K. Now see what it's like when we put the right foot on the floor.
It's quite a bit of core stabilization work, then you know you're doing it right. If your core feels like it's definitely turned on left knee comes in, And then we're gonna slide that leg kind of right above the floor. Bring it back in without moving your pelvis We drop the leg down and kind of slide it forward in the end already engaging the core as you slide the leg out knee back in a little release, stretch, and strengthen as we come forward and down. Come in. I'm already feeling my core muscles engaged to keep my front of my pelvis neutral, so I'm not rocking.
And as we work this hip flexor, it's one of those great muscles that helps us with posture. So your lower back should kinda feel like it does when you're standing. That would be my hope. Alright. Now let's go ahead and put both feet on the ground. And find one of your blocks, and we'll add that now underneath your sacrum pelvis area. So let's have a flat block here. And when you have that in the right place, let's tip your left knee towards your chest.
One of my all time favorite stretches here with your right leg up in the air. So keep that ankle flex and that right leg strong as you drop that right leg down towards the floor whatever amount you can without going into a big backbend. You swing the leg back up and think of that leg lengthening as it comes down parallel to the floor or heal down for some of you. Go up and down. And up and down.
And up. Now the last two, let's your toes just turn out couple degrees to the side and let that leg come down, which is a little bit of external rotation just to feel into a slightly different area. So toes turn out maybe 10, 15 degrees as the leg comes down and straight up. Kinda working that muscle as you turn your foot a little bit and come back up. Now last time when your leg comes straight down with that right arm reach back by your ear and hang up here for an extra moment. Notice your lower back isn't going into excessive arch and about your left knee to tip a little bit to the left.
Let's come back to neutral, grab your right knee, and take your left leg up in the air. Start dropping that leg down and you're reaching long through that heel as it comes down, and we come up ankle stays flexed. Again come down and up. So we don't hopefully have the goal. The heal does not need to touch the floor. We're trying to keep your lower back relatively neutral.
And how far does your leg come down? It's gonna be more curious Does the repetition help you lower the leg? Does that feel good? And now this next time, we'll do a couple times where we turn the toes out just a few degrees. And when your leg comes down, you might just feel a slightly different area in that inner femur, inner groin area. See what that's like.
And engaging in front of the low abdomen to keep your hit points more narrow than wide. And maybe this last time that left leg parallel left arm back by your ear, lovely stretch here on your back. Alright. Now if we tip the knees in towards your chest, let's put your feet on the ground And when you feet meet the ground, lift your hips off that block and put that block between your thighs and that medium position. Hands at your side, palms face down. Now let's come into that bridge to lengthen the front of the psoas as we draw the hips up, stretch your knees away from your chest.
Maybe wiggle your shoulders a little more under, the chest area. Lower back down. I'm a huge fan of war, I mean, up by going kinda in and out of the pose a couple times. Maybe you squeeze the block the whole time you come up and be willing to adjust where your feet are so that it feels healthy in your lower back to do this pose. So some might lift an inch or some are lifting maybe 6 inches off the ground Whatever works for you, let's stay nose pointing to the ceiling and just give a little squeeze of the thighs to the block.
So we'll feel, again, often more muscles in the psoas engaging, glutes, engaging, hamstrings, engaging as we stretch your front body. Alright. Let's go ahead and lower and move that block out of the way for a moment. Maybe I'll move that to the side as we get ready to turn to your side. So we're gonna come up And maybe I'm gonna have you be on your right side first with your legs bent. Let's use your right arm as your pillow here.
When you're on your side. When you get settled there, bring your left elbow and knee to touch, and then kick that left leg back, left arm right above your ear or cheek area. Bring your elbow to knee. Again, we're stretching and lengthening the front of that left. So as here, elbow to knee, kick back, Try a couple more times. So if you imagine you're sitting a lot, how great it is to stretch that so as how much so of us so many of us need that on a daily basis, maybe even more than once to stretch this area open to help us with better posture.
K. Now let's go ahead and keep your leg back. And when your left leg is back, let's see if we can bend that left leg and grab your foot and give a little kick of your foot into your left hand as we imagine this thigh stretching a little bit back in space. Maybe you're upper body leans slightly forward. I think one more moment there enjoying that. When we come back to legs together, let's go ahead and flip around to the other side.
So you'll be on your left side with your left arm as your pillow. And when you're settled there, bring your right elbow and need to touch. Kick that right leg back as you reach through your right arm, elbow to knee, kick that leg back until you for sure feel a stretch to the front of that right so as area. And I love incorporating the arms stretch with the leg stretching because that soas, again, connects up into that thoracic spine area. So when your arm reaches overhead, You kind of stretch that upper part of the psoas, and we're doing the lower part as we move the leg. So kind of working the full length of the muscle.
Now perhaps this next time we'll keep the leg back. And with your right leg back, bend your knees, see if you can reach back and grab your foot and have the intention to push your foot a bit into your hand until you feel a little bit of energy and stretch to the front of that right hip. And then to help maybe balance, maybe your chest is tipping a little bit forward. One more moment as you are here. Alright. Let's go ahead and read and we're gonna roll right onto your back for one more piece here.
So when you're on your back, start with your arms out to your side, and they'll let your feet wander to the edge of your yoga mat. When you're ready, we'll start to do our windshield wiper boove of tilting the legs to the left as you turn your gaze a bit to the right. Come back to neutral, knees point up, and then legs a little bit to your right as you look to the left and back to center and keep tilting your legs one direct and then your eyes look the opposite and just hydrates the hips and the soas with the tipping side to side kind of imagining maybe that muscle as you move from that thoracic part of your spine down into the inner femur It's kinda getting a sense. This muscle lengthening as you rotate side to side. Maybe one more visit to each side. Just kinda considering that little warm up.
Alright. Let's meet back in the middle. And if you like, just tilt your legs towards you, and we'll either rock up or roll to a side and come up. And this is where we might, enjoy having a blanket for a little bit of padding underneath your knees. Okay. So as we turn to face the short end of your mat here, and when you have the hands in front of your blankets and your knees on the ground, hip distance apart, Let's go ahead from here and be in a position where we can do a little bit of cat cow just for a moment to kind of be oriented in this tabletop position. Rounding and arching.
And if we can stabilize ourselves here with straight strong arms and maybe bring your legs a little closer together. One of the great ways to stretch and maybe also get to strengthening that so as is if we keep that right leg bent and we lift the knee up maybe towards the height of the pelvis and imagine you're lengthening the knee away from the belly as it comes up and bring the knee back down. Again, slowly stretch that knee back and up. And bring it back down. The knee goes back and up and down, and we're trying to keep the pelvis neutral.
And maybe one more time in that same way, kind of lifting up and then neutral. Let's try and feel how the left side is as we keep the leg at about 90 degrees and stretch your knee away from the belly as it comes up. Neutral. Let that leg lift, knee away from the belly. Neutral.
The away from the belly, neutral, and one more time, a little warm up there. Alright. Now let's give your hands a refresh, spread your palms open, and either forearm dog or I'm gonna demonstrate straight downward facing dog with straight arms. If you bring your feet just a little closer together, often it's easier to balance slowly stretch that right, like, up into the air without rushing or hurrying, bend that right knee. And tilt your help us a little to the side as you lift that inner right knee up towards the ceiling, and let's look maybe a little bit under the right arm. Square your hips, lower your right foot back down, but slowly lift that left leg as we lengthen through that psoas. Bend your knee and open that left knee a little bit out to the side.
Do a little lift. Look back at your right foot. Square your hips and feet down. Right knees to the blanket, walk your hands towards your knees. So we'll come up to this kneeling position and Campbell pose is another great one to stretch the front of the sew as.
So I invite you to bring your palms to right above your buttock area of fingers face down. And what we'll do is go one arm at a time and then stretch from that upper so as down into the inner so as of that right leg as we lift up the chest in that right hand and then lean a little bit back. As you come forward again, right hand to the lower back, Left arm is doing the lifting, looks slightly up, and then maybe you arch, and we bring that left hand to the lower back. Right arm comes up and we're lifting out of the lower back. Stretching more than so as was we potentially go into our backbend.
Look forward, right hand to low back, left arm lengthens up, lift the chest, maybe the gaze, arch, hand to lower back. Let's do one more. Right arm goes up. And as we look a little forward, maybe we arch deeper stretch for SOWA's hand to low back. Left arm goes up.
Lift, and then it may be a little arch. And enhance that lower back. Alright. Let's curl your toes under, and let's fold this blanket out of the way and your blocks off to the sides as we come up to stands. Hey. So we'll be in our mountain pose for a moment. Just orienting yourself.
Let's have your arms flowed out to your side to help you balance. As you shift your weight to your right foot, bring your left knee up towards your chest. So that does more of the strengthening of the psoas. Like, you're taking a big step. Then we'll stretch back and touch the floor, and that's more of the strengthening part. Lift your knee back up and then take the leg back. K. Knee up and leg back. It's also a balance post.
In the up, and back, the up and back. So one more up, and back. Hey, rest your arms. Both feet on the ground. Arms again out to the side. Very short rest. See if you can balance here and bring the right knee up.
And then we do the stretching as we go back. Bring your knee up and back. And use your arms to help you kinda navigate into balance. It's okay to be a little wobbly. We can still do some deep strengthening and stretching. Using your arms to guide you into balance.
Let's do one more. Now day to day balance is a little bit different. So just notice how it's going today. Arms down will take that rest. Okay. So we can do a little bit deeper strengthening now with your arms out to the side.
And when we lift the knee up, we're gonna kick the leg out in front of you, and let's reach down and touch the knee with your right left with your right hands, back out to the side, lift your right knee, and then kick your leg out, as you bring your left hand to your right knee back to neutral. Left knee up, kick that leg out and touch the knee with your right hand. Back to neutral, right leg up, kick it out, touch the knee, back to neutral. K, knee up, kick out, touch the knee, neutral, knee up, I'm getting ahead of myself, kick the leg up, touch the knee, Let's do one more set. The up, leg out, little touch, neutral, knee up, kick the leg out and that little touch.
Hey, arms out to the sides. Wonderful. Let's bring your hands in front of your chest. I'll turn this side. It's a little easier to see now. So if you balance on your left foot, bring your right leg up behind you, And as we reach back for that foot, take your left hand up towards the ceiling.
We're gonna visit that, front of the sos here on that right side as you press your foot back into your hands. Could always be by a wall, but your left hand on a wall or a chair or a table. And as you push your foot into your hand, we're lifting up through the left hands. Look straight ahead. K. Let's switch.
Bring your palms in front of your chest and stand on your right foot as you look forward and your left leg. Grab the foot. If you have access to that, right arm towards the ceiling. So we're lifting that upper part of the psoas on that right and stretching back through the left as you kick your foot into your hand. Big breath in and out. Hey. Let's bring your hands in front of the chest and turn your toes out a few degrees so we can maybe come down into a squat.
Just a little different move there. And as you adjust your angles of your feet and get your to come a little closer to the ground, hopefully a nice way to stretch the back. And that's put the hands down lean forward and then put the knees down. And this is where your blanket might be nice for you and your blocks. We're gonna put them all the way up at the top of your mat. And we're gonna have to blink it if you like for some padding for the knees.
So flat wide blocks And we might lift your torso up, so it's a little easier to get in. And well, let's take the right foot forward first. Put your hands on these flat tall blocks. As you wiggle your right foot forward far enough that you can get your left thigh to drape a little bit towards the floor. So this could be our starting position or where we hang out where we look straight ahead, and there's a little bit of a back been happening.
So we always try to keep a little core integrity as you're doing that backbend. Now some might come down to elbows on the blocks as a another variation of that pose and see how that feels and kind of explore again, be willing to keep adjusting the angle of your right foot, or if your right knee feels better by your shoulder or tipping away from your shoulder, to bring you to a place where you're really interested in what's happening. Let's take a moment or 2 here. Just to kinda dive in and take few deep breaths where you feel some change happening in your body. Alright. Let's bring the knee in and hands on the block as you press yourself back, and then we'll bring that right knee to the blanket and switch with your left foot forward.
And then as you tip forward, adjust your left foot far enough forward that your right thigh gets to do a little bit of draping and your lower abdomen gets a little bit of tone as we start with our arms straight and just kind of dive in slowly to that sewa's muscle. K. Maybe some of you will come down to elbows on blocks. And as we have that nice, long spine, maybe you adjust the angle of your left foot. So for some of you, your left knee might tilt away from your shoulder, and that might feel a healthy spot. Maybe it's better with uni by your shoulder.
K. There's not a one size fits all here with the so kind of make it your own and that we feel some benefit that front of that right thigh area or groin area in her leg on the left. Can you take a moment again? Just noticing what changing where your body wants a little bit more of your attention. Let's bring that knee in just a couple deeper stretches there. Put your hands on those blocks. And as you swing the left knee back, let's move your blocks out of the way, and I hope your blanket's, gonna be great padding for your pelvis as you come down to the pelvis. We'll point your we'll keep your toes actually curled under.
And we're gonna do kind of a deeper stretch where you put your fingertips on the floor rather than your palms. And we're gonna let the nose kinda hover just above the ground and we're just gonna let those fingertips walk forward away from your yoga mat toes, stay curled under. And we're just gonna try to do a little bit of lengthening of that sew as muscle as you stay here with your nose just above the ground. Again, we get to stretch from the upper part of the psoas with our arms reaching forward. And with the pelvis just lightly pressing into the blankets and stabilize the pelvis here, So maybe this feels like an ideal posture that we wanna try to bake into our muscle memory.
Actively keeping your palms off the floor. Something that maybe with time help you feel like your back is really nice and open and feeling that rhythm that's happening as your belly presses towards the earth on inhale, and belly moves in towards your back on exhale. And if you imagine when you've been sitting a lot. This is just a wonderful opportunity for your front body to get a little bit more length, back body to get more open And there's maybe a little bit challenge in the shoulders, right, by having your fingertips on the ground and actively kind of encouraging the back ribs to float a little bit away from the pelvis. Right. Now maybe we're warmed up enough in that way where you point your toes straight back and slide your elbows in a little bit more in front of your chest with your palms together and just do maybe a few moments of a little bit more lift in our sphinx like pose where the crown of the head is lifting up towards the ceiling, and there's a little pull of the elbows kind of more energetically back towards your waist as your chest is reaching a little bit more forward.
K. And if that feels like you're shortening in your back, your elbows would be just a little bit more out in front of you. Alright. Last thing we'll do here, put your hands on top of each other, bring your forehead for a moment down towards your forehead onto your stacked hands as you lift both feet. Press your pelvis into the blanket as you hold your feet up. That's that lengthening part or, sorry, stretch the lengthening part, stretching part, and then bring your feet down as you lift your head up. Bends your knees.
Point your toes up, forehead on your stacked hands. Legs's come down. We lift the head up and strengthen the upper mid back. Point your toes up. And then the next time, just let your feet come down to the floor, maybe wiggle your hips here a little bit side to side. Releasing any tension in that lower back area.
And then after doing our little wiggles, slide your hands beside your chest. So we're gonna press ourselves back into wide knee child's pose with your knees on the edge of the blanket. And those stretch a little bit more across that lower back and outer hips, and you might stack your hands or have one fist and one flat hand. And just for a moment to help you settle back into a symmetrical post and even post stretch more of the hips. And just a moment, maybe acknowledging all that your body was able to do today.
And for some of the space we were able to make in our body through various shapes. Made that serve you well and walking around and whatever adventures you're gonna get into today or this week. And just generally helping with better posture. Let's go ahead and lift up. Bring your legs.
Together. And if sitting on the feet is okay, we sit on the feet for a moment or slide a block between your ankles. And resting your hands for a moment on your thighs. Okay. If you, for a moment, sit in a way where you're aware of your posture, can we maintain that kind of natural curve of the lower back without a big backbend without rounding? And see if we have a little bit more mobility in the sewas area in pelvis to come to neutral spine. Big breath in and out.
Alright. Thanks so much for being here. Everybody namaste until next time.
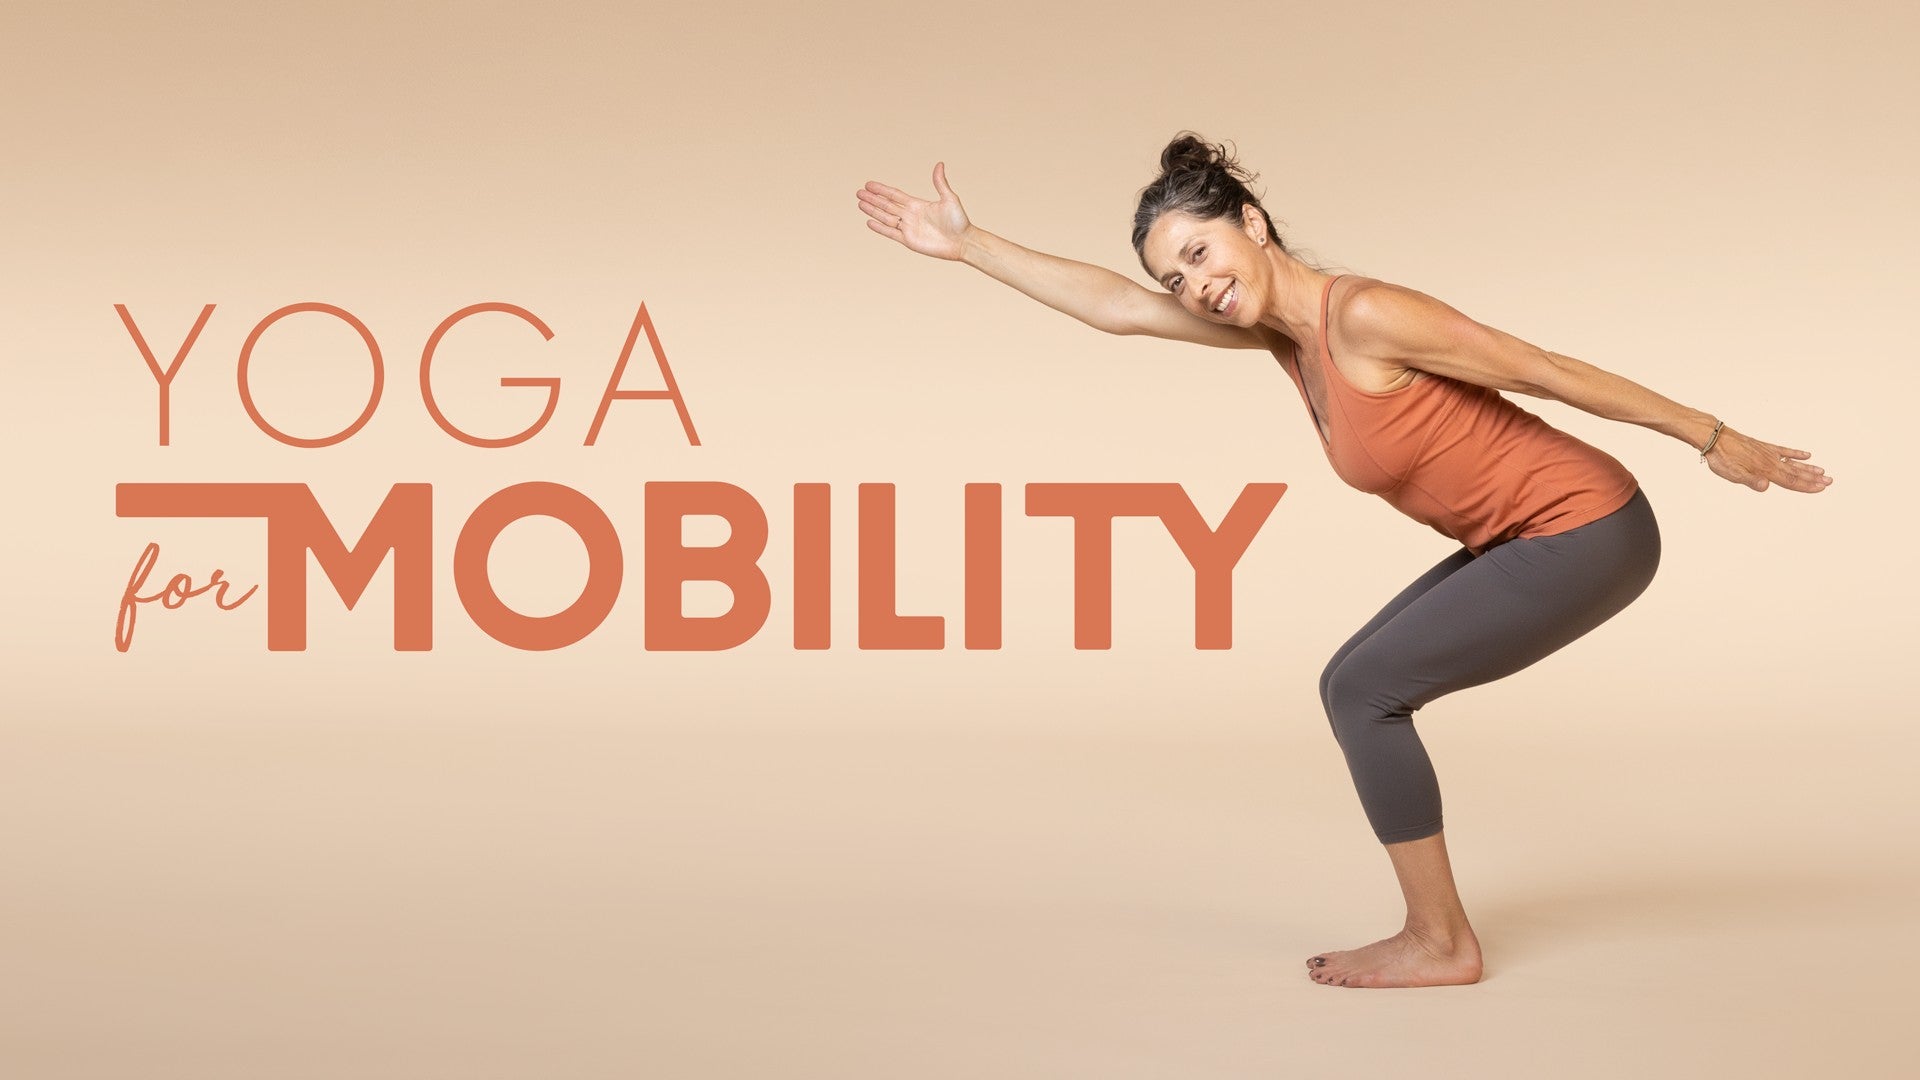
Yoga for Mobility: Melina Meza


Comments


You need to be a subscriber to post a comment.
Please Log In or Create an Account to start your free trial.
