Description
About This Video
Transcript
Read Full Transcript
(waves crashing) Namaste. So far what I'm hoping that you've done is that you've watched the series on stability and equanimity, and you've watched the series on fluidity and you've watched the series on moving attention through the body because all of that is definitely gonna help us with where we're going next, which has to do with exploring lightness. Lightness in the body and lightness of being, and flight. We're gonna do this in a sneaky way. There's an advantage to this.
What I've found was that I didn't really start doing arm balancing until my early 40s. I never thought I would be one of those people that would do those arm balances. But I became really curious and started to engage the practice in that way and learn some things about helping my body lift. I want to attempt to teach us some basic fundamentals today for flight. But many of us will be learning as we go.
So sometimes I may introduce a posture that is a challenge for some time, and I want to give you the chance to feel what the posture would feel like a little bit lying down. And then when you're watching it, the more you see the posture, the better chance the brain begins to have of putting together the posture in your body. All right? So let's begin. I think it would be great to begin in child's pose so we can just feel the breath for a moment.
Coming down, take the arms forward. Relax the body downward. We're looking for very fluid breath. Easy in and out. In fact, in this practice, the breath really matters.
We want to become even more aware of our exhale and how we use the exhale to get in and out of postures. Good, slowly draw the hands in under the shoulders and rise up. If you've got a block, it's not necessary but it will be helpful for our purposes, activating the inner line. The inner line's gonna be really important, so we're gonna take this block, place it right between the thighs, and we're gonna press the thighs together a lot. We've talked a lot about zipping up the tight jeans.
No kidding, these jeans, again, these are the old man pants we talked about before, we're gonna need to zip all the way up here. We're gonna stay zipped up so the pelvic floor will lift. Think about the internal contents of the body, they've got to lift. We're gonna bring the hands to the floor. You're using your whole hand.
The fingers are spread wide. There is no air between the hands and the floor. I'm gonna spin the outside of the arm bones back and down. OK, zip up, lift the knees off and squeeze the block, and then come back down. Inhale.
Exhale, lift up, squeeze the block. Inhale back down. OK, did you feel that? Actually, we'll do one more. Ready?
Lift up, and down. Now we'll move the block out of the way. When we talked about fluidity, we talked about angry cat. You might remember this move here where we take the shoulder blades around the body, rounding a lot. So that action becomes very necessary for where we're going next.
We want to pretend now that there's a block here. We've zipped up, hands just under the shoulders, fingers spread wide. We'll inhale, exhale, knees up. You're gonna play with taking the feet off the ground. You're looking forward, everything lifts off, and then slowly come down.
OK, so now even if you just came off the floor for a second, that counts. What we're doing is we're attempting to expand time. All right? So let's try it again. Hands down, inhale, exhale, knees to chest, lift off.
Push into the floor. Remember stability, fluid breath. Come back down. All right, so from here, this posture is really essential. It's essential to all of the other arm balances that we practice.
This is a posture that at home when I'm teaching, every class I teach we do it. No matter what the class is, we do it. Get used to lifting off. This posture is known really as the first arm balance that's usually taught. But we're gonna do it with a block.
So you'll come onto the block just like that. Feels like, I'll often say like the edge of the Grand Canyon. Don't let that concern you. So take the knees wide, hands down. So what you've got here is you've got these armpits.
The armpits can work like a shelf. You're trying to get the thighs right up against the rib cage. Now those same principles that we used in Lolasana, the last one, they apply. Fingers wide. Lift up, look forward, steady your gaze.
Zip up, zip up, lean forward, feel your fingertips. Maybe the feet come off. Come back down. Several issues there. If you're trying this for the first time, one foot off, center the foot so that when the other foot is ready to come off, it can find the first foot.
I'll demonstrate. Hands down, lift up, come forward, that's the scary part. You're gonna look about 10 feet out in front of you. Further than you think you can look. One foot off.
It's at center so that the other foot can come off. Push the ground away. Steady breath. Come back down. So what happens with that one is we'll want to hold the breath.
The breath stays fluid, right? We're interested in ease. So how is it that we can create ease with these kinds of postures? One more time. Fingers down.
If you've been doing this now and you know crow, you're gonna for arms straight or bent. Try arms straight, knees into armpits, look forward. Zip up. Push away. Listen to your breathing.
Got it? OK, so let's take the legs wide for a moment. Move the block out of the way. Set your legs at about three and a half to four feet apart with the feet parallel. Lifting the knee caps.
Hands are right there under the shoulders. Inhale, exhale. We'll just fold forward for a moment. Walk the arms back. Take a look at your arms.
Check that they are parallel with one another. That usually means you've got to spin the elbows in. Good, now inhale, lengthen and exhale. We're simply gonna turn the feet so the toes are out and the heels are in, and we're gonna come in here and just spend a few moments opening the hips. All the while the breath is really steady.
One thing that's important to remember with the practice in general is to remind ourselves to not attach to any particular result. You know that joy is in the journey phrase is true, so we want to enjoy every bit of it. All these other things will work themselves out over time. Come over to the other side. Good, feel what it's like in there.
Notice your sternum. Keep it long. Good, and then come back. Let's pause for a moment. Deviasana is to rising up.
Lubricate the shoulders. Inhale, come to center. Exhale. Bring it in, inhaling. Exhale.
Inhale, exhale. Good, slowly lift up. All right, so take your hands to your hips. Inhale, lengthen the front spine. Exhale folding forward out and down.
Now bring the hands to the floor again. Forearms are parallel with one another. Allow the top of the head to make its way toward the floor. Now it may be that the top of the head doesn't come to the floor. There's nothing to rush there.
Just fold forward. Line up your arms. You might play with coming up onto the balls of the feet. Now the lower navel has drawn way in toward the spine. You're gonna play with maybe taking the toes off and you're gonna go wide with the legs, point the toes, and then turn your toes into pins.
You're gonna draw a circle coming all the way up. Elbows stay in. They may want to splay. Zip up your whole front line. Good, lift your shoulders away from your ears.
Inhale, exhale. Go wide, wide, wide, and come down. Good, grasp your big toes with middle and index fingers. Inhale, lengthen. Exhale, fold.
Good, so we've all met back here. Have your neck be long. Shoulders move away from the ears. You can see how absolutely vital that is to a posture like headstand two. The shoulders must remain away from the ears or bad things happen to the neck.
When you are folding here, draw the inner line of the legs inward so the two legs draw them in toward each other. Slide the shoulder blades up the back. Inhale, lengthen. Exhale, hands to the ground. Good, legs to the ground.
Just come down and we'll sit for a moment. Just feel the effect of all of that forward folding. Good, so I like to talk a lot about being sure that you take the time after a posture to feel the effect of the posture because that was a big one. So let's move on. We're gonna take the left foot out to the side just a little bit.
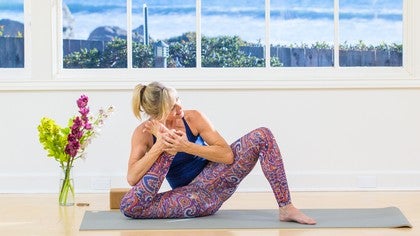
Take hold of the right leg and draw it. Keep this foot flexed. Draw the shin in. You might be holding the foot with your left hand, bringing the right hand around the knee. You might be able to put the foot in the elbow crease and let's cradle.
Let the left leg hang out. Don't forget the navel here. It's very easy for the belly to collapse. Draw the shin up toward the chest. Relax the shoulders.
Lengthen the spine. Yes, and breathe. You can play with where this shin will go. You might be able to draw it up a little bit. Then when the right hand comes to the outside of the foot, put the left foot on the floor.
We're gonna roll onto the right thigh. So we sort of come off. Those left sit bones come off. You're using the knee pointed this way to help open without falling over. Good, and then I often play phone call.
This foot is like the phone. We attempt to take the call. Take the call. Get in and bring it back. Let this leg hang out.
Let's grasp and draw in. You can move side to side a little bit. Notice what it feels like in there. Good, lengthen the spine. Good, draw the shin up a little bit.
Take hold, put the right foot down, knee out, and roll. Come back. So if you've been living for a while, there's often some terrain in the glutes. We're gonna cross over that terrain, smoothing out, especially if you sit all day. Good, all right, so one more time.
Left foot down, we'll take hold of the right foot. Roll over, let the left knee out to the side. The left foot's gonna hold the right foot. Play this game called inhale. Lift the right arm up and see where the tricep will go in relation to the foot.
You might not get it there. It may be slow. We do not push here. We're very patient. This is an exploration.
We're seeing well, will the tricep come to the foot? Oh, will the armpit come to the foot? Just play and assume that we're malleable if not in the body, certainly here. Malleable. And return.
Right foot out. Foot is flexed. Roll, pause, lengthen. Get your angles. Right hand holds.
Left arm goes up, inhale. Exhale, cross. Push the foot into the arm. The arm pushes back. Inhale, lengthen.
Exhale, cross. Good, you can twist in. Root down, inhale, lengthen. Exhale, cross. Going wherever it is we go today.
Every day is new. Good, slowly we release. Bring the soles of the feet together. Knees go wide. Remember to block the knees if there's any pain.
Slowly fold forward. Good, inhale, come up. All right, so from here take your legs up kind of like a seated happy baby. The hands come to the ground. The navel draws in.
We're gonna use our breath to get us where we want to go. We may have to try this several times. So we inhale. Exhale. Try that again.
Trying to not use the hands but we may have to use the hands. Inhale, exhale. Again, inhaling, exhaling. Good, bring your hands to the ground. Separate your legs so that you come down into a pretty deep and wide squat.
Sit down, walk your hands back. Look at your forearms. They're parallel, fingers spread wide. Whole hand presses, sit down, look forward. Look forward just like you did in crow.
Now the big deal here is sometimes when we say sit down, it seems like that means, oh, we can just relax. It's not really like that. You're zipping up, pelvic floor lift, walking your feet in, crossing. Let's see that again. Walk in, fingertips, zip, zip, zip, cross, breath is steady.
Good, the gaze forward at a certain point you're creating this huge triangle between your hands, the top of your head, and that point that you're gazing at. Inhale, and exhale. Feet down, let's pause. Let's roll the wrists. Good, so see how when I do this, the wrists never come away from each other.
Let's roll in the opposite direction. Good, now lift the hips, walk the hands back, check your forearms, sit down, zip up. Either cross, try to get the feet to cross, or legs extend. Legs extend, arms press, zip up, gaze forward. Listen to your breath.
Good, land the feet. Come back down. Land the sit bones. Good, let's take hold of the feet to help release the wrists. Push your feet out to whatever extent they go out.
Holding on here. All right, so we're gonna hollow out the navel in a big way. Big way. Here's the thing. If you have tiny calves, then you might just bring your legs to the floor because otherwise you are not gonna have the cushioning necessary here.
So here is how this works. You want to work with the breath here. Inhale, flex your feet like crazy, exhale. OK. That looked terrifying, didn't it?
Let's try it again. Come back up. Inhale, flexed feet, exhale. Go where you can go. Inhale, lengthen.
Exhale, fold in. Root the sit bones. With a posture like this, it's very common if you look at your legs they sort of like to roll in, so just keep the toes turned up. Think about the outside of the hips dropping downward. Inhale, rise back up.
Exhaling bring the legs together. So let's take hold of the right foot again. Take your left foot to the floor. Roll right back onto the right thigh. Good, pause, open things up.
Don't forget the lines. Good, and then we're gonna take this leg with the left hand holding the right foot, and we're gonna take it all the way back behind us. See if we can wrap the thigh around the back of the shoulder. So I like to squeeze my shoulder with the back of my calf and thigh come together. If you're working on this and you're down here, be patient.
Just gonna work on getting this leg open. Over time it will happen. This is said to be one of the easiest balance postures. I'm not sure that's true, but it's definitely more accessible than some. The toes are wide.
The right hand comes to the ground. Good, the left hand comes to the ground. The left leg needs somewhere to go so it's just gonna sit on top of the right foot. OK, time to zip up. Zip up.
Steady breath. Inhale. Exhale, push the ground away. Push the ground away and then pretend to push away whatever is there on the right side. Push and squeeze.
Look at your feet. Then roll the shoulders up, up, up. Navel draws in. Strong lines. Inhale, exhale, return.
Good, let's celebrate. Take the feet. Good, inhale, exhale. Set your feet down. Good, right hand grasps left foot.
Left leg way over. Just hoist it back. Now this shoulder, you want to really draw the shoulder back. So the thigh is pushing into the arm. The arm is pushing back resisting.
Zip up, right hand down. Right leg up. OK, push the ground away. Pelvic floor just lifted right off. Leg out to the side.
Inhale. Exhale, slowly come and squeeze everything. Squeeze. Inhale here Exhale, come back. Grasp the feet this time.
Interlace. Pull, draw the shoulders down, lengthen the spine. Draw the chest to the chin. Good, feel that. We appreciate this body so much, this body that we've got.
OK, so we take our hands back in prayer position. Lift the legs back up. We're gonna come right back into that squat. So let's rise all the way up. OK, so we're gonna stop wherever we need to stop.
There's all kinds of places along this series where we may find, oh, I've got work to do right here. I'm gonna stay here and watch and learn. So we'll bend the knees and we'll take the right foot over the front of the left for our figure four. Foot is flexed. Take the hands to the hips.
We'll just fold forward here. Let's bring the hands to the floor and the face toward the shin. The right sit bone likes to fall. Try to keep the sit bones in the same plane. Good, so we've zipped up the lower navel.
We're gonna take a look at this right foot and see can we wrap it around the left shoulder. The answer may be no, we cannot in which case stay right here and do your work. If you'd like to go on, you walk the hands forward. OK, steady breath, steady gaze. Look well beyond the hands.
Six feet out. Set the foot, wrap the foot. Good, left leg comes off, and gradually come back down. Fold forward. When you're ready, inhale, rise up.
OK, so let's try that on the other side. The deal with this is that you want to think that the navel is doing the lifting of that back leg. If you're thinking about lifting that back leg, it feels so heavy. The lift happens here. Other side.
Left ankle crosses. Palms in prayer position. Sit down. Fold forward, hands to the floor. Face to the shin.
Good, take a look at this foot. See if you can wrap it high. Hands walk forward. Gaze steadies. Navel draws in.
Navel lifts back leg off. Good, come down, fold forward. When you're ready, inhale, come back up. Release the foot. Good, all right, so now we're gonna take this to the next step.
The next step is a big step because we're putting a twist into the mix. So if this was a challenge, then come here. And again, do your work in the forward fold. So from here, what happens next is we've got this deep forward fold. We want to bend the left knee.
Bring the palms together in prayer position. We're gonna see if we can cross the tricep over the sole of the foot. Now there's a lot of engagement there. The foot presses into the arm, the arm presses back. We're rolling the chest.
We might have to work on that for a little while because it's a big deal. If you can bring the hands to the floor, do. Now you're gonna sit down. It's like you're sitting down with your foot. You're pushing your foot into your right tricep.
The left leg comes off and you are sending the left leg out. Looking in that foot is helpful. Feeling the whole body. Good, come back up, and rise when you're ready. All right, so lots of engagement in this area.
It never stops, have you noticed? There's a theme. Always engaged here. So left ankle crosses, sit down. See how important it is to keep the breath soft and steady.
Navel draws in, inhale. Exhale. Cross, set. Twist. Inhale, exhale, hands down.
Good, look forward. Lift off. Wait for it. Push your left foot in. Take the right leg out.
Point the toes. Move the weight around the body. Soft easy breath. Good, come back. Inhale, lift up.
Fold. Inhale, all the way up. Release. OK. So this one relies less on the arms and more on the legs.
I love this posture because it sort of represents, the whole feeling internally is of these postures. We come in to the posture. If we're struggling or bearing down here, it sort of shows in the posture. We want to open and unfold. We take the posture and then we inhabit the posture.
We inhabit the posture with all of us. Good, knees bent. Left foot crosses. Elbows down. Hands down.
This time onto the ball of the foot we go. Left foot stays flexed. Pelvic floor lifts and play. Take your gaze steady. Take the arms off.
Feel the route. Arms might rise. Hands down. Hips up. Bend the knee.
Rise up. Take a breath. Be breathed. I like to think of it that way. Be breathed.
Right foot crosses. Fold forward. Come all the way down. Set your heel between your buttocks. Lift the pelvic floor so you're not resting heavy.
Keep the foot flexed. Begin to play. Good, hips up. Exhale, fold. Inhale, rise, exhale, release.
Good, let's lie back. Turn the palms up. Feel the weight of your body. Feel the support of the ground beneath you. Feel all that sensation rise and pass.
So what we call us in here inside the casing of your body, this energy that is very precious, feel that. Notice that the breath is breathing us. We receive the breath on the inhale, and we release and let go on the exhale. We use the practice to let go anywhere where we're holding on in our lives. Anywhere where there's attachment that we've put at the center of our thoughts that's preventing us from enjoying and being fully present and alive.
Just let go. In our last few moments here, invite the exhale to lengthen. Nothing to push or force. Draw your navel into your spine. Bring the knees close to the chest.
Give yourself a hug. Take one arm up and roll to the side. Press the hand into the ground. Gradually rise up. Come to a comfortable seat.
Draw the palms together in Anjali Mudra. Let's take the hands to the forehead. Right thought. May we be steady and present and joyful. The hands come to the mouth Right speech, may our words improve upon the silence.
Our hands come to our heart. Right action, may we be the change that we wish to see. Namaste.
Mandala Yoga
Comments
When we flop our legs down in the wide position is this to teach us to be fearless? What is your main purpose of that exercise?
Thank you,
- Christy :)
You need to be a subscriber to post a comment.
Please Log In or Create an Account to start your free trial.
