Description
About This Video
Transcript
Read Full Transcript
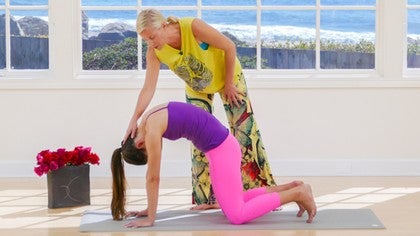
Hi y'all, I'm glad you're here. I want to introduce you first to Casey. She's gonna be my student today. I'm very glad she's with me to let me teach her just the first few, I call them spinal pelvic movements of this class. So we're gonna start in a seated position and I realize this might not be the way you'd watch a movie so I know this is not exactly the most comfortable position but if you just start in a cross-legged or simple seated position you could put, if you're at home, put like a blanket underneath you or a pillow underneath you and prop up the hips if you want. We won't be here long but just a moment to start to find our spines. So if you want to go ahead and close your eyes you can and I'm gonna get Casey to close her eyes and just relax for a moment. One of the cues I give often to my students is settle the bones. You know, feel your bones just settle. Let yourself get heavy in a good way. My mother used to always tell me to settle down and I hated it but she's right. I mean it's like settle down and you might even slump a little bit in your posture and that's okay. And then just start to notice whether you're leaning into one butt cheek more than the other. You probably are. I usually am but can you level that out and feel yourself even in the pelvis and now it's as if the pelvis is your feet. So your sitz bones at the base of the pelvis, you're gonna stand through the sitz bones and start to become buoyant through the crown of the head. So it's like you're picking yourself up out of your waist and you start to feel your spine get a little bit longer. Another way to think of it is to think of the dome of the crown of the head pointing upwards. The dome of the floor of the pelvis pointing downwards and you just feel those two domes moving in opposite directions. Just creating length and space. So a couple more breaths here. I hope you'll check in. Sometimes as we lift up through our spine we get a little tense in the face and the jaw. So can you relax your eyes and relax kind of strange things like your ear lobes, the tip of your nose, the eyebrows, and then just take about three to five more breaths here. And if you would please just focus on your exhales. So making sure that you exhale to completion. And it's a gentle exhale. It's not aggressive. You're not competitive. Last breath just gently getting all the stale air out of the lungs. And then when you're ready you can open your eyes. And you just meditated. So yay. So let's come forward on to all fours. So I'm going to ask Casey to come on to all fours when she's ready. We're not in any hurry. I don't think you should ever be in a hurry on your yoga mat. So you come on to all fours and get yourself in a position that feels stable to you. So I'm not going to say your hands need to be under your shoulders or your knees need to be under your hips. I just want her to feel stable. I want you to feel stable on all fours. And then we're just going to start into a really basic movement. So cat and cow. So she's gonna probably exhale first and round her spine up towards the ceiling. And then probably an inhale will start to drop the belly down towards the floor. But I don't I'm not the breath police. Like you could change this up. It's okay. So simple basic movement. What we're doing is we're back bending and forward bending. But we're taking the spine through its full range of extension and flexion. And I love that she tucked the toes. It's fine to do this kind of stuff. You know like there are no rules. The only rule is that I want this to feel good. Basic basic movement. So a couple things. Just notice how the shoulder blades move on the back. And can you feel your shoulder blades moving away from each other? Can you feel them moving towards each other as you move? And can you really feel that you're connecting this movement to the breath? Whatever that breath is. You can add breaths as needed. But just it feels connected. And then I'm gonna keep her in this position. So next time you're in the cat position just hold it for a moment please if you would. So your back is arched up towards the ceiling. And let's see if we can perfect the arch a little bit. Not to make it look prettier. But just to make it a little more functional. So maybe functional is the wrong word. But I really want to get a lot of length in the back of her spine. So pick the belly up. Pick your lower belly beneath your navel up into your spine. And then imagine that you were wrapping your sit bones around towards the backs of the knees. So it's almost like the pelvis is wrapping around the back of the femurs.
And really lift the belly up. And then relax in the shoulders a little bit. And drop the head down. So that the back of the neck is getting length. Just a couple more breaths here. And it emphasize it. Like really get in there and pull the belly up. Not so much through the shoulders. Good. You can see her getting longer. And then slowly eyes closed start to move back into your cow position. So slowly just starting to let the pelvis. Notice the pelvis is rolling forward on the femur bones. And just hold that position for a moment. So linger there if you don't mind. If you'll linger in the cow for just a moment. Where you feel okay. And then just start to move back and forth through the movements again. So you can kind of emphasize your cow for a moment. Pause there and let it feel really nice. There's ways to make it a little deeper for you. It doesn't have to be super deep. And then if you'll just go back and forth through the movements a few times, Casey. So again just connecting the movement to the breath. Nice and easy. Nothing big. I do these movements. I try to. But I try to do these movements almost every day. Every morning. Okay. So we're gonna move into a movement number two. So when you're ready just come back to a neutral spine. Just you know basic tabletop. You don't have to get really too into it. But then so her shoulders are kind of coming up by her ears a little bit. But just draw your think of drawing your upper arm bones towards the back of the room. And draw the shoulder blades down the back. And then lift your belly up into your spine. Because a lot of times when you draw the shoulder blades down the back it makes the belly sag. So just inflate the lower belly up into the low back a little bit. But keep the shoulder blades down the back. Yeah it's hard. You're asking the body to do something that it doesn't necessarily normally do. So just stay with it. And now I'm gonna ask her to side bend. Basic side bending. Lateral flexion. So she's gonna keep her pelvis relatively stable. And then just still meaning stable. And move her right shoulder towards her right hip. And you can see it's kind of hard for her. She's kind of figuring it out. That's good. And then come back to center and pause. And then just move left shoulder towards left hip. Good. Try not to move the pelvis. So do it maybe one or two more times each side if you would please Casey. And so y'all this is almost annoyingly hard. Because she's not side bending. I'm asking her to side bend. She's not side bending with a twist or a back bend. She's side bending pure pure lateral flexion. Which is hard. We don't do that very much. So she's earned her more loosey-goosey movement. So now I'm gonna let you go ahead and turn it loose a little bit. And now you can bend your elbows and shift your pelvis. So just taking a little bit more in. Yeah. So see how much you wanted to move her pelvis.
So it's hard to not move our pelvis when we side bend. Good. Beautiful. And I actually I mean it's worth it. When I do this I actually really bend the elbows. And like I steer the pose with my elbows. And feel free to linger on one side. So let's go ahead and linger on the right side and just pause there. This is great. So see if you can get a little more compressed on your right side. Like meaning you just squeeze the organs on the right side. Stretch more on the organs on the left side. Good. You can look back towards your right foot. Maybe even push into one hand or the other and get a little deeper. And then just come back and pause and tabletop for a moment. And see if you feel a little rebound. Like it's like a flush. And then move on to the left side. So this stuff can actually get you kind of high. Which is great. So squeezing on the left side. Lengthening on the right side. Pushing into one hand or the other. She's looking back towards her left foot. And then she's going to come back to center when she's ready. And she gets a little high. A little rush hopefully. Alright so that's movement number two. So now movement number three. Arch the spine up like a cat again. So you arch the spine back up towards the ceiling when you're ready. Mm-hmm. Good. Perfect. And then you're going to move the spine either to the right or left like a jump rope. So you take these kind of barrel rolls. And y'all I'm going to go ahead and tell you that this movement is hard. It's harder than you think. It takes coordination. And you can see her kind of trying to figure it out. Which is great. Most of my students when they first start out with this it's hard. And but it's so luxurious once you get it. So once you get it it's just like the spine is able to move like a jump rope. So imagine that the pelvis is holding one end of the jump rope and the head is holding the other. So make sure you go in both directions Casey. Good. But y'all you could go five times one direction only one and the other. I think asymmetry in our practice is great.
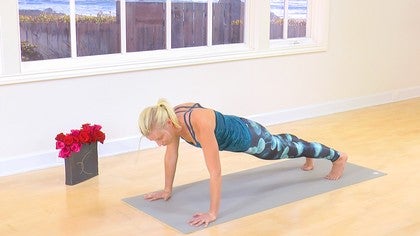
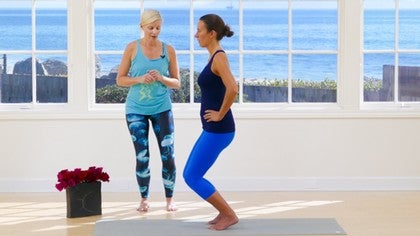
So you kind of see what your body wants today. If it only wants to go to the right then go to the right. That's great you know. She's bending her elbows a little bit which is fine. But some days I try to do this without moving the pelvis at all and without bending the elbows. So just to really try to make the spine be the jump rope. It's beautiful. That looks great Casey. All right. So the last movement movement number four we're almost there. She's going to keep the knees stationary. Come back to a tabletop when she's ready. And then you're going to drop your hips back towards your heels and just start to stir the pelvis around the knees. So the knees stay stationary and she's going to move the pelvis either to the right or left and just kind of stir it around the knees. So in circles. Almost towards perfect. Towards a modified up dog and then back towards child's pose. But what she's doing is she's taking the femur bone which is her thigh bone through its movements and its major joints. The femur bone is moving. The thigh bone is moving in its two major joints. The knee and the hips. And let's face it as we age those are the two issues that most people have trouble with. She's also getting a healthy stimulation on the wrists which you might not even think about. But for older clients this is definitely a great movement. So make sure you go in both directions here. And you can go fast sometimes. You can go slow sometimes. You know but it's like you also are probably getting a stretch to the outer hip like the glutes the butt or maybe even the inner thigh of some people. And sometimes I do this more of a horseshoe. Like see how she's kind of lingering in the back. It's great to do that. You don't have to do circles. And then eventually if you'll just start to let the movement become its own. So you the last movement is like you just kind of move like a jellyfish or like an amoeba. You imagine that you're inside of a ball and that you're trying to touch every aspect of that ball. So see what she's doing is she's ironing out all the creases that only she can find. I can't find these creases for her. So she's finding the creases that she needs to iron out. And we all are so different. We have unique skeletal systems, skeletal bodies, but we also are male-female. We have different careers, different lifestyles, different hobbies. So we all need to move and figure out our own kinks. So maybe three more breaths like this and you can really get into it and kind of move forward. And then we'll just meet in child's pose. So again no rush. Looks great. Perfect. So your child's pose y'all can be any pose that feels good to you. And I'm just like gently giving her a little pressure, not much, and just a little wobble. So you can even do this at home. You know you can just kind of wobble yourself and just remind the spine that it's liquid and fluid. It's like a snake or a river meandering. It's not like this intense structure. And your child's pose I love that she brought her arms back. You can bring your arms back. You can bring them forward. You could prop your forearms up underneath your head. So it's not like there needs to be a specific child's pose. What I want you to feel here when you're in child's pose is the breath moving into the side body. So I'm just putting my hands on her side ribs, just kind of cueing her with my sensation to feel the breath move into the side ribs. So you're breathing laterally. You breathe out to the side for a few breaths because usually we're compressed in the front body. The bulk of the lung tissue is in the back body. So breathe into the lungs behind the heart in this position. A couple more breaths. Exhale to completion. Remember you try to get all the stale air out of the lungs. You can really see her breathing deep. But in the last breath or so you also want to remember that the lungs come there. The bulk of the tissue is in the back of the body, behind the heart, but then they wrap around the front of the heart. And so it's like this beautiful embrace in your in your rib cage right now going on. And then when you're ready you can just bring your arms back forward, Casey, and just start to make your way back up onto all fours. But in no hurry, you know, you just kind of slide your arms back forward. And it's great. She's making the movement luxurious. She's taking her time. So peek at your hands when you get there. You kind of wake yourself back up. Peek at your hands. Spread your fingers wide and make sure your hands make sense. I don't mind if the fingers point out or in, but just make sure they make sense. Sometimes we look at them and we move and we're like, okay, that makes sense. That feels right. And then just tuck your toes and we're gonna come into the first downward facing dog. So first downward facing dog you're basically just like an upside down V, right? Sometimes you're more like a U. That's okay. The heels don't need to touch the floor. That doesn't matter. All I'm using for this is in a functional way. I'm trying to think of the backs of her knees getting to open up now because we've been in that position mostly with the knees bent or compressed. And so the backs of the knees are getting to open up. I'm also gonna ask her to start to feel her shoulder blades and it's great that she's peddling her feet. I think we should walk our dogs more often. In fact, not all the time. Sometimes it feels good to be static, but to move and bend and stretch the calves is really nice. Good. And then so a little softness in the elbows, just a little softness. Sometimes I think we lock our elbows out and down dogs. I see that a lot in my students. They lock their elbows out and they're leaning into the bones as opposed to just a little micro bend which turns on the muscles of the upper body. All right, so we're just gonna take three soft planks. So just let an inhale bring you forward into plank pose. So shoulders are gonna come over the wrists. Mm-hmm. So she's gonna need to slide her feet back a little bit and that's fine if you need to do that. So I would pick her pelvis up a little bit and bring her pelvis here just so her pelvis isn't sagging. I don't want you to ever hurt your low back. And then I again I would give her the cue I gave earlier which is triceps kind of pulling back and belly lifting. It's hard hurt. Good. And then lift and get out of there. So hips come back, downward dog. Perfect. And then just soften your knees and start to walk your hands back to your feet. So you come into the back of your mat, back of your mat. So when you get to the back of the mat you're in a standing forward fold and if this is too much you can always prop your forearms up on your thighs. So I might get Casey to go ahead and do it. So she's just gonna bend her knees and prop her forearms up on her thighs. And this way you can maybe some of you like protect the low back. You don't have to bend the knees as much as she is. This is not, you can do what you need to do here. This is not, I'm not trying to get a quadricep workout for you here. All I'm really trying to get her to do is relax the low back and relax the back of the neck. So something I'm starting to find is that it's really hard to get students to relax the back of the neck and that's something I cue often. We overuse the back of the neck and we under use the front of the neck a lot of times. So if you're okay here, this might feel really great and this isn't like the wussy version. So you could stay here if this feels good. You know you're not non-advanced if you stay here. But if you'd like to go ahead and let your arms dangle down you could let your arms dangle down and just really let the arms release. And the knees can be bent or soft. I would say at least soft. I wouldn't lock out the knees here. I'm not trying to get you to do that. So now I'm gonna really ask you to let the arm bones dangle in the joint. Like really kind of fall out of the joint. Some of us with a little more tension in the neck and the shoulders, it's actually, it requires bravery to let go of the head and the shoulders in this position. I am one of those people. I'm very tense in the shoulders. So when I lean over like this it's, I think I'm relaxing the shoulders and I'm not really. So be really brave and let go. It almost feels like your head's gonna fall off but I promise it will not. So but there is a sensation that the head's gonna fall off. So I understand if it actually feels like bravery. I really, I really do. So she's moving a little bit which is great and then if you notice you might notice but her, she's in the heels a little bit more and I'm gonna try to get her forward a little bit. So see if you can bring 60% of your weight forward into the balls of the feet which is just 10% more than half. So you still got weight in the back of the foot and now see if you can dive your head a little bit deeper down. So she's diving her head down. That again requires bravery so it's like she's brave. Diving the head down, keeping weight forward in the front of the foot. She's got a stable distance between her feet. You could move your feet at this point if you want. I would say a little space between the feet is nice. Arm bones are dangling down. Alright so now I'm gonna stand behind her and you obviously don't get this but just try to keep your weight forward into the front of the foot. So she's moving a little weight forward into the toes and then we're gonna start by lifting the belly up into the spine. So pick your lower belly up into the spine a little bit. For some of you that's gonna make you dump back into the heels. So try to keep the weight forward into the front of the foot as you lift the belly up. Remember the cat pose from the beginning of the class and really think of that arch and now your sit bones are gonna wrap around towards the backs of the knees. Knees stay soft and start to slowly roll the spine up. So take your time. You only get one spine in this life so there's like no no there's no rush.
And also notice some of you are gonna lock out your knees on the way out. She's not she's being good but keep wrapping the sit bones towards the backs of the knees. Try to keep the knees soft and bone by bone you're stacking your spine. And you notice how lovely this is so lovely she's going so slow. So it's like you're rebuilding your spine on the way up. Oh good. So she's got a really nice softness in the knees and what's wonderful about her spine now is that it's her spine. It's not her jobs, it's not her car, it's not her boss or her in-laws or anything. It's like this is her spine. She found it again you know that's that could make me weep. But as well so a little softness in the knees she's gonna start to feel that lift up through the arches of the feet all the way up through the crown of the head. So it's like this updraft up through the body. Beautiful. Thank you Casey. Namaste. Namaste y'all.
Get a Backbone
Mention
 |
Kate Smith (Teacher) |
 |
David G- |
 |
Kate M |
 |
Jenna P |
 |
Silke S |
|
|
Laurie D |
 |
Misty Eve Hannah |
 |
Marleen R |
 |
Kelly Sunrose |
Comments

I especially loved the imagery of "move like a jellyfish or an amoeba." Pure sweetness.


You need to be a subscriber to post a comment.
Please Log In or Create an Account to start your free trial.
