Description
Transcript
Read Full Transcript
So welcome back. This is a short tutorial on drop backs. This is a fun part of the practice. It can become a little bit goal-oriented and achievement-oriented. They are definitely an advanced aspect of the practice, and some people can do them very easily, and for others it just takes a really long time.
And I've seen some people who practice them for many many years and still need support and help. It doesn't mean that they're not doing the drop backs or they're not doing the practice and they're not doing them right, it's just different body types have different capabilities, and the process is definitely more important than the end goal. So, like anything in yoga, it's always important to remember that. They can continually get deeper. In the beginning it's, maybe your hands land far away from your feet, and then as your back bends open up, they land closer and closer to your feet.
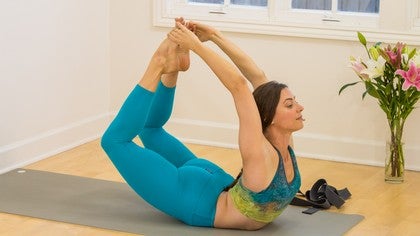
So just because people can drop back without support doesn't mean the work is done there for them either. There's always something more that we can go to, which is why it's always important to be happy just having a practice and doing the work. This tutorial is really meant to be done when you're already warmed up. We are going to do urdhva dhanurasana to start up. Just to open up the spine, shoulders, get some opening in the front of the legs.
But I do recommend that you start with a back bending practice, or your second series practice, anything that's already got your body, sun salutations, or my other back bending sequence, would be great to start with that and then go into this, just for a little bit more detail on drop backs. So, let's get started. So let's lie down on our backs. So we'll just come down to the floor, feet separated at least hip distance, maybe a little wider, and we'll just keep the feet natural. So we don't want them totally turned out, but we don't want to turn them in, just like, natural, you're setting your feet down on the floor.
And we'll press the head, bring the shoulders underneath. We're just gonna come up and down a few times in urdhva dhanurasana. So, fingertips pointing to the shoulders, squeeze the elbows in and drop the shoulders down, start to lift the chest up in between the shoulders. Push down into your feet. Squeeze the knees just a little bit together.
And when I say that, I don't mean touch them. I just mean that, rather than letting them splay out to the side, we wanna keep a slight direction that's forward and slightly in, which is what's gonna power the legs up, especially for drop backs. Push down into your hands and feet. Come up to your head. Squeeze the elbows in, lift the chest through the elbows.
And then press down into the feet and hands. And come on up to urdhva dhanurasana. And take a few deep breaths here, start to lift the hips up. And breathe. First one, we'll just stay with our hands and feet where they are.
And then we'll exhale, and lower down to our back. And we'll do another round. Press your feet. Lift the hips up, press the hands, come to your head, and then we'll lift up again. And this time, we have the option to walk the hands in towards the feet.
So rather than walking the feet towards the hand, let's bring the hands to the feet so we get used to transferring the weight into the feet. Again, squeezing the knees in and forward. And then if you need a rest in between, then you'll walk your hands out, lower down, either to the head or all the way to the floor. The other option is, you can just stay in your back bend, and start to walk the hands in. And go for another five breaths.
If you chose to come down, come back up when you're ready. And then we'll come down. And we'll roll over to our side, come up to seated. And we'll prepare to come up to standing for drop backs. And back bending in general, we should really be working our legs, and drop backs are a good reason why.
So we need the legs to be supporting the body as we're going up and down. So we just start with our feet at least hip distance apart, maybe a little wider to begin with, and the feet just natural. So I see some people who turn their feet out really wide, and they start to do this kind of thing. When we do that, we're not really accessing our spine, we're not coiling our spine, we're not able to lift up through the chest. But then I've also seen where it gets a little too rigid and the feet also start to turn in a little.
And when that happens, sometimes we aren't able to stretch the front of the hips. So back bending becomes a little like this. And if we just keep them natural. We do wanna press the hips slightly forward so that we can get this nice stretch through the hip flexors, and then we lift up out of it. So to start, let's stay a little closer to the wall.
I don't know, maybe about an arm's distance away from the wall. We'll plant our feet down. Now once the feet are planted, try to keep them there. See if you can commit to that position. Bring your hands to prayer position.
Roll the shoulders down the back. We're gonna lift up out of the low back. So lifting up out of the low back rather than collapsing into the low back. Lift the sternum up. I sometimes will adjust people by just bringing my hand here and having them lift up into my hand the whole time that they're doing the drop back, and that's the only adjustment they're getting.
And it's just to continually lift up here. So have that imagery, that you're just continuously lifting up the chest as you're going back. We'll drop the head back, chest lifting up, lifting up, look to the wall. And then inhale, come up. For some of us, that'll be enough.
If we start to take the arms up overhead sometimes, what happens is, we bring this up and then collapse into the low back. Which you may be able to get away with for a little while, but at a certain point, it's probably gonna cause some pain. So we're gonna lift the chest up, lift the chest up, tip the head back. Keep lifting. And touch the fingertips to the wall.
And then inhale and come up. So we're pretty close to the wall right now. We might wanna step a couple more inches away from the wall. Bring the hands up to prayer position. Lift the chest up, tip the head back.
This time, we're gonna reach the arms to the wall, and then we'll start to walk the hands down the wall. And as you walk your hands down the wall, you'll start to press the weight forward into your legs. The knees will bend. And then you come up. So, as you're going down, the knees bend, and then as you come up, you wanna get your legs to anchor and pull you up.
So before, what I'll see for instance is a lot of times people come here, all their weight's going here, and then we're wondering why we can't come forward. Well, if you bring the knees forward, push yourself forward, then it's just a matter of straightening the legs to come up. We'll try that again. Inhaling. Bend the knees, reach the arms, and start to walk the hands down.
And then up. Now here, important, push the knees forward to come up to standing. So you can stay with the wall. At a certain point, it's really helpful to have somebody who can support you so you can do it in the middle of the room. The wall, if you're gonna use the wall, try to keep your fingertips really light on the wall and continue to bring your hips and knees forward so that the legs are doing the work in holding the weight of the body.
If you're gonna come away from the wall, we can start with the hands here. Sometimes I like to teach it this way, with the hands behind the thighs, chest lifting. Because now, if you don't quite have the strength in the spine to keep yourself lifted, your hands will help support that. So we lift the chest, lift the chest. Keep the legs straight.
And then you start to bend the knees. And then you can come up from there. Or, straight legs, hands back, head back, bend the knees a little. You can reach one arm. The other arm.
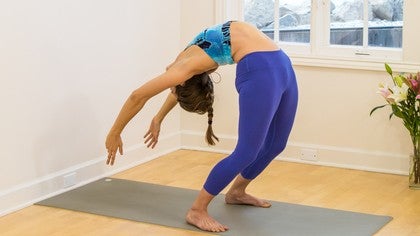
And maybe both arms. And then you can come up. So you start getting yourself used to holding a little more weight with your arms back. Then at a certain point we can start with the hands in prayer position, lift the chest up, tip the head back, look back. Start to coil as far as you can.
Let the knees bend a bit. And reach. And then inhale to come up. Now notice that the head is the first thing to go back, and it's the last thing to come up. So we don't wanna lead like this, and then in the end sometimes we bring the head up too quickly, and that causes us to fall back.
So head is the first thing back, and the last thing to come up. I like to say that we lead with our heart rather than our head. So lift the chest, tip the head back. Once you've gone as deep as you can go here, reach the arms, then the rest is just bending the knees. Then we bring the weight forward, so we shift the knees forward, and we come up.
So you see, you're holding yourself up. Then just to bring the hands to the floor is just a little bend in the knees to gently place the hands down. Inhaling, chest lifting, chest lifting. We'll do one more. And then we'll come into paschimottanasana.
Coming down into seated. Taking your legs out in front of you. Bring your hands forward, ease into this, especially if you're not used to dropping back. Let's take a few moments here, just neutralizing the spine, breathing. And then slowly exhale, and take your time coming into your forward fold, countering the back bend.
And we'll stay here for 10 breaths. One. Two. Three. Four.
Five. Six. Seven. Eight. Nine.
And 10. And that's all. Thank you very much. Namaste.
The Ashtanga Practice: Maria Villella
Comments
You need to be a subscriber to post a comment.
Please Log In or Create an Account to start your free trial.


