Description
About This Video
Transcript
Read Full Transcript
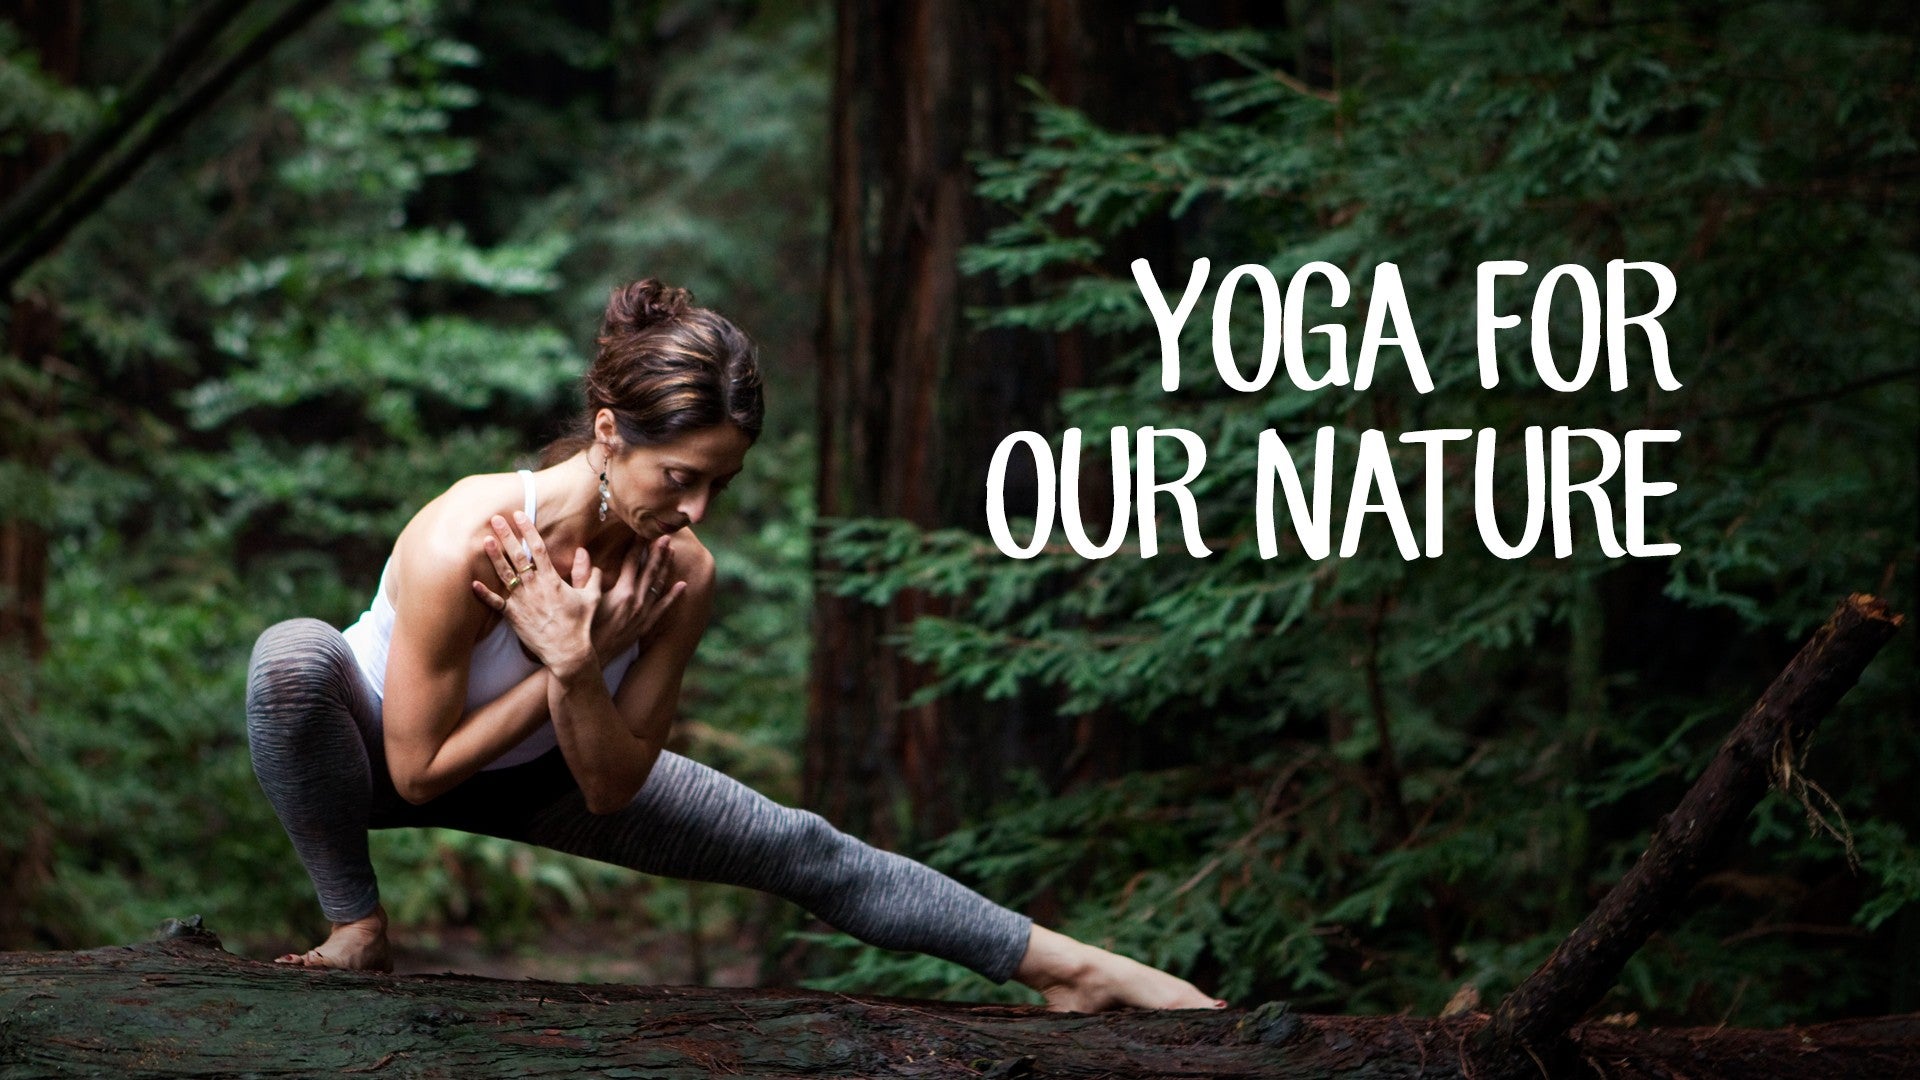
(water swashing) Hello and welcome to our Rock the Kapha class. This is going to be an energizing practice, in case you've been feeling a little bit slow, dull, or lethargic lately. I'd like to invite you into this practice to warm up and get the core engaged and improve overall circulation. So to do this practice, it'd be great to have a bolster, a blanket, and a block, and we're gonna start where Kapha's usually most happy and that is close to the earth. So, we're gonna start with the support of a bolster for this spine and you might choose to put a blanket underneath the head.
That's optional, you can also keep that to the side. We're gonna use a block in a moment, not right away. So, first take your seat with your legs stretched out. Bolster underneath the spine and this is where want to check if you need the blanket. If the chin is pointing towards the sky, please the lift the head with a little bit of support of a blanket.
Otherwise, try to nestle up into a cozy shape, where your shoulders are wrapping around the bolster, legs out to the side and finding that place of comfort and ease. So we want to start nice and slow and gradually build our momentum in the practice, so that momentum and that heat will carry you, hopefully, throughout the rest of the afternoon or morning, whenever you might be practicing. So settle in, when you're ready, close your eyes if you're comfortable and then start to pay attention to the air coming in through the nose, moving down in towards your chest. Being aware of breath and the essence of the breath moving down towards the belly and organs. Breath and the essence of the breath moving down towards the hips and the legs.
Just confirming for a moment, your place here in the room and then we work with the practice to build a little more energy. We want to notice now, as you're breathing in, that there's a little pause at the end of your inhale, where you hold the breath for a second and then exhale slowly. As you're breathing in, start to count the breath, internally. At the end of the breath, hold for one to two seconds and then exhale the breath out. Be aware of counting breath as it comes in, maybe two to four seconds, hold.
Exhale the breath out, two to four seconds. Breathing in, two to four seconds. A short hold. Then exhaling the breath out. A couple more times.
Breathing in, with that little pause at the end of the inhale to help bring a little more space into the lungs and upper chest. And reduce that feeling of heaviness, exhale. One more big breath into the upper chest. The chest and respiratory tract are ruled by Kapha, so we often want to give them a little bit of attention, when we're doing our Rock the Kapha class. Exhale all the air out.
Okay, so we're gonna start now by bringing the legs together and then you want to reach for wherever your block is and we're gonna take the block up into the air above the chest while your legs are grounding towards the floor. So as you inhale, I'd like you to hold that block and stretch your arms back towards your ears and then we're gonna exhale and do a movement. We're gonna come off the bolster, reach forward with the block, maybe over the knees or over your toes. Inhale the arms up in the air, bend your knees slightly and reach the block forward, maybe out beyond your feet. Come back up on the inhale, put your legs down and then we're gonna exhale and roll back to the bolster.
Arms in the air and then eventually the arms all the way back by your ears. So we're gonna go quickly with our rhythm, we're gonna exhale, inhale, lift the arms up, bend your knees. Exhale, go forward with the block. Inhale, arms up, legs down, exhale as your roll back to the bolster. Inhale the block, with your arms all the way back.
Exhale, long breath, come forward, bend your knees, inhale, lift up. Going quick with the practice, exhale forward, inhale block and arms are up, legs are down as you exhale, roll back to the bolster. Inhale, one more cycle, arms back. Exhale, come all the way up, lift the arms in the air, bend your knees. Exhale the block out over the feet.
Inhale, come up, legs are down as you exhale, roll back to the bolster and then from here, you can roll over to any side, get the bolster out of the way and we're gonna continue working with your block and please stay on your back. Bring your knees in towards chest and then take the block now, the skinny, narrow way, back behind you and as you go back with the block, lift the feet if that's okay. If you need to, bend your knees. But with straight legs, stretch the arms away from the shoulders. As you exhale, we're gonna take that block and reach over to the outer right side of the knee and then inhale, go back to the floor.
Reach over to the left as you exhale and then go back to the center. Reach the legs apart and as you exhale, reach the block through the legs. Legs together, inhale. Okay, so that's one cycle, let's go again. Exhale to the right, inhale to center.
Inhale to the left, inhale, back to center. Legs apart, exhale, reach straight ahead. Remember, we're keeping the movement quick. Last time, exhale, go to the right, inhale, back to center. Head to the left, as you exhale.
Inhale, back to center. Open the legs, exhale, reach the block through the legs and then inhale back to neutral. Okay, we can leave the feet down, you can set the block out of your way and then from here, take your right leg, cross it over your left leg and then lift that left foot up and maybe do a tighter bind of the legs for eagle legs or just do your best and squeeze the feet in toward the midline and take the left arm over the right arm and if you find your arms don't wind around each other very easily, just press your forearms and elbows together. So, in our bind, as we exhale, we're gonna bring the elbows and knees towards each other, lift the head and as you bring your head back down, let your knees move forwards and let your feet come down to tap the floor and then as you exhale, curling in forward and try to keep your lower back stable as you bring your feet to come down and touch the floor. Bring your knees and elbows to touch and then slowly bringing your feet forward and down and then exhaling, curling up.
One more time, feet reaching forward to touch the floor and then exhale as we curl up. And then slowly unwind your limbs, grab the knees when you're ready and stretch your legs up, bend your knees, rock forward, and then two more times. Let yourself rock back, rock forward, just getting a wave of that movement and now we're gonna cross the ankles, set your hands down, and lean forward to lift up a second, rock back, cross your ankles the other way, do your best, lift a little bit, rock back, cross the first side, one more lift. About one more, go back so we're even, cross the ankles and then lift up, alright? So from here, we're gonna roll all the way around now and onto the knees.
I'm gonna suggest a blanket under your knees for this part and if you have the blanket underneath your knees, slide your hands up to the yoga mat, you've got the knees on top of the blanket and then try to find where your neutral in this center position. From your center position, I'd like you to take you left leg back behind you, lift your left heel closer to the ceiling and try to get nice and stable through the center of your body. Reach out now with the right arm, so you're in a diagonal, reaching away from each other and I'd like you to bring your left leg out to the left and your right arm out to the right and just feel that extra challenge. Try to keep your chest lifted away from the floor. Come back to the midline and then one more attempt to reach that left leg out to the left and your right arm floats out the right side.
Take a deep breath, lifting your chest away from the floor. Go back to neutral, bring the right hand down, left knee down, curl your toes under, walk your hands back in towards your knees and just say hello to your feet for a moment, opening up those arches. You can bring your knees away from the ground and keep hugging the knees in. For a little extra work, potentially even bringing your hands off the ground for a moment and doing a little bit more core engaging work. Bring the hands back down, knees to the floor, and then we're back to all fours.
This time, step back with your right leg. Lift up the belly into the back body, chest away from the earth and then as you lift that right foot, engage those glutes and then send that left arm up by your ear and stay with this until you feel steady. Send the right leg to the right and left arm out to the left in that diagonal and try to notice that your chest is really lifting away from that lower thumb. Take a big breath in, as you hold that, come back to your neutral position. This might at one time seem difficult and then it's all relative in comparison to when we take the left arm to the left and right arm out to the right.
Lift the chest one more time. And then as you come around to the center and take the hand down, this time, take the right knee to the back of the left knee and then might take just looking back, we're doing a little bit of Gomukhasana in the legs. From this kneeling position, slide your feet in towards your midline and see what it's like if you walk your hands back in towards the blanket, so that this front knee has got to lift off the ground and then you have to readjust your calves, which are getting a big squeeze right now. A big press into the calves or the ankles, places that we don't tend to visit very often, so it might feel a little bit uncomfortable at first. You might stay here or some of you might start squeezing the legs into each other and bringing yourself up to a little bit more of a balancing shape, with your palms pressing together and trying to sit down in some way, toward that back heel.
One more breath with hat calf squeeze and our Gomukhasana or you're forward with your hands here. Walk the hands out, set that left knee down and then we'll cross out and put the left knee now behind your right knee. Slide your feet in toward your midline, walk the hands back towards the blanket. The blanket's helpful 'cause this is usually a little bit of extra pressure on the kneecap, that doesn't feel so great and then you add the calf squeezing part and that might not feel so great at first. But in the end, it feels wonderful and just bring some attention to an area of the body, again, that we don't get to very often.
So, we're doing a little squeezing here and if you felt stable in that place, your legs have to squeeze together, upper inner thighs, to bring the hands up and imagining that you're sitting down slightly into your back heel area. Imagine at some point, you'd be sitting more or less down on that back heel. It's not a requirement, but it's just where you might head. Maybe one more breath. Reach your hands out in front of you, walk the hands out and then we'll uncross those legs.
When you're ready, curl your toes under, you can walk your hands back, take the blanket out of the way and then from this position, we're gonna come with you toes touching into a wide knee squat position. Fingertips on the ground in front of the shoulder line and let's inhale and look up. As you exhale, lift your hips and bring your head in towards your knees or shins. And then with the knees wide, inhaling again, look up, stay on the ball of the foot. Exhale, thighs come in, we're on the ball of the foot, and fold in.
Knees wide, come up with the chest and gaze. Exhale, fold into the legs and one more time. Knees wide, inhale, look up, and then come into the forward fold with the feet a little bit apart and then stay for a moment. Enjoy your relationship to the ground for a moment. Feel your feet and the pressing down into the earth and that invitation to that ground, the energy coming up into your legs.
You'll notice the blood moving more from the heart to the head in your inversion. Breathing through those sensations, one more breath. And then working your way up the best way to stand, all the way up to standing position. You want to keep your feet underneath your hips and actually, let's come to the front of the mat. With your feet underneath your hips, as you inhale, let your arms come up, lift your gaze towards the ceiling, then bring the hands towards to chest, as you exhale, bend your ankles and knees, press against your thighs and do an audible exhale here.
At the end of the exhale, pull your belly in towards your back to get either a deeper lunge in the legs or little bit more Uddiyana through the belly. Come up to straight legs, relax the belly, inhale up and we're moving to that long exhale as you bend your legs, feel like you're going into a squat. The end of the exhale, let your bellybutton move in toward your back, chin to chest. Inhale, come up, breathe through your nose. One more like that.
Exhale as you come down into the legs, chin to chest, bellybutton toward spine, and then spring all the way back up. Eyes open, heel toe your feet together, and then exhale, hands to the chest. Then we'll go to the sun salutation. Quick movements as we go up, eyes are open. Exhale as your fold forward, it's okay to bend your knees.
Inhale, with your eyes open, look forward, step back into your plank pose and then from your plank pose, bring your knees down, cross the ankles as your feet come towards the pelvis. Three times, little mini Chaturanga, coming down halfway. Elbows are brushing in towards your waist. At the end of three, put your feet back on the floor, hips up in the air, as you exhale. And then step forward with your left foot into a high lunge with the back knee a little bit bent, hands to the waist, come all the way up, hug the thighs in parallel.
Straighten both legs as the arms come up on inhale. Exhale as we work our way down toward to the floor. Inhale, thighs stay parallel as you come up and then exhaling our way down. So, we're doing a lot of what I call tweeners, where we're going in between poses, so it's not a full lunge. Where we're working in between a full lunge.
Come all the way up and then as you exhale, bend the knee, lean forward and then we'll transfer that left leg back into plank. Come down, knees, belly, chest to the floor and then as you inhale, cobra. Cobra moving toward an up dog with knees on the ground, to all fours and then into your downward facing dog. 'kay, quick movements here. Right foot forward, back knee comes a little bit down towards the floor.
Find your balance, lift your spine. Inhale, straighten both legs, bring your arms up to the ears. As you exhale, lower your left knee almost to the floor. Inhaling, legs straight, arms up. Exhale, left knee toward the ground, arms at your side.
Inhale, come up. This last time, we bend the knee, we'll lean forward and step back with that right leg into plank. Taking the full flow, knees, belly, chest to the ground. Inhale into cobra, or cobra into your up dog. And then rolling over the feet back into your down dog.
Take a big breath in and a big breath out. Bend the knees, walk or jump your feet forward. As you exhale, fold into your legs, bend your ankles and your knees. Inhale, come up into your chair. Right away to straight legs and then exhale, hands in front of the chest.
Again, inhale, arms come up, eyes are open. Exhale all the air out, reach down, touch the floor. Inhale, lengthen your spine, quick, sharp movements, step back, plank pose. Knees to the ground, cross your ankles, three times, lower halfway, mini Chaturanga, push up. Exhale, come half way and then push up one more time, bringing some heat to the upper part of the body.
Uncross your ankles, back to your downward dog. Step the right foot forward this time. Lower the left knee halfway. Same flow, come up, find your balance. Straighten your legs, lift your arms towards the ears.
Exhale, when that left knee comes towards the ground. Inhale, come up. Long breathe, exhale, moving down. Not touching the floor, inhale, come up and then as you bend the knees, lean forwards, step back into your downward facing dog and then as you exhale, step forward with your left foot and bend your back right knee halfway down. Come up, find your balance.
Straighten both legs, lift your arms up and then as you exhale, lowering your right knee halfway down. Inhale, up, and working your way halfway down. Inhale, up, and as you bend that left knee, right at the end, we'll lean forward and then full the full flow, from plank, knees, belly, chest to the ground. Inhale cobra, or cobra into your upward facing dog. Hang your head towards your heart as you roll over your feet, downward dog and then take a big breath in and big breath out.
Bend your knees, look forward, either walk or jump your feet to the front of your mat. Fold into your legs on exhale. Bend your knees deeply, come in through your chair pose, arms up by your ears and then inhale up to standing and let the hands settle down in front of your chest. Okay, so hopefully that's already got a little bit of energy moving with the sun salutations. I'm gonna have you grab your block now and then turn so you're facing this long edge of your yoga mat.
We're gonna open the feet up to the side, your triangle pose distance, so maybe that's three feet, maybe that's three and half feet. We'll take the block in the air, above your head and so some blocks weigh more than others, so if you have a heavier block, it's a little more work in your shoulders. We'll start by turning your right foot out to the side for the triangle base. We're doing more tweeners, where we're going in and out of poses, rather than staying in the main pose. So, if we're heading toward triangle and you'd be leaning over to your side, inhale, come up to center, I'd like you to feel how you're engaging your side waist as your reach over to your side.
Lower arm is straight, as you reach out to your side. Maybe one more time going in between triangle pose and neutral. This fourth time, as we hold, I'd like you stay a round of the breath, breathe in, lift that block up towards the ceiling, breathe out and then come up to the middle position. Spin that right foot in and spin the left foot out. Lift the block towards the sky, so you feel like you're lifting from your inner legs, up through your navel and the pelvis swings to the right as you lean to the left.
Lower elbow stays straight, come up. And again, as you exhale, leaning out to the left. Come up to the center and feel your right waist turn on as you lean to your side. Come up to the center position and then this fourth time, we'll stay and try to hold that block way up above your head, as if you're reaching into the corner ceiling area. Take one more breath in and then come up to the center.
Turn that left foot in and then lower this block down to the floor. We'll keep it there but walk your hands now forward, so we're gonna do a little hybrid of downward dog meets your wide legged forward bend. Stay up on the tips of your fingers and slowly let the head drop between your arm bones. Legs are wide, legs are straight and wide as you stay either on the tips of your fingers, head hangs down, some of you might put your palms down if that feels better and just stay another breath. The hybrid of downward dog torso, wide legged forward bend in the legs.
And then the hands are gonna walk back in towards the block, feet might come in a little closer. Grab the block on your way up and we'll try another one of our tweeners. So, we'll turn the right foot out to the side, bend your knee and then take the block to the outside front corner of that right foot. Let the arms float out to the side, bend your right knee in your warrior two shape. We're gonna scoot in a step, reach down for the block and then slide it forward so that you're doing your dress rehearsal for half moon.
You can bring your hand back to the waist, left hand to the waist. Bend your knee and then come in to warrior two now with the block. So arms can be out to the side. So, we're gonna go in between this with your right foot steady as you step into half moon. Right foot is steady as you come out of half moon into warrior two.
So try our little tweener pose a couple more times with the intention to stabilize your right foot. Go slow enough that your right foot isn't twisting around. Even if that means you have to go slower, notice how much you're engaging your core. Come up and out. Keep the block low as you transfer it over to your other hand.
And it's quite a lit of arm work if the block weighs something like this cork block does. Set it down for a second. Bend your left knee, spread your arms and then step in a step with that right foot, grab your block. Slide the block out and try to feel into left foot, leg, and hip. Can we be steady?
Our dress rehearsal, bend the knee, grab the block and come up. Okay, then we'll start. In your rhythm, coming in and out of the pose, not at all worried of the outcome, the goal of half moon. See if we can keep our focus on our left foot and keeping the left foot really stable. Notice how slow or how fast you go, with that as your intention.
So we're just going in and out of the pose versus the whole pose. Last one, left foot is steady, left foot is so steady as you're going in, so steady as you're coming out. Okay and we can drop the block down to the neutral position. Actually, let's set that back for a moment and then heel toe your legs and feet toward each other and then shake out the legs. Okay, we'll keep the feel parallel and then one more little tweener pose.
We'll try a tree pose. So if you're hands are at your side waist or hip bones, put your weight over onto your right foot and lift the left knee and then turn the knee out to the side so your inner left heel is lifting toward the ceiling. Get a little taller through the spine, arms can be out to the side to help you balance or lifted a little bit towards the ears. So, you'll start to feel with time, a little bit more muscle engagement in this inner upper left hip. Maybe 'cause you're doing something new, maybe even more energy moving into your right leg.
Take one more moment, lift that inner left heel toward the ceiling. And then arms down and the leg down. Just notice if you're noticing more than you do when you just glue your foot to the inside of your leg. Okay, so sometimes there's new muscles to wake up. Once again, feet under your hips, your feet together, let the right knee come up.
Let the knee open without using your hand and try to raise that inner right heel toward the ceiling. The arms out to the side to help you balance, maybe palms facing up or lifted arms closer to the ears. Okay, whatever helps you lift up off that lower standing leg at the same time, keeping that stability firmness in your left foot. Take another breath, keeping that lower heel, right heel lifted. And then go ahead and let it come down and then shake out the legs.
Okay, so if we turn towards the front little edge of your mat. With the feet touching and we'll let the heels lift as we did in the beginning and come down a little bit toward the squat position. So as we're doing these quick movements, we're staying away from the ground in a lot of our movements intentionally and working on balance to build heat and concentration. So, crow or crane pose, it's called many things, if the pelvis is lifted up and the feet are joined together, we can always, again, work this with the hands off the floor if there's any wrist or shoulder injuries. The hands can come down and as we lean forward and put some weight of the knees on the front backs of the arm bones, you might lift a foot or you might lift both feet and then you might put your feet back down and just once again, rock back with the hands up, make sure you're breathing.
Put the hands down, lean forward and knowing the tendencies to hold the breath, breathe in and exhale, pull your feet up. Put your feet, take a big breath in, hands up. As you exhale, place the hands and then come forward one more time. Take a breath in, exhale while you're pulling your feet up toward the hips and then put your feet back down. Bring your knees parallel and then we're gonna sit on a maybe medium block or turn it if you need to, a different angle or a different height or grab two side by side.
But in general, be sitting on top of the block. Hold onto the knees and from our tall spine, walk your feet in a little bit closer toward the block, so we're getting a new angle with the knees down to your shins, down to your ankles and when you find where you're stable here, I'm gonna have to start to turn towards your left leg and take the right arm to the outside of your left leg and as we do this, we're gonna try to keep the length in the spine as you keep reaching this right arm more and more down toward the floor and at some point, you'll find a position where your right knee wants to slide forward of the left and you're gonna try to keep your knees parallel to each other, which means the thighs are squeezing in and slide the right arm down toward the floor. When you find your end range of movement, let's take the left arm around the back and open up this top upper chest. And we can look down toward the lower hand as we roll open the chest and try to feel like you're pushing down into your feet to get that length into your chest and your spine. And if it feels okay to start looking back more and more over your left shoulder, look more and more back over the left shoulder as you wind that left arm deeper and deeper around into your inner legs.
And if you're losing your breath, you want to back up to a place where you're lifted enough, if you're open enough to breathe in and to breathe out. Maybe one more round, with trying our Pasasana, maybe reaching more toward the floor. Arms pressing against the knees, knees are parallel as you open your chest. And then slowly, slowly, release the arm from behind your back. Take your right hand back to side and just sit up tall for a moment and feel the effect of the twist.
Eventually, we do this without sitting on a block, so it's much more challenging in the ankles and the legs, eventually. Left arm now, second side, comes down around the outside of that right knee and I'm trying to keep that knee right from sliding out in front. So I squeeze the legs together and lean a little forward, press against my knee. Reach around the back with my right hand and then play around with this. As I go forward, can I reach toward the ground?
Push down into my feet, literally, and lift the spine. So, I've got a little more length and a little more option to roll open my right chest. Take a big breath here as you roll open the chest after lengthening your spine. Big breathe in and a big breath out. You release the arm that's around your back first, hold onto your right thigh, hold onto your left thigh and lift your spine up nice and tall.
Okay, we're gonna fold the leg back, get rid of the block that's underneath you and if your knees like padding, you want to add some blanket under the knees. We're gonna take the bolster one more time on top of the calves. And as we have them on top of the calves, I'm gonna have you just use that as a little bit of grounding force for the lower legs. You can have your hands to the upper part of the glutes, lower part of the back. Bring your elbows in parallel and begin to press down into your shins as you lift up through the side waist and chest.
You want to just get comfortable looking down the tip of your nose, finding your breath here. And then eventually, we'll let the hands start to reach down toward the bolster and different bolsters are different heights. So as your shoulders come back, have the intention to bring your palms in a little bit more toward each other. Reach down and lift the chest. Feels really good when your legs are rooting into the floor.
It feels okay, the eyes look a little bit more up. If this shortens your breath, you're welcome to continue looking down the tip of your nose. So stay in that way to have the intention to bring more space, more lightness into the upper chest. Whether the head goes back or not. Take one more breath in our Ustrasana or camel variation and then looking forward, guide your hips back for a moment down onto the seat of the cushion.
Just pause as you take a breath here in Vajrasana. Okay, we'll continue then to use a little bit of cushion underneath us, as we come to supine position, where we're on our back and we can use the bolster to rest the pelvis. Slide into the edge of the bolster, so maybe it's maybe a little easier to roll down onto your back and as you roll onto your back, let this cushion support you and rather than doing full legs up the wall, we'll do legs up the wall in this variation, so it's a little bit more effort in the legs and that's intentional. Arms out to the side, as we continue to find ways to improve our circulation. Hopefully reduce any feeling of heaviness or dullness after our energetic practice.
Come back to where Kapha's really comfortable, which is close to the earth. And noticing the difference now, as we're coming down toward the earth here, the core temperature and notice it changing after our energizing practice. Take a few more breaths with the legs up in space. If it's too much for your legs, you're always welcome to bend your knees and do your best to keep your feet up. And then over the last few breaths, we're still keeping the legs up.
Now, let your arms come up and you can just have your palms either pressed together or keep your arms parallel as if you had a block between your arms and we can feel more fluid movement. Again, more drainage down from the forearms through the upper arms, down in towards your chest. So, in some ways, if you were holding this for a minute or two, you would start to feel there's actually quite a bit of work involved in holding the limbs up. And just seeing this as a way to help improve overall circulation or maybe even decrease swelling, if there was swelling in the arms or the legs. Another breath.
Anytime that you're ready, we'll let the arms open up to the side, touch the ground, bend your knees, and with your feet apart, just allow yourself to receive that support underneath your sacrum. You can move if it's not quite in the right spot and if you're comfortable closing your eyes, close your eyes. If that feels like that takes you into too much of an internal space, just have a relaxed gaze towards the ceiling. Now that we built that heat in the body, we'll be down on the ground briefly, so that we can use all that warmth and energy for the rest of the day. Take a few moments to try and balance your breath here in this little mild inversion with the hips higher than the heart.
Slowly transitioning towards Shavasana in the next couple of breaths. And I might recommend now, as we start to prepare for that, that we roll over to the right side and as you roll to your side, that we do our Shavasana with this bolster underneath your spine, so it's got a little bit of chest opening, not totally on the ground. Got a little bit of lift and just keep breathing where we need to, to reduce that heaviness of Kapha, which is into the chest. Okay, so please settle for our brief Shavasana, which is intentional. Do not cool down too much here, when we're on our back, but to really allow ourselves to rest, since we've done some vigorous poses.
To try to focus again, on that little pause on the inhale, without craning any strain or tension. Let's see if you can find your breath. Counting it internally is one way to stay a little bit more alert and focused. Three more rounds, trying to find the pause after the inhale. Holding the breath, feel that extra pressure, lightness, space, in the upper chest.
Now over the next breath or two, just getting ready to roll over to your right side, if you have space. Bring the feet in under the knees and as you make your way over to your side, please stay there for a moment to catch your breath, wake up a little bit more here. And from your side, coming up toward a seated position and sitting on some height, again if that's helpful to be stable in your seat, cross-legged or Veerasana. And I'd like you to wiggle around until you do feel stable. Let your hands rest on your knees, as you sit up nice and tall.
Okay, we'll take your right hand over the front of the navel region and we'll do Kapalbhati breathing, if you're menstruating, skip this part, just do Ujjayi breathing, natural breaths. And for those of you Kapalbhati, let your belly push out into your palm and as you exhale, you're gonna pull your belly quickly back away from your palm and exhale through the nose. So, it's more like this. (quick exhalations) when you're ready, begin. (quick exhalations) Take a big inhale through your nose.
Both hands to your knees, exhale all the air out. At the end of the exhale, take a moment, hold the breath out, naval towards spine, chin toward chest. Quieting the mind. Inhale, relax the belly, lift the head all the way back up. One more time, hand over the belly region.
When you're ready, quick sharp exhales, Kapalbhati. (quick exhalations) Inhale through the nose. Exhale all the air out. At the end of exhale, just a moment, hold the breath out, naval toward spine, chin toward chest relax the belly as the head comes back all the way on top of the spine. Take three normal breaths.
Feeling that effect of the pumping action through the belly, the front of the abdomen. Bringing that heat and air up through the lungs, clearing the nasal passages. Trying to disperse that heavy feeling in the mind. One more round of the breath. Okay, then with the hands up in front of the heart center, after our invigorating practice, may others now benefit from our yoga practice.
Thank you so much for visiting the Rock the Kapha class. Namaste.
Yoga for Our Nature: Dosha Jam


Comments


You need to be a subscriber to post a comment.
Please Log In or Create an Account to start your free trial.
