Deconstructing Gate Pose
Description
Having access to a slippery surface like a wood floor is needed for this practice.
About This Video
Transcript
Read Full Transcript
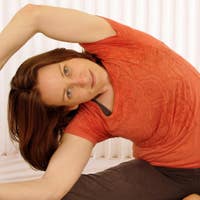
Welcome to my yoga deconstructed class. Today's class is called Deconstructing Parigasana or Gate Pose. And we are going to do a before and after check of a Hanasymatics exercise that involves side bending. I have my Joseph Pilates pants on so I'm a Pilates teacher as well and so if you also love Pilates and yoga I think you'll enjoy this class because you'll see elements of Pilates pop up throughout. So let's get started. For this first exercise you'll just need a blanket, a slippery surface, and a yoga block. And we're gonna come to lie down. The blanket needs to be long enough to cover you in constructive rest pose which just means knees bent feet on the floor from your feet to your head. The block can go at any setting in between your thighs. I'm gonna do this setting here and then interlace your fingers and cup your skull. And I know generally it's taught to have your elbows just you know flopped out but because we want to avoid this happening, the rib pop, if you bring your elbows slightly up into what's called scapion or the humerus follows the line of your scapula which is curved not flat on your rib cage. It's a little extra work but it's worth it. So elbows are slightly up, feet are on the ground, hug the brick, take a breath in and as you exhale you're gonna laterally flex your spine to the left and to the right. And we're just shining the floor and starting to light up the obliques, the quadratus lumborum and noticing if it feels a little bit easier to side bend on one side versus the other. As well as can you stay connected to your center, your pelvic floor, your abdominals by giving the brick a nice little hug and then one last time check in with your elbows if they sort of pieced out on you can you lift them up just slightly and then maybe pick up the pace without losing the precision of the movement. I forgot to mention you can be an imprint or neutral spine here. All right and then just pause for a moment and rest. Notice your breath and notice if you've created a little bit of heat hopefully around your center. Then you can remove the block, come up to seated. I'm just gonna move the mat or sorry the blanket off to the side a little bit so it's out of the way and fold it. Because this next exercise we're gonna use the mat and you don't need any props for the Hannah Sematics exercise. Start by lying on your side. I'm gonna start on my right side and my left hand is gonna go up and over to touch my right ear. Then I have my bottom arm can be you know just straight out so I have a little extra cushion or you could have your arm forward. You could also put a prop underneath your head. I'm gonna do this variation. Your knees are bent and it's kind of a fetal position. Go ahead and close your eyes and settle in. I'm wiggling a little just to let gravity do its thing and exhale. Sematics exercises Feldenkrais are very slow and mindful and not so much about watching more about feeling. We're gonna begin by lifting our head up and lowering it down. The sort of mantra I would say in this type of movement is less is more. You don't need to lift your head as high as you possibly can. If you're okay with closing your eyes go ahead and do that. Let's do three more. Breathe any way that feels good to you so just a natural native breath. Last time and then if your arm is tired you can always rest it for this next one. So the next part is you'll lift your left shin up and lower it down.
So my knees are staying connected and what you might notice is something that's called the follow-through. So as my shin lifts notice how my hip hikes a little bit. Let that happen. Close your eyes if that's okay for you or you could always fix your gaze on a spot. Just something to get you out of your thinking mind if there's no right or wrong way to do this and into your feeling body and notice sensation. Where do you feel maybe effort and where is their ease. Let's do two more just lifting the lower leg up. Notice how that creates what's called internal rotation at the hip and elevation of the left side of the pelvis and maybe even a little bit of lateral flexion of your spine and then rest. Okay we're gonna put it together. So you'll bring your left hand back to your right ear and this time as you lift your head you'll also lift your lower leg and then come back down. And again I'll remind you less is more doesn't need to be super high with the foot or the head. Feel free to close your eyes and notice what you're feeling. What's working and what's easy and the parts that feel like work is there a way to make it a little bit easier. Let's do one more and then release your hand. Pause for a moment on your side and observe if you feel a little heavier on the floor or maybe a little lighter. If you have more awareness of this whole lateral line from your left ear to your left ankle and then we'll switch sides. So coming on to your left side knees are bent you're in a fetal position and just setting up to where you feel comfortable with the bottom arm. This time it's your right hand that's gonna touch your left ear and then settle in. Surrender to gravity and notice your breath. We'll start with just lifting and lowering your head. So as you lift and lower your head notice that there's so many ways you can do this. I could let my head be completely passive and use primarily my shoulder girdle or I could use the right side of my neck and my right obliques and my arm shoulder isn't working as hard. So on these next few try both. Try a combination of the two because this is really just an exploration. And then lowering your head you can release your arm and we'll lift the lower leg. So this thigh bone internally rotates to help you lift your shin bone up. Once you've got that you can go ahead and close your eyes. And just like before where's the movement coming from? Where's their effort? Where's their ease? Is it your right inner thigh that's helping lift your leg? Or maybe you feel more work in your anterior tibialis sort of outer leg and thigh. Perhaps you're feeling more work in the side of the waist or none of it feels like work. It's just easy. Last two times and then we'll put it together. So right hand to left ear and then lifting your head and your lower leg and lowering back down. Eyes can be open or closed and I want you to experiment with how there's so many different ways you can do this. So notice how you're doing it right now. Is it more shoulder work or neck work? Is it more hip work or foot? And then maybe it could just feel like an even amount of effort or an even amount of ease. Like everything's just floating up and back down. There is no right or wrong way. Let's do two more. Noticing what it's like on this side versus the other side. And then rest. Go ahead and let the whole left side of your body relax into the floor. And then take your time. Use your right hand to help initiate pressing yourself up to seated. And we're gonna get the blanket back out and recheck the constructive rest slides. So again you just need the blanket to be long enough to cover you from your feet to your head. You'll grab the yoga brick and come on to the blanket with knees bent feet on the floor. The brick can be whatever setting you like. The skinny or the wider. Interlace your fingers, cup your skull, plop your elbows down and then go okay I'm gonna lift my elbows up and begin to side bend. So right armpit to left hip and then left armpit to right hip. As you continue take a deep dive into sensation and noticing on this time around what does it feel like? Do you have more range of motion or less? Is there more effort in the same places or in different places? The somatic work changes your nervous system which can help you to embody movements in a new way. Then we'll pick up the pace going just a little bit faster and then rest. Remove the block. Let your legs actually go long on the floor. Take a breath in, sigh it out and one more time check in with sensation around the sides of your waist. When we do paragasana pose later you want to feel very warm there and ready. Go ahead and bend your knees, find the floor with your feet, roll onto your side, make your way up to seated. For this next exercise we don't need the blanket anymore so you can fold it up and toss it off to the side. We are going to use two yoga bricks and this is I call cross pattern jitara parivartanasana. Jitari parivartanasana is a mouthful I can barely say it. It's Sanskrit for revolved abdominal pose. Isn't that so much easier to say? So it's a nice way to again warm up our center but through rotation as opposed to side bending. So come to lie on your mat but with a block on each side of you and you want to place the blocks in such a way where when your head's on the floor and your elbows are out to the side and you internally rotate you can touch the blocks. So if you can't touch them you can always take them up to a little higher level. Also you want them in a spot where when your knees are bent and your feet are on the sorry when your knees are bent and you're connected through your feet and you go side to side you can use them as a little bit of a landmark. And let's start actually in cactus. If being in cactus makes your ribs lift up off the floor then definitely put a blanket underneath your head. I have this like massive bun so it's kind of like a pillow but yeah you don't want to feel like your head's tilted backwards for this. And then very slowly let your legs go over to the right feel for the block and then exhale your way back to center. Inhale take your legs over to the block and you might need two blocks whatever is works for you and then exhale back to center. I do want you to be able to maintain contact with your hands, your forearms, your elbows, your upper arms, and your shoulder blades. So it's a smaller range than you might be used to doing. Exhaling your way back. Okay let's get our brain involved, my brain involved. So let's start with your left shoulder and internal rotation. So my left hand's on the block. Right arm shoulder and external rotation and your legs go over to the right. Okay prepare your brain for this. When we switch right shoulder internally rotates, left shoulder externally rotates, knees go over to the left and then switch. Notice how I have my knees pretty close to my chest. That's a regression. So if I had my legs further away from my chest that makes it harder. I'm not gonna do that because when I do that I start to arch my back and my head kind of does this backwards thing where I hyper extend my neck. So make this work for you and let's go for four more. When I teach this what I see happening a lot is one knee gets left behind because my students aren't using their lower back muscles or their belly. So if you have your knees matching it's a lot more work and so if this feels really easy just take a look at your knees and go oh yeah that's why it's easy. One knee is left behind. I'm not stabilizing through my center. Last one each side. If you're struggling with one knee left behind notice which knee it is because that can give you information. All right and then go ahead and bend your knees. Take a breath in. You can stick your tongue out. A little lion's breath. In fact let's do a big lion's breath. So inhale and then exhale.
All right you're at home no one can see you. All right move the blocks off to the side. Roll on to your side and come on up to seated. Okay so our next exercise is called parigasana bridges or gate pose bridge. What happens in gate pose is a lot of times there's not enough hip extension and it feels like you're sitting back. So we're gonna prep for that with this little mobility drill. You'll need two blocks and the blocks are gonna be stacked like so and you get to lie down in your gate pose. I'm a big fan of changing your orientation to gravity in your yoga poses to an easier situation before we do it upright. So in gate pose your foot is I guess you could call it parallel to the other foot or to the knee. So but if that doesn't work for your body just let your foot and leg turn out. I'm okay with that so I'm gonna go here. The other thing with gate pose is you're in a little bit of a side bend. So you can laterally flex your spine to the right. You can do a little reach of this arm and then plant your left foot into the floor drive down through your right calf and bridge up. We're gonna go for eight of these if I can remember to count. I usually just start talking and cueing and forget what number I'm on. If you're short-waisted and this feels awful please don't side bend. You don't want to feel like your bottom rib is you know digging into your top iliac crest. I have a longer torso and so I'm okay but make this work for you. This is kind of like a single leg bridge but you've got a little bit of support. We're gonna go for four more and as you lift up see if you can avoid the big rib flare back bend. If you can keep some connection into your upper abdominals and make this less of a back bend, a spinal extensor exercise, and more of a glute hamstring exercise. Alright I'd say that's enough. We're gonna switch sides so pick up your bricks, place them over on the other side, right knees bent, right foot's on the floor and then you might have to do a little bit of finagling to figure out where you want the bricks. I kind of like the calf but you might prefer your ankle or your foot. Then you have the choice. You can wiggle into your side bend so it's more like gate pose or you can stay upright or parallel. Take a breath in where it can be turned or externally rotated and then lift up and back down. As you continue see what would happen if you think of driving your right knee over your right toenails. So you're actually reaching your knee forward in space as you slide, you won't go anywhere, but you attempt to slide your heel backwards. We're trying to get a little more firing through the hamstrings and the glutes and then again you can take your left hand to your rib cage in the front. It's just a reminder that this isn't a big sort of squeeze your shoulder blades back and down and arch at the TL junction. That you're you're staying stable here and working through the glutes and the hamstrings. Let's do one more time and lower back down. Go ahead and come back and let's bring one hand to our belly. One hand a little bit higher up on your ribs, close your eyes or pick a spot to focus on on the ceiling and as you inhale let your belly rise. Broaden the ribs in three dimensions and then exhale. Let's do one more time. Inhale, belly swells, ribs expand, you fill up your lungs and then empty. I'm gonna go ahead and roll onto your side and come on up to seated. So our next setup is Cacao on our forearms and we're gonna do it a little bit asymmetrical. So all you need is your your two yoga bricks. I recommend the cork ones because they're just a little bit sturdier than the foam. You can always put a blanket under your knees if you want a little extra padding. And what I'm gonna do is take one brick a little bit forward, so that's the right brick for me, and the other a little bit backwards. When we're in gate pose we're gonna add a little Cacao. So we'll be doing side bending and rotation and flexion extension and this is a really good way to get into some of the nooks and crannies that we don't typically get to in our regular Cacao. So I've got my forearms on the bricks, the right one is forward, the left one is backwards, but we're gonna do something else. We're also going to bring our left knee forward and our right knee backwards. So that means you'll be a little shorter through the left side of your waist, a little longer through the right. And then it's just your regular Cacao that feels different. So you can do fists or you can relax your hands. I'm gonna do fists to create a little bit of tension. And let's start in cat, rounding your spine, drop the crown of your head, try to look up at your belly button, and then very slowly articulate into extension. So widening the sits bones, threading the breastbone up and forward, shoulders draw back and down, try to look at the ceiling. And then let's initiate from the chin to the chest, then protract the shoulder blades, push the bricks away, middle back, lower back, flex, tail tucks. And now we'll initiate from the tail. So stay rounded through your upper back as you start to arch the lower back, the middle back, the upper back, and the neck. So I'm teaching this more as an articulation than a regular Cacao. Let's do one more, starting from the chin to the chest, so cervical flexion, and then you initiate upper thoracic flexion, mid-back round, lumbar flexion, low back, tail tucks, push the ground away, and then come to neutral. And we'll switch. So bring the left block, kind of where the right one is, and pull the right one back slightly. Instead of having your left knee forward, you can bring your right knee forward, left knee back. By the way, there's like a million incarnations of this that I teach and that you can do. This is just this two of them. So I encourage you to play with this on your own. And if you have clients with scoliosis, this can be a really interesting way to work with scoliosis. Okay, here we go. Chin to chest. We're gonna start in cat, so rounding your spine, flexing your spine, tucking the tail. And then go the other way, initiating from your tailbone. So stay rounded through your neck and your upper back as you anteriorly tilt your pelvis and extend the lumbar spine, the low back. Then drive your forearms into the bricks, try to scrape backwards to get extension through your upper back and your neck. And then we'll initiate from the chin. So flexing, dropping chin to chest, shift your gaze, round your upper back, middle back, lower back. Pause in your cat. Notice what it's like on this side. And then initiating from the tail. We could initiate from the head, but let's initiate from the tail.
Work to stay rounded to your upper back as long as you can until you feel the ripple effect from the lower back. Follow through into the upper back and neck. And then dropping chin to chest, let's make our way into neutral. Bring the right block back to meet the left block and even out your knees. And let's just do a regular cat cow. And as you round your spine, we didn't do a before and after, but maybe you have a little bit more range of motion than you would in your regular old cat cow. And in your cow and your spinal extension, notice if there's some areas that maybe are awake and alive that aren't usually. One more time. Exhale. Cat. And inhale. Cow. All right. And then let's come into child's pose. So any child's pose you like, you can have their arms straight out in front or arms by your hips. Forearms can be up or down. I want you to check in with your breath. When you inhale, can you let your belly relax and swell? Can you also expand into this middle upper back region on the inhalation? And then empty. Exhale and surrender to gravity. One more time. Breathing in. Belly and ribs expand. Your lungs fill up. Pause at the top. Hold for just a moment. Maybe you can sip in a little more air through your nose. And then exhale, ejecting the breath out of the nostrils, surrendering to gravity. Okay, so make your way out of child's pose. I'm gonna roll up a little bit. And what we're gonna do next I call sunflower salutes. I like a little extra padding underneath my knees because we'll be kneeling. So I'm gonna use the blanket for that. And we actually don't need the blocks. If you want, you could do a block between your inner thighs, but sometimes it gets a little tricky. So I'm gonna do no blocks for this one. And let's come to tall kneeling. Take a breath in. Reach your arms out and up. Connect your palms and look up at the sky. Then a big swan dive forward into child's pose. Inhale, let's come to a kneeling plank. And then exhale, lowering down to your belly. Breathing in. Exhale, come to a mini cobra. I like to take my hands out so I can traction and get a little more length in my backbend. And then hands come back under the shoulders. Bend your knees, pressing back to child's pose. From child's pose, keep your arms up by your ears. Ooh, lots of strength. And look up to the ceiling. Hands connect. Draw a line down the center of your body. And we'll begin again. Arms reach out and up. Tiny backbend if that's okay for you. And then swan dive the arms out. Child's pose. Inhale, coming to your kneeling plank. Exhale to lower. Arms reach out. You can do your cat claw fingers. Inhale to look up. Cobra. Exhale, lower. Hands come underneath the shoulders in one piece. Push up. And then sit back. Child's pose.
Come into your hitchhiker thumbs. Arms stay at your ears if possible. Press down through the feet, through the shins, and come back up. Hands connect. Drawing a line down the center of your body. One more time. Inhale, arms reach out and up. And then exhale. Swan dive forward. Child's pose. Inhale, come forward. And exhale. Slowly lowering down. Cat claws come out. Let's do a little lion's breath. And then hands come back under your shoulders. Come up in one piece. Push into the earth. Come back to your child's pose. And on this transition, rather than arms by your ears straight up, I'm gonna have you sweep the arms out, back, and up. Into your little back bend. And then drawing a line down the center. Pause and close your eyes for just a moment. One hand to your heart, the other hand on top. And taking a moment to notice the pace of your heart and the pace of your breath. Slowly opening your eyes. So this brings us to gyrotonic blanket swirls. I love to bring gyrotonic and Pilates into the yoga practice. And if you've never been on the gyrotonic tower, it's really fun. There are these handle units that look like Lazy Susan's and it takes you through some triplanar motion that feels delicious. So I'm gonna do my best to recreate that with the props we have here. So I am going to fold the mat in half so I have some cushion underneath my knees. Sometimes it's nice to fold it in half twice if you want a little bit of extra cushion. Then you'll take your blanket and you want the whole blanket so you have lots of fabric to work with. So I recommend having the fringes on either end. You open it out like a big beach blanket and then scrunch it up so that you have a lot of fabric to swirl. Then grab your block. It's gonna go between your upper inner thighs so you can maintain a connection to your midline. Tops of the feet are on the floor and I recommend watching this first because it's a little bit different just so you can see where to go because you won't be able to see me once you start doing this. You'll come into cat first and then bring your right hand closer to you and your left hand further away. Internally rotate your shoulders and it's a thread the needle but without the collapse. So I'm resisting gravity and then I pop back into my cat rounding the spine. Internally rotate so I'm pointing my fingers inward and thread the needle again without collapsing so I stay lifted and then I pop back up. So this can be a little bit more dynamic and quick. And right now I'm just demonstrating the round back version but if you want you can arch and then round. Arch and round. Press down through the tops of your feet. Your hips will go, your sitz bones will go backwards a little bit towards your heels. Let's go one more cuz it's fun and it feels so good. Just one more. Spiraling and then coming back up. All right so there's your gyroscopic or gyrotonic. I like gyroscopic. Gyroscopic swirls. Okay our next exercise is called Gate Pose Slides or Parigasana Slides. So we'll be using the blanket but in a folded up tidier manner. So grab your blanket fold it up so it looks more the way it does when it comes off the shelf. If you are at home and you're on carpet you could always use a paper plate or a slider because the blanket's gonna go underneath your right foot in just a moment. I'm gonna rearrange the mat so that I can do both sides. Okay so once you feel like you have enough padding for your left knee you can tuck your left toes under or do top of the foot on the mat. I'm gonna tuck my left toes under and bring the right foot onto the blanket. I mentioned earlier like this feels fine for me to have my foot parallel but if you want to turn your foot out please do make make it work for you. And we'll start by actually let's do a fist with your right hand and then wrap your left hand around your fist. Remember the bridging we did? So it's easier to sit back. I want you to engage your glutes and try to remain in hip extension here. If you've ever been on a reformer and done this you know that the lighter the spring the harder it is. So only go out the first time as far as you know you can get back in. And so you know just kind of test the waters oh yeah yeah because hello right you got to come back. So we're gonna do a few of these.
I'm gonna test the waters make some faces see what happens. When you're doing this exercise I want you to think of bringing yourself back in with both adductors. So even though you know it seems like just this leg and foot are moving pretend that you could pull the mat that's underneath your left knee that way. One more time let's make it into a pretty pose. Okay and then because it's fun and because why not we're gonna do a little bit of arcing to challenge your hip stability. So again foot can be out or forward. I'm just gonna see what I can manage here. So I think I'm gonna do out let's try out. Okay so try to slide the blanket forward holy moly and do whatever you want with your arms to slide it back. So these arcs can be as big or small as you like. There's kind of like a little sweet spot where if I go here I was gonna say it's not as much work but it's still work. So I want you to play with this left hip stability. I'm shaking the strength in your right hip extensors aka your glutes and actually from like a neuromuscular standpoint it gets a little bit easier the more you do it because your brain is like okay I'm not freaking out anymore I get this I see where you're going and then let's make it like you're going on a little stroll because why not right. Okay this like is exhausted I don't know about you. So take a little breather close your eyes or place your gaze on a spot on the floor your drishti and just check in. I am a student of my body I am a student of my breath and perhaps your breath space and your heart's pace both increased. So just watch them slow down for the next couple of breaths before we go to the other side. Opening your eyes let's switch the blanket over to the left there's a random block over there okay let's see what's happening on the other side. Left foot on the blanket I'm gonna turn out I think it's just more manageable whatever you want to do with your arms tuck tuck the back toes under so you have a little bit of a kickstand and just start to explore the range of motion and I'm immediately like you know doing a little bit of cross patterning with my arms because I find it to be extremely helpful hmm the side is much easier who knows right okay so I'm gonna try it without my arms much harder. I also am working pretty hard to not sit back in a chair to keep this right you know right glutes firing. Let's do one more can you feel the connection from your foot to your leg to your hip to the center of your torso while breathing last one and then we got to do the out and in don't think I forgot I did forget but now I remembered. So we go out remember only as far as you can come back in and keeping in mind is that both inner thighs the adductors both hips can work to bring you back home even though only one you know part of your body is sliding and moving they can both work one in a stabilizing way and the other in more dynamic way so this eccentric strength is so important and a lot of times it's just missing from our traditional yoga practice so these blanket drills are really a wonderful way to put that back into your practice last one and then if you want you can get a little fancy balance for a moment and then take a seat in Virasana pause for a moment and close your eyes taking a breath in and exhaling it out and then go ahead and open your eyes so we made it to Parigasana our gate pose we don't need the blanket for this but what we are going to use are the blocks so you can take your blanket off to the side and then have the blocks sort of behind you at the highest level let's start with the right leg out you can kickstand the left toes or not and we'll flow so left arm reaches up inhale and then exhale side bend take your left hand behind your head breathe in and as you exhale I want you to twist your chest towards the ceiling and then curl your chest towards the floor one more time inhale as you extend an arch look out of the left corner of your left eye at your left elbow and then exhale peek under your right armpit behind you on the floor then coming back to this neutral sort of gate pose position reach for the sky take your right hand off of your leg and let's do a little bit of balance transfer whoo yes okay other side shift your body weight into the right knee right toes pick up your left knee pick up your left toes that was a quick one I'm sure you did much better and then just feel the stretch no need to go crazy here right hand goes behind your head inhale as you lift your chest and try to look up and back and then exhale just like the cat cow we did earlier flex around and look under your left armpit one more time inhale and exhale and then coming back to the side paragasana cartwheel the arms find your moment of balance and coming back okay so what I notice is my bricks are not quite in the best spot so check and see if yours are when your right leg comes out to the side we're gonna do what I call cartwheel past the brick so have the brick in a place where you actually can access it so somewhere close to your calf when your leg goes out to the side all right let's do it so we don't usually get to lift external loads and yoga but we do have cork bricks so I'm gonna use those today coming into gate pose and then grab the brick with your right hand pick it up lift it up pass it off look at the brick look at the sky and then as you place that brick on the floor lift your right leg up and let's pass it back so right foot drops down pick up the brick pass it off and place it on the floor then reach up to the ceiling exhale place your left hand on the brick turn your head to look at the sky look at your right hand want you to use the right side of your waist stay grounded through your right foot pick up the brick pass it look up tap down pick up the brick pass it and tap it back down and then just bending your knee we'll do the other side so left leg goes out to the side organize your bricks paragasana gate pose make sure you can reach the brick and always straight elbows lifted up pass it off look up we don't get to look up very much anymore we're always looking down at our phones and then pick it up look up pass it off and place it back down then from here we did a little cartwheel up and over tap the right brick and then pass it off going the other way finding space to put it on the ground and then pick it up feel the sides of your waist remember all the way back to the beginning class how easy that constructive rest slide was compared to this and then pick up your foot bring your knees back together and take a seat close your eyes for just a moment to check in become a student of your body and a student of your breath slowly opening your eyes we're gonna finish up this practice on our backs so all you'll need is your blanket and your mat so opening the mat back out and grabbing your blanket we're gonna use the blanket like we would use a strap what's nice about that it's just the heaviness of the blanket and the softness of the blanket gives you a little bit different feedback into your hips so I am just folding it into a long skinny blanket so it is more like a strap like so and then coming on to your back of course you can put a pillow underneath your head you want to be comfortable and the blankets just gonna be strung across the soles of your feet yet a nice grip and remember when we did your Charaparivartanasana so we took our legs over to the side and came back so that's all we're doing here but in a more lazy easy way but I want you to notice how there's different ways you can do this so I can use mostly my arms and my elbows like little stoppers rather than needing to use my obliques so try that then experiment with your outer hip strength so pull the blanket apart with the outsides of your feet and notice how you might not need your elbows and your hands you can use your outer hip strength and connection to your center a lot of times we get really confused and we think core is just our center but it's our lower body connection to our center and it's our upper body connection to our center one more time over to the left and then back to center go ahead and place the blanket off to the side and come into Shavasana or constructive rest so knees bent feet on the floor or you can bring your legs long anything that works for you bring one hand to your belly and the other hand slightly higher up on your ribs and take a longer slower breath in and out this is the chance you give the opportunity to your body mind and your mind body to soak in everything you just experienced in your practice as you observe your breath notice all the parts of your body that have contact with the ground and how the ground rises up to meet you and support you you are supported if you have more time I encourage you to rest here in Shavasana or as long as you like if you need to move into the rest of your day start slowly so finding small movements in your arms your legs fingers and toes stretch your arms overhead wiggle shift and then bend your knees find the floor with your feet hug your knees to your chest and rock a little from side to side and then choose a side to roll on to and make your way up to seated connecting your palms together at your heart center thank you for practicing with me today namaste
Comments


 .
.
 .
.

You need to be a subscriber to post a comment.
Please Log In or Create an Account to start your free trial.
