
Description
Transcript
Read Full Transcript
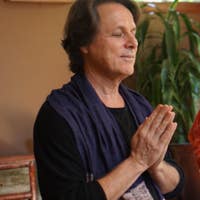
Namaste and welcome. In this practice, we'll be doing poses to help map our experience of opening in the hips. We're going to start out, and I again recommend seated up on two blankets, or maybe even three, to help lift and open up your chest. Press down through your sitting bones to help get a feeling of lift through the sides of your body. And we're differentiating the sides from pushing the back forward.
So the cue that I'll give is to lift the front of the spine and sides of the body. Roll the shoulders back so you feel the shoulder blades press against the upper back and open the chest. And then without dropping or caving the chest, you can bring the palms together and the length of the thumbs of the sternum. Gently press the thumbs against the sternum to help lift and open the chest. When you do that, you'll feel the shoulders relax, trapezius to roll down the back, shoulder blades to descend.
Take a minute to close your eyes. Allow your attention to drop down out of thinking and towards the spaciousness of the chest. As you let your attention settle there, you may notice that there is a quiet stillness that's different from thinking or spaciousness. From that open stillness, I say, om namaste and welcome, please release your hands and open your eyes. And we'll start out in our first pose called barakonasana.
I'm going to use a strap for this to help widen out the legs and bring the soles of the feet together. And if you can easily reach without falling forward or caving in the chest, then you don't need the strap, but it's very helpful to use the strap to get the extra space in the body. So I've got the strap wrapped around the pinky sides of the foot and the heels pulled in close to the groin, as close as my knees are comfortable having them. My first step, and notice that my palms are held out as I hold the strap. I'm going to pull with the arms and I'll show that again.
You see the body changes. I pull the spine lifts. So that's the first part of our map here. Pulling against the legs, the feet, helps to lift and open the spine and we'll relax it a little bit. Again, pull on the strap or the pinky toe side of the foot, feel the spine lift.
And the next thing to feel for is the sacrum and tailbone moving forward. Forward is this way. So again, I pull on the strap, the spine goes up and the sacrum and tailbone come forward. So as that happens, sacrum and tailbone come forward, you feel the glute muscles. Let them engage and assist in pulling the sacrum and tailbone forward.
And then that gets us to our full destination. As the sacrum and tailbone come forward, you'll start to feel that the groin muscles elongate out towards the knees. And this is something where part of our roadmap in this particular practice will be following all through class. Let's feel it again. I pull up on the strap, spine goes up, sacrum and tailbone come forward, and you feel the groins begin to lengthen out to the knees.
Let's do the reverse. Feeling the tension of the groin as you let go of the tension of the strap, you feel the groins recede and shorten. Okay, let's do one more time. The action we're looking for the map that we're trying to follow, lifting spine, sacrum and tailbone forward, groins elongating toward the knees and we'll stabilize here for a moment. And then releasing.
All right. We can put the strap away for now and we'll extend the legs out wide. I'm going to stay lifted up on the blanket to get a nice effect through the whole body. Nice lift. Wide legs, hands behind you on the blanket and it's the same effect we're going for.
So widen out those legs. I'll press down through my hands to lift the spine up. And then as though, this can't happen, but as though I was going to take the legs together behind me. That's the energy I'm using with the legs. So I feel those glute muscles really turn on.
Here we go again. Press down through the legs, put through the arms to lift the spine. And as though you could take those legs behind you, feel how the glutes become alive and they pull the sacrum and tailbone forward. And that once again gets us the elongation of the inner leg. That's the opening, the map that we're looking for.
And then as you relax, feel the reverse happen. And we'll do it one more time. Go down to the arms, drawing the legs back to feel the glutes firm and the grinds to begin to lengthen. And then relax. We'll lean back, draw the legs in and we'll make our way into a kneeling position.
We won't need the blankets anymore. From our kneeling position, we'll take the right leg out so that the heel is in line with the left knee and the left leg is vertical. We'll stretch the arms out, inhale and exhale over to the right side, hand down on the inside of the foot. Here we're going for that same mapped experience where the right glute firms and presses the sacrum and tailbone forward, which opens the groin and lengthens all of that for the hip. So let's undo it just a little bit.
And again, we press the foot down through the floor, the right foot down through the floor to feel the strength of the hip muscles begin to open the groin. And then we'll release and do the second side. Left leg comes out, heel in line with the knee. Stretch out the arms, take a breath in. As you exhale, extend over the left side.
I press down through the left foot to get the feeling of the strength in the left hip. That brings the sacrum and tailbone forward. I'm pulsing that for you so you can see that. And then we get the length in the inner leg. Good.
We can even stretch over the arm a little if you like to help open up a little further. And then coming to center. From here, a downward facing dog. Start by raising your heels up nice and high. This takes some of the tension out of the backs of the legs that sometimes will limit us in getting deeper in the pose.
And we'll take a few easy pulses by pressing the hands into the floor and stretching back through the legs. The feeling I'm going for here is that I'm bringing the pubic bone through the legs a little further. A little pulse. Sharpening you could say the crease of the thigh and pelvis. Deepening the top of the triangle of dog pose.
And then I'll keep that depth of the thigh crease there and slowly lower the heels. Or a full stretch. Then we'll bring the feet a little close together. Raise up the left leg first. Take an inhale and turn the hips open.
Here again, the right leg, the ones attached to the floor, we want to strengthen those hip muscles to help press open the groin. And we'll complete the pose by taking a bent left leg. A few breaths here as you work that strength in the right hip. Then we'll release back to dog pose. Second side, right leg lifting.
Turning the hips open to the side. And it's the power of pressing the left foot into the ground that gets the strength into the hip muscles. And that helps us open the inner leg. We complete the pose with a bent right leg. A few breaths.
Let's come down and rest in child's pose. Knees down, you can fold the arms and rest your forehead on the hands. And then we'll come back into dog pose and step the left leg forward. And we're in a kneeling lunge, sorry, standard lunge actually. And lift up the back leg knee.
And this is some of the work we worked on in previous poses where we were to press the heel through the wall and that gives the support of the leg that's going to open the twist. Right hand stays down. You can use the left hand to begin to turn into the twist. Let's take the arm up. So my map in this pose is from my right heel, that heel that's back there.
It's lifting into the right leg which lifts all the way into the groin and abdomen. And that's what revolves the pose. A better word would be unlocks the pose. Smells the body to freely open. And then we'll set it down.
Step back through a dog pose and second side. So I charge up the energy in the left leg all the way through to the hip socket and the abdomen and I begin the twist. Watch as you twist that you keep the energy up in the left leg and that's what helps us to turn and unlock the body into the twist. And then we'll come back down. Dog pose for a few nice long breaths.
And we'll step forward and come up to standing. So our next pose will be utkatasana. We'll start the first five with the arms down. Take a breath in, send the hips back and aim to touch the fingers to the floor. Come back up and we'll do a few of these.
And this is just going to further warm up our hip joints before we go into the deeper standing poses. One more like that and then we'll add the arms. Arms coming up high and again, fierce pose, utkatasana, sitting back and coming up. Sitting back and coming up, three, two and one and we'll let it go. Wide legs stance and bring the hands down to the floor.
This is prasarita paratanasana and we're going to use it to enter triangle pose in a unique way. We'll turn the left toes in and the right leg out in 90 degrees and walk the hands over to catch the right ankle. I push down through that right foot and open up the chest and then I'm going to come back down to the ground and feel for a few things. When my chest turns up and open, my right hip follows forward and that's the map we've been working on. When my chest turns down, my right hip goes back, recedes away and so we're connecting that experience in our body third time and come down.
Let's turn the feet to center, revolve the right toes in, left leg out 90 degrees and catch that ankle. Then turning open the chest, remember the left hip will come forward, we want to encourage that and then coming down, hip recedes back, chest goes open, left hip comes forward and down and all of this helps to teach our nervous system amazing potential for movement our body has. We're going to do one more time. Left toes in, right leg out, I capture the right ankle. Turning the chest open, teaching the right hip to come forward into the pose.
Turning down and again, coming forward I stretch through the right leg to powerfully engage the hip muscles and one more time. Let's do the final side, left side. Right toes in, left leg out 90 degrees, I turn the chest open and that encourages the left hip to come forward and down, forward, releasing and one more time. Coming forward and down. Let's go back to the center, strong legs, hands to hips with an inhale come up.
Walk the legs together, let's stand in, tadasana for just a moment, it's always nice to take a pause and feel the effects of your practice, a few breaths. Feeling in the hip area, that's our main focus in mapping for this practice. Then wide legs, side angle pose, we'll stretch out the arms and turn the left toes in, the right leg out. A big breath in, exhale, bending your right knee and we'll take the hand to the inside edge of the leg. Here I'm going to use my right arm to push against the right leg to help open the knee back so that, as we've been learning, the hip comes forward.
Why is that important? Well if you're in this pose with me, allow your right hip to recede back and see and feel what happens to the chest, it must turn down, that's our biomechanical linkage in the body. If I push the right foot down again and once again bring the right hip forward, the torso can open and my neck is free to turn, my shoulder is free to open. And that quiet stillness can begin to emerge because I'm not fighting the body. It'll come up.
And then right toes in, left leg out, take a breath in and side angle. Hand on the inside of the foot. Once again I use my left arm to help open the knee and bring the left groin forward. Let's complete the pose with the arm over. And let's do again allowing the left hip to fall back so we can feel how the spine twists.
And then the left hip to come forward and how that opens up and gives us the potential to fully turn and experience this pose. A few more breaths. And we'll come out, inhale and turn the feet to center, walk the legs together. Our next pose we'll use a strap for to give us a little extra support. And we'll be taking the strap underneath the right foot to start and then holding it on the inside of the ankle.
I take my right hand as close down to the ankle as I'm comfortable doing and then I'm going to draw the leg back. Powerful pose, takes the balance. With my right arm I'm pushing that knee backward to once again help get the openness that we have been hunting for here. I feel my right glutes very strong to help support and open the hip joint. This is our pose.
And then we'll release and do the second side. I bring up the left leg. With the left hand I'm going to hold way down low on the strap with a long straight arm so we don't want to be working with our bicep, we want to just work with the length and strength of the arm. And then pressing the left arm back to open the hip. Here again my left glutes are firm, that helps support the joint and then I can open.
And then release. We'll do the right side again with the possibility of adding more. Right leg comes up, find that balance, there we go. Moving on and opening the leg as before. See how taking the leg out to the side also draws the right chest open.
If we like, if you feel like you've got the balance, you can attempt extending the leg. We'll see. Got it. So I'm actively pulling my right arm into the right socket which helps me engage the right glutes and open the right groin. And then coming down.
Second side, challenging poses. Left side strap, holding with the left hand. Taking it out to the side. And if you stumble here, remember you can always use the wall for support. So wonderful to use so you can explore these poses and not have to worry so much about the balance.
There it is. Taking it out to the side. So once again, I draw the left shoulder into its socket to help me engage the left glutes and open the leg. And then we'll release. And once again, come to Tadasana and we won't need the strap anymore.
You can put that off to the side. Let's see how our body is changing. Let's take a recovery pose, ragdoll pose. We'll separate the feet about hip width. Let's take soft knees, hang the trunk down.
You can capture your elbows if you like or you just let the arms fall, whichever is your preference. And we're going to let the body recover in this pose. Soft head, soft neck. Releasing the back muscles. It's a strong set of standing poses.
So we need to recover. And then hands on your knees, lift your chest, let the blood come down. And we'll come up to standing. Our next pose will be another single leg balancing pose. We'll start by bringing the legs together and folding forward.
And step the left leg back just a little bit so you're on your tippy toes. And the right arm out diagonally from the foot. We'll take the left hand behind to capture the Achilles and here's our work, lifting the left leg, bending the right arm so you can go down. We take the trunk closer and closer to the thigh. So we have to actively stretch down with the right leg, at the same time reaching up with the, excuse me, stretch down with the right leg, reaching up with the left.
And then come down. And we'll organize the pose. Two feet together. Right toes go back, left arm out just a little for balance. We'll take the right hand behind the opposite foot there, the left foot, and we'll start our work.
Long spine to begin and bringing the trunk down and right leg up. Use your breath to go a little deeper each time. The right leg challenges, left leg works into the floor as the right leg goes for the ceiling. And then we'll set it down and find dog pose. If you need a child's pose at this time to take rest, please do.
Otherwise we'll look for a little rest and space in dog pose. Feel the length and mobility that we've created in the hips from this session so far. And we'll lower to the knees and take a pause for just a moment. So we're building a little bit in our inversions here and we'll be practicing a prep for headstand this time. We'll start by interlacing the fingers and forming a cup-like shape for the headstand foundation and we'll work from there.
I'll place the foundation on the floor with the elbows shoulder width apart. The first step will curl under the toes and raise the knees. And we're trying to work to press the shoulders away from the hands and move the chest toward the knees. Then we'll walk in and we can use bent legs for this, no problem at all, as we work on the strength of the shoulders that will be supporting us eventually in a headstand and walk out and take a pause. You can roll the shoulders if you like, recover however you need to recover.
Let's take the next step. Once again we'll make our foundation, interlacing the fingers all the way to the webbing and place the elbows shoulder width apart. Curl under the toes, lift up and once again we're going to walk in while resisting the shoulders back. So here the mobility we've created in the hips is going to help us as we raise the right leg up. Challenge that lift.
You might even be able to straighten the left leg. Please do if you can, otherwise bent left leg is fine. All of that strength in the shoulders and the mobility in the hips coming together to aim at headstand. Let's take a pause. And second side we'll do.
If you like and you can remember which way you interlaced your fingers, you can change the fingers. The other one on top. We want to get the brain to have to think in both ways. Place the foundation down, elbows shoulder width and raise the knees. Walk in.
Keep the shoulders resisting away from the hands, pressing toward the knees. Here comes the second side, left leg up. Pressing the shoulder blades up the back and challenging the lift of your left leg. Soft head, soft neck and head is definitely off the ground right now, even though in headstand it does touch the floor. And then come down and rest.
Let's recover one more time. All right, our hips are warm from all the great work we've been doing so far. We'll take a little bit deeper posing now and we'll start out with wide legs in a kneeling position. You might need to either fold your mat or maybe even lay out a blanket if you're on a hard surface so that you can be comfortable in this pose. We're going to widen out the knees to our capacity and come down to forearms.
The feet will be directly behind the knees and start to work into the pose. The hips, by the way, should be in line with the knees, not pressed backward towards the feet. That'll be our next version of the pose. So right now, it's basically legs straight out to the sides. In this pose, we want to use the groin muscles, the ones that we've been lengthening so far, but use those inner thigh muscles to gently hold the knees toward one another.
We don't want to just let the legs out completely and be resting on our ligaments and tendons. So have some muscle strength there to hold the knees a little bit inward. And we'll hold onto this pose for a few breaths. It doesn't take long before the heat starts to develop in those muscles. This is good.
It helps us bring the strength around the hips. If at any time you fatigue, of course, you bring the legs together and take a pause and join us in the next version when you're ready. We'll spend about another 15 seconds or so here working in this pose. If at any time your body starts to say that it could give up a little bit more space, then by all means, you can take that. But remember to keep the strength in the hip muscles.
And now that we've got those hip muscles quite aware, we're going to slide the big toes together, the feet together, and then begin to push the hips backward toward the heels, settling deeply in toward the floor. You can walk your arms back to support the pose. And again, the theoretical destination anyway is to bring the hips right on down to the mat as you settle in the legs. Whereas before, the previous pose was more for the long adductor muscles. This is more for the shorter adductor muscles and prepares us for the deeper poses to come.
And then to come out, you can use your arm strength to lift up and slowly walk the knees in and together. We'll just take a kneeling pose to recover and you can gently squeeze the thighs toward one another for that recovery. And our next pose will be a long lunge as we take it deeper into the hips. We'll step the right leg forward and the left leg back. And for this, we'll let the back knee be on the ground.
Then our challenge is we'll walk the right foot a little further out and begin considering to taking the elbows down. It's usually easiest to take the left elbow down first and then the right elbow, we can slowly work toward the ground. I'm going to come back just to point here at the right hip. This is where the movement is really happening. The depth of the pose is the turning of the right hip in its socket.
I'm not doing so much of this with my back. Left elbow down and then the turning of the right hip, lowering of the hips to the floor. That's where we're headed. We'll take a few breaths here. You might lift a little and lower a little, helping the body to experience and let go of tension when it finds it.
And then we'll walk our way out. Stepping the right leg back, we'll bring the left leg forward. Find a nice depth in the pose, allowing the hips to settle in and we'll bring the elbows down. This time it's the right elbow that'll settle a little bit more easily and then I'll work with the left elbow, slowly pulsing into the left hip. Now you have a chance to see this is where that wheeling happens, the turning of the left hip.
That allows me to go down. If you can't get close to the ground, a couple of blocks underneath both elbows is a great way to go. You bring the floor up to you so we can accommodate your body. And then work your way out and we'll come into a sitting position. The next pose is one that's not often seen in a lot of classes.
It's called a Karna Dhanurasana, archers pose. We'll start with the left leg, we'll bring the foot back and we're going to grab with two fingers in the thumb around the big toe. You could also grab the outer edge of the foot if you want a little bit more firmer support but there's a subtlety to holding onto the big toe that connects us to the hip. The second arm will be here for support and I'm going to start by lifting up and just like a bow and arrow, that's why this pose is named, we're going to pull the left leg back and I'm coaching that wheeling of the hip you just learned in the kneeling pose. And if you want sort of a physical metaphor for what we're doing, it's like you're trying to pick up the phone and answer the phone, hello, pulling back and pulling back, working focusing mostly on that hip and you can begin to turn the chest open and turn the chest open.
A few more pulses here, this is fantastic work for the hips if you happen to sit a lot or travel in your car a lot or airplanes, those sorts of things to mobilize the hips and get the blood moving back in our hips again. Let's go for the right foot, two first fingers and the thumb wrap around or remember you can grab the outside, let's bring the leg in first and up and I keep the shin level so I'm not going up and down and we'll start with that pulling backward of the knee. Pumping action. Action in poses is really what helps the nervous system feel and understand where it's holding tension or new ways of moving that it hadn't previously known were possible. Let's get two more and letting down.
Our next pose we're ready for is half bound lotus and I'm going to use the strap one more time because it'll help us reach the foot a little bit more easily. We'll start with the right leg, I bring the leg out and we can begin by just resting it on the left thigh. Coming underneath I'll help bring that foot closer and closer to the groin. If your knee for whatever reason doesn't appreciate this pose you can always leave the foot a little further out or you could take a support underneath. My body is such that I don't think it'll ever allow the knee to go to the floor in classic lotus so mine rests up here but we can still take it into the pose.
The way I'll use the strap is to bring the strap around the foot and around the left side. I take my right hand around the back and you see I'm going to grab with a palm down grip. That helps me anchor this leg in and as I pull that leg a little deeper in I can get the work into the hip. So I'll take a few pulses with my hand to help draw that leg around into the half lotus position. From here I can lift up the trunk and with those two fingers again start to grab hold of the big toe and fold forward.
Definitely a challenging pose but we've worked quite a bit to open up the hips to be ready for this type of depth and we'll lift up and release. Time for the second side. I'll let the leg roll out and draw the leg back all of that hip work we've been working for bringing up the foot and taking it across. Left side is actually my easy side. We all have different sides, stiffnesses in the two sides of the body.
This side seems to be easier for me. I'll put the strap around the foot and then reaching around the back with the left hand I capture the strap and that helps me as you can see this leg is being worked in from the strength of the left hand holding the strap. I'll reach for the right big toe and get the length in my body and then bend into the pose. I'm using my breath to hunt for tension that doesn't need to be there. Looking for ways I can extend my body into the pose a little bit more.
Not force but unlock a little deeper and then come on up out of the pose. We'll release the leg. We can set the strap off to the side and let's take a dog pose to recover the legs. Opening up the backs of the knees you want to firmly grip the kneecap muscles, the quadriceps and you can feel the effect of our work today in the hips, the space that's been developed. From here we're going to go into pigeon pose with the left leg first.
We'll draw the left leg forward resting the shin forward and the right leg down. We're going to keep the version of the upper body lifted in this pose because of the folding it gives us in the left hip allowing the pelvis to come closer and closer to the ground. If your body doesn't settle onto the ground easily you might like to take a block and settle it underneath your left hip in this case so you don't feel overly pushed and there should be no tension at the knee when you're doing this pose. Let's take some breaths here and again enjoy the space that we've created and allow the body to settle in. Every so often you can try to work your right leg backward just a little bit, backward that direction to go a bit deeper into the pose and then we'll curl the toes under.
Use the arms and back leg to lift and we can take the left leg out. Dog pose, again firming the quadricep muscles around the left leg and we'll bring the right leg through and supporting the trunk as we settle the hips down into the ground. Every so often again you can try to stretch the left leg back a little bit further and it takes a bit deeper into the right hip. And then we'll come out through dog's pose tightening the quadricep muscles and helping to go up and back through the hip joints. And then come down and pause.
Our next pose is going to be recovery pose and I'm going to invite you to use either two blankets or a bolster to help support the body. I'll place the bolster roughly in the middle of the mat and then sit down on the end and relax back. So at this point right now you can see my shoulders are not on the sticky mat so I'm going to take a slow, easy slide of my body and slide is the key word here, you don't want to hop, sliding on down so that the chest begins to roll or coil or turn over the edge of the bolster. And this gives us a very lovely opening of the chest and dropping the arms out. You want to feel the weight of the body is definitely resting on the shoulders.
And then you can relax the knees together, walking the feet out. We can begin to settle down the nervous system, the mind and allow the body to refresh all of these areas that we've been working with fresh blood and awareness. You can allow your eyes to close and we'll stay in this pose for about another minute as the hips are quiet and still, your attention might slowly draw towards the space in the chest that this pose automatically creates and you can start to hook into the flowing of your breath. And then we'll slowly lift up the hips and remove the bolster and it's a special placement if we're going to use the bolster down at the lower calf and ankle so that when you extend your legs, it's basically the lower leg that rests on the bolster. This is kind of a unique Shavasana and it supports the legs up a little bit and helps the hips be soft and the lower back to be soft.
So again, you can see it's about from my middle calf down to my ankles and this will be our Shavasana. Allow the legs to relax, let the feet to fall open, palms turned up and shoulders gently tucked underneath the upper back. Allow your eyes to close and you can let your breath settle, your attention settle in on your breath, drawing away your energy from the periphery toward the center. Let's spend a few minutes here. As you continue to focus on your breath, you can begin to see the shape and movement of your breathing, right side ribcage and lung, left side ribcage and lung.
They move symmetrically, is there any waviness or jumpiness to the breathing? You don't need to change it at all, it's just a practice of watching and you can settle your attention there. All right. Thank you. Thank you.
I invite you to stay as long as you'd like to stay. If you're ready to finish, you can rest your hands on your tummy. One by one, bend the knees and turn softly to your right side. Please support your head. Then turn a little bit further toward the floor and press yourself up to sitting.
If you like, you can use your bolster again. Just a little support for sitting. Rest your hands on your thighs and close your eyes. I'm grateful to have you with us. Namaste. Look forward to seeing you again soon.
Aligned and Awake: Nathan Briner


Comments


You need to be a subscriber to post a comment.
Please Log In or Create an Account to start your free trial.
