
Description
About This Video
Transcript
Read Full Transcript
Namaste and welcome. In this practice we're going to be mapping the experience of the chest and shoulders and seeing how we can dive a little deeper into opening up these areas of the body. I just want to make mention as we're starting out, I'm sitting on two blankets here because this gives a wonderful lift of the spine. Stretching with the hips below the knees tends to make the back want to collapse. So you might try using two blankets to help automatically open up the chest and we'll start in that way.
Stretch down through your sitting bones and raise the sides of the trunk up. Roll the shoulders back so you feel the shoulder blades pressing against the back body. And then we'll just take a minute to join the palms together and bring the length of the thumbs to the sternum. Stretching up to the sides of the body, relax the arms down and gently close your eyes. And I invite you to take your awareness and attention down into the open spaciousness of the chest.
Let the awareness settle into that quiet stillness away from the thinking for the time being. And recognize that there can be a new place to put the attention outside of thought. From that stillness, I say om namaste, again welcome to the practice. We'll start in child's pose with a little variation. Adho Mukha Virasana is the name of this pose so we'll have knees apart, big toes together, and arms out the width of your sticky mat.
Extend your trunk forward and then rest the head down. If it happens that when you reach the arms forward that your head does not comfortably touch down on the ground, you can place a block or folded blanket under there so that there's no strain or stress on the shoulders. And I want to make mention of the action of the arms. Here as we're mapping into the experience of the chest, we want to press down the palms into the floor and stretch those hands forward. Then you'll feel the experience of lifting the forearms, lifting the upper arm bones, and connecting well to your shoulder blades.
And this is what gives us our first experience of space in the chest. Take a few breaths as you hold the energy in the arms and think of lengthening the sides of your trunk forward. Every so often you might take a little further reach and then walk the hands back. Now we'll do more of a traditional child's pose with the legs together, again extending the arms out about shoulder width and releasing the forehead down on the ground. Use any support you need for that height there for your forehead.
We'll walk the arms now over to the left side leaving the sitting bones down on the heels and this will begin to stretch and open up the side chest. Relax the back of your neck and take a few deep breaths into the right side chest. We'll come back to center and adjust to the second side. We're leaving the sitting bones down and then side movement over to the right. Relaxing the back of your head and breathing deeply into the left side chest.
And then coming back to center, we'll once again rest the head down on the mat and bring the hands back behind the body to clasp and bring the arms up away from the back. If your shoulders happen to be quite tight you might do well to grab a strap and widen your grip so that the shoulders can move. If the elbows bend it will tend to pitch your shoulders right towards the floor and we won't get the openness we're looking for so please don't be shy to use that strap. Take a few more breaths here and then we'll release the hands and come up to a kneeling position. Next we'll come into a kneeling position with the right leg forward and the left leg about straight back.
We're going to do kneeling side angle. Stretch the arms out to the sides, take a breath in, exhale and lean out over the right leg. Here we want to use that right arm to help press open the right leg and that helps us turn the chest. So you want to feel that revolving in the chest up toward the ceiling. We'll turn the left palm over and stretch that palm alongside the ear.
So this helps us get in touch with this area of the chest. As you stretch over, this area of the chest should open nicely. Take a few breaths here and then coming out and we'll do the second side. Left leg out to the side, right leg straight back. Stretch the arms, take a breath in, inhale, exhale and over to the side we go.
So once again pressing the left arm to help open the knee and that begins to turn open the chest. We'll take the right palm over the ear and bring the space into the right side chest. A few breaths as you become acquainted with this pose and then we'll come out and we'll go legs together and then a bent knee downward facing dog. In the bent knee downward dog, we have a great ability to open the chest as compared to sometimes with straight legs it tends to do this in the body. So with the bent knees we're able to fold the hips well without any restriction from the hamstrings and truly work on the openness of the chest.
Press the palms like we did in the earlier child's pose to help feel the lift of the forearms, the lift of the upper arm bones and the connection of the shoulder blades onto the upper back. That's where we begin to get that opening and pliability in the chest. And then we'll take a nice step forward with the left foot into a kneeling lunge. We'll bring the arms up high. As you exhale we can let the hips come forward and let's come back again.
We'll do again. This round focus on pressing your right shin very well into the floor to get an internal, organic lift feeling all the way from the shin to the hand. So we'll take a breath, keep that right shin and we'll come in again. Then let's add to the pose. We'll bring the right hand down, turning toward that left leg.
We're going to clasp for the back foot. If it so happens that you can't reach that foot, you might grab a strap to capture the foot so we can enter the pose. Here the left arm, the arm closest to the ceiling, we're going to roll back to begin to get that openness in the chest in these poses. Taking some breaths and using the breath to search the body for tension that doesn't need to be there. And then letting go.
And we'll do the second side. Right leg forward. Arms up. Press down on the back shin and we'll ease into it in an exhale. Come back.
We'll reset, pressing down on the back shin to help get the inner lift of the body and then coming forward. Then we'll place the left hand down. We're going for our twist. Start to turn the chest open to the right side. Again, if you need the strap, you can use it there.
Or if you can clasp, grab hold of that foot and we begin our twist. Let's roll the right shoulder back to help that shoulder blade open the chest. Again using your breath to look for areas that you could open up to let go of tension. And then we'll release. Once again into a dog pose, but this time a little shorter dog pose than you're used to taking.
And we can open up the backs of the knees now. Straight legs. We'll take the right hand coming across for the opposite shin. We'll take a nice breath in. As you exhale, bend that right elbow to help pull the chest around into a twist.
Couple of breaths here. And we'll do that aside. Left hand comes across, grabs that right shin. Take a big breath in, rolling the left side chest. And then bring it back to center and we'll walk the feet forward and come up to standing.
Let's take a moment in Tadasana. So in Tadasana, let's start from the feet and see if we can feel how we map the release and unlocking of the body all the way to the chest and shoulders. Start by bringing the thighs back just a little bit. It tends to be that we'll often sit, and I'm exaggerating, but thighs quite a bit forward. So we're going to draw the thighs back until you feel the very, very back edge of the heels and then stretch them straight down.
You'll feel your thigh muscles start to firm and we want that. Seeing the legs down into the floor, you might start to feel a lift. I tend to call it like a helium feeling in the torso region where the spine is starting to lift because of what we're doing in the legs. And that lift comes all the way up through the chest and the feeling is that it blossoms open this way, holding open the sternum. That's the Tadasana we're going to use in the next few poses as we explore more deeply in some shoulder opening work.
I'm going to suggest taking hold of a strap just to help get the knowledge of shoulder motion. So I'll grab a strap. If we don't use the strap and we try to clasp the hands behind the back, it can tend to pitch the shoulders forward like this. So with the strap, we'll have much greater access to this motion. So let's find the Tadasana again, thighs back, stretch down through the heels, and get that inner lift.
And we'll start by grabbing hold of the strap with the palms forward. Moving on, we'll start with shoulder action, rolling the shoulders back. And then letting go. Let's do it again. Shoulders back.
And letting it go. I'm going to turn to the side so you can see how this works. This is then known as the head of the shoulder. And what we can sometimes do is pitch the head of the shoulder forward as we try to open up the chest. So our goal here is to take the head of the shoulder back and using the strap to help us find that connection.
Let's do it again, rolling the shoulders back. You can see how, and hopefully you can begin to feel, how the shoulders going back supports and opens the chest. I'll give you one more shot on this side here. Rolling the shoulders back, head of the shoulder back, and feel how that brings the shoulder blades deeper into the upper back. One more time.
And then we'll release. We can put the strap away. We won't need it for right now. We'll come back to it later. And we'll start to work in a new shoulder opening.
I'm going to be clasping the elbows behind my back. Let me turn to the side so you can get a good look at that. I'm reaching back to hold on to those elbows. And again, there's a tendency for the shoulders to want to pitch forward. So our job, as we just learned in the last, is to bring those shoulders back as we hold on to the elbows.
Let's relax the shoulders a little and try again. Using those muscles between the shoulder blades, the rhomboids are trapezius, and relaxing. Now, it's a little bit tough, but if you can figure out, change the elbow interlock so the other forearm is closer to the floor. So I grab a hold again, and let's practice. Taking the shoulder bones back, and then releasing, and shoulder bones back.
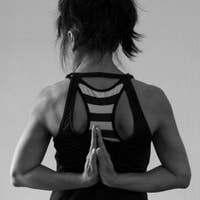
And releasing. Our next pose is going to be reverse namaste, where we'll be taking the hands together, fingers down behind the back. Once again, I'll turn to the side so you can see. I'm bringing the palms together, work my hands up the back a bit, fingers pointing at the ground. Here again, you can see the tendency of the shoulders.
So we're going to undo that by pressing the thumbs into the back and moving the heads of the shoulders back. It's quite tempting to just pull the elbows back, but you can see that won't necessarily change the direction of the shoulder bone where I'm pitching forward now. Instead, work more of the shoulder. And undo, and again, pressing the thumbs into the back, and work the shoulder back. And releasing.
Now, perhaps that might be where you want to stay if your shoulders feel like that's plenty of motion, but if you'd like to take it one step further, we'll take it into full reverse namaste. For that pose, we'll softly bend the knees, take the arms out, and bring the hands up the back and together. We have to kind of snake the hands up a little bit, and then try to bring the palms together. The first job is to try to get the fingers to go a little higher up into the back, and then we're going to work those shoulder bones again. Remember, it's not about pulling the elbows backward.
It's about trying to get the shoulders to go backward. And this takes a long time to really work into and find that motion. Trying to get the shoulder blades to go flat to the body. And we'll release. And we'll finish this shoulder series with arms overhead.
We'll start by interlacing the fingers, turn the palms out, stretch down through the heels, and bring the arms up. And then we'll come down, changing the interlock of the fingers, and I'll turn for the side to the side so you can get one more look at that. Arms out, stretch down through the heels, and bring the arms up. And then release. Let's take our next pose, a wide leg, forward fold, with a few variations.
You'll come forward, hands on the floor. If the hands don't easily go to the floor, or if you find that your back is quite round, a few blocks will really help in this pose. We'll start here and bring the left hand to the floor, right about below the heart. We'll bring the right palm onto the hip, and we're going to work some of those same actions where I roll the head of the shoulder back and begin to twist. For this twist, let's turn the head to look at the floor, and we'll do the work, and let's undo the work a little.
Again, push down through the left hand, roll the right shoulder back. And one more time, push down through the left hand, roll that shoulder back. Right shoulder back. And coming to center, and we'll switch, right hand on the floor, left palm onto the hip. Here we go.
Press down through the right hand, turn the trunk open, roll the left shoulder back. And release. And again, press down through the right hand, rolling the left shoulder back, and it's the shoulder blade that really helps to open the chest. That's the map that we're looking through. And one more time.
Press down on right hand, roll back the left shoulder, look for the openness in the chest. Come to center. The next variation we'll do is to clasp the hands behind the back like we had it in the child's pose. Remember if you need to use a strap to help you with this, please do take it so you can get full advantage of the shoulder motion. So here I'm doing two things.
One is to take the arms overhead toward the floor, and two, I'm reaching the hands away from my body to help mobilize the shoulders and open that chest. Take a few breaths here. And then we'll release. And to come out, it's nice to heel-toe, heel-toe your way in. Just pause in Tadasana and feel the effects of the work that we've done so far.
Get a sense of the space in the chest that's starting to develop. Let's take a downward-facing dog so we can work into a few standing poses, and once again feel the space in the chest. Having the hands connected to something like the floor, as in downward dog or handstand, is very, very helpful to feel the openness in the chest. And we'll start with the right leg forward and coming up open to the side. We'll start by using triangle pose to further open the chest.
Bring the left hand behind you, and you can use your right hand for a little help. We're going to try to get it near, near to the thigh. Once again extend the right hand. Take a breath in, as you exhale, elongate your way into triangle pose. So I use my left hand, the one that's clasping the thigh, to grab hold and draw the shoulder back.
Grab hold of that thigh and begin to roll the chest open. So once again we're mapping from shoulder, from hand to shoulder to chest to get that whole experience of space. Take a few breaths, in the beginning if you want to pulse this action, the best way to learn these actions is to do them and undo them. Do them and undo them. That way the nervous system learns, starts to feel itself.
And then we'll release, take the hand up, take the hand behind you, turn the chest open. Bring the arm up, one more, we'll take the arm over the ear to complete that series. And then inhale, come up, and we'll rest. The next one is Parsvakonasana, a side angle. We'll take the arms out, take a big breath in, exhale, and we'll start by placing the right forearm on top of the thigh.
Once again we'll take the left arm behind, but it won't catch the thigh. It'll be right behind the hip. Our job is to work with the right hand underneath and search for the left hand behind. This is a classic bind in Parsvakonasana working with the map of the shoulders and chest. So I have hands clasped behind my right leg.
And I'll show you this on the other side in just a minute. Rolling the shoulder back again to help turn open the chest. And a little teaser for some hip work we'll be doing later. When the chest's open like this, the right hip comes forward. There's a connection between the turn of the chest and the hip.
We'll get more into that in later practice. And then we can release the hands and open the chest. Bring the arms straight up above your shoulder, turn the palm over the ear, and we'll complete the classic pose. To fully experience the chest. And then we'll come up.
From here we'll take our pose into warrior two. And with a breath in, exhale, bend the right knee. Left hand on the left thigh. Turn the right arm up and reach over. This will open us a little bit into the other side chest and it has a counter pose for the previous two.
Let's take some breaths and open up the right side chest. And then we'll come out, turn towards the front foot, and downward phasing down. If you need a child's pose here, please do take that. If you need a rest, otherwise we'll work here, again palms pressing into the floor, lifting of the forearms to help open the chest. Let's do the second side, left leg forward, coming up in our open position.
And here we'll be taking the right hand around the back to clasp hold of the leg. Notice how my palm is rolled down onto the thigh. Let's go for triangle pose. A breath in, exhale, extend your way out, holding onto the thigh, and take a hand down for support. You could certainly use a block if you needed it.
Let's do the work of holding onto that thigh and begin to roll the shoulder back. Undo it a little, roll the shoulder back. As the shoulder rolls back, the chest turns up toward the ceiling. One more. Let's undo the arm, raise it straight up, and we'll take it behind.
We'll bring it up, turn the palm over the ear, stretch the arm for another variation. And then inhale your way out of the pose. Our next pose will be a side angle. Take a breath in, on your exhale, bend the front knee, and rest the forearm on the thigh. Here we'll take that right arm behind again and rest it at the back of the left hip.
Then we come a little bit further into the pose, leaning the trunk in. I'll take the left hand, around and under, to hunt for the backside hand. So this clasping, we want to be very firm because it's what helps us anchor for the motion of the shoulder. So holding onto that bottom hand, I roll the top shoulder open. And again.
And one more. Then I'll release the hands, left arm to the floor, right arm to the sky, and once again open. And then we'll turn the palm over the ear for the traditional pose. As this arm comes over, it helps to lift and open the right side chest. Then inhale your way out.
And we'll complete this series with Warrior II. Breath in, exhale, bend the left knee, take the right hand to the thigh, left palm up and over. Here we get a little counter pose from the work we were just doing. And we'll come out and through downward facing dog again. Feeling the motion and pliability in the chest that we've created.
And we'll step forward and come on up to standing. So once again we're going to take advantage of the strap for a half bound lotus pose. For this pose, we'll start with the left foot and bringing it up to the side. We'll draw that foot up and now we're going for that same clasping action around the back. I'll take the left hand around and grab hold.
So this helps me, notice the position of my hand. It's palm down toward the floor and I'm going to actively roll that hand down right there. The free arm we can take up if the balance is available. But here we go, now we're going to put it all together. I roll the left hand down and take that left shoulder back.
Let's do it one more time. It's a challenge to do that with all the balancing. Once again, left palm rolls down, left shoulder goes back. And you can see that opening come through the body. And we'll release and do the other side.
Right leg comes up, so we'll step on the strap to begin. And bring up the foot, can help it in there. And allow the knee to drop down. I'll take the right hand behind to clasp. Want to get as close to the foot as you can.
There we go, alright. We'll take the free arm up. And once again, rolling the right hand down brings the right shoulder back. And one more time, we'll roll the right hand down to bring the right shoulder back. And then release.
We can put the strap away again. And we'll finish our standing poses with a variation of eagle pose. And this will act as a counter pose for all the opening that we've been doing. We'll take the arms out, left arm under, right arm over the top. Take a nice big breath in and exhale, come down into chair pose.
We can lift the elbows a little and bring the hands a little away from the face. Now we're opening up all those muscles that we used just a moment ago. Come on out and release the arms, and I'll show one from the side. Arms out, this time right arm is under, left arm wraps around. I take a breath in, exhale sitting back.
Again, elbows can come up a little and hands a little away from the face. And then we'll release. Let's move our way into a dog pose. Arms come up, exhale your way forward, and step back into dog pose. Here again, we get that sense of pliability and motion in the chest that we've been searching for.
Let's come down to the knees and take a moment in child's pose and rest. And then we'll walk our way up to sitting. So next we'll begin to challenge what is known as Forearm Stand or Pinchamaya Asana. And we'll do it in some intermediate stages to take advantage of all the space that we've developed in the chest and shoulders so far. I'm going to recommend the use of a block.
It's not absolutely necessary, but it helps keep the spacing of the hands just right. I'm going to make the letter L around the block as I place the hands. I place the elbows shoulder-width apart, curl under the toes, and our first step is just to find what is basically like a dog pose, sometimes known as dolphin pose. My work is to resist the temptation of the shoulders and head to fall forward toward the block. So I push down on the forearms and press the shoulders upward toward the hips and forward toward the shins.
And this is our first stop. If your hips happen to be quite tight or don't allow that kind of flexion, you can certainly bend your knees to take advantage of the pose. And then we'll come down and rest. Part one is done. Next step, we'll once again place the hands around the block, elbows shoulder-width, curl under the toes and lift the knees.
You choose if you want to go straight legs or bent knees. And then we're going to walk in with the resistance in the shoulders so they're not allowed to fall forward. We walk in a little, working the hips higher and higher over the shoulders. We're holding strong shoulder work, chest lifting and opening, and then walk back, come down and rest. You can choose a child's pose or any other restful pose you like.
We've got two more attempts at the pose with a little addition. If you feel like you're at your edge, you can stay right where we've gone. If you'd like to go further, we'll do that together. Place the palms around the block, curl under the toes and lift your knees. Then walking in with either bent or straight legs, resist the shoulders up and back, and we're going to challenge a leg lift.
Here we go. Right leg comes up. And like we've been learning in some of the previous practices, the energy of the legs is what pulls us up and out of the pose. The arms are working, but it's the charge of the legs that really holds us together. And we'll bring the knees down, child's pose, rest, and breathe it out for a few.
And then we'll do the second side. We'll place the palms around the block, elbows shoulder width, curl under the toes and lift. Then with either straighter bent legs, you walk in, resist the shoulders up and toward the shins and its left leg now. I lift up and charge the energy in the legs as though I was reaching my heels through those imaginary floor or wall that we learned earlier. And then coming down and rest, child's pose.
And we'll walk our way up to a kneeling position. It's quite a challenge, the elbow stand. We'll grow through more and more practice. Let's put the block away off to the side for just a moment. And we'll come into a seated position, wide legs.
And what I'll recommend again, because you can see how my body tends to want to slump back, if you bring a blanket into play underneath your hips, it'll give you a much better support to lift up your spine. And already I can feel that that's much more lift in my spine. We widen out the legs and our first step is opening the chest. So I'll put my thumbs and fingers on the blanket and a little bit of the floor and begin to lift. So it can be tempting to, when you press the arms into the floor, to just push forward.
That's not the kind of lift we want to do. Instead we want more of a vertical lift through the spine. So the cue that I'll use is to lift the front of your spine up rather than pushing the back of your spine forward. Lift the front of the spine up. As you're lifting up the trunk, the energy of the legs should be pressing down.
We roll back the shoulders and open up the chest. See if you can feel that connection, the map as I'm calling it, as you roll the shoulders back and you get the expansion in the chest. Then can we keep that lift and the space in the chest and raise the arms up? Here's our first challenge. Nice strong legs and a lift through the trunk.
And then arms down and support. We'll take it into a little twist next. So once again, nice tall spine. Raise up the arms. We'll turn to the right side.
A breath in. Exhale. Bring the left shoulder around as we're turning to the right side. It's tempting when we twist to just pull the arms, but we really want to pull that left side trunk around into the twist and then come to center, reach back and support. This is our rest.
And then we'll do one more. Arms up, raising the front of the spine, take a breath in. Now it's the right shoulder that we want to turn around. We want to bring that shoulder blade into the upper back and we're turning left side. And then come back, support once more, holding in center.
Good. And then we can lean back. We'll pull the legs in and take the next pose. You can set the blanket off to the side. Our next pose is going to be tabletop.
We'll start with the hands and fingers pointing forward toward the hips, feet about hip width. Here all the work we've done earlier is going to help us get a full lift of the chest. We'll start by rolling the shoulders back like we've done before and press the arms through the floor. With an inhale, bring the hips up and let the head look at the ceiling. And then come down and rest.
And we'll go again. Start by rolling the shoulders back, getting the lift in the chest. And inhale your way up. Challenge lifting the low, middle, and upper back toward the ceiling. And then come down.
And then if you want a little further challenge, we'll try the full pose called Purvatanasana where we're going to extend the legs straight. And our challenge is to bring the toe tips down onto the floor. Same arm position. We'll start with a nice strong shoulder support and then inhale. Stretch the toes toward the floor and lift your hips.
Again, looking at the ceiling. Three, two, and come down and rest. Excellent job. From here, we're going to relax onto the back. Bring your block by so we can use it as a little support.
We'll be taking a supported bridge pose. And I'll invite you to take the block onto its highest setting. If that's too much for your back, you could turn it to its lowest setting. Just notice the difference in positioning for that. Wide way on our lower setting, tall and thin way for the upper setting.
And we're going to place the block underneath the sacrum. Check that it's not resting in your lower back but holding just underneath the plate of the sacrum. Let's just take a few minutes here and enjoy this inversion. We'll have one little supported pose to do from here, but we can just take advantage of the inversion here and let the body calm down, especially with the support of the block. Then we'll bring the arms a little closer together, shoulders tucking under the upper back, and if you can, clasp the fingers.
If that's not available to you, if the block is in the way, you might see if you can grab hold of a strap and hold palms towards ceiling, or if the shoulders just don't quite reach. A strap is a nice way to go. And then we'll start by bringing the feet a little bit closer together, keeping the chest open, and bring the right knee toward the chest. And then extend the leg straight up. Here it's tempting for the chest to want to collapse to use the abdominals to support the lift of the leg.
Instead we want to keep the chest well lifted and use more of the deeper hip flexors for this pose. So the abdomen is actually soft and descending, as opposed to, I'll show, hardened and pushed up. We want soft and descending, and we'll release the leg down. Gentle press of the arms into the floor to help open up the chest. We'll go second side.
We'll draw the left leg in nice and tight toward the chest without pressing the low back down, and then extend up. Next abdomen, lift and open the chest, and then we'll let the leg down. Release the arms and take the block away. From here, we'll bring the knees into the chest for just a little bit of a counter pose. And then it's time for Sharasana.
I'll recommend bringing one blanket underneath for support of the head and neck. And then we'll lie down. Open your spine onto the floor and adjust the blanket so it supports the head and neck but isn't underneath the shoulders. We'll do a little tuck of the shoulders and then extend the legs out on the floor. So allowing your body to unwind any tension that may be left, allowing the hips to relax, the feet to fall wide, can relax the lumbar, let gravity take the spine, allow the shoulders to release down away from the ceiling into the floor.
You're slowly just drawing the energy away from the periphery and in towards the center. You can feel the fingers softening and you can gradually allow the attention to become focused on the movement of breath. That's all I have for you today. And I invite you to stay as long as your body desires. If you feel you're ready to come out, you can rest your hands on your tummy.
And one by one, you can bend the knees and turn softly onto your right side. And turn a little further toward the floor before you press your way up to sitting position. Once again, take a little support of a blanket. You can rest your hands on your thighs and close your eyes to feel within. Thank you so much for joining me in this practice.
Namaste. Have a wonderful day.
Aligned and Awake: Nathan Briner


Comments


You need to be a subscriber to post a comment.
Please Log In or Create an Account to start your free trial.
