Description
About This Video
Transcript
Read Full Transcript
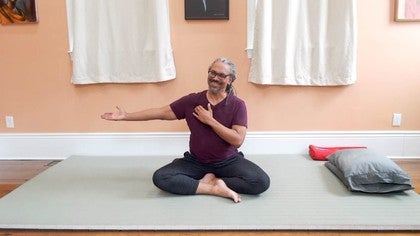
Hello and welcome to day seven of our 20-day yoga retreat through Yoga Anytime, Trusting the Connection. We're going to start off seated. If you gather some props, a couple of pillows, like regular bed pillows, is great. And if you have a blanket or a big towel, we're going to be doing one restorative pose with the actually two restorative poses with all of this stuff as we get into our practice. But first off, we're going to come up to seated. And one thing I've liked in some of the earlier classes, like with Biles, doing this heart check-in that I'd like to do a heart and hara check-in. So one hand over the heart center, a palm over the heart center, and another palm just down below the belly button. In martial arts, the hara or tan tien, a few inches below the belly button, is the center for powerful physical movement. And then in energetic practices, the heart center is the it's the center chakra with an equal number of chakras above and below. So we'll just connect in. You can let your palms rest on those spots and connect in with your hara and your heart. And take a few deep breaths. Let your eyes close if that's comfortable for you. And connect with your own internal, your own internal sense of time, which is something Sanithi said last week, I thought was really beautiful. And entering into your landscape, the inside landscape of sensation. Thank you, Alana. Let your shoulders relax. And just letting the palms rest and connect with yourself. For me, part of trusting the connection is connecting with myself. And another layer of trusting that connection is for me to know that the sense of disconnection with self sense of separation from others, those are all illusions. We are already connected to ourselves. We're already connected to everything else. We just forget about it. Let your jaw soften. Let your eyes soften. Shoulders relax. Letting go of the distractions that keep us away from that sensation of connection to self, to others, to world. And then slowly releasing your hands from your heart and your hara. Bring your hands down to your legs. And you can open your eyes. We're going to do a little self massage on a couple of points on the lung meridian. So I'm going to take my right hand. And the first point I'm going to do is right here in the meaty part of the thumb. I'm going to find this is called lung ten. And I can either use my other thumb, or I can reach if I put my hand kind of in pledge of allegiance position, then I can use my fingertips. And I want to come right along the edge of the bone and press into the almost like I'm trying to go a little under the meatiest part. And just under there is a very special point. A lung ten. This is one of the resuscitation points that is used in emergency acupuncture and acupressure. And just kind of smoosh it. You can find it. Not so much pressure that you're going to bruise yourself, but just enough where it kind of hurts good. And if you get a nervy, tingly sensation, then move a little bit. You might be compressing one of the little tiny nerves in your hand. In Chinese medicine, the lung meridian is one of the most superficial meridians and organ systems in the body. It really interacts with the outside world. And it is also part of our immune function in Chinese medicine. The lung generates what's called the wei qi, or the protective qi, that is like it's like an energetic barrier that helps keep us healthy. And when our wei qi is down, we tend to get sick, catch colds easily, etc. Oh my goodness. And let's do the other one. Whoa. You can either do it in the kind of awkward Pledge of Allegiance position or just bring it down in front of you. Right along the edge of the bone, the first metacarpal. If you're an anatomy lover, and smoosh around, smoosh is the technical bodywork term. Smoosh it till it gives you that good achy sensation, not bruising, not nervy, tingly. And breathing is always a good idea. Especially when stimulating the lung meridian. Then let's do another lung point, but this one's on the chest. So find your collarbone and come a little away from the midline and then drop just below it a couple inches and circle around in there. Again, this looks a little like Pledge of Allegiance style, doesn't it? Circle around with your finger pads. If you have nails, definitely don't do your fingertips. Finger pads are a little better for searching. Ah, there we go. And you might find a little tender spot. So I'm going to hold that point and do a little movement. So I feel this getting stretched underneath my fingers. And smoosh around, let the hand relax, and then play explore with some movement. Maybe you try rotating your elbow up, reaching the hand up and back like you're getting ready to spike a volleyball. Reaching out for a hug or a hand. And the pushing fingers, the smooshing fingers, they can get tired. So when they're getting tired, don't keep pushing through that exhaustion. Let a little blood flow back in there and then come right back in.
Ooh. Oftentimes the brakes taking the little pause from the pressure has a really great effect. Another movement you can try is turning the palm up and rotating the arm. Keep the elbow down by your side, rotating the arm like you're passing a pizza to somebody on the right. I must be hungry. And then release the pressure, release the hands. Take a little circle of the shoulders and take a few breaths. And then let's do the long one on this other side. So finding the collarbone, going a little laterally, and then drop below the collarbone, a couple of finger widths, couple inches. And you have to smoosh around to find it. Right about there. If you're an anatomy person, it's right around where the origin of the pectoralis minor. And it's probably tender as heck if you're not an anatomy person. And then when you find a nice tender point, hold just the right amount of pressure. Take some slow movement. Oh, to feel that stretch underneath. You can rest your fingers. Oh, right there. You might try rotating the elbow up and the fingertips down. You're the one inside there. You're the one who can tell where the best angle is, or angles, to bring some breath, some energy, some prana, some chi, some blood, bring all that good stuff into this area that is really restricted. Especially if you're spending a lot of time on a laptop to do the opposite and open that up. It's really great. Our bodies are designed to move, not to sit on a laptop or a gaming device. And you can release your hand, release your shoulders, take a few slow circles, and breathe. Great. And if you're elevated on a throne, go ahead and slide your throne off to the side and grab a hold of your blanket or towel. So I'm going to open it up into a rectangle. And if you're using towels, you're going to be MacGyvering this. Basically, what we're aiming to get to is to make a strip, a long strip that's about as wide as the span between your thumb tip and fingertip. About that wide. Doesn't have to be exact. But when you're forming your strip, you want to feel it. And if you feel any hidden lumps or bumps, take a little time to go and seek them out in the underneath layers and smooth them out. Because we are going to lay on this on our back to do some diaphragmatic breathing. And if you have lumps and bumps, it's going to be like, what was the folktale? Is it Goldilocks who falls asleep on the bed and feels the pea underneath the little rock underneath 15 layers of mattresses? Anyway, make it smooth, slide it a little towards one end of your mat, long ways in about the center. And if you have fringes on yours, put those fringes towards what is going to end up being your foot end. If you don't have fringes, don't worry about it. You're gonna pinch the end of it with your booty. Use your hands and your abs and slowly come back. So that strip is going right up the center of your back. Okay. And then as you come back, if you have a little extra there to curl underneath your head, you can do that. If your blanket is a little shorter than that, or your towel is shorter, you can use a pillow at the back end just to have a little extra cush and gush for your head. Now when you come here, you want to feel like your tailbone is coming off this end of the blanket. So you get just a slight tilting of the pelvis, tilting forward like this. Okay. And I'm going to use the end of the blanket for my head pillow. So I feel like I keep needing to scoot down. Oh, there we go. There it is. I can feel that it just, I tip far enough, slid far enough towards my feet that my pelvis came into that slight anterior tilt. I'm going to keep my knees bent. And in this position, we're going to do some diaphragmatic breathing. Now the diaphragm is the main muscle of inspiration, the main muscle of inhaling. And it's down here at the bottom of the ribs. And to help find it, I'm going to bring one hand or both hands over my hata right in the lower belly. So as I inhale, I want to feel my hata on my belly expand. And as I exhale, my belly is going to fall back towards the floor. As you inhale, the belly expands. As you exhale, the belly comes back towards the floor. Keep doing that. If you're having a hard time feeling that, if you feel like your chest is expanding on the inhale, that's okay. You're just trying to learn a different breathing pattern. If you are feeling your chest expanding, try bringing one hand to your heart and one hand to your hata. And we want to practice feeling the heart stay still so the ribs don't expand. But the belly does on the inhale. And the belly expands because on the inhale, the diaphragm is drawing down. And that makes the organs in the belly don't compress well. So when the diaphragm drops down, it shifts them forward. So this is one time when you want to let go of the intention of keeping a six-pack. As you inhale, allow your belly to expand bigger than a six-pack. Let the abs relax. And as you exhale, falling back towards the floor. Belly breath is really important to help turn off the fight-or-flight response. The fight-or-flight response is something that helps us survive. It's very important for us as human animals to survive. But sometimes it gets stuck on and we may not even be aware of it. Where our body can be stuck in fight-or-flight mode. And that makes it hard to connect. It makes it hard to connect with ourselves and makes it hard to connect with others. Voodoo belly on the inhale, on the exhale, falling back towards the floor. And if you've been practicing yoga a long time and you want you're really tempted to do the three-part breath, you can go for that. You can inhale into the low belly first and then the low ribs and then the upper chest. And then exhale and reverse.
The chest comes in, the low ribs come in, the belly comes in. But make sure that finding the diaphragmatic breath becomes natural. This is something that can help take us out of the fight-or-flight response and stimulate the other side, the parasympathetic response, the rest and digest response. And then let go of the effort with your breath. Take your arms out to your sides. They can be down along your hips or further out from the shoulders or even maybe up above a little bit if you feel like you want to open up a different part of the fascia on your chest. This restorative pose with the strip, it's just lifting your spine a little towards the sky so that the heart can open, the solar plexus can open, the abs can open, the neck can soften. Take five slow deep belly breaths here. Let gravity do the work for you. As you surrender into the draw of gravity, your shoulders gently open, your heart gently opens. Then as you're ready, you're going to take one hand and bring it alongside the hip, tip the knees away from that hand and you're going to reach your hand and take a hold of the strip and slide it out from behind your spine. If you were using the strip for a head pillow, go ahead and turn it sideways and continue to use it as a head pillow. If you used a pillow pillow for that, just slide the strip out to the side and then come back onto your back with your knees bent, feet flat on the floor and take a few breaths here, feeling how your back is connected into the floor. When I do the strip and slide it out, I always feel like the floor has been scooped out to fit into my back more, more ribs and more sacrum are contacting the floor and more shoulders. Just a couple of breaths here. From your side, slowly from your side, from your back, slowly roll onto your side, you can use that strip as a head pillow or the pillow as a head pillow. Draw your knees a little up towards your chest and pause for a few belly breaths. Even this asana changes the shape and the movement of your breath. And from your side, roll a little forward, let your head stay heavy, slowly rolling your way up one vertebrae at a time and finding a comfortable seated position. I'm going to scoot back and I don't need the blanket in a strip anymore, so I'm just gonna fold it somewhat neatly to the side. But I do need my two pillows. I'm gonna stack them up. And if you have a bolster, you're using a bolster, you can also use the bolster with a blanket or two, a blanket, I can't name things correctly, a fluffy thing or two on top. It's always easy to take them out when you come into the pose. So if it's too tall, it's easy to adjust. So now we're gonna slowly come up onto all fours, hands and knees. If your wrists don't like being palm down, you can try coming on to a gentle fist or even onto your forearms, whichever works best for your body. And let's do a little dog wag the tail asana, just slowly wagging your tail and letting your head be connected to the wagging. This is my dog's favorite asana. But I want to do it slow-mo compared to how a dog will typically do it. They'll do it at breakneck speed and come back to the center. I'm gonna keep my hips right over my knees, but I'm gonna walk my hands forward. And if I can, I can come down to my forearms or I can bring my forehead to the floor and leave my booty sticking up in the air. Want a little arching of the low back, so a little feeling like you're sticking your booty up towards the ceiling. And then take both hands and walk them over towards your left, walking the right hand out a little further forward. What we're aiming to stretch here is this right armpit area, the right rib cage, and the right low back. Get a nice lateral stretch. Let your palms, your palms get sticky with the floor and you can gently, if it feels good, let your hips sink just slightly towards your heels. Find the yummiest stretch for you here, and breathe and melt into it. This is another place where you can let that six-pack go. Let the belly hang. Let all that fascia on the right shoulder, right ribs, right low back, may even feel it down into your quadratus lumborum and between your pelvis and your lowest rib. And then slowly slide back to the center with your heart and your hands. And then walking the hand, sliding the hands and the heart over to the right to get that lengthening sensation on the left side. You might take that left hand and spider-walk it a little further forward and you may feel like you can let your hips sink an inch or two towards your heels. Let the six-pack go.
A few breaths, melting that left side open. Slowly, sliding the hands, the head, the heart back to center. Press your way up to all fours. And then take that stack of pillows and start to bring it in just where you can reach it easily. We're going to settle the heels, the hips towards the heels. Now, if that doesn't work on your knees, take your blanket or your towel and fold it up as high as you need to to bring a little support under your sits bones. So it may not be a pretty support, but it can be a functional support so that when you come up to this low squat, there's no pain in the knees. And you may even need to take one of the pillows under the booty. Settle the hips down onto the heels, slide the bolster stack in. Bring your hands down in front of your knees. Inhale, lengthen up. And as you exhale, take your heart forward onto the bolster and then turn your head to one side. Oh, that's so cushy with the extra pillow, but it's a little high for me. So I'm going to slide one out and have your knees wide apart. And this blanket is not coming into your belly, just under your chest. The bolster, the pillow stack is supporting your chest, but your hata, your center hangs free.
Coming into child's pose, notice if your elbows are in really close, you might be propping up on your elbows. See if you can slide your elbows wide so your heart rests into the support. And I can feel that I was wrong. I do need that extra pillow in there. It's okay. In yoga, we get take backsies. We can make changes that help fit our bodies a little better. And there I go. Belly hanging. So take some deep belly breaths here. And as you breathe into your belly, feel the backside of your breath. Feel your lumbar spine, your low back and your sacrum, that triangular bone at the bottom of the spine. Feel how the breath moves and massages your low back from the inside. And also notice how the belly breath is helping to turn off that fight or flight response. You may hear your stomach start to gurgle. That's a good sign. It means the rest and digest side of the autonomic nervous system is being stimulated. It means your body is feeling safe. If it's uncomfortable turning your head to one side, you can also turn your head forward, stack your palms and bring your forehead down. Just make a little pillow with your hands so your face doesn't get smooshed. And sliding the hands, palms down into the floor underneath your shoulders, slowly press out. And then turning your head over to the other side. So twisting the neck in the opposite direction. And you may need to adjust a little, shift the pillows a little. Find what is perfect for you, your yummy pose. What's perfect for you is going to be different than what's perfect for me, perfect for anyone else. That's one thing I'm really enjoying about this retreat that we're doing is we're practicing together, but we don't have the temptations to compare ourselves to anyone else in class. We can just do our practice from the inside and go for the extreme yumminess of the pose, which may not be the deepest or quote unquote, most advanced pose. For me, yumminess supersedes depth or bigness. A few more belly breaths here. And sliding the palms down roughly under your shoulders, press down with your hands, lifting your heart, your head, slowly coming up to find your comfortable seated position.
Let's go ahead and actually walk it forward to hands and knees again, because we've been sitting with the toes, with the knees bent quite deeply. Coming to hands and knees, and I'm going to straighten out the right leg, tuck the toes and shift my weight back towards the heel. Some folks call this quarter dog pose. Stretching through the calf, and slowly release and straightening the left leg out, tucking the left toes and shifting weight back through the left heel till you get a nice calf stretch on that left side. I'm still breathing. Shifting forward, coming off the knees to side saddle. And you can take your two pillows in front of you, and you can either stack them, or if you know when you lay on your back, your legs like to flop open, then you can place them side by side. If you have a bolster, you can place the bolster with one pillow on top of it, whatever you want. I'm going to go for the wide final relaxation when I get there. Your blanket or towel, you have a choice. You can make a head pillow out of it, or you can use it to cover yourself when we come into final relaxation. We're not coming there yet, but we are going to come onto our backs. Go ahead and draw the right knee in towards the chest, and you can straighten the left leg out, and then use your hands to guide that hip through some range of motion, through what's possible. Really smooth and easy. Notice if you're doing a set pattern, see if you can explore out into areas where you may not move during your day to day life. So letting the knee drop out to the side might feel some tight spots in your inner thigh, taking the knee across the body towards the other side. Oh, you might feel a little tightness in the booty. When you find a tight spot, a speed bump in the movement, go ahead and just imagine that you can breathe into that tightness and soften it again from the inside. And explore. You may even want to roll a little on your left side and slide that top knee back a little bit. That might feel good. Another couple of breaths of exploration for that right hip. Then coming back to the center and slowly releasing that right leg down. Just pause for a moment. Notice if that right foot feels like it's further down your mat than the left foot is now. Let's bring that left knee in towards the chest and use the hands and your awareness to guide yourself through the possible movement. Again, notice if you're doing a set pattern of movement and see if you can slow down. Go a little slower. You can usually feel more when you go, oh, when you go slower. You definitely want to feel where the movement is smooth and easy, but also explore into your edges. Really let yourself feel what you're doing and it can be helpful to close your eyes, moan and groan. You may even want to roll on to the right side and take that left knee a little behind you to open up the psoas on that left side. Eventually roll back on to your back. Coming back to center with the left knee and slowly releasing it. Now, if your pillows need to be adjusted, bring them right underneath your knees. Your head pillow, if you want that head pillow, can slide it underneath your head. Or if you're feeling cool, you can take that blanket and cover your body with it. Take a few moments to feel into this pose and find your yummiest version. Shavasana is a pose. You are still doing yoga. See if you can really go for your most delicious shavasana. And if laying on your back isn't your jam, roll on to your side and take one of those pillows and bring it underneath your head and neck. Draw your knees up towards your chest and find your delicious sideline resting pose. As we settle into shavasana, start to take a few slow deep belly breaths again. And if you'd like a reminder of where the belly breath is expanding, you can bring a hand to your low belly. The next few breaths, we're going to tune into that draw of gravity, that force of nature, that sense of attraction that is drawing us in towards the earth. So we want to say yes to gravity. And especially our bones, our movable bedrock has an affinity with the rock beneath us. Let the bones of your skull say yes to gravity and get heavy. The jawbone, heavy. And feel your shoulders, shoulder blades, the upper arm bones, the elbows all the way down to the finger bones. They're going to say yes, they're going to go along with gravity for the ride. The spine and the ribs all the way down to the sacrum and pelvis and to the thigh bones, shins, even the kneecaps get heavy. All the foot bones, toes, heels, everything surrendering towards the earth. And as you surrender, notice that the earth is right there, right here to support us. Almost like the earth is using gravity to draw us into a big hug, inhaled safe.
And letting go of any effort with your breath, then just rest into that embrace. Just rest. And let go of any effort with your breath. Just rest. And let go of any effort with your breath. If you like, you're welcome to stay in Shavasana, resting deeply into the earth. If so, just just ride that gravity wave. If you're wanting to come up to end your practice, you can start to deepen your breath again. And feel the energy of the breath expanding out into your toes, fingers. Bring a little movement out into your edges, stretching your feet and your palms, your wrists, your ankles. You can lengthen your body. And as you're ready, slowly rolling your way onto one side and pausing on your side with your knees slightly up towards your chest. From your side, let your head stay heavy as you roll forward, pressing your hands down and slowly coming up one vertebrae at a time to find a comfortable seated position. You can sit up on your pillows, bringing your palms together, hands in front of your heart.
Namaste. Thank you.
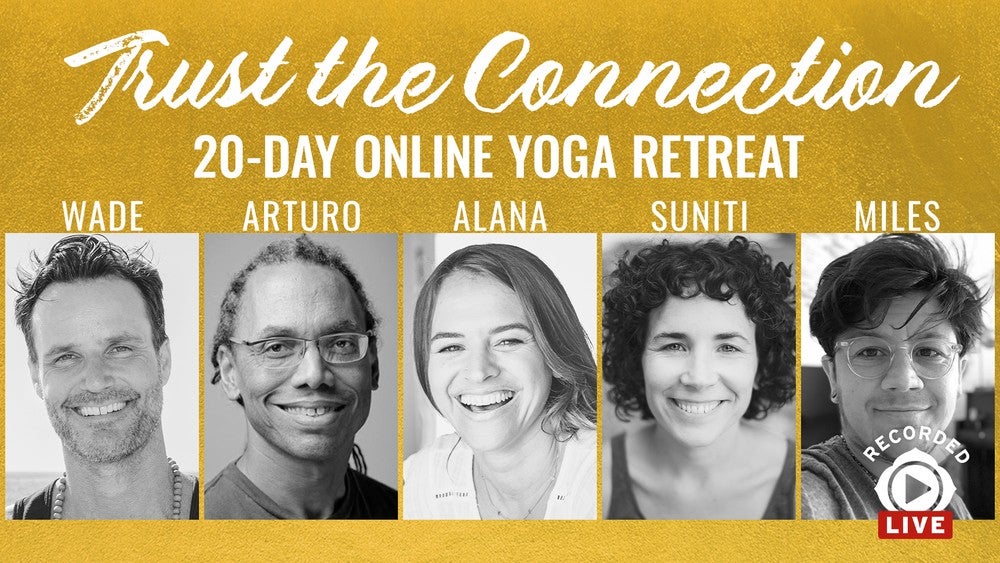
Trust the Connection: 20-Day Yoga Retreat
Comments
You need to be a subscriber to post a comment.
Please Log In or Create an Account to start your free trial.
