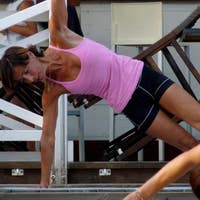
Building Strength for Bakasana
Description
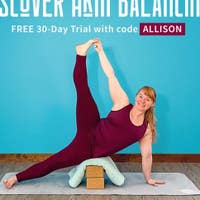
About This Video
Transcript
Read Full Transcript
Hi, everyone, and welcome back. Today we'll be doing a conditioning class for arm balancing. And so it's really important to know that arm balancing isn't just always being on your hands. So this practice is geared towards the Bakasana family. And it's a great way to maintain your skills even if you don't plan on arm balancing for the day. So we'll look at strengthening the core and mainly the upper body. That doesn't mean that the lower body doesn't participate. But we have a whole other episode dedicated to just that. So for this practice, you will need a blanket and two blocks. This is my co host. She's currently sleeping. Her name is Belle. And we're gonna get started. So grab your blanket. And you might have to open up your blanket a few times so that it wraps around your body. So I'm opening up my blanket to about this length. Let me fold it two or three times.
Okay, and you're gonna place the blanket around you and then hold on to it with your elbows. So you can certainly do this without the blanket and just hug the elbows in towards the sides of the body. But having a prop here just helps to give a little more to the movement. Okay, so have your palms facing down and squeeze your fists, okay, hug your elbows in, squeeze your fists, and then open the hands, squeeze and open. So you're bringing a little more awareness or awakening the hands and the wrists, and truly all the way up the upper arms and into the shoulder blades. Okay. And then from here, you're going to internally rotate your arms to bring your fists towards each other and do the same motion, squeeze your blanket, open and close. And then externally rotate. So pull the fists away from each other, hug the elbows in, start to feel some awakening in the backs of your shoulders and open and close the fists. Now you'll do the same thing, but this time come back to center, turn your palms to face up, okay, then squeeze your fists. And you may notice just a different a slightly different connection when the underbelly of the forearms is facing up. So in my case I feel a lot more happening in the backs of my forearms, but also my biceps. Okay. And now internally rotate, squeeze the elbows in and squeeze and release the hands. Then we do the opposite, bring the fists away from each other, squeeze. Good. Take another round there and then shake that out. From here, hold on to your blanket. I'm going to roll mine just a little bit more. So it's a little more circular. And from here, have your hands about shoulder width apart. So the same that you would set your hands up for an arm balance. And here you're going to ring the towel. Okay. So if you didn't have a blanket, you could use a towel. You're going to take your hand forward. So right now my left hand is inflection, my left wrist. And then I do the opposite and I start to ring the towel or the blanket with my right wrist. So now my right wrist is inflection. And so you alternate flexing and extending your wrists as you're gripping the blanket. And since it's a little odd and lumpy, it provides a little more challenge to your hand strength, your grip strength. As you're doing this, just notice if the elbows start to move. So keep the shoulder girdle steady so that the movement comes purely from your wrists and get some nice forearm awakening here. Okay. And now release. You can place your blanket to the side. And from here, bring your hands out in front of you. So they're shoulder width apart, pull your left fingertips back and you're going to hold the base of the knuckles. So where your finger meets your palm and to pull that area back, keep your left elbow straight. See if you can find some movement with your left thumb, little circles there. So right now your right hand is helping your left wrist to stay in this position. So I want you to see what happens when you release your right index finger. Does your left forearm muscles, do they have to work a little bit harder to keep this position? And then do the third release your third finger. You can bring the thumb back to stillness because you need a little more concentration there. Keep the pinky finger pressing against the left palm, but release your ring finger.
And then eventually the pinky finger. And notice how much concentration you're using to maintain your position actively in wrist extension, which might feel different if you just extend your other wrist. Okay. Okay. Now you're going to do the opposite. So you'll flex your wrist, take your fingertips, point them down, use your right hand to help that motion. So you get to about your end range. You don't have to go all the way to your end range. Find some movement at your left thumb. Okay. And then keep the hand steady, but release that index finger. Now the muscles and the underbelly of the forearm, they're trying to help keep your wrist in this position. Release your third finger, your fourth finger. It gets a lot harder. Okay. And then your pinky finger releases as you actively pull your hand, your palm towards your abdomen. Okay. And then release. Okay. And shake that arm out a little bit. So a lot of work. Okay. Other side, take your left arm out in front of you, pull the hand back, take your left fingertips right to the base of each knuckle on your right hand, and then find some motion with your right thumb, little circling. Okay. Then from there, release your index finger, then your third finger. Try not to allow your right hand to come forward as you're releasing the fingers. Try to keep your hand as extended in this position. Then when you had the force of your left hand bringing your right wrist into this position. Okay. And then you can kind of test like, oh, it is much different holding them side by side. This one already had a little bit of that action going on. So it may not feel as distinct from the first time. Okay. Now we do the other side. So you now you bring your wrist into flexion, pull the hand down, circle your right thumb around a few times in one direction and a few times in the other direction. Then pause, release your index finger, keep your hand in this position, release your third finger. Try not to allow the wrist to lift away from the floor. Okay. Fourth finger, kinky finger, hold the hand there and then release. Okay. Shake that side out. So now we'll make our way over onto all fours for tabletop. Place your hand shoulder width apart, kind of check out, see how your wrists feel, how your arms feel. Okay. Is there a sense of steadiness at your shoulder girdle? Then from here, press your fingers into the mat, keep the base of each knuckle as you felt before pressing into the mat and lift the heels of your hands away from the floor. Now, if this is hard with the shoulders over the wrist, you can back up your hips. Okay. And that's going to take some of the load, some of the weight off of the wrists.
Okay. And slowly lower the heels of your hands back down to the floor. Repeat that two or three more times. If this is coming along well, then you can challenge this position by doing it with one hand. So you take your right hand, bring your right arm behind your back. Try not to rest your arm on the back so that the head of the shoulder kind of slumps forward. So you're going to bring the shoulder up and back, pull the shoulder blade down just a little bit so that your upper traps don't kind of take over the movement and then lift the hand. Then from here, lift the left heel of the hand up and lower it down. So this side is much harder on my left. And I might ease up a little bit by pulling my hips back. That makes it more manageable in my case. Okay. A lot harder coming forward. Okay. And then try the other side. Place your right hand down, left arm behind the back. And then from there, lift and lower. And then bring your left hand back down if it was up. Come off of your wrist just for a moment. Give yourself a little break because I know it's a lot. The next round that we'll do is you'll lift up and then count down from five as you lower the hands. Okay. Rock forward. You might be shifted back some or you might come forward even more. That will be up to you. Press down through the finger pads, lift the heels of your hands away from the mat and then five, four, three, two, one. Lift up and five, four, three, two, one, and lift. Five, four, three, two, and one. Okay. Come on off your wrists. So part of that is important because when you are in your arm balance, right, we're not succumbing to gravity. There's always that sense of pushing. So the fact that we can control our way down just means that we aren't kind of sitting into the wrist and pressing into it and relying on it, right? There's some rebound action there. Okay. So now grab a block, have your other block handy, but you'll need one block for right now and make your way down onto your back. So you'll take the block and place the block between your thigh and your elbow. And you could use a different height for your block, but I'm going to choose this height for myself today. I'm going to turn my palm to face away from me and pull my wrist back into extension. So this is setting us up for the shape of Ekapada Bakasana, one legged Bakasana. So you're pulling your thigh up into the block as you're pressing your elbow down into the block. And then the upright arm balance variation, right? Your knee is resting on the back of the right arm. So the block is sort of a bridge for that action. Take your left leg, extend the left leg forward. It's your choice. You can keep the left leg on the floor or lift the left foot away from the floor. If the foot is lifted away, press forward through the ball of the foot and try to maintain a straight leg the entire time. And then your left arm can mirror your right arm as best as possible. So you'll extend the wrist. Then from here, you could stay here. You can lift the head and the shoulders. And if you want to add another layer to it, start to roll. But now when you're rolling, try not to use momentum, right? So I'm not going to swing my body to one side to then roll, right? From here, I feel the right side of my hip lifting away from the floor. Start to move to the left super slow, as slow as you can. And now I feel the right side of my hip is lifted away from the floor and I'm rolling to the outside of my left thigh. Okay. And then I get to about here. If I go any further to the ground, my arm will stop me or gravity will take me the rest of the way down. Now I go back. Okay. Now as I go back, the same thing, I feel myself rolling onto my left buttock. Okay. And very slowly move across the sacrum to your right buttock. Now more weight is going to come onto that right buttock as your right shoulder comes closer to the floor and you take it over to the right.
Sometimes that leg comes forward and helps you a little bit. Okay. And then you shift back. Okay. Feel yourself moving onto that right buttock across the sacrum. Try to lift the shoulder blades up without momentum taking over across to the left buttock. I hope you're feeling this. Like I'm super feeling this right now. Okay. And then over to your left side and back across. Press your block into your elbow and the elbow back into the block. Shift your way over to the right. Notice if your left arm has lost all kind of bearing. Come right back to center. Press the thigh into the block. Push your elbow down into the block. Take another breath here and then release. Okay. So that was challenging. That was a lot to be expected. Okay. We have the other side to go. So you know, take your options rest when you need to rest. Okay. So the switch sides. Take the block between the left top of your thigh and the left elbow. Position it to where it feels steady. Okay. And then from here, if you want to give your wrists a different position, you certainly can, right? You can turn the palms up. You can bring the hands in. You can flex the wrists. All that is good. This is just a variation to get closer to the shape of Ekapada Bakasana. Okay. And slide the right leg forward. So the legs are going to be up or down. Same thing with the head. If you are lifting, right? Try and get the tips of the shoulder blades as high off of the floor as possible. Then roll to the right without, you know, touching kitty. And then feel the weight shift across the buttocks. So more weight comes into the right buttocks. The left buttocks starts to touch. Try not to let momentum take control. It's okay if it does. Right. So I desperately want to swing my right leg to the left. Try to keep your right leg back, but use what you can get. Right. And then feel yourself rolling onto the outer left hip. Pull the block into the elbow and thigh. Make your way back. And then over to the right, slow and steady. You can also think of the movement coming from your shoulders. Right. I have more weight on my right shoulder. And I come slowly back through center until there's about even weight on my shoulders. Okay. Take another breath here.
And then as you exhale, you'll release down. Lower your left foot down. Take a break. Take a pause there. Okay. You can rest your block on your abdomen. Take a deep, slow, steady breath in. Let the abdomen expand. And then slow, steady breath out. Deep, slow, steady breath in. Long, slow, steady breath out. Okay. Now we're going to come into very much similar to this last position, but it's a contralateral position. So your right elbow, okay, will make contact via the block to your left thigh. So that's getting us more attuned to a Parsvabhakasana side crow. And we're only going to turn to the side where the leg is bent. And the reason for that is because when you're turning, right, if you're in the arm balance, you're only going to turn to that side, right, where your elbow is connected to your thigh. Okay. But you could certainly play with rolling back and forth. Super fun. Okay. Lock to the left thigh, right elbow to the top of the block. So the block is your bridge. It's your connector. Okay. The right leg is going to come out. You could certainly pull the knee in and that's much more Parsvabhakasana like. Okay. Set up your hands and then start to roll to the left. Lift your head and your shoulders. Okay. Pull the block in and then roll on back to center. Press into the block. Keep the press of the block throughout the entire motion. Right. That can be very challenging. I'm back. And then one more and back through center. Okay. Then we're going to change sides right away. So you're going to take the block to the left thigh, left elbow to the left thigh, hands like you'd like, and then start to roll to the right. Slowly come back through center. Press into the block. So the thigh is pulling up into the block as your elbow is pressing down. Back through center. And one more. Roll to the right and roll back to center. And then release. Okay. Place the block onto the belly. Deep, so steady breath in. Long, so steady breath out. Deep, so steady breath in. Long, slow, steady breath out. Okay. So now that we've rested the weight-bearing aspect of the wrists a little bit, we're going to come back onto our hands. Okay. So come into a plank position. And what I want you to think about, it's perfect that that bell is here assisting today, right? Is that action almost of kneading, right? That cats need. And so in this position, like we talked about earlier, right? That the weight isn't just, you're not just putting all of your weight into your wrist, right? That there's that sense of buoyancy at the heel of the hands. And that's important in arm balancing, because what allows us to shift and helps us to perceive where we are in space and to literally catch our balance when things start to move. Okay. So have your hands shoulder width apart, step your feet back into plank and open up your feet just a little bit wider. So this is like a row. Okay. So you're going to shift your weight over onto your left hand, pick your right elbow up, pull the right elbow back. Okay. Place the right hand, try to keep the right heel of the hand buoyant. It touches the floor, but it's just not releasing entirely. Okay. Then the left palm comes up, pull the elbow back, place the left hand down, then the right hand is going to step back, left hand steps back, right hand a little bit, twisting up and back into Adho Mukha Svanasana, downward facing dog, shift your weight into your left hand, lift your right hand up, then the left hand up, look forward, walk your hands forward. Okay. So that sense of being able to adapt as you're walking forward, we can't kind of melt into the floor. Pick your left palm up, place it down, right palm up, place it down, step your left hand back, lift your buttocks as your right hand steps back, walk yourself back into downward facing dog, hover your left palm, place it down, right palm lifts, right palm down and start to walk forward, left hand forward, right hand forward, you bring yourself back out into your plank. Okay. Lower down to your knees and then sit back. Okay. So as you move throughout that sequence, think of being light on your hands, which might sound a little counterintuitive, but it will help you in the long run. Okay. So now come on down onto your back and we're going to come into a supine version of bhakasana.
So grab your two blocks, take one block, place it horizontally between the inner knees, take the inner edges of your feet, hug them together and then take the block onto your belly, hug it with your forearms, lift your hands up. Okay. And from here you'll kiss the block. So bringing the blocks closer to each other, you can lift the head and back down. Do that again. And then if that's going well, think of your back being like an egg. So you're going to lift your tailbone up and then lift your shoulder blades up and then lift your tailbone up, lift your shoulder blades up. Maybe lift the block that's between your elbows as you squeeze it, lift your buttocks up, shoulders up, buttocks up, shoulders up, buttocks up, shoulders up, and then roll all the way back down. Okay. All right. From there, one more time, come on up to sit. You're going to take your blocks one more time and do a little play. Okay. So you have two blocks, have some space between them. You can sit back, right? Have your hands come behind you. That's going to assist you. Okay. You'll also have the options to have the hands come in front of you. So from here, I lift the block up and place it down onto the other block. Okay. Lift and down. And then you can start playing with the different heights. Okay. If you want to lift up higher, go ahead and do that. So it gives this action of becoming compact, right? The body is becoming more condensed like we want in our arm balancing. So it's very strengthening for the hip flexors, but also the rest of the core. And then you're also working a little bit with the mobility of the feet, right? When your hands are in position, we can't use our hands to move our legs. Okay. That's going well. Then we can do something a little bit different. Move a block to the side. This is guaranteed to make you smile. Okay. So have your block between your feet. You'll lift and throw your block up into the air and then catch it. Hopefully with your feet. Okay. So lift and catch. Okay. And then lift and catch. And it's probably going to go everywhere and that's totally okay. And maybe that's why you have a second block. Okay. Or catch it between your shins or your thighs. And then you can readjust lift and catch. Okay. Let's do that one more time. Hold the block, lift it up. Okay. And then put it down. That's over. So hopefully you had fun with that. Come on down onto your back. Bring your arms out to the sides to cactus arms. Okay. And then open up your feet about as wide as your mat. A little windshield wipering of the legs from side to side. If you want to take the head in the opposite direction as the knees, go ahead and do that. Let your abdomen be incredibly soft. Your hands and your wrists. And find your way back to center. Okay. Similar to what you did at the beginning of your practice. Take your hand, palm faces you. Use your right hand to grab around the base of each knuckle. Pull the finger towards you and the heel of the hand away from you. And then switch sides. So the right palm faces up. Pull the fingertips back. Use your left hand to assist. Good. And then release. Okay. From here, pull your knees in towards your chest. Give yourself a little rock side to side. And make your way back down, placing your feet onto the floor and extending your legs forward for Shavasana. Let your eyes close. Adjust your body as you need, as you feel the strengthening effects of your practice.
Thank you. Deepen your breathing. Wiggle your fingertips and your toes. Stretch your arms overhead and press forward through your heels. And on your exhalation, release your arms and soften your legs. Bend your knees, placing your feet on the floor. Roll to one side. And using the strength of your hands, press yourself up into any comfortable seated position. And of course, crop as you'd like, as you come up to set. I'll take a few moments here to feel the connectivity from your fingertips all the way into the shoulder blades, down the trunk of your body and into your hips, down your legs and into your feet. Place your hands together in front of your heart. Touch your thumbs to your heart to uplift it. And I hope this experience has been wonderful and fun and challenging for you. And I'll see you for the next one. Thank you.
Comments


You need to be a subscriber to post a comment.
Please Log In or Create an Account to start your free trial.
