Description
About This Video
Transcript
Read Full Transcript
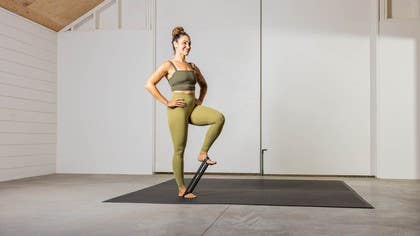
Welcome to hip strength and stabilization. We're going to get started on the floor with your knees out in front of you. This is what we call a 90-90. Your leg is going to be 90 degrees in front of you. Let's say your left leg and your right leg is going to be behind you at 90 degrees also. What we're going to do is first brace our core. So pull the shoulders down, corkscrew those arms in, and we're going to drive this knee up, your right knee, and follow with the left to the floor. We're going to go back. Left knee is leading. When it's about halfway, your other leg should be halfway too. They should be pretty even. Let's try it one more time. Add the breath. So inhale, exhale, shoulders away from your neck, neck long. Keep everything in your upper body super stable. Start to lift up as you follow with the other knee. Let's come back. It's going to take you a couple of repetitions to get the feel for this. So continue to do it at your own pace. I'm just going to go at this pace. You see that I'm kind of inching from one direction of the mat to the other. That's pretty normal. We tend to move during that one. Let's do one more. We're just warming up the hips for our stabilization. All right. I'm using a mini band today, and we're going to start with it on our feet. Put it on your feet, create some tension, and stand up. In this position, we're going to do what's called a march. And here, we're going to start with our pelvis tucked, our ribcage down, tight tight core, and we're going to march for eight. Lift, keep that tension in your foot, and drop down. Pull up and drop down. We're working on the hip flexors. This is halfway. Keep moving through it. Keep that tension especially on the way down. You really want to make sure that you're not flopping all over the place. We've got one more each side. Good. Take a second to rest, regroup. If you need to hold on to something to find more stabilization in your hips and your core, that's perfectly fine. Just don't lean on it, okay? You're putting all of your strength into your feet. Maybe shift to one side to begin.
Tighten up the core. Round two. Here we go. Pull like you're trying to rip that band apart. Add the breath this time. Exhale. A couple more. Starting to burn. Last one on each side. And rest. Notice that I'm exhaling at the most intense part. That's when I really want to group my abdominals in to help me with that lift. We're going to do one more round. Your best round yet. Pull your shoulders back. Your armpits are engaged. That's how you know your lats are engaged. And it helps your core engage as well. Here we go. Lift. Exhale.
Hold it as long as you can up at the top. Halfway. Hip flexors should be on fire. If you are sitting a lot during your day, this is a really helpful exercise. Last two. Good. Take a second. Take the mini-band off. Give yourself a break. Shake it out. Always starts to burn. Okay. Let's put this guy down and grab your block. Okay. So you're going to find what level works for you. I want you to start low. Once you get the feel for it, you can advance it at your own level. All right. I'm going to step on top. All of my weight is on the block. So I should be able to keep my other foot floating. What we're going to do is here is do a step down. But what we're focusing on is the hinge. So your hips are kind of leading the path for your foot to come down. And you're standing with one foot next to the other. So you're not stepping down here. You're not stepping down behind. You're stepping down right next to the other leg. Right now my left leg is on the block and my right leg is going to be stepping down. So I'm going to step down with my right leg, bending the left. Hips are hinging.
Keep going. If you find that you're losing your balance, holding onto something is fine as well. But what we're working on here is hips pushing back, dropping that heel to the floor. Working on your hips stabilization takes time and also a lot of repetition. You can go for about 10 to 12 reps before you start to feel this at all. That's okay. It doesn't mean that you need to go higher. It just means that you need to keep focusing on the hinge and keeping that heel coming right down next to the block. Let's do three more. Three, push the block away with your left leg as you come up. Two, push the block away. Last one. All right, let's transfer to the other leg. So right leg on the block, left leg on the floor. If you have back issues, low back issues in particular, doing these step downs could reset your hips, which is really great for everyday maintenance. So put your hands on your hips, right leg on the block, left heel coming down, bend that right leg, push your hips back. Remember that your heel is going nowhere except right next to the block, touching the floor, coming back up. All of your weight should be on the block. We're going to keep going for five or six more. You go until you start to fatigue. Now check your gaze. Your gaze should be maybe at the edge of your mat if you have one or just in front of you about four feet. Keep going. We got two and last one. Good. Go ahead and take a break, shake it out. We're going to repeat for round two. Let's bring our attention back to our core. So we've been getting the step downs now. Now we're going to focus on a different portion for the same movement. Different portion of your body. Core is engaged.
Rib cage is down. You're stepping your left foot on the block again. You're looking right ahead of you in this space right there. So your neck is in alignment with your spine and we're going to do some drop downs. You're going to go at your own pace. Hips push backwards. It helps if you even put your fingertips at the edges of your hips and push them back so that that heel is still tapping right next to the block. My right heel is tapping the floor. My left foot is on the block. Let's do five. When you stand, squeeze your glutes. Three, two, last one. Good. Go ahead and transfer to the other side. Set yourself up. Core is engaged. Gaze is in the right place. Neck is in alignment. It's important to pay attention to all of those things every time you begin because that's what makes the difference between stabilizing and just powering through a movement, not really getting the benefits. So push the block away with your right leg. Tap with your left heel. Hips are really pushing back towards that back wall or the side wall for you at home. Keep pushing. Pay attention to your core. You can even add your breath if you'd like. Push the floor away. Exhale. Inhale as you stand. Exhale as you drop. We got two more.
Last one. Good. Go ahead and rest. Okay, now we're going to move on to our hip drops. So I'm going to face you. This one's kind of tricky. You're going to step up on top of the block like you just did with your right leg. You're going to put your hands on your hips and I just want you to watch this part for a second. I'm going to drop my hip, not my knee, not bending anything, and then pull my hip up. So watch that again. Dropping the hip, pulling the hip up. I'm exaggerating. You don't have to go as far. It could be smaller, but really what we're focusing on is the drop and the pull. The knee on the block is soft. It's not locked out, but it's also not bent or bending. So let's practice five. Knee is soft. Core is engaged. Drop the hip, pull it back up. Drop the hip and pull it back up. Most of my weight is still on this, on the right side. Pull. Three, two, one. Do you feel that burn? Good. Rest. Nice job. Let's try the other side. This side might be more complicated. Who knows? Let's find out. Left leg on the block. Stand up.
Find your balance. Hands on your hips. It helps to know where your hips are. Core is engaged. Start with your feet. Almost like you're going to put the other foot on the block too, but off. Ready? Core is engaged. Drop the heel. Drop the hip. Pull it back up. Drop and pull. Drop and pull. Now use your breath. Inhale as you drop. Exhale as you pull. Inhale as you drop. Exhale as you pull. A couple more. Almost there. Last one. Those are pretty brutal. Shake it out. Feel free to repeat those two exercises, especially when you're having a back pain flare. Once the pain goes down, this is a good one to incorporate into your daily routine. Okay, so you don't need the block anymore. So let's put that to the side. But you do need your mini band. Grab that mini band, and you're going to put it on your ankles.
Keep the tension here. You have a couple of options. You can move around your room, or you can stay stagnant. But you really need that core either way. We're going to start here. Tension is already here between my legs, so there's no slack. But what I'm going to do is step to the side and bring my other foot to follow. Again, step to the side and follow with the other leg. Step to the side. I'm just going back and forth, keeping that core engaged. Knees are not locked out, but they're also not bent. So maybe what we can think about is our quads, squeezing our quads. Our knees are soft. Step to the side again, and follow. Step and follow. We're going back and forth. We're going to kind of pick up the pace a little bit for five. Four, three, two, and one. Deep breath in. Deep breath out. You're going to feel the legs kind of starting to fire up. You're going to bring that mini band to above your knees now. Again, tension is there. We're going into squats. You're going to keep your arms wherever they feel most comfortable. I usually keep them in front of me, and I'm going to sit my booty back and drive my knees out as I stand. Again, sit back, drive my knees out against the mini band as I stand. Let's do five. Four, three, two, last one. Good. Stand up, shake it out, keep your band there, but meet me on the floor. Now that we're here, I'm actually going to keep the mini band close to my knee crease because I'm going to hold onto it with one leg while I extend the other. Let me show you what I mean. Lay back on your back. We're doing bridge holds here. Tighten up the core.
I'm going to hold on to this mini band while I extend the other side and push my hips up. You can hold onto it with your hands if you want to, but what happens is that it slides up a lot of times, especially if you have slippery pants on. So we're just holding it and holding it and holding it. And then you're going to drop back down. Then you grab the mini band with the other side and pull the leg across, then thrust your hips up towards the mini band, towards your knee. This glute and this hamstring should be on fire, the one that's pressing into the floor. Drop back down. Let's try the other side one more time. Tighten up the core, pull the mini band, and tighten it with your crease and then pull it with the other side. Once you're there, then you can thrust your hips up. Hold it for five, four, three, two, one. Let's go back down. Last one. Crease tight both sides and pull. Three, two, one. Go ahead and release. Let's sit back up and repeat from the ankles. Round two. Let's stand up, repeat from the top. Mini band on your ankles again, we're going to step side to side.
Tighten up the core. Maybe we pick up the pace this time. We're stepping with one leg, following with the other. Depending on where you are in your house, you can walk around if you'd like, or you can stay stagnant. Keep going for five, four, three, two, and one. All the way there, all the way back. Holy moly, my legs are on fire. Pull that band all the way to above your knees. Let's go straight into squats for round two. Tighten up the core. Sit back, drive the knees into the band as you stand. Sit back, drive them in. Pay attention to your glutes at the top. Squeeze your glutes at the top of that squat. We're going to do five. Add the breath. Three, two, last one. Good. Relax. Not all the way, though. Sit down. Here we go.
Last set of bridge pulls. If you're having trouble with this one with the bands, lose the band. You can still do this movement without the band or resistance. Pick your hips up, up. Thrust those hips towards the minivan. Squeeze for five, four, three, two, one. Drop your back. Press the other foot into the ground as you lift. Separate the minivan from each other. Hold it for five. Thrust those hips in. Three, two, one. Release. Last set. Make sure you got that minivan on tight. Pull. Hips hold for five, four, three. Maybe we hold it for a little bit longer. Should I give you a little story here? Two, one. I'm kidding. Drop it. Let's go to the other side. Hold it up. Hold it. Press that foot into the ground. Thrust the hips up. Maybe a story on this side, maybe. Three, two, one. Drop it down. Take that minivan off. Feels good to get rid of it. And come back to the sequence as many times as you'd like.
Great for your hips. Thanks for being here with me.
Joint Mobility and Strength
Comments
You need to be a subscriber to post a comment.
Please Log In or Create an Account to start your free trial.


