Description
Transcript
Read Full Transcript
Welcome. This practice is designed to awaken the pelvic floor muscles and rediscover our ability to both strengthen and engage these muscles, as well as soften and relax these muscles. Typically, six to eight weeks postpartum is a general guideline for resuming activity. But as always, trust your unique timing. It'll depend on your pregnancy and birthing journey.
This practice is going to target the glutes, the pelvis, the hips, the legs, as well as the abdominals. So let's begin seated. You might prop yourself up. I'm sitting on a block. You might sit up on a bolster, a blanket, whatever feels good for you.
And let's take another landing breath, or a few landing breaths together. Ice full exhale, settling, centering. And then let your mind bring your attention down towards your pelvis and into your pelvic floor. And without engaging the muscles, can you psychically, mentally, get a sense of lifting those muscles? What did it feel like to lift those muscles once upon a time?
And then let them relax. And then let's try that together. So so gently, get a sense of lifting and engaging the perineum, the pelvic floor muscles, and then relaxing them, even if it's like the slightest amount. Lift and engage, and then relax. Let's do that one or two more times.
Lift and engage. So in yoga, we call this mula bandha, and relax. Make sure the face, the jaw, the shoulders are relaxed. One more time, lift, engage. You might hold, and relax.
Let's take a big clearing breath. Inhale, nice full exhale. So keep the pelvic floor relaxed, and just get a sense of bring your hands onto your low belly, and get a sense of drawing the lower belly in, and then let it release. And let's try that with the exhale. Exhale, we'll inhale, and then exhale.
Inhale, exhale, draw the lower belly in. One more time, inhale, and draw the lower belly in. Inhale, and then relax. Clearing breath, exhale. We'll play with those two actions at the same time.
So as you're ready, get a sense of lifting the pelvic floor as you draw the lower belly in, and then release. Gently lift the pelvic floor, draw the lower belly in. Feel that sense of drawing and lifting, and release. Let's try that one more time. Lift, draw the belly in.
You might hold, and release. Clearing breath, inhale, exhale. How did that feel? Now we're going to play with elevator kegels. Kegels is a medical term for that lifting and engagement of the pelvic floor.
So as you're ready, get a sense of drawing the pelvic floor up and in. As you draw the lower belly in, we're going to hold, and then hold again, little squeeze, and release. And again, draw the pelvic floor up and in, lower belly in, like you're moving up to the first floor of the elevator, and then maybe squeeze a little bit more, second floor. Hold, and then release. Nice.
Let's take a clearing breath, inhale, exhale. Let's try one more. Drawing the pelvic floor up and in, lower belly draws in. Engage. You might stay here.
You might squeeze a little bit more, moving up to the second floor, maybe even the third floor. Squeeze, hold, and then release. Big clearing breath, inhale, exhale everything. Beautiful. Let's transition onto our back for some bridge work, and we'll incorporate that into the movement.
So as you're ready, find your way onto your back. And then just start by bending the knees, grounding the soles of the feet. Press through your heels, and just lift the feet up off the floor, but keep the heels grounded. And then do the opposite. So press onto the toes and lift the heels, and then rock back and forth.
So heels, lift the feet, toes, and then rock onto the toes, lift the heels. A few times, squeeze, and then release. Press onto the toes, lift the heels, a few times back and forth, just waking up the feet. And then we're going to add the pelvic tilt movement. So relax the soles of the feet as you're ready.
Curl the tailbone under, let the lower back come down to the floor. And then as you inhale, arch the back and lengthen the front of the body. Lift the lumbar spine. You might open the arms up into like a cactus shape or out to the sides. And then curl the tailbone under.
Press the back ribs down, navel to spine. As you inhale, arch the back, lift the lumbar spine. Chin might soften down towards the chest. And a few more times like this, you might soften the gaze inward and draw your awareness down to the tailbone, feeling that movement through your pelvis and up through the spine. And we'll add the engagement of the pelvic floor.
So next time you curl the tailbone under, lift and engage the pelvic floor as you press through your heels a bit. Relax the pelvic floor. Inhale, arch the back, lift the lumbar spine, soften the chin. Exhale, curl the tailbone under. Engage and lift the pelvic floor gently.
Press through the heels. Relax the pelvic floor as you inhale. Arch the back and lengthen. Let's do one more. Curl the tailbone.
Press through the heels. Lift and engage pelvic floor muscles. Relax that effort as you inhale. Arch the back and lengthen. Nice.
Just let the lower back come down to the floor. We're going to interlace our fingers behind our head. And we're going to do just a gentle little sit-up. But the intention here is to really awaken the spine. And it's not about doing a crunch.
So as you're ready, press the elbows down. Arch the back. That's the inhale. Exhale, lift your head up. Draw the elbows together.
Do a gentle curl. Press through the heels. Lift the pelvic floor. Slowly lower down. Arch the back.
Inhale, elbows pressed down. Relax the pelvic floor. As you exhale, lift and curl. Gently awaken those muscles of the pelvic floor. Lower down.
Inhale, arch the back. Open the lungs. Exhale, lift and curl. Press through the heels. Engage the pelvic floor.
Let's do one more round. Inhale to arch. Exhale, lift and curl. As you're ready, just slow lower down. Nice.
Releasing the arms. Bring the heels in line with your sitting bones. Feet about hips distance apart. Spread the toes nice and wide in preparation for bridge. Feel your ability to arch the back again.
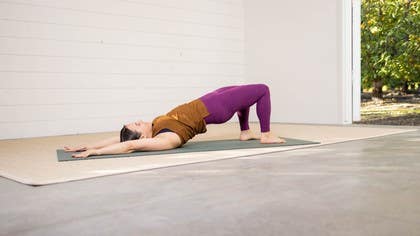
And then as you exhale, curl the tailbone under. Press through the feet. Lift the pelvis up. And feel how you can lengthen the front of the body here. Fingers might reach towards the heels.
Feel how you can press through the heels. Engaging the hamstrings. The sense of drawing the inner thighs in towards each other. And then slowly roll the spine down. Upper back.
Mid back. Low back. Release. Inhale, arch the back. Exhale.
Curl the tailbone under. Press through the feet. Lift up into bridge. Feel the essence of engaging and lifting the pelvic floor muscles without clenching. Pressing through the heels.
Feeling that sense of the hips drawing towards each other as you lengthen. And then roll back down nice and slow. Upper back. Mid back. Low back.
Let's do three more. Inhale, arch. Exhale, curl, press. Lift, lengthen. Holding here.
Spread the effort evenly through the body. Feeling the buoyancy of the lungs and the heart. The strength of your legs. The muscles really hugging into the bones here. And then exhale.
Roll and round the spine. Back down. Two more. Inhale, arch the back. Exhale.
Press, lift, and lengthen. Again, feel the essence of the pelvic floor gently lifting and engaging. So you press through the heels, lengthening. Exhale to roll back down. One more round.
Inhale to arch. Exhale, press, lift. This time you might reach your arms overhead in your bridge. Feel your ability to lengthen. Allow for an inhale.
Exhale everything. And at the bottom of the exhale, roll the spine back down on empty upper back. Mid back. Feel that nice traction in your low back. Pause.
Feel the breath coming in. Exhale, release. Beautiful. Let's try that with a block between the legs. So go ahead and grab your block.
You can bring the block between the legs. Whatever side feels right for you. We're going to press through the heels. Curl the tailbone under. Lift.
And feel that feedback of the block. So the inner thigh squeezing towards the block, pressing through the heels, lengthening the front body, feeling that engagement of the glute muscles, the hamstrings. And then just slow roll the spine back down, upper back, middle back, low back. And just finding the width that feels right for you. So maybe it's even slightly wider.
We'll take one more round. And you might play with the position of your block. Press through the heels. Lift, lengthen, and hold. Again, you might awaken those pelvic floor muscles without clenching or gripping.
And then roll back down, upper back, mid back, low back. Beautiful. So the bridging work is, I find, very stabilizing for the pelvis and hips. We'll play with one more in this sequence. So as you're ready, press up into your bridge.
Draw the elbows in towards each other. And then lift the fingers up towards the ceiling. And feel how you can press into the upper arm bones and broaden your chest, lengthening. Now, you might stay right here. You might bring your fingertips onto the front of your hip bones.
Feel them nice and even with each other. Again, you might stay here. You might play with shifting the weight into your left foot as you lift the right heel above the floor. Whoa, whoa. And then play with grounding that right heel.
And then maybe shifting the weight into your right foot, lifting the left heel above the floor. And then lower back down. You might keep playing with that, or you might play with grounding for your left foot. And what would it feel like to lift your right knee up? Keeping the hips nice and even, ground the right foot, press, stay here, or lift the left knee up.
Whew. You might stay with this or play with a little marching, side to side, keeping the hips nice and even. And you might notice that one glute or one leg feels a little stronger or weaker than the other. Again, find what feels right for you. Grounding both feet, inhale, lift.
Exhale, roll the spine back down. Let's hug the knees into the chest. Rock a little bit, side to side. Ground the soles of the feet, windshield wiper. Oh, this feels so nice.
Let the knees go side to side. Relaxing the effort through the hips, the glutes, the legs. A little break for the psoas, hip flexors. And as you're ready, draw the knees into the chest. And we'll transition.
Roll to your side. Use your arms to press yourself up. And let's come into a tabletop position. So reorganize. As you're ready, spread the fingers wide.
And you might have padding underneath your knees, a blanket if that feels good. And let's find cat cow here. So exhale, curl round, stretch your back, soften the chin towards the chest. And then you're going to come up to the floor. Inhale into the chest, and then inhale, arch the back.
And feel your ability to lengthen and lift. Exhale, curl round, stretch, navel to spine, releasing the head. You might soften the hips towards the heels. Inhale, arch, and lift. And if you have a baby crawling around, you might make some sounds.
I like to do that with Cedar. We go mmm, meow, round and stretch. Inhale like a cow, mmm, exhale, meow, round, stretch. He likes that a lot. OK.
And then let's find some circles here. So just begin to circle your ribs, circle your hips in one direction, allowing your head to move as it feels right for you, moving the rib cage. And then we'll move in the other direction, circling the hips, the ribs, all the way up through the neck. And then come back to neutral. And feel how you can drop and protract into the shoulders.
So you're hugging the shoulder blades into the spine. And then press the floor away. Feel that buoyancy in the chest, just like in plank. And then dropping into the shoulders, protracting, and then press and lift. Let's do that one more time, getting that nice stretch in the upper back.
And then press the floor away, broaden through the chest. Nice. And then from here, let's turn the fingers in. Or you might spin them around or out to the side. Get a nice wrist stretch here, a little side to side.
Breathing, softening the jaw. Spinning the fingers back forward. Tuck the toes if it feels good. You might ease up into a downward facing dog. Oh my goodness.
Bend the knees, reach and lift up through your sitting bones. Let the head release. And can you feel and access that sense of lifting and engaging up through the pelvic floor muscles? Get a sense of drawing the heels towards each other as you activate the inner leg lines, activate the inner groins. And then let's bend one knee and stretch the other heel down.
And then bend the knee and stretch the heel down. Just pedal the feet, stretching the back of the legs, the hamstrings, the calves, the heels. A few more moments like this. And then as you're ready, lower the knees. Let's sit back, child's pose for a moment.
Soften the hips towards the heels. You might wobble a little bit side to side. Take a nice, beautiful breath into the back body, nourishing the kidneys, the low back, the sacrum. As you're ready, inhale, rise back up. We're going to turn on the heat a little bit for some glute work.
So you might stay up on your hands. You can always lower onto your forearms for support. OK. As you're ready, we're going to spread the fingers nice and wide or come onto the forearms, extend back through your left foot. And as you're ready, you're going to get a sense of really lifting your front ribs in.
So lifting the abdominal muscles up. Otherwise, you can hyperextend the low back. So get a sense of lifting. And then you might lift that left leg up off the floor. And then maybe if it feels good, you're pulsing, flexing the foot and pulsing.
And again, lifting the belly up and in. And feeling that workout in the glute. Nice. Let's go five, four, three, two, and one. And then turn the foot out.
So externally rotate the hip. And then we'll pulse again if you'd like to. Feeling that deep in the hip socket. Pulsing five, four, three, two, one. Turn the foot back down.
You might stay up on the hands or lower onto the forearms. And then bend the knee. From here, draw the knee in like a cat. And then lift the knee and the foot up. And then we're going to draw it in and lift up.
Draw it in and lift up. Again, mindful of your ribs drawing up and in as you protect the lower back. Let's do five more. Five, four, three, two, one. This is a workout for the right hip as well.
Release. I'm going to come back up onto the hands. We're going to extend back through the leg again. Internally rotate the foot. Inhale, exhale.
Knee towards the elbow. And then extend. Knee towards the elbow. And extend for five. I like to do this with a smile.
Four, three. It burns. Two, and one. Extend. And we're going to bend the knee and make some big circles with the hip.
Nice and fluid through the hip joint. Again, this is a ton of work for the right hip. And then circle the other direction. A few more. Good.
Release. Draw the knees together a little side to side with the hips. Might feel nice between sides. Maybe a child's pose. Inhale.
Exhale. As you're ready, extend back through your right leg and lift the leg. Again, you might stay right here, drawing the front ribs in, lifting, maybe pulsing. Five, four, three, two, one. Turn the foot out.
Externally rotate and pulse. Keep that integrity through the core, the abdominals, as they're lifting for five, four, three, two, and one. Internally rotate. And you might stay up or lower. As you bend the knee, draw the knee in and then lift.
Draw it in and lift. So let's do five, four, three, two, and one. Extend. Lower. Come back up onto the hands.
We'll extend the leg and draw the right knee to the right elbow. Reach. Right knee to elbow. And five, four, three, two, and one. Extend.
Draw in in a big circle in one direction, juicing up the hip, the hip flexors, really strengthening and stabilizing the left hip. Circle in the other direction. Good, and then release. Draw the knees together. Side to side might feel good.
And let's come into a puppy pose. So you'll walk your hands forward, nice and wide, and then softening the heart towards the floor, forehead down, hip served on a more or less stacked over the knees. Find what feels right for you, releasing the chest towards the floor. You're welcome to find a child's pose here. Nice, slowly walk the palms back up.
From here, we'll find that action of engaging and lifting the pelvic floor in a wide forward fold. So you might have two blocks with you. Bring them out in front of you if you have them. And then go ahead and step your feet nice and wide on the mat. This feels really nice after all that glute work.
And feel how you can ground through the palms, spread the toes, and just lengthen your spine, softening the gaze down. Feel the front ribs draw in just like we explored in the glute work. And that sense of grounding through the heels, drawing the heels in, engaging the inner leg lines as you lift up through the pelvic floor muscles. Yeah, just the slightest sense of lifting without exerting, without clenching, or creating any tension. Breathing here.
Again, grounding through the heels, drawing the heels towards each other, awakening the inner leg lines, awakening the groins, the pelvic floor muscles, lower belly gently lifting up and in, softening the gaze down. Nice, let's turn the toes out. Bend the left knee, shift the hips to the left a little bit. Bend the right knee, shift the hips to the right, just a little side to side. Ooh, feels so nice.
For the hamstrings, the inner leg lines, side to side. You can keep the hands and blocks where they are. You can choose to lower the blocks, walk them forward, little hammock action through the spine, the heart, the back of the neck, side to side. And then as you're ready, walk the hands or blocks back in, and we'll transition to Malasana squat. So toe, heel the feet a little closer together as you bend the knees.
And you might have explored this during your pregnancy, the squat. I like to stack the blocks for support. And sit down. Find what feels right for you always. And it might feel nice to just inhale and stretch the left arm up to the sky, opening, and then back.
Inhale, stretch the right arm up. And let's do that one more time, little side body stretch and opening. Inhale the right arm up and back. And we'll transition to the floor, however you'd like to get there, mindfully lowering. You can bring your blocks off to the side.
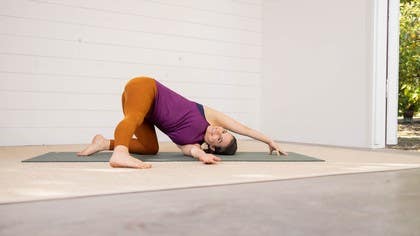
We'll come on to our back. Hug your knees into your chest. And we'll ease into a spinal twist. As you're ready, just roll the legs, the whole body over to the right. Stack the arms.
And then let that top left arm circle overhead and open. And you might bring the right hand onto the outer left leg. Inhale to lengthen. Exhale, softening the belly, relaxing the pelvic floor, relaxing the effort, breathing into where you feel the stretch and the sensation. A few more moments here, just releasing the hips, releasing the back.
And then slow, lead with the top leg to unwind. Roll everything over to your left side. And then circle the top right arm up and over. Left hand might rest on the outer right leg. Inhale to lengthen.
Exhale, softening the belly, breathing into where you feel the stretch, resting in the spaciousness of this moment. You might stay a bit longer. You might just slowly unwind, knees and a chest. And from here, you might stretch your legs out, taking as long as you'd like for Shavasana, letting the arms release, the legs release, really giving yourself permission to rest here as long as you'd like. When you're ready, you can just roll to your side, pausing, using your arms to slowly press up.
We'll take just a few moments to sit together, centering or continuing to rest in Shavasana. Allow for an inhale. Nice, full exhale. And you might bring one hand to the heart, one hand to the belly, appreciating this body, offering gratitude for what it can do here and now, and it does so much. Thank you for being here.
Postnatal Yoga
Comments
You need to be a subscriber to post a comment.
Please Log In or Create an Account to start your free trial.


