Description
Transcript
Read Full Transcript
Hi, and welcome to my yoga deconstructed class. We are going to be deconstructing dancer pose. And the props that you'll need for class today are two blocks, I recommend cork blocks or firm foam blocks, blanket, yoga strap, and then either a thera band or a stretchy loop band. Let's get started. All right, so we're going to get started by experiencing dancer pose and how your core can be connected while you're in the pose by doing a little rolling sequence.
I suggest that you watch first because it's different and it's helpful to see it before you do it. So what we're going to do is come onto our sides and if you bring your legs slightly forward it's easier to balance and just take a simple quad stretch. You can rest your head on your arm or you can float your head up. If that feels all right and you want a little extra challenge, add a little bit of a back bend so it's more like the dancer pose. And if you want even more challenge, you can bring your leg in line with your body.
Your bottom arm comes forward and voila, there's your sideline dancer. We're going to roll. So come into a hollow body hold, pause here, and then without arms or feet touching, try to roll onto your side. Bring the bottom leg forward, quad stretch if that feels all right. You can line up your leg, give yourself a little back bend, and then you transition.
Arms up, legs up, hollow body hold. Feel free to join in with me now that you've watched, you know where we're going. So the leg forward is much easier and easier to balance. So recommend starting there. And then when you're here, just feeling this connection of your mid-back, lower back spine into the floor.
Now I know that this might feel a little awkward and challenging, but I promise you after we do a whole bunch of corrective exercises and somatic movements, we're going to recheck this hollow body, sideline dancer sequence and it's going to feel amazing. All right, last hollow body holds, bend your knees, come to rest. So let's actually make our way to four point kneeling on the mat and you'll have your hands under your shoulders, your knees under your hips, but I want you to turn your hands out kind of like a seal. And from here, just feel the stretch, perhaps maybe, maybe not. And then right away, come into cat cow.
So rounding your spine, lifting the belly in and up as you push the floor away, tucking your tailbone and then slowly articulate through the spine, lifting your heart, lifting your gaze, feel the shoulders pull back and down as the tailbone lifts up. Let's do that once more, chin to chest, protract the shoulder blades, push the ground, activating your serratus, deep abdominal connections as you posteriorly tilt the pelvis and then back the other way. So enjoy the extension of the spine, retracting your shoulder blades, they come towards each other as you lift your gaze up. And then one last position, another forearm stretch, so you're going to have your fingers pointing towards your knees. If that's too intense, go back to fingers pointing out.
We're doing this because you'll be grabbing your ankle in dancer pose later and we're going to be doing that in external rotation of the shoulder and supination of the forearm. So this is a little warm up for that. One more time, checking in with your breath, so I'm going to inhale as I arch and then exhale as I round. And then let's come back to neutral and bring your hands back to neutral and we're going to side bend the spine. So turn and shorten the right side of your waist to look at your outer right hip.
And then side bend the other way. And guide the movement with your eyes, not just with your spine. And then let's add a little bit of extension, so looking up at the ceiling. And then side bend left, inhale, look at the sky, exhale, side bend right. One more time, side bending through extension and then let's add flexion.
So come to your cat pose and side bend right, staying flexed, staying rounded, and side bend left. Notice how it's similar but different and that I'm not actually wagging my tail from side to side, it's a motion that's occurring in the waist area. Then let's put that together into a scrape the peanut butter. So if you imagine you're inside a jar of peanut butter and my belly is going to get the peanut butter at the bottom of the jar, but then I've got to go over to the side because there's some dark chocolate chunks that I want to make sure I also get with my spoon. And then over to the other side and back up.
So you're rounding your spine and then you side bend to the right, arch your spine, side bend left, rounding cat pose, side bend right, and then let's reverse. So go back to your cat, rounding your spine, side bend left, arch into your cow, and side bend right. One more time, exhale the flex, inhale side bend and arch. And then coming back to center, tuck your toes under, press back, and just get a little stretch to the bottoms of your feet and feel this activation through the shoulders, through the hands, pressing backwards. If that feels all right on your toes and your ankles, we can increase the challenge, progress by lifting the knees up.
The further you come forward, the more pressure there will be on your wrists, so you can modulate that pressure. You want to think about pushing the floor away the whole time. Let's do two more. Breathing in, exhale, last time breathing in, and exhale, lower the knees, tops of the feet, and now we're going to use our brains. Not that you weren't before, we're going to use our brain in a sort of cross patterning, challenging way.
So let's start by tucking the left toes under and the top of your right foot's on the mat. You'll round into your cat pose, bringing your right knee to your nose, and then lower your right knee and shin, arch, and lift your left knee. Let's do that same thing two more times. So cat pose, knee to nose, right toes pointed, and then cow pose, left toes tucked, left knee lifts. One more time.
Exhale, flex the spine, nose to knee, toes pointed, arch your spine, lift the knee, and inhale. Okay, we're going to switch. So right toes tucked under, top of the left foot's on the ground. This is going to come back later in class at the very end when we're standing up balancing. On your spine, exhale, left knee to your nose, toes pointed, and then lower the knee.
Toes are tucked on the right side, arch, lift your right knee up two more times. Exhale to round, and inhale to arch. Last time. Exhale to round, push the floor away. Inhale to arch.
Okay, this is really challenging. We're going to go back and forth, and we'll see how well I do. So let's go back to the other position. Left toes tucked under, top of the right foot on the ground. Same thing we did.
Round your spine, right toes pointed, nose to knee, arch your spine, lift the left knee up, and then we switch. Top of the left foot on the ground, right toes tucked, exhale, left knee to chest to nose, right knee lifts, and switch. Exhale to round, inhale to arch, switch, exhale to round, inhale to arch. Last time, exhale to round, and inhale to arch. And then come to heels to sit bones, and you can rest here in child's pose for a moment.
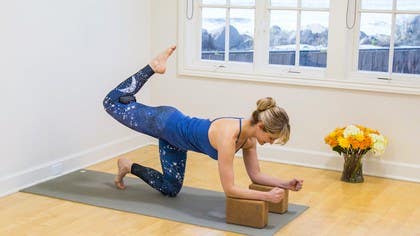
Rolling up from child's pose, or just lifting up from child's pose, we're going to need two blocks. So grab your blocks, and place them on the second level for your forearms. You also want to grab your yoga strap. I have mine rolled up, we're going to use it in what I call your knee pit, so between your calf and your thigh. So you could also use a rolled up towel, or a ball, just some sort of object that's going to keep a closed angle at the knee joint, and really work your hamstrings.
Once you're set up with your forearms on the blocks, if you have longer arms and hands than I do, you could always add a couple extra blocks here and here. And then tuck your left toes under. Take a breath in, find somewhat of a neutral spine. So we did Cat-Cow already. See if you can find the Goldilocks, or sort of halfway in between.
And let's start with hip extension. So lifting your thigh up as high as you can without collapsing, and then going out into external rotation, and forward towards your chest. My toes almost kind of grace the mat, so try pointing your toes. Inhale, big wide circle out to the side. Hip flexion.
We'll do one more in this direction. I can feel myself sinking. So this is a whole body exercise. Let's go the other way. My left hip is stabilizing, like crazy, even though it's not moving.
And so are my shoulders, because I really want to sink into gravity. All right, I think we did three going one direction, so this will be number three going the other direction. I hope you can see me shaking. I'm making fists for a reason. There's what's called the Sherrington's law of irradiation.
So when you need to tense and stiffen your whole body to create extra muscle force in one area, helps to make the fists. Let's do the other side. So take your strap or your object, you're going to place it in your sort of knee pit, so between the calf, and your thigh. Point your toe. I like to tuck this toe under for extra balance, but if you can do it this way, awesome.
Take your fists. Go ahead and stabilize and tense through the arms, through your core, through the hips, and we're trying not to move anything as we isolate this motion at the hip joint, at the coxal joint. So I'm pushing the ground away, squeezing that little belt to activate through the hamstrings, okay? A lot of times, for me, for many of us as well, I think, the hip position is really challenging. Your head is heavy, so you get to work those deep neck flexors as well.
Okay, I think that was three, not the best counter. I welcome grunting and scrunched up faces in my class because we do a lot of strength work. Okay, last one. I hope you're breathing with me and shaking as we warm up the hip in circumduction. All right, that deserves a child's pose for a little break, so come into a child's pose of your choice and notice your body, notice your breath.
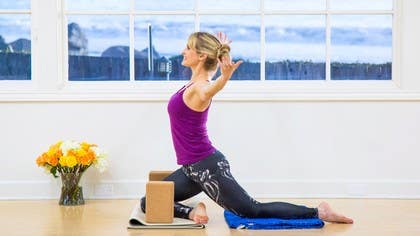
Start to roll up from child's pose, connecting your sitz bones to your heels. Let your arms be heavy, articulating one vertebra at a time as you stack yourself back up, noticing your body and your breath. Okay, you're going to need your two blocks and a blanket for this next exercise. We'll be in tall kneeling, so take your blanket and fold it in such a way that you can use it as something to engage your adductors, your inner thighs, and then you'll grab your yoga blocks. You can do toes tucked or tops of the feet on the mat.
We're going to click the bricks together, just like I think there was a video game called Tetris way back in the day, and hold the bricks overhead without arching your back. So this is going to look different for everybody. And then from here, grip the bricks. Try to maintain Tadasana in your spine, and then connect the bricks behind you. And you can see, I kind of connected them, but it's an exercise in proprioception, sensing where your body is in space, where the bricks are, and challenging your grip strength.
We don't do any gripping, actually, really, in yoga. It's a lot of pushing and no pulling. So if you were to do a pull up or a row or something like that to balance out all the pushing that we're doing in yoga, you would need some grip strength, so we're building that right here, right now. And I hope you're breathing. I'm going to give you a little bit more detailed cue on this next one.
So as you connect the bricks together behind your buttocks, I want you to retract the shoulder blades. So squeeze them together and extend the shoulders, lift the blocks up until you feel your triceps. And then one more time. Bricks connect overhead. Bricks connect behind your pelvis, and you lift.
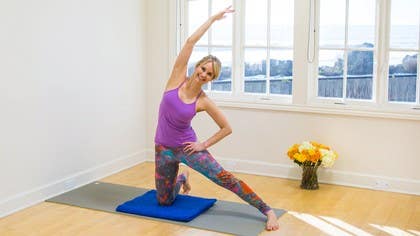
All right. Set the bricks down. Shake your hands out a little bit. And let's do a little bit of rotation. Let's hold the bricks straight out to the sides, again, working on that grip strength.
Take a breath in, lengthen, and as you exhale, you're going to let everything turn. So I'm turning my head, my shoulders, my ribs, and my pelvis, and then let everything turn to the left. As far as your head's concerned, what I like to do is my drishti, my gaze point, is going to be at the brick that is behind me. Oof. These bricks are heavy.
Think how easy warrior two will be. One more time, turning everything. Come back to center, take a little breather, give your arms a rest, sort of shake it out. Because we're going to do the next one where we isolate the rotation into the thorax. The thorax is just fancy talk for your ribcage.
So you have these two frontal hip points. They're going to stay pointing forward, and the turn is going to come from above. You want to be able to turn in all kinds of ways. So here we go. Pelvis stays steady, lengthen through the spine, and twist to the right.
Come back through center, lengthening through the spine, twist to the left, and come back through center. And notice if there's more work in your obliques, there definitely is for me. And a little more activity through your pelvis. Now neither one is good or bad, or right or wrong. You want to be able to do everything.
The more movement patterns you have, the more choices you have. Last one. This is steady, rotate to the left, and then come back center, and set the bricks down. And from here, let's come to rest in constructive rest position. So you can take your props off to the side.
Come to lie on your back with your knees bent, feet on the floor. Close your eyes, and just bringing awareness to your belly and your ribs. Noticing how to expand as you inhale. And as you exhale, let the weight of your body be absorbed by the floor. Feel the support beneath you.
Low breath in, 3D expansion, belly and ribs, and then exhaling. Let's slowly make our way up to seated. And the props you're going to need are two bricks, and either a strap or a band for your hands. I like the band because I like the resistance. The first bridge is a parallel bridge, and you have lots of options.
We're going to create some closed chain feedback. That's just fancy talk for giving your body something to feel into and to activate more muscles. So I'm going to place the brick, I guess you'd call it the wide, not the widest way, but the second widest way between my feet. And then this brick is going to go in that same width. You're welcome to do wider on both.
So make it work for you, everyone's body's different. If you don't like the bricks as well, don't use them. Okay, so coming onto your back, you want to have your feet pretty close to your sitz bones. So if your feet are far away, you might get some hamstring cramping. Not that I'm guaranteeing you won't here.
And then grab your strap or your loop. If you have a loop, you can pull apart, you can pull apart in a strap as well. Take a breath in and lift your pelvis up, bringing your arms overhead. Pause the top, arms stay on the floor. And then exhale, articulate through your spine, lowering down vertebra by vertebra.
And then arms come back up, take a breath in. We'll exhale as you lift, that's just a hinge lift. Arms to the floor, pull apart on the band and exhale your way down, articulating through the spine. One more time. Inhaling arms up, lift your pelvis, arms go back up and over.
This time hike your shoulders up to your ears, reach your knees over your toes, traction your spine as you exhale your way back down. Okay. We're going to switch the bricks and the position of our hips for the externally rotated bridge with tilts. So you just need one brick for this. It's going to go the skinny way between your feet.
This is kind of like a Baddha Konasana, or Supta Baddha Konasana. And we'll start with arms down by your sides. That's the easier version. Take a breath in. I want you to squeeze the brick.
So if I flop my legs out to the side, my big toes aren't actually touching, I want all ten toes to suction into the brick, activate all the muscles through your hips rather than a passive stretch. Anchor the arms through the floor and let's articulate up through the spine into your externally rotated bridge. From here, we're going to tilt from side to side. So if you can imagine there's a cup of water on the inside of each knee, you want to spill the water while still gripping the brick. So it's not just, you know, this thing here, you're actually going a little bit further, which is why it's nice to have your arms the first round.
Then take the strap, pull it apart. This time you don't have the support of your shoulders or your arms, it's a little more challenging. Otherwise, same exercise. Notice which way, it's easier in which way, it's harder to come back up. Going down is gravity.
Last one, each side. Feel the connection from your obliques into the hip socket, through the knees, all the way down your shins into your feet, roll your pelvis down, set the strap off to the side, bring the soles of your feet to the ground and just pause for a moment. Noticing your body and noticing your breath. Okay, we've got one more, third bridge variation. This is the internally rotated bridge.
You just need one block. You definitely want your arms on the floor. The block goes between your thighs and knees and you take your feet out wide so that your femurs, your thigh bones, your hips are internally rotated, the opposite of what we just did. Arms come down by your sides. Go ahead and just lift up into your internally rotated bridge and anchor a lot through your arms.
We're going to do passive range lift off of the foot in internal rotation. The first ones usually don't look so nice. So give the block a nice squeeze and try to kick the foot out to the side. So much stronger in my internal rotators on the right than on the left. Definitely exhale.
And because in yoga we do so much external rotation of the hip, in order to balance it out and have a sustainable practice, I highly recommend you adding some internal rotation strength work into your practice. One more time, pelvis-based study, internally rotate, lower down and rest. Close your eyes if that feels okay for you. Take a deep breath in through the nose, sigh it out through your mouth. And then let's remove the brick and make our way back up to seated.
So we're going to recheck the side lying dancer pose with the hollow body holds. And notice how it's likely going to feel a lot easier. So you want to take your props and just move them out of the way off to the side so that you have room to roll. And let's start on our left side. So if you remember, you want to bring your legs forward just to find your balance on the first round.
Take your right hand and grab the top of your right foot. If you're really feeling ambitious, externally rotate and grab the inside of your ankle. You're going to rest your head on your arm and just enjoy a little bit of a thigh quad stretch. And then let's make it a little more like the dancer pose lying on our side. So you can bring your left arm forward, karate chopping into the ground.
Find the stabilization through the bottom hip and shoulder and then add a little kickback with an arch. And there's your side lying dancer pose. Then we'll transition slowly, getting your mid-lying connections. There's your hollow body hold. The further your arms are behind you, the harder it is.
The lower your legs are, the harder it is. Then initiate from your obliques, right arm comes forward, left hand grabs either top of the foot or inside. You can slide your foot forward to find your balance and then once you feel balanced, arch. All right. So join me.
Let's make this a little more fluid and the tempo will rise. Now that you understand the movements, make it your own and allow it to flow, observing which direction is easier to roll onto without judging it. Maybe one side you need the bottom leg forward more than on the other side. Last one. Switching your back, rounding, hollowing and rest.
From here we're going to make our way up to stand. For this next section of class, you're going to need a strap and a block. I'm going to use the stretchy loop band but you can definitely use a regular yoga strap. The strap, whichever one you choose, is going to go around your thighs, above your knees and the block is for between your ankles. I have the block this width and we're going to start with just some simple calf raises because I want you to bring awareness to your arches for something we're going to do later on.
Your arms can really be anywhere here. So I'll do hands on my hips. Spread your toes really wide, hug the brick but also use the resistance and feedback of the strap. With your knees straight, go straight up into your calf raise and then halfway down. It's straight up, it's hard, it's a lot easier to go forward and up and back down.
Use the connection of your medial malleoli, that's just fancy talk for your inner ankle bones to pinhole into the block and activate through your adductors. Go all the way down and then all the way up to your highest, highest, highest point and then we'll do some quick ones. So halfway down, all the way up, halfway down, all the way up. You need this for gait which is just a fancy term for walking. Every time you push off when you walk, you have to have this action happening at your metatarsophalangeal joint, just the MTP joint, the ball of your foot.
So make sure if you have shoes that are really stiff and don't let you do that, that you get rid of those shoes. All right, then the next part we're going to move into is some chair pose calf raises. So grab another strap or a block or a blanket, just anything to hold overhead and if holding something overhead is too much, just, you know, you don't need to do it. If you're holding something, pull apart, spread your toes and then come into your chair pose. From here we're going to add the calf raise.
So grip the brick with your inner ankle bone, lift up and lower down. Let's go for five more of those. So anchoring through the base of your big toe. What generally happens is you roll to the outer edges of the foot. All right, I think that was two and this is three.
And look down at your feet, just check in, see what's happening. There's four. And you can bring your head in line with your spine and there's five. Lower the heels, come to stand, rest your arms for just a moment, close your eyes. Notice your breath and your body and how perhaps your heart rate quickened a little bit.
For the last variation, this is a single leg squat or single leg chair pose. So I'm going to get rid of the blanket, you can bring your hands to your hips or wherever it feels comfortable, I'm going to do hands to my hips. Come into your chair pose, your ukutasana, spread your toes and then shift your body weight over into the left foot and bring your right heel to your buttock. You can imagine that strap is right there in your knee pit. And then from here you're going to go down and up and you can watch me wobble, actually take your arms out to the sides, use them like antennas to help you balance.
And use the strap, pull apart on the strap to kick in the gluteus medius, your lateral hip stabilizers. That's just fancy talk for your side hiney. A lot of my clients come in and they say, can we please work on my side hiney today? Not for aesthetic reasons because they just want to walk without their cane. And so that's what we do.
And it helps. Okay. Take a little breather, other side. Hands anywhere you like. I'm finding that arms out to the side is helping me with balance.
Come into ukutasana, shift your body weight over. Left heel to left sitz bone, down and up. Now the range of motion is optional, so you could keep it really small, that might be a great place to start, or you could go way far down and all the way up. I'm doing what I can today to just not fall over. So that's why I'm doing the range I'm doing.
And please follow suit. Okay. I did not count on the other side, but I'm thinking this is our last rep because I'm tired. Feel free to do more if you want. And then come on up to stand, take a breath in, and let's ragdoll rolling down.
So chin to chest, round your spine. Exhale through the mouth, pause at the bottom, you can shake it out a little bit. Take a breath in through your nose, and sigh it out through your mouth. And then inhale, bend your knees. As you exhale, push the floor away, rounding your spine, tucking your tail, articulating each vertebra as if you could one at a time, stacking your head over your ribs and your ribs over your pelvis.
Then let's take the loop band off and move the block to the side. Then grab your blanket. I'm going to keep the loop, but take your blanket and fold it, kind of roll it up so that you have support for your forehead and your nose is in front of it so that you can breathe. And come onto your belly and loop the strap around your ankles. Bring your forehead onto the blanket and take your arms out to the sides, thumbs point up or backwards.
The more external rotation you can get, the better. Take a breath in. As you exhale, I want you to lift your arms up as high as you can, bring your shoulder blades together. And then bring your arms up by your ears, literally reach forward and lift up as high as you can. And then back out to the sides and back up towards your ears.
Back out to the sides. Pause here, pull apart on the band and then lift with your legs straight. Bring your arms back up by your ears, lifting off, and then bend your knees. Thighs are hovering, pubic bones anchored, arms out to the side, lifting your chest. And pause here for a prone double dancer, almost, but not quite, but working what you'll need to work actively through the arms, through the legs, through the spine, and then take a break.
Get rid of your strap and come into sphinx pose. So your elbows are underneath your shoulders, your forearms are parallel. Go ahead and bend your right knee, dorsiflex the ankle, so flat shoe. Anchor through the pubic bone, lift your belly up as you push down through the forearms. Try not to let your pelvis rock or your ribcage shift so everything stays still and you reach forward and then back down.
Let's switch sides, bending the left knee, flexed ankle, stabilize, nothing moves. Reach your left arm forward and back down. Back to the first side, we'll add on. Bend the right knee, push into the ground so you protract into pressure shoulder blades. Pull your belly in and up, so core stabilization, reach forward, and then out to the side.
Try not to touch your inner ankle here. Slide your left form a little further out, and here's your open chain dancer pose. Much harder than closed chain. Here's the closed chain. And then release, let's do the other side.
So my forearms are a little bit further out to start. I'm going to push the ground away, slight little lift of the belly, anchor through the pubic bone, tops of the feet, press into the ground, glutes are strong, reach forward, reach out to the side, bend your knee, go for your open chain. So it's like, look, I'm not touching, it's so much harder. And then use the closed chain feedback to push hand into ankle, ankle into hand, lifting the thigh just a little bit, not much. You won't be able to lift it much, I don't think.
And then release and rest in crocodile. And let's make our way to standing. So we don't need the strap or the blankets, you can set those off to the side, but you do need your two bricks. And what you want to do with the bricks is set them up in such a way where there's a little bit of space in between, that's going to be for the arch of your foot. Let's start with our left foot.
And this is different for everybody. So I want the ball of my foot and toes on the front brick and my heel on the back brick. And whatever amount of space you feel comfortable with for you in between. Okay, let's start by just testing your balance. You could always do this with a hand at the wall.
And then bring your right knee to your chest. So find your passive range of motion in hip flexion. So I'm using my biceps to get this shape. Now let's see if I can own this shape, meaning my active range of motion. Can I hold it?
From here, let's make it fun. So you'll internally rotate and come into your cat, your round back, and then externally rotate at the shoulders, flex the ankle, and here's your cow, your arch. So exhale, think of lifting the inner arch of your left foot up. There's air under there, and then find some air beneath your wings as you arch. And we'll switch sides.
This is my interpretation of dancer pose, the way I see it. We're going to do the traditional one though, don't worry. Right foot on the brick, ball and toes on the front, heel on the back, left knee to chest. Use your arms to find your passive range of motion. Go ahead and point, plantar flex, and find your glutes, these guys, to help.
Here's your passive range. What's your active range? Internally rotate, round your spine, thumbs point down, think ninja karate kid, and then flip the palms, arch, flex the ankle, cow. So let's keep going, exhaling to point, and internally rotate, inhale, wobble, wobble, and arch. Okay, we only did two on the other side, so there's our two.
Take a moment to just stand and feel your feet connected to the blocks, and your arches lifting up. And then let's step off the bricks, you can place them off to the side for dancer pose. Traditional natarajas, I think I said that right. So shifting your body weight over into your left foot, let's find our active range of motion in knee flexion. So remember at the beginning, if you get a little cramped, that's okay, there's that imaginary belt between your calf and your thigh.
And then reach, sorry, reach your right arm out to the side, there's your external rotation, thumbs up, and let's do left arm to the ceiling. Then do arch and lift your back foot, but try not to grab, find your open chain dancer pose, your active, I own this range of motion, dancer pose, whoo, wobble, wobble, and then grab something, ay, ay, ay, and push your hand into your ankle, your ankle into your hand, shakey, shakey, shakey, shake, whoo, that's all I got, let's switch sides. All right, take a moment here with your mudra, check in, and then shift your body weight over into the right foot. Let's go right arm to the ceiling, left arm out to the side, left thumb is up, active range of motion in your quad stretch, which will feel like a hamstring cramp. And then you start to lift your chest, and torso goes forward.
Find that space, that active open kinetic chain dancer pose, own the range of motion, feel the strength there, close the chain, and then slowly release. Take a moment again, because I know I wasn't breathing, to breathe, feel your breath, notice your body. All right, we're going to make our way onto our backs, coming into constructive rest position. So that just means you'll have your knees bent with your feet on the floor, and pause for a moment, feel free to check in with your breath, and feel how you're supported by the floor. Let's go ahead and separate your feet so they're max width distance apart, and bring your arms overhead to a V shape.
Let your knees drop over to the right, and then once you're here, I want you to push into the floor with the backs of your arms, the back of your head, inside of the left foot, outside of the right foot and outer hip, and engage your left glutes so that you get this nice opening and stretch through the front left side body. And then exhale, windshield wiper over to the other side, let's make it active. So feel the posterior kinetic chain, the engagement, back of the hands, back of the arms, back of the head. You can even spread your toes, lift your chest, reach your right knee away from the crown of your head as you engage your right glutes. And then switch, now that you know what we're doing, you can inhale, exhale to activate, and then inhale to transition.
Last time, exhale to activate. Inhale to transition. And then making your way into shavasana, letting your legs go long on the floor, palms out to the side facing up. Close your eyes, and if this position doesn't feel right for you, find any comfortable position for shavasana. So you might have your knees bent, hands on your body.
Once you've picked your position, take a breath in, and as you exhale, notice all the parts of your body that are connected to the floor. And give over the weight of your body to the ground. Good. On your next breath in, make it slightly longer and slower. Notice the pause when your lungs are filled with breath and then exhale.
At the end of the exhale, noticing the natural pause before you inhale. Allowing the slower breaths in, the pause and the longer breath out, followed by the pause to bring you back to your body. And perhaps noticing any sounds inside of you, the room or outside, begin to wiggle your toes, your fingers, stretch your arms overhead, reach, inhale, and then let it go. Change your knees and give yourself a big hug. Then choose a side to roll onto you.
And then come up to any comfortable seated position. Open your eyes, bring your hands to your heart center. Thank you for practicing with me today.
Moving Smart: Trina Altman
Mention
 |
Trina Altman (Teacher) |
 |
Donna M |
|
|
Gabrielle H |
|
|
Jennifer D |
 |
Kate M |
 |
Christel B |
 |
Ruth Henriquez Lyon |
 |
Matthew |
 |
Silke S |
 |
Becky B |
 |
Lauri K |
Comments


You need to be a subscriber to post a comment.
Please Log In or Create an Account to start your free trial.
