Description
About This Video
Transcript
Read Full Transcript
Hi again. Welcome back. This practice is a seated stretch for the shoulders and also the hips. So we'll be standing up, it's for one of those days when you're feeling tired or maybe it's a warm-up for your sport or it's a cool-down from your sport. And it's actually also my airplane go-to practice, especially the shoulder stretches for when I have a small contained area and then I can still work to open up the top of my chest because so much of what we do is forward flexing.
And most people's resting length of their pectorals, probably you could resonate with this, are really short. So that's what we're gonna get into today. So if I can three seats sometimes on an airplane, I can do the seated work, some of it as well. 'Cause I'm short. You're always in first class when you're short.
So here we go. I'm sitting on a bolster. You might wanna get something to sit on, and I'm sitting in a hero's pose, which is feet just outside of the hips. And it might be useful to have a thick block and a blanket if you're a little stickier in the hips for this practice so you can get your arsenal of props ready. So however you're sitting also, if this is not good for your knees, go to cross-legged, no problem.
Kick one leg out, sit like this. But I like this flexion of the knee 'cause it's nice for pulling, a little bit more space and length into the fascia that goes over top of the knee. And when I come out of it, there's a nice flush. So that's the purpose. So we'll interlock our hands in front.
Press them forwards. See if you can keep the pinky finger interlock a little bit snug. And then reach your arms up and over your head. I like to bend my elbows here and descend the inner shoulder and then press up, and try not to turn into a back bend here. If it feels good, you can do it a little bit, but you're gonna be using your spine instead of your shoulders, so just for pure shoulder opening, keep the front ribs in and reach up.
Sometimes it's nice to sway a little bit, see if you can keep that pinky finger webbing nice and snug. Exhale, take your hands down. And switch the lacing of your fingers. Tighten it up a little bit through the pinky finger and reach up, inhale, exhale, bend. And then re-straighten, descending the base of the neck down and then ascending the outer part of your shoulders.
It's also nice to wrap your outer shoulders forwards and bring your front ribs in. Let's take a nice deep breath there. Sometimes it feels good for people to tuck the chin if there's lots of bunchiness at the base of the neck or stickiness there. And then release, and exhale, take a few seconds to let your hands come down by your sides. We'll take the right arm up and behind the head.
I'm just gonna turn so that you can see this, but you can stay in the same position. So take the right arm up and behind the head, and either hold onto it with your left hand pulling it back a bit, again, minimizing the back-bend. Some people can turn the thumb down, reach up the back and you can hold onto closing, you can reach, or if it's available and you can do a little wiggle, you can find the fingertips there. Nice big inhale. Exhale, dropping the tailbone, and then releasing.
And try the other side, you can do a few shoulder rolls here. And then the left arm comes up and back, right arm comes up, you can tuck the chin a bit to make space. Wrap that outer left armpit forwards, bring the ribs in and down. Feel like your ribs are like, just like blinds dropping down. Right arm out to the side, the thumb can turn down, wiggle it up the back.
You can reach and hold on, or hold the fingers. Look forwards if you can. Breathe. Take a nice deep breath into the collar bones, so the breath goes all the way up into the shoulders as well. And then release the arms, roll your shoulders up and around a few times.
And then we'll take our arms behind the back, interlock the fingers. Reach the arms back a bit without overly popping your ribs forwards. So as the ribs come down and it's a cue that I use a lot, but it helps to open and release the top of the psoas muscle, one of the deeper hip flexors. It keep the spine there happy. Then swing the arms over onto one hip, squeeze the elbows together, and drag the shoulder blades and the elbows a little bit down, and it might be nice to sort of roll your head towards your right shoulder, and you can move your chin up.
And you can roll it down, and just find those little sweet spots in the neck. And then we'll release and swing it over to the other side. Squeeze the elbows a little bit together and drag your shoulder blades down, playing with a little bit of movement in the neck, just easing into that. May feel good to sort of move around a bit nice and slow easing up the tension through the base of the neck. You can move the chin up over to the side.
And then release that. Release your shoulders, roll. And then last one is to take your arms behind you, either hold onto opposite elbows or if you can manage to get the pinky fingers together at your back, ring fingers, middle fingers, index fingers, and thumb. And you're kinda slumping to get into that. And then once you find the press, roll your shoulders up and back a little bit.
And maybe the thumbs come together. And I'm just gonna turn around here. Once you've seen that. And take a few breaths into that. Think about collar bones, the top of the chest, are like spinning upwards and the lower ribs are dropping down.
So you feel that lift and drop of your rib case so that it gets nice and long. Lots of space for your lungs. And then we'll release that. And we're gonna come onto our hands and our knees. So you've probably been in that position enough that it'll feel good to come onto your hands and your knees and then walk one leg back, open the back of the knee, and then the other.
And also the back of the ankle, that feels really good. Stretching through that opening of the back of knee and letting at blood flush through the legs. And we'll come into the rest a little bit, so we're gonna take the backs of the hands down towards the floor, curl the fingers in towards the center of the palm, and then bend the elbows and start to straighten your arms, but see if you can take your knuckles up off of the floor and start to straighten your arms, maybe a little bit of a rounding in your back. Just peel those knuckles up towards your face and start to straighten the arms. For a lot of people the arms won't go straight here.
And then we'll release that. Good. And then we're gonna sit down and flip the fingers and place them on the floor starting to come down through the root of the thumb and the root of the pinky finger, and maybe even bend the elbows a little bit. Press every single finger pad into the floor, even the pinky finger. So you can ease some of that tightness out of the forearms.
And then we'll release that. Hands and knees, inhale arch, and exhale rounding, bringing the belly in. Inhale arch, and exhale and round. Then come back to sit back towards your heels, and here it'll be useful to have a block between your hands. So holding the block in between the hands, little bit of a light pressure.
I'm gonna walk my knees back, pin the elbows down, and let your head come down towards the floor. And I'm really gonna pressurize through the outer tip of the elbows, so the tip of the elbow presses down, and from that place, I'm gonna reach my hips back, letting the belly get nice and long. Then it might feel interesting to lift up through the block and it feels like I need to walk back a little bit here and bring the block towards the back of the skull. It's as if you had eyes in your armpits. Think about those eyes turning to face each other so that they're not turning away from each other, the outer armpit is wrapping down towards the floor and then pulling the spine through the leaning back of the hips into more length.
With your forehead on the floor, you can think about emptying, open your mind, and pouring anything that's in your mind that's sticky to you right now, that's got ahold of you. Pour that into the earth. Let that go. Walk our knees in. And come to a seat.
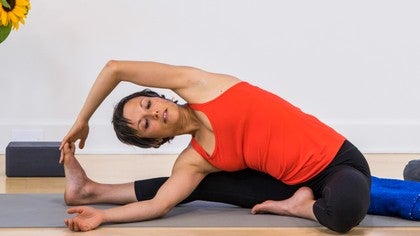
So I'm gonna shift my legs around. This seat, most of you know, if your pelvis is rolling backwards in a seat, that it's useful to put some height underneath it. So we're gonna be here for a little while, so I'm going to take the blanket, place it underneath, so if I can feel my sit bones, I wanna have the front edges of the sit bones weighted, so it's almost like you're in a little downwards slope so that your belly is not contracted like that. So you feel your belly release. Left leg is forwards, and I'm gonna bring my right leg in, seal the knee joint and open the right leg out to the side like this.
This posture is called janusirsasana. Hands on the pelvis, tip the pelvis forwards. For some of us maybe it means bending the knee a little bit, so tip the pelvis forwards so it feels like the lower spine is coming in, the navel is stretching towards the knee, and then I'm gonna support myself with my hands. And this knee doesn't have to be really wide, it can actually be coming in at less of a right angle. Find the space for you, for some people, you'll want to widen time a lot more if you feel like that's your sweet spot.
I'm gonna walk in here. And then so as you forward fold and you tip that pelvis forwards, and once you come to the place where you're, it's almost like you have these crane lines that I feel like I've hit the edge of it, then you can start to round from the top of the pelvis all the way through to the head, and you can get that little bit more of a stretch in the back of the spine and also the connective tissue that holds the spine, which is called the dura. My left foot is a little bit awake, but the quality of the posture is relaxed. I'm gonna press to lift back up, and then open up this right knee a little bit more, so i'm actually gonna shift my prop so that now my angle is a little bit wider. I'm gonna take my left hand on the inside of the leg, start to side-bend over, place my right hand on my right hip and push the right hip away a little bit so I feel la big opening through the right side of my lower back.
So pushing your thigh away. Leaning in. And if your elbow can come down to the floor, you can support your head, and one variation that I like is taking the arm up, out and over, and bending that top arm and just letting it rest on top of your head. For some people, it'll feel like maybe the shoulder can come a little bit lower down, and you can find the foot. Wherever you are, open up your breath into your side, into the lower back, into the organs on the right side giving a lot of space.
And then pull all the way up and then we're gonna take a left arm across our right hand behind and twist. So when you're twisting, try and not to round in the lumbar. And then we're gonna unwind that twist. And I've got my bolster here, which I'm gonna set behind me. I'm gonna shift my bum off of the prop, and lower myself down so that I'm in this relaxed opening through the groins, in the shape.
And as you can see, I'm doing a little circular movement with all of these postures so you don't have to move the seat too much. It's like a janusirsasana mandala. So allowing some space to through the groins here, really letting the weight of the head go. And then I'm gonna push myself back up. It might be the time to put my hips back on top of the prop.
Then I'm gonna come across here, so right arm comes across to the outside of the leg, left hand comes behind and twist. And I can think about my right shoulder blade moving away from the spine, and my left shoulder blade moving closer to the spine as I twist. Some people might fee like it's interesting to even come a bit lower, hook the outside of the foot and keep twisting. Then we'll come on up, let this right leg go. Roll down onto the back, and just between sides, I'm just gonna roll my knees in a little floating twist.
I'm drawing a big smile on the earth with my knees. Even letting the legs stretch out a little bit. That's a nice tugging on the fascia in the lower back, and a nice rotation through the spine. So depending on how you like to get up, you can roll over to the side, or roll right up with a little rocking and rolling. And we'll do that sequence on the other side.
So prop, seal the knee joint, roll open from the hip, tip the pelvis forwards, lower back is just gently swooping in towards the belly. Come forwards until you feel like you hit that line of extension, the extension through the spine. It kinda feel feels like it's gonna round and then from the lower spine, do a little tiny rounding of articulation through every single vertebrae. And it's almost like you're, like you know when a fern is filled with water and it bends, it's not collapsed, it's just hanging in space there but the water within it, the aliveness in it keeps the angle of it nice and smooth. If it dies, it kind of collapses and breaks and it's brittle.
So think about that with your spine, like you're going from the base all the way up and then come on up, we're gonna turn, make this angle a little bit wider. Gonna keep my bolster back there to get ready and I'm gonna slide the right hand down on the inside of the leg, push the hip away. This posture never gets boring. Opening the side, breathing room into the side, into the back. Sometimes the back can get really tight from just like sitting in chairs and slumping, so one really great back repair tip is not to use the back of your chair, so constantly working to sit on the front edges of your sit bones, so you can come a little bit lower here, and not slumping into the back of the couch or the chair.
So if you have back pain, that might be useful. So coming wherever it feels like you're getting a really nice sensation of stretch, it's like your whole side, all of the fibers are starting to open up. Sometimes I like to wobble forward and back because it's almost a feeling of like loosening the tissue instead of just holding it tight and clenching your jaw. Can you have a little bit of liquidity to the posture? Like there's no end of the shape.
And then we'll come all the way up. I'm gonna turn and do a little twist here. Lifting from the low back, mid back, upper back. The right shoulder blade is moving away from the spine and the left shoulder blade is moving into the spine. And then I'm gonna take this really nice, I'm gonna move the prop up from underneath the bum, take this really nice, just kind of messy lie down (laughs).
And just like let your body totally relax here. Take the time to let your belly go, there's this sweet opening across the front of the chest, you could do this cactus arm thing. Just a short visit here. And then you can place your hands down. I'm gonna push myself back up.
I might wanna come back onto the prop. And I'm gonna twist across to the outside of the right leg. My right leg can come behind. Using the shoulder blades as you twist from the lower belly all the way up to the top. So it's like you're climbing a marble staircase or a spiral staircase, like all the way up to the top from the base, and then bring your left shoulder blade away from the spine, and bring your right shoulder blade into the spine, and try not to over-rotate from your neck.
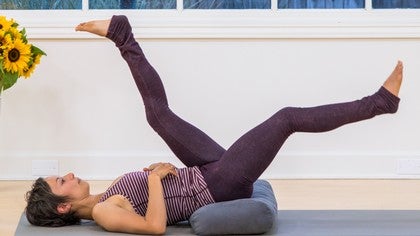
For some people it might feel interesting to come a little bit lower, hold the outside of the foot with the palm flipped and twist. And then we're gonna come on up, let the legs go, roll on down arms up over the head and just let your knees fall to one side and then the other. Nice, let your legs come up into the air, bend the knees. Bend the knees until you feel like you're not holding in your lower back. Just take a few breaths there.
Might fee good to take your hands and your legs and just like wiggle the tissue. Often I think like in postures, we're stretching sometimes when joint can come from the other, and that stretch is useful and then also this wiggling and wobbling in your practice, and it's loosening all of the fibers. If you've ever had a really tight, really thin necklace, you just pull the two edges apart, it usually gets more knotted, but if you wiggle it, then it just loosens. Or maybe you've had that experience with a climbing rope as well. Okay, so we're gonna place our feet down and take a short rest here.
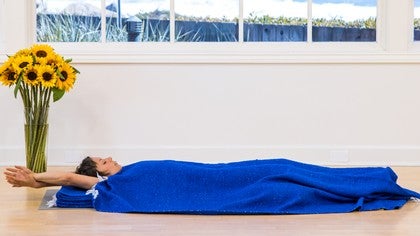
So it might be nice to lengthen your legs, you have all these props. You could put a bolster under your knees, blanket under your head. In fact I'm gonna do that 'cause I like the feeling of my ribs dropping down into the body, and the back of my rib cage can just spread open and release here. So I'm gonna rest, close the eyes, and let's practice a really short meditation lying down, just watching the breath. So with the eyes closed, perhaps it's easier to focus on the breath.
And bring your awareness to the tip of your nostrils, feel the air coming in through the inner nostril, the opening of the nostril and it's a little bit cooler on the way in, and it's a little bit warmer on the way out. Feeling the breath there. Mindfulness of breathing, in is a little bit cooler, and that out breath is a little bit warmer. You can fine-tune that to thinking about the in-breaths sliding across the inner part of the nostril, and the out-breath sliding out on the outer part of the nostril. On the in breath, feel your center, on the out breath, expand into your surroundings.
And let all the thoughts be in the background. So in the foreground is the breath, tethering the attention to that easy fluid natural breath. Might feel good to stay here for a bit longer. And always let yourself luxuriate in shavasana for as long as you'd like, as long as you have the time for. But if you're ready, you can stretch gently.
Roll over onto one side. And however you do come up to sitting. Thank you so much for sharing your yoga practice with me today. I hope to practice with you again soon. Namaste.
Yoga for Athletes: Recovery Practices
Comments
Thanks for posting a great practice. I'm on the recovery side of supraspinatus tendonitis ( I just learned that terminology the other day so I had to us it
 I'm really looking forward to pain free, flexible shoulders. I've been working with Kira Sloane's neck and shoulder practice, which has really helped. Now I can do one practice in the morning and another, different practice later in the day. Anyhow, great practice.
 and the lying onto the back in this pose. Silke
You need to be a subscriber to post a comment.
Please Log In or Create an Account to start your free trial.
