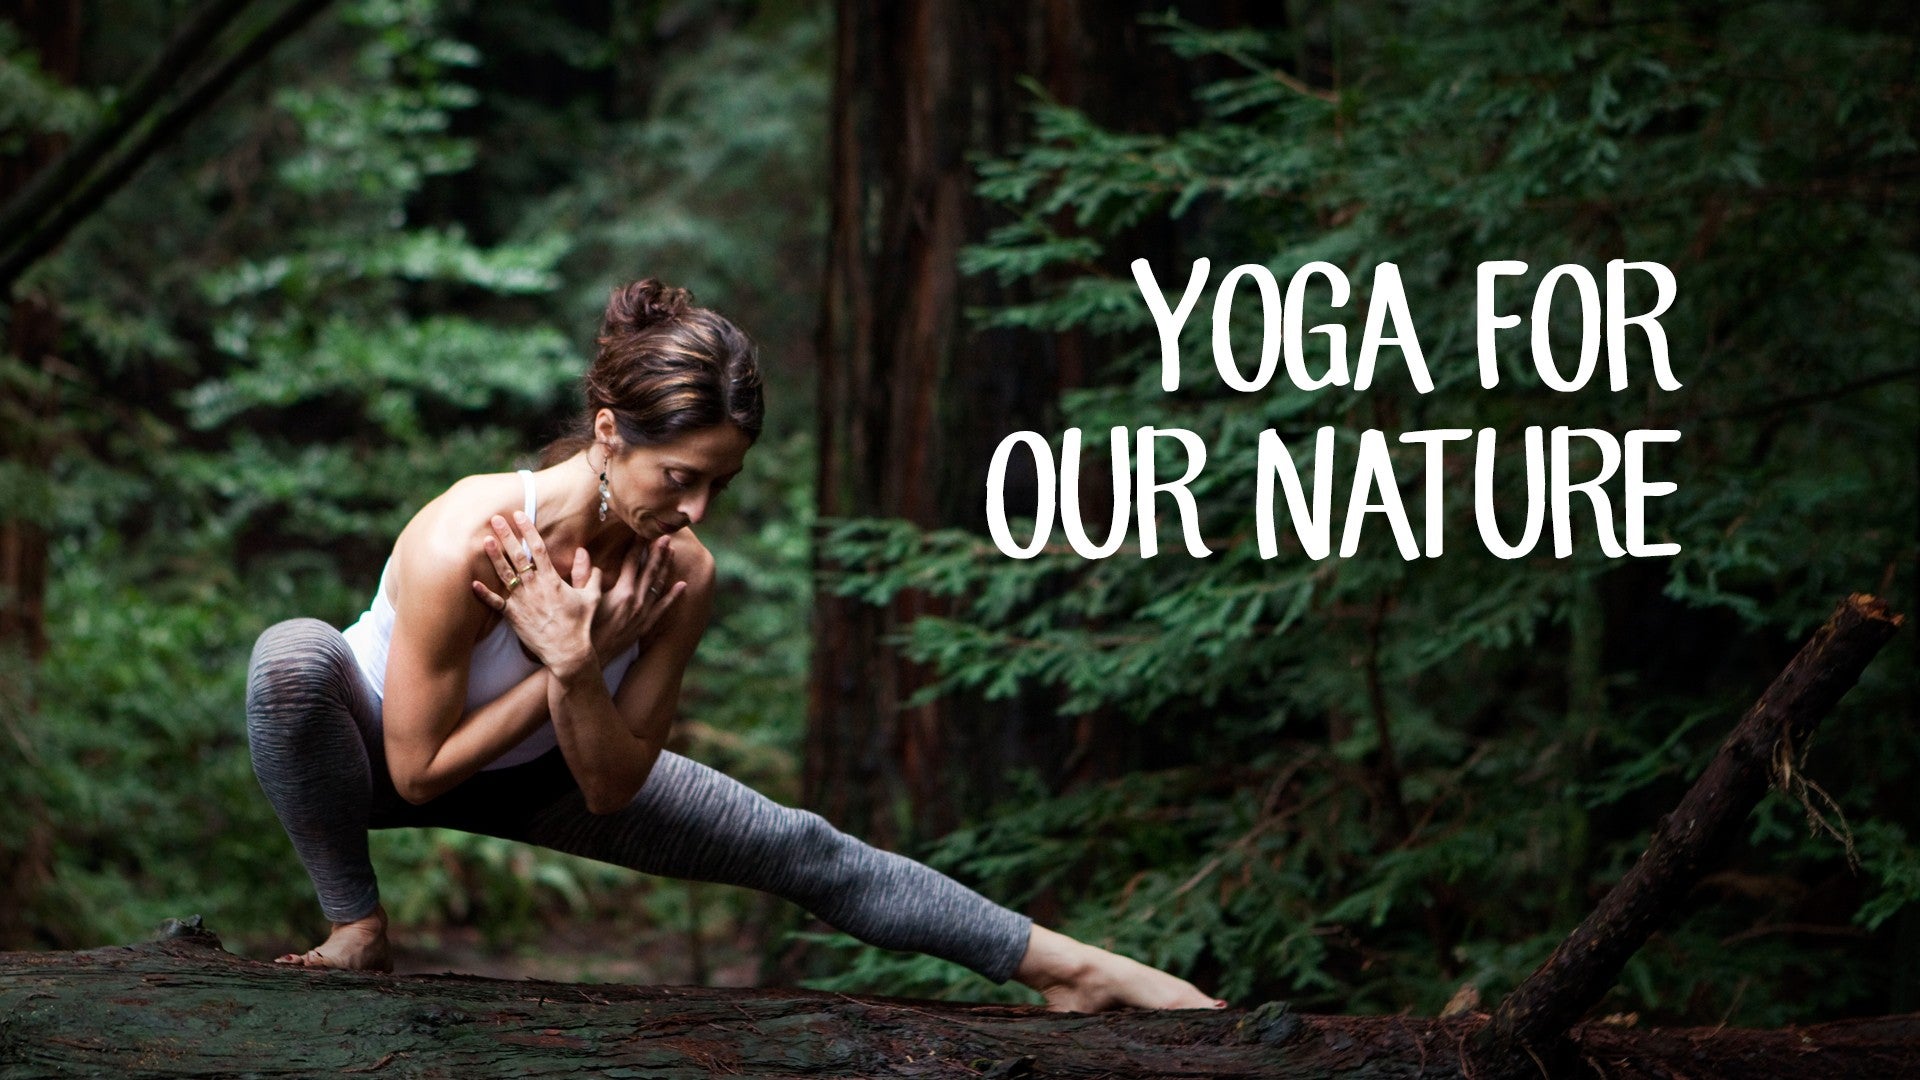
Description
About This Video
Transcript
Read Full Transcript
(waves splashing) Hello, and welcome back. This practice is a tridoshic, all around balancing practice. We've got the wall supports and lots of props to help stabilize the vata constitution. We've got some alignment techniques done in a noncompetitive way to help balance the pitta constitution. And we've got lots of standing core invigorating poses to help uplift that kalpa energy.
And I'd say this would be a practice that would be great to drop into all year round, pretty much anytime of the day would be appropriate to use a practice like this. So, for our balancing practice, we need a wall space. We need two blocks today, a strap, and also a bolster, and a blanket for maybe some cushion for your knees. So, when you're ready and you've got your props, find your wall space and we're gonna actually step right up into the wall space with your feet about hip distance apart. When you're ready, I'm gonna have you walk your hands up the wall and allow yourself to press into the wall with your palms.
And if you feel comfortable, let your forehead come in contact with the wall. And just as a grounding moment and gesture, just to close your eyes if you feel comfortable. And just stretch up through the tips of your fingers, while activating the legs, pressing down into your feet. And just allowing the breath to start to open through the longer inhalations in the nose. And feeling the longer exhale through the nose while your forehead perhaps rests against the cool wall.
A few more feeling the forehead on the wall, deep breath coming in through the nose. Grounding force moving down through the legs into your feet. And as you notice, you get comfortable with your breath, just notice there's a possibility of letting your fingertips inch up a little bit towards the ceiling. Allow your shoulder blades to rise as the arms and hands walk up the wall. This can be a nice pose when we've had a really busy, maybe overwhelming day or feel anxious, just to let our eyes close and feel the coolness of the wall with your forehead.
We'll start to bring a little bit more wakeful energy into the practice by maybe stepping back if you need to to allow your heels to come up now and walk your hands up a little bit higher. So, see if you can imagine your hands are like on a Velcro patch up here on the wall. Try to keep your hands that high as you slowly drop down through your heels and try to resist lowering the hands. So, you're getting a real long stretch through your back body. We'll try that again, lift your heels, walk your hands up the wall, try to keep them up that high as you slowly drop your heels.
Of course, the hands will come down a little bit, but try to keep them as high as you can. Okay, one more time coming up, stretching the back body, slowly, slowly sinking your heels down towards the floor. Now, I'm gonna walk the hands down towards the line of the chest, and then step away from the wall. And we're gonna turn so that your right hip, your right leg is near the wall, but maybe about a foot distance away from the wall. I'll have you walk your right hand up the wall, and this would be maybe the 12 o'clock position on a clock.
And then take your left hand in front of the stomach area to keep your stomach and your ribs centered over your hips. And I'd like you to look straight ahead wherever you are in your room. So, this is about good posture. And then allow your hand to walk back maybe to the one o'clock position on a clock, and then press the palm into the wall without letting your ribs push forward in space. So, feel like you're reaching down through your legs, standing up tall through your spine.
And then maybe we walk the hand back to that two o'clock position on a clock. And maybe around here, we start to feel a little more sensation through your inner arm, your biceps, into your chest, the pectoral muscles. And see if you can stand again nice and tall, look straight ahead with your eyes open, big breath in. And then we usually go into a little more intense sensations when we walk between that two and three o'clock position if this was a clock. Press into the wall and then turn your shoulders straight ahead, hips are squared in the same direction as your feet.
If it gets a little bit too much, you always are welcome to move your feet a little more away from the wall, especially if you feel like you're turning your chest to the wall. Just simply step your feet farther out. And maybe about now, you're feeling again, some of these muscles stretching, widening, lengthening from your chest into your inner arm. Take another breath here. And then we can let the hand slowly walk down that clock, maybe a four o'clock position, five o'clock position, and then slowly release.
And just allow your arms and shoulders to loosen up a little bit here in this way. All right, so, I'm gonna turn my back to you, so if we can stand now the new way with your left hip, left side of the body facing the wall, and walk that left hand up to that 12 o'clock position. And reach up as tall as you can, right hand goes in front of your stomach area, just so you're aware of not pushing the ribs out in front of you as you walk your hand backwards. So, you're going up as high as you can, and then walk back, let's say now to the 11 o'clock position on a clock. Stay strong in your legs as you take a big breath in.
And maybe there's not a lot of sensation in that region, so we might walk back toward that 10 o'clock position on a clock. And noticing that the ribs are wanting to turn, or shoulders are wanting to turn to the wall. Try to resist that. Firm your legs, breathe from your chest out to your inner arm to your palm. And then as you consider wondering down to the nine o'clock position.
If you need to, scoot your feet a little bit away from the wall, so you can keep the straightness through the left arm, and press into the wall with your palm. Big breath in, big breath out. And then as we come out of that shape, we'll still be mindful of walking down to that eight o'clock position, not rushing, seven o'clock position, and then we're down to the six. And then as you come forward to face the wall, you can relax your shoulders again here. So, now with your hands stretch out to the wall about shoulder height, and we'll come into a simple downward dog variation.
With your feet hip distance apart, press into the wall with your hands, and then walk your feet back so they feel like they're right under your hips. And you want to have that sense that you're lengthening your arms into your waist, and you're moving your hips back away from the shoulders without letting your ribs fall towards the earth, or without collapsing in your chest. So, think of keeping your chest bone lifted into the center of the body, belly button lifted in slightly towards your back. And just allow yourself again to open up the shoulders, breathe a little more into your side ribs and waist. And for some us us, we'll start to feel even more stretch and length into your hamstrings, maybe more than when we're actually in downward dog, the more traditional version.
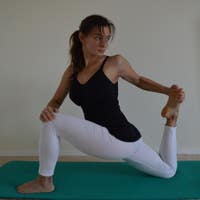
Take one more breath, letting your downward dog open against the wall. And then as we start to look forward, I'm going to have you take your right foot forward towards the wall. And we might need to lower the hands and step back an inch or two with both feet, so that you're able to have straight legs, both legs wide enough that you're not struggling with balance. And then maybe find the position where your hands are maybe slightly higher than your shoulder line to focus on one leg at a time for our front hamstrings. So, if this is our Parsvottanasana or pyramid pose.
You might see that your hands are shoulder distance, press into the wall with your hands to literally move your hips back in space. And you wanna find that position that's just right for you to tune into that right hamstring, lengthen through your side body and it's not uncommon to feel a lot of stretch through your back left calf. There's lots of areas to awaken in the legs. Another breath or two. Breathing well, sensations are arising.
And then after investigating your pyramid pose here with the wall support, we can look forward between your hands, bend that front knee, and then transfer that left foot forward, and then step back with your right leg. Again, make sure your feet are about the distance of your shoulders or your hips, so you're not struggling at all with the balance. You might need to adjust if one leg feels a little bit more flexible than the other. Press into the wall with your hands, literally as you move your hips back in space. Try to find that position that really stretches your left hamstrings, the front leg.
And it's okay if you're feeling the stretch through your back right calf. That would be appropriate, as well. And then noticing like we were in downward dog, that we're not dropping the belly or chest toward the floor, that you're keeping your chest lifted, you're keeping your belly engaged and able moving toward your spine. So, you're thinking of having a long, neutral spine rather than a back-bending spine. Take a few extra breaths here.
One way to target the left hamstring. And if we look again toward the wall, bend that front knee and step that back right foot forward. All right, then we're gonna need to move back a little bit. And for the next one, if you notice that your feet are facing the wall, and you might have to adjust a couple of times here the distance where you're standing. We'll stay on the right foot and we're gonna take the left leg up to the wall.
And when you take it up to the wall, notice that your lower foot hasn't turned. And if you need to, readjust so that your lower right foot is facing straight ahead. So, another way to get into the hamstrings. So, with your hips turned toward the wall right in front of you, see if you can stand up a little bit taller, pressing down through that lower foot. And as you get the length through this right side, my standing leg, my balancing leg, we'll take the arms toward the ears and just go a little farther into that stretch.
If your shoulders are tired and you wanna conserve your energy, you're welcome to keep your hands in front of the chest. Okay, so either here or letting your arms come up, and try to imagine as you're lifting through your ribs, your shoulders, and your arms that it feels like you're literally lifting the pelvis away from this right standing leg. So, you feel a little more spacious, and allowing again for that lower abdomen area to engage and create what the yogis would call the Mula Bandha Uddiyana to lift up and lengthen through the center of the body. Take one more breath here. And I often love to do a little twist while I'm here, reach the right hand toward the wall, left arm more into the center of the room.
And as much as you're comfortable turning without creating any pain in the neck, to look toward the direction of your back hand. Take one more, keeping that nice tall spine. And as you unwind back to the center, relax your arms, pull that leg off the wall, and then go ahead and shake out the legs. And again, notice your feet are about hip distance apart. Stand on your left foot this time and take your right leg toward the ceiling.
And you might notice you might have to adjust your step in case one leg feels more flexible than the other. The higher the foot goes, the more you'll feel your hamstrings stretch, and it's okay if we keep the foot down here and that's where you feel your stretch. Okay, so whatever feels like a good, healthy stretch for you. Look down, see that your lower foot is facing straight ahead. Hug the hip points toward your midline.
And then take the arms up if you enjoy that variation. And try to feel like you're lifting from that lower abdomen up toward your chest to get a little bit more length through the center of the body. Still tending to the hamstring stretch, as the right foot pushes into the wall. Breathe in as you're going up toward the ceiling with your shoulders, with your hands. And as many of you know, if you've tried this in the middle of the room, it's a pretty tricky pose in the middle of the room, and it's a great place to develop some strength here when you're actually using the wall for support.
We don't just struggle so much with the balance. And then let's try the twist part, so your left hand is reaching toward the wall, your right hand is reaching back behind you. And as much as you can turn through your rib cage, through the chest and shoulders without tightening up in your neck. So, that part's not so essential. Just try to feel the length in your spine, turn through the rib cage.
And then we'll come back around to the center position, relax your arms, grab that right leg, and then you're out of that wonderful balance pose with the wall support. The next one is triangle pose. If we keep the left foot on the ground, we're gonna use the right foot on the wall. And this will be the leading leg in your triangle pose. So, as soon as you get your right leg up on the wall, see how far you're comfortable taking this left leg back, this will be the back leg in triangle pose.
The right leg is the front leg in triangle pose. So, if we can spread the arms out like you would do in your full complete triangle pose, perhaps turn the palms forward, open up the edges of your chest. And imagine if you're reaching toward the wall, or some of you might even grab your big toe, you can modify by holding your shin, and look toward this left hand, which will be the hand in the air. And just see how much you can turn from your belly through your chest, reach into that opposite hand with a little bit more ease, keeping this length through the side body. And as you progress and you feel more space, more length, more permission in this right leg, you might start to reach more toward the wall, grab your big toe, like some of you might actually do in the full pose.
So, when we do reach toward the wall, we were still turning the belly, we're still turning the chest towards the left hand that's reaching into the room. And take another breath or two. So, just a way to feel maybe some different areas come alive in your triangle pose. And when you come out, let go of the big toe, or let go of your shin, and relax your left arm. Use your right hand to grab that leg and try to come down slowly, shake out your legs.
And I'm gonna turn so my back's to you, so we can stand there with your right leg on the floor. Your left leg goes up on the wall. And it could be a different distance, again if one leg is tighter. Notice your right foot is facing straight ahead, and your left foot is pointing to the ceiling. And this would be the front leg in triangle, the right leg is your back leg in triangle.
So, spread your arms to create a shape you might do in triangle, palms facing the same direction as your chest. You might start holding your shin, as many of us do in triangle pose. And then look into the center of the room, look out toward your right hand, which would be the hand in the air. So, in this variation, it's a lot easier in the neck than most triangle pose in the middle of the room. Turn your belly toward your right hand, turn your chest toward your right hand.
Try to keep that quality of ease, deepen the breath, and maybe reach forward, see if it's appropriate to grab your left big toe with your first two fingers. You're pressing your left foot into the wall, which makes things quite interesting in the legs. And then continuing to stand as tall as you can through the spine. Take another breath or two. And as we let go of the big toe, or let go of your left shin, relax the right arm down at your side, grab that left knee and slowly bring that leg down to the floor, and then go ahead and shake out the legs.
The next pose, some of our basic poses, the standing poses we're doing is Warrior II. And so Warrior II now with a block. If you straddle the yoga mat, if you're okay with the ground underneath you, we're gonna turn this this long way and slide it down to right about where your calf, the outer calf area is in your Warrior II. So, you wanna set up your right knee so it's over your heel. And then you're pressing your calf and your knee back into the block, which makes you really work this lower part of the leg, which is sometimes forgotten in our Warrior II poses.
So, if you press down through the feet to the foot, press back through your shin, the calf, press back through your thigh, we might notice that the pelvis is up a little higher than normal. And that's okay because we're teaching this lower leg how to work maybe in a different way. So, scoot your left leg back as much as you feel appropriate while you keep this right knee, your right calf as your focal point. Take your hands to your pelvis, and just feel the position of the pelvis maybe come up a little more than neutral. So, in this pose, see if you can feel like you're making more space between your right femur and the right side of the pelvis.
As you press into the block, it usually happens on its own, but just so you're really aware of this intersection here on the right side. You can roll up in the chest here if your arms are tired, you're conserving your shoulder strength, you might stay with hands at the hips or spread your arms out to the side, and try to feel your fingertips reaching a little bit back toward the wall. So, you're really clear about the openness across the front of the chest, and that pressure's still working in the calf back toward the block. And maybe by now you're starting to feel some new heat and activity in that right hip. Take a deep breath in and a deep breath out.
Let's reach down for that block, straighten that right leg, and then turn the right foot in, slowly heel-toe your legs and feet toward each other. Shake it out. And then once you've had that little rest, your right leg should feel quite different than your left leg about now. We'll give the left leg the same treatment. So, if you can turn your block the long way, bend your left knee, and just notice where your foot is in relationship to the left knee.
When you've got that 90 degree angle, press into the block, and now your hands are free. You can scoot back that right leg as far as you feel is safe and appropriate while pressing this left calf into the block. Imagine the weight in the feet is 50/50. Bring your hands to your hip bones so you can be even more clear and aware of the tendency of that left hip to drop to the left femur. When we press into the block, a lot of times it naturally will lift that left side of the pelvis up, so you feel longer in your waist, you feel longer in your spine.
Which are pretty good qualities here in Warrior II. Okay, the arms, the additional piece if you like, maybe for some variety, palms face up for the second round, thumbs going back to the wall so the chest is widening and the shoulders are relaxing. We don't need to shove them down your back, but just allow them to relax naturally down your back. So, you might enjoy looking out over your left fingertips, pressing into the block to feel a little bit more heat and energy in that left side of the pelvis. One more breath here.
Arms down toward your side, you wanna grab that block with your left hand and straighten the leg, turn your left foot in and then heel-toe your legs and feet toward each other. Okay, when you shake out the legs, you're gonna walk over and find your other block, and we'll start to connect the whole body again to the practice with a little downward dog variation. So, if you take your blocks and take them to the edge of your molding about shoulder distance apart. This is one other way to do your downward dog and it's an easier version I find for the shoulders. And as we can see, the angle's a little bit lower to the ground than a normal downward is a little bit higher in the angle of the shoulders, maybe more challenging.
So, spread your hands on the block, the more sturdy the block, the better. We're gonna lift the knees, walk your feet back and find what would be like your downward dog shape. And you might notice it feels a little bit easier again, because the angle of the shoulder's a little bit lower. It's less severe as it would be like this more in a normal downward dog. So, consider as you're here moving the feet back, lift the heels enough off the floor that you can see that there's no wrinkling of skin around the ankles.
Try to lift your heels enough so that you feel that skin lift up toward the knees, and really get that upward action through the back of the legs. And with this extra length in your arms, just be mindful of not dropping down through your chest. You're trying to keep the chest bone lifted in towards your back body. Lots of breath moving in your awareness from the nose down toward your naval. And from the naval back toward the head.
So, you're in a sense again using this as an inversion. A really gentle, more mellow version of an inversion. Take one more breath here. And then we can walk the feet in a little bit toward the blocks. Set the knees down.
And as we set the blocks to the side for right now, you're welcome to repeat that if you're not doing a full inversion. And if you're doing a fuller inversion, I'm gonna invite you to come up with your hands shoulder distance, walk the feet in toward the wall. And as you walk in toward the wall, try to find a place where your shoulders shift forward toward the wall. Relax through the back of the neck, and take the left leg toward the ceiling. And you could even stop here as a great place to get ready to come toward an inversion.
This simply builds some strength in the shoulders. If you wanna play with coming up, bend your right knee a lot, get some momentum in this right leg, some power, so that you can kick up and slide your heels up the wall. Then drop your head down. And then not so much coming up and down, but trying to get a good feel of your inversion and your upside-down shape. If you need to try to kick up again, keep trying to kick up, we'll take just a few more breaths.
Lock your heels up the wall and take a couple breaths. When you come down, think about coming down slowly so you don't crash your feet into the floor. Lower the first right leg and try to come down quietly, both knees touch the floor, eventually for just a moment. And I usually like just to sit in neutral. And for some of you, coming down to the knees doesn't feel quite right just yet, you might enjoy a little more inversion of just staying with that forward fold, grab an opposite elbow.
So, there's no work in the shoulders, but you're still in that inversion a little bit longer. You might come back down with your hands, you might come back down with your knees, and just pause for a moment in neutral. So, that was just to bring a little bit more energy into the upper body portion of the practice. We'll do a couple more standing poses, and as we do this next standing pose, we need just one block. When we come up to stand, if I can have you turn the block tall, and with the block tall if we have the right leg being our leading leg here, and put the foot on top of the block.
And stand so that you feel balanced right on top of this lower left leg. And we're gonna do a twist where we have the hands maybe about shoulder height. And as your hands push into the wall, see if you can feel with your elbows slighting bending that you have some permission now to turn from your waist through your chest, maybe to the neck eventually to look back toward your right hand. You can bring the elbows in eventually down under the wrist line, under the middle finger line. And just try to feel that work that's required on this right side of the belly to turn slightly toward your right elbow, keeping that length in the spine.
Take another breath in our preparatory twist pose. And then if we unwind that first side of the twist, and then try what it feels like now when we go to the next level, which would be a revolved triangle pose. I'm going to encourage you to take your block to the inside of your right foot, adjust the stance so you feel wide enough in your feet that you're not struggling with the balance. And there often will be some space between your hip and the wall. Maybe if you had a narrow block, you could also wedge that here between the wall if you like more support.
So, my left hand's gonna be forward for a moment, my right arm's gonna go back, and we can start here just like we were but now with straight legs, and do that same action of pressing into the wall and getting some support to do this little twist of turning the right waist toward the back right hand, and then turning this left side of the belly toward the wall. So, I'm getting a good twist here. If you wanna add the portion that involves the legs, you can reach down and take the block maybe to the inside of the foot first, under your shoulder line, and then walk that right arm straight up toward that 12 o'clock position. And you can press into the wall, root your back heel, and then begin to do that twisting of the left side of your belly toward the wall. Feels great here in this way, you've got the wall to press into to really get clear about how to twist, how to turn from your belly into your spine.
Of course, this full revolved triangle pose gets you a little bit more into your legs, as well. To come out, take that right arm that's in the air down to your sides. You can press into your right leg, grab your block and come up to center, and then we'll turn and do all of that on the second side with your block turned tall. And then if we square ourselves so that we put the left foot on the block, right foot is under the right hip, and then we've got the hands about the height of your shoulders. Press into the wall.
You might start with your elbows drifting away from each other to help you get a little wider across the shoulder blade line. And just get connected to your breath, the length in your spine, the rootedness through your lower foot. You have the intention to turn that left belly toward your left elbow. Right side of the belly's turning toward the wall. And now, if the elbows can drop down a little more under your shoulder line, get a little more stable here in the upper body, and try to turn more through the belly.
You won't actually turn a whole bunch but there's some effort involved, which can feel really nice to get the specific wringing out through those stomach muscles through the digestive organs. One more breath here. And then unwind yourself from that version of the twist. And then put that left foot on the ground, step back with your right leg. We're gonna take the block to the inside of your left foot.
Make sure your feet are wide enough that you feel stable. And then we can send the left arm back to the wall behind you, and the right arm about shoulder height out in front of you. So, ground your legs, step into your back foot. And then from here, stand tall and start to do your twist, which feels fantastic even this amount of twisting, right side of the belly turning toward the wall. Look, if it's comfortable, toward your back left hand.
And we either stay with that variation a little bit longer, or you can take your right hand down to the block. Take your left hand straight up into the air above your shoulder or chest, and then feel what it's like to press into the wall to help you turn. And as you're turning, you're still putting weight in your back heel, so that we're keeping the pelvis from twisting or turning too much. And just enjoying as that top hand presses into the wall, the movement you find through the right side of the belly, the length that you find through the right side of your waist. Take one more breath in your revolved triangle with the wall.
When you come out bring this left arm down, grab your thigh bone, grab the block as you come up and around to center. Then you can shake out the legs. Then we can set that to the side. As you set those to the side, now let's go ahead and come down toward the floor. When we come down to the floor, if you'll grab your blanket so you've got a little cushion for your knees.
And then perhaps have a block nearby as an option. We're going to do gate pose. And you'll play around with standing, let's say on your left knee to begin with. Take your right foot to the wall with your toes pointing up toward the ceiling and your heel down against the floor. So, in that shape, we're gonna be stretching this right leg, the inside of the leg.
And we might take this block to the outside turned tall somewhere around your calf for a moment. So, as you're standing here, the low right side of the pelvis is dropped down. We'll slide your hand maybe down toward the shin area for a moment, or to the block. Take your left arm up toward the ceiling and as you reach the arm toward the ceiling for some of you, the block will be in your way and you would reach more to the ground and you would reach for the wall, which feels great to press into to deepen the stretch down that left waist. So, some modifications again, are holding the block, and if you come up and we're not touching the wall, don't panic, never fear, we've got an option to hold your head and allow yourself to rest here opening this left side of your waist.
Turn the block lower to get a little deeper stretch. So, the right leg is stretching, the left waist is opening. One of my other favorite variations is just to try a little bit more is to walk that right hand up the wall, and then maybe reach over and grab your forearm, or reach toward your wrist, the way that the head is resting in your right arm. So, take one more breath here. That left arm can come out of the pose first, and then slowly move yourself to neutral.
Then turn that foot in, heel-toe your right knee down underneath the right hip. Okay, and I'll have to turn my back to you to get to the other side. So, as we stand on the right knee, the left foot goes to the wall, slide your right knee back, it's just a little bit to the outside of the hip line. This block might go tall. When you feel stable on your right knee, I'll have you stretch your arms out to the side.
And this one, see when you tip over, start from this tall position. Do we touch the wall with the left hand? Or does it feel better to reach down and grab the block? Does the block need to go lower? Or do we grab your shins?
There's a whole range of options, whichever one feels best for you now that you know what the pose feels like from the first side. We can reach that right arm now over your head, maybe reach toward the wall, maybe grab your forearm or your wrist. If it's too much work in that way just hold your head so right hand could support the left side of your head. At some point as you're breathing and relaxing into the shape, reducing some tension, some stress, some stiffness. It might feel like we can actually explore reaching a little bit more toward the wall.
Maybe we can reach down toward the floor with the lower hand and start to feel a little bit more rotation through that right side of the chest toward the ceiling. Just noticing, again, as your body giving you permission to make these adjustments. You can tell if your breath stays deep, slow, and rhythmic, you might be enjoying what you're doing. And that's the right direction to keep heading. As we consider coming out in the next moment or two, unlock that left knee, if it tends to lock, grab your shin or the block, right arm comes out of the pose, your spine is neutral.
Then turn that left foot in and bring your left knee to the ground under your hip. So, we can free the mat now of the blanket. And we'll come down to a variation of Navasana boat pose, where we get a nice stretch through the legs and some core engagement. So, if you stretch your feet up to the wall, legs straight out in front of you, and notice again, everyone's gonna be a little bit different how close you're sitting to the wall so that you can actually have straight legs. And maybe be on the tips of your fingers, move your belly toward the wall.
And there's maybe enough effort for some of us to be here, stretching both legs, which maybe we don't feel often in Navasana 'cause we're so engaged with what's happening in the stomach area. So, we're gonna try to keep this work in the legs. And then we'll reach the hands out toward the feet, toward the wall, and just start to feel that maybe ease that we've got the feet pressed into something solid to teach our body how to come a little bit forward in the pose. And try to find that right position where your belly area's working more than your hip creases. And that we can find what time that you might be able to adjust and scoot in a little closer.
Walk your feet up the wall and then you're reaching a little bit more toward the wall. Not saying it's an easier version, but it's another way to keep advancing the pose, getting more leg stretch, and at the same time lots of core work. Take one or two more breaths finding some joy here in the pose, maybe the edges of the lips slightly lifting toward the eyes, that inner smile. One more breath before we let the hands come back, slide your feet down the wall. And as you go back away from the wall, just notice that you have a strap and a block close by, so that when your feet come to the floor, the edges of the wall, you can have straight legs.
And as you have your straight leg position, let's keep the right leg attached to the floor and the wall and bring your left knee in toward your chest. So, this would be the one time to use the strap here in this practice with the strap around the arch of your foot. And then noticing if you look at your foot that the foot is opening evenly toward the ceiling. If the pinky side curls more to the ceiling, pull the pinky side down toward your outer hip. Just take a moment, energize both legs so you've got a dynamic L-shape through the legs.
This is probably one of my favorite all-time poses. So, receive all that support for your spine, at the same time opening up your left hamstrings. Imagine you had a sandbag on top of your upper right thigh so that right leg is grounding down toward the floor. Keep that action in the right leg. And then we'll use the block to the outside of your left hip.
So, this is more supports, excellent for the vatas. Let this block hug in against the side of your left hip, left hand holds the strap. And when you open this leg out to the side, you won't go probably as far as you could go, but it's really easy to open up this left side of the inner leg and groin. And that feels easier to breathe into your spine. Left elbow makes a nice little kickstand here.
You might open your right arm out to the side. And it's a lot easier to do this pose on your back versus standing. So, just appreciating that for a moment. One more breathe in. And then take that left leg up to the center, hug the knee in toward your chest, and maybe both knees into the chest for one breath.
And we'll transfer left leg to the ground. You might need to scoot back into the wall. Transfer your block. And then find the strap and it goes around the bottom of your right foot. As it goes around, lock your hands up.
I like to have straight elbows, shoulders moving back toward the floor. And as much as I'm focusing on this top right leg, I'm also really rooting down through my inner left thigh, as if I literally had a sandbag on top of this leg. The hands apart, right leg stretching. Perhaps close your eyes to feel again the weight of your body moving back into the floor. Receive all of that support, so it's a little easier in your right leg.
And then keeping the rooting action of that left thigh, hug that flat right block, the block against the right side of your hip, and you hold the straps with your right hand, left arm can open to the left. Open your leg out to the side and that block is gonna catch you and it makes it really easy in that right leg to open the leg, less effort in the right arm. So, you can basically be hands free in this pose. I keep holding this strap just to add a little bit more stretch, 'cause that edge feels really good for me. So, notice what feels good for you.
Take one more breath in. And then as you inhale, let that right leg come all the way back up to the center position, move the block out from your side. And then we'll pull the knees in toward the chest. And then we'll do our last pose for closing, which is wonderful if you have time to do it for 10 minutes, which we won't do. But our legs up the wall pose which is a wonderful one to use a bolster.
And if we've got our bolster set up so it's close to the wall but not right up against the wall, so a few inches away. Probably the most ungraceful part is going into the pose. But one of the ways I usually teach is where you're on the bolster on your side, shoulder down, slowly roll over onto your back, and then let your pelvis start to slide toward that little space you've made between the wall and the bolster. And everyone's gonna be different because our torso lengths are different. So, mine is short, so the bolster takes up a little more space.
Some of you it won't be so supportive in your back ribs, which will also feel good. Palms face the sky, legs up in the air, and the back of the sit bones, legs as close to the wall as you're comfortable. It's okay if we're not right up against the wall. And then give yourself a few moments to use this more like our Shavasana, as a time for reflection, a time for slowing down. And yet at the same time, a pose that helps with improving circulation.
Helps bring us more into the rest and digest system, especially if we've been again, working with stressful times. Great way to start to calm down. So, take a moment maybe with your eyes closed if you're comfortable just to feel the shifting fluids, circulation from your feet to your hips. And feeling the changing temperature and sensations from the hips, your lower belly, through the digestive organs. And feeling the rush of fluids and movements up toward the heart, which initially might feel like the heart's beating a little bit faster with a gentle inversion.
And feeling that rush of movement and fluid energy moving toward your brain... allowing the inversion to really nourish the brain tissues, the cells, with all this extra oxygen and blood. Please be aware of your breath, you're breathing in, you're breathing out, without trying to control the breath in any way. Letting the body return to its own natural state of balance. Taking about another minute appreciating the inversion...
and the time to slow down. Feel the effect of the practice. So we remember more freshly every day why we practice. If you have the ability to stay longer today in the legs up the wall pose, you might push pause and stay a little bit longer. For those of us moving along, you might start to let your eyes open if they've closed.
Slide your heels down the wall, and prepare yourself to roll maybe over to your right or left side, whichever one you have space. And as you roll over to your side, go slow and you might end that transition, let yourself walk up to maybe sit with your hips on the support of the bolster. And to have just a moment, you could even lean back into the wall if you like that extra support, or stay to the front edge if your spine and pelvis are comfortable. So, taking just a moment to sit in the best way possible, correcting any postural imbalances, taking a few breaths to balance from the restorative pose. And with the hands gathered in front of the heart, just a moment of gratitude for the practices of yoga.
And may others now benefit from our practice. Namaste, thank you so much.
Yoga for Our Nature: Dosha Jam


Comments


You need to be a subscriber to post a comment.
Please Log In or Create an Account to start your free trial.
