Description
About This Video
Transcript
Read Full Transcript
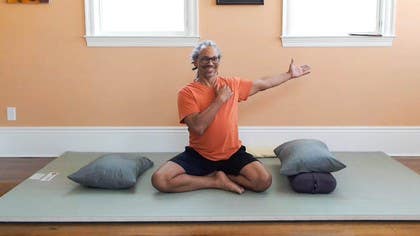
Hi, welcome to the class. Today we're going to work and focus a little bit on tonifying our lung health and creating some mobility for the lungs, more space for the lungs, and in strengthening the lung function and health also to help boost our immune function. Going to need some props. You can use a couch cushion, a bolster if you have it. I have a bed pillow here, makes it a nice little additional bit of softness.
I also have a towel, just a regular old towel, and then I have another bed pillow up here. So that's the setup that you'll need for today's class. We're going to start off sitting comfortably, and because my hips are tight, I'm sitting up on a block so I have a little more height. If you notice when you're sitting on the floor you're really rounded like this, then get something underneath your booty so that you can have a little arch in the low back. And we're going to start off finding one clavicle, one collarbone.
And when we do this, we're going to use the flats of the fingers, not the fingertips, not the fingernails, the flats of the fingers, and draw circles. You kind of get stuck into the skin and slide the skin along the underlying structures, and you can really feel the bone. So you start kind of close to the midline, go your way out a little bit, and then, oh, about so far, drop below it, and then circle around, smoosh into the layers of tissues here, and find a tender point, oh, a good tender point. You can just smoosh it with some roundness. We want to get some blood into here, some circulation.
If you've been spending a lot of time on the computer, these are probably really short and tight muscles. And this is where lung one and two are, the first two points on the lung meridian. So now find one of those tender points, hold it, and take your arm and lift it forward and then out to the side while you're holding pressure with your finger pads here. And then bring it back down, relax this hand for a moment, press, and draw that circle again, and out to the side. The amount of pressure, you want to use just the right amount of pressure where it hurts good, that good achy sensation, not so much where it's a really intense pain.
And it's a good idea to breathe. Let's do it one more time, relaxing the fingers. This time I'm going to draw a little bit bigger circle, and I'm going to bring my fingertips down to the ground behind me and turn a little towards that side. Now I can keep smooshing or I might just want to relax my hand down and take a twist, but a twist where I'm really lifting and opening my heart, and take a few deep breaths. And then come back to the center, and at the center just take a moment to circle the shoulders.
Bring them forward, up, back, and down, and you may notice this shoulder is moving a little more freely. Good, now we're going to take the other hand to the sternum, the breastbone, and come just a little across the body, circling, sliding the skin over the underlying structures. Find and follow the bone, come out about yea far, and then drop below it and smoosh through the pectoral muscles, and find some tender spots. You can just smoosh around there for a moment. We want to get blood to circulate through these often tight muscles.
We also want to get energy circulating from this lung 1 and 2 area, the first two points on the lung meridian. Now find a point that's a little tender, hold it with your finger pads, reach the arm slowly forward, up a little bit, and out to the side and back. You're drawing kind of a big lazy circle. When you come back forward, relax your fingers for a minute. Find a point, and then draw a circle again.
While you're holding the pressure on that lung 1 point. Find the point, hold a little pressure, draw another circle, and as you come back you can release the hand, and the next time we're going to reach up, back, and come into the twist bringing either the fingertips or the palms down behind you, turn your shoulders towards that side. You can either hold pressure with the fingers, or if your fingers need a rest just bring your hand down to your leg. And breathe in and out through your nose. Try to keep your spine tall, keep your heart lifted as you gently twist.
In your next inhale, inhaling back slowly to center, and when you arrive at center take your shoulders through a few slow circles. Now we're going to take a gentle forward fold, inhale, lift the heart, and as you exhale get the feeling like you're sticking your booty out a little bit, and bring your hands down to the floor if they come down to the floor. If they don't you can bring your pillow or couch cushion in front of you to give you a little extra height. And some of you may be able to flop your chest all the way down to the floor. Let your chin drop towards your chest, and take a few slow deep breaths here.
You may notice as you stay here for a while that your body loosens up, your connective tissue gets a little more pliable. So you might want to walk your hands a little further forward, or you might not. You can stay wherever it feels good. Chin dropping towards the chest, you can even let the upper back round. Your next inhale slowly roll your way up to seated, and notice which shin is in front.
You're going to switch sides, just to balance out the gentle hip stretch there. Sitting up tall again, inhaling, exhaling, coming forward. Let the chin drop towards your chest. You can keep that feeling of arching the low back. And breathe in and out through your nose if you can.
And as you hang out on the second side, you may notice all of a sudden you can go a little further as your fascia warms up. You can lean a little forward into that if it feels good. Let the upper back round a little. Nice check-in with your breath. In your next inhale, you can slowly start to roll your way up to seated, lifting the heart, lifting the head.
And then I'm going to come off of my block. I won't need it anymore. Set that off to the side. We're going to take the towel and make sure it's smooth. You don't want any hidden lumps or bumps in it.
And for me, I'm going to fold it one more time in half. It's going to be up to you what feels like the right amount of opening. We're going to lie back with this behind our heart. And if it's up too high, it's going to feel like too much of a stretch. But the towel is a little squishy, so I'm going to fold it about this thickness.
And again, I want to feel that there's no lumps and bumps in there. I'm going to bring my leg support in. So this can be a couch cushion with a pillow on top. It could be just two pillows if you have extra pillows. And then when I come back, I need to find the bottom of my shoulder blade.
It's right about there. That's the bottom corner of my shoulder blade. And I can do that same circling thing to find, yeah, there's that bottom corner right there. That's where I want this edge of the bowl of a blanket or a towel to be. If you're wearing a bra, that's right about where the bra strap line is.
So I'm just going to kind of eyeball it. Use my abs and my hands and slowly come back. And I can feel it's too low, so I'm going to scoot it up a little bit. Oh yeah, right there. And then I can bring this head pillow in, oh, underneath my head and neck.
So once you're here, feel into it. If you have a pinchy sensation in the low back, you can bend one knee at a time, press down with your feet and tuck your tailbone. Make a little more space in your low back and then set it down. Set your pelvis down and extend your legs out. If that pinchiness stays in the low back, then this might be up too high, might be too tall.
And you can change it just by rolling out, coming up, opening at one layer. I still want this edge, this top edge, to be right at the bottom of my shoulder blades. So I might need to sit on this a little bit. Come on back, oh, I got it just right. Bring the head pillow in and then open the arms out to the side.
So what hopefully you're feeling here is a little bit of a gravity assist, letting this area where the lung one and two points are underneath your collarbone, helping those drop down and open the upper pectoral muscles, getting gravity to help open the body. Take a few breaths and for the first few breaths, breathe into the chest space intentionally. So as you inhale, feel your chest expand and you exhale, your chest comes back down. And then the next few breaths, we want to breathe down into the belly. And this is the breath we generally need to practice more.
When you inhale, your belly expands. And as you exhale, your belly comes back in towards your spine, towards the floor. And if it feels unnatural at first, that's fine, it's something that's worth practicing because this belly breath actually helps us get more air into and out from the lungs. As we inhale, the diaphragm muscle drops down and that's what makes our belly expand. As we exhale, the diaphragm muscle comes back up, inhaled, belly expands.
So that belly breath helps bring the breath into the lowest parts of the lungs where we actually have more structures to absorb the oxygen and to release the carbon dioxide on the exhale. There's more gas exchange that happens in the lowest third of the lungs. Also a really good practice if you've had asthma. And this belly breath also helps to turn off the stress response. Always off the fight or flight response.
As you do it for a few minutes, you may even hear your stomach start to work more. That's a sign that you're relaxing. There may be some gurgling sounds. That's good. That means that your body is getting out of the fight or flight mode into the rest and digest mode.
And you're making more space for your lungs. Eventually you can let go of any effort with your breath and just rest in the pose. Having your breath moving in and out across your body at its own natural rhythm. That's a sign that your body is getting out of the fight or flight. That's a sign that your body is getting out of the fight or flight.
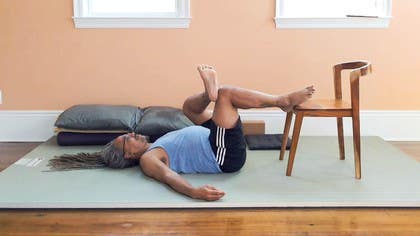
Gently start to deepen your breath again. Bring a little movement into your toes and fingers. And to come out of the pose, bend one knee at a time, placing the feet on the couch cushion or pillows. Press down with your feet to lift your hips just enough that you can reach under and slide that towel out from behind your back and then slowly roll down and set your hips down. Keep your knees bent and your feet up on the bolster and take the arms out to the side.
If it's crowded, you can bring your hands into a position like a cactus with the fingertips pointing in the direction of the top of your head. We're going to do some movement and match our breath to our movement or match our movement to our breath. So inhale here. As you exhale, slowly lower both knees towards one side and roll your nose, your head in the opposite direction. And then as you inhale again, bring your knees and nose back towards center.
And then exhale your knees in the second direction and your nose going the opposite way from your knees. Bring the knees and nose back towards center, exhaling into a gentle twist, inhaling back towards center, exhaling towards a twist, inhaling center. One more time, each side, exhale, twist, inhale, center, exhale, twist, inhale, center. And as you exhale, extend one leg at a time over the couch cushion, pillows, whatever you got underneath your knees. Feel into the pose.
You might need to wiggle to find the yummiest position for a final relaxation. And take about five slow, deep belly breaths to settle into Shavasana. One, two, three, four, five, six, seven, eight, nine, eight, nine, eight, nine, ten, ten, ten, ten, ten, ten. As you're ready to let go of the effort of your breath, let it go and just rest. With your hands and arms heavy, your feet and legs relaxed, the head heavy, jaw soft.
Just rest. Just rest. Just rest. Just rest. Just rest.
Just rest. Just rest. If you want to stay in the final relaxation, you're welcome to stay here. If you're ready to come out, you can start to expand and deepen your breath again. Some nice belly breaths.
And breathe a little movement into the toes and fingers, lengthen your body. And as you're ready, bending one knee at a time and then slowly rolling onto your side. You can bring the head pillow up underneath your head and neck and just pause here for a few breaths with your knees up towards your chest. And as you're ready, taking that top shoulder a little forward, let your head stay heavy, your neck relax, press down with your hands and slowly roll your way up to seated. Your head's the last thing to come up.
Sitting up tall, if you need that extra height underneath your booty, you can bring that back in. Bring your palms together, hands in front of your heart.
Rest Deeply
Comments
You need to be a subscriber to post a comment.
Please Log In or Create an Account to start your free trial.
