Description
About This Video
Transcript
Read Full Transcript
Hi, so for this class, we'll need a towel or a blanket that's going to end up being a head pillow and a couch cushion or a bolster if you have it, or even just a couple of pillows. You can use that as well. And then come and find a comfortable seated position. I needed some elevation under my hips. When you sit up, you want to have your knees a little bit lower than your hip joints so that you're not rounding in the back. It just makes it a lot easier in your low back to be able to sit up like this. And we're going to start off by doing some movement to free up the head and neck. A lot of us are spending many hours on a laptop and getting really crunchy in the suboccipital, the base of the skull area. And a lot of times when you get up from that, sitting in that position for a long time, your body stays stuck there. So we want to free up that movement, free up the base of the skull. So to start with, we're going to imagine that we have a long nose like Pinocchio and put an imaginary crayon on the end or paintbrush and then drawing circles with your long nose on the wall in front of you. And see if you can really feel the shape that you're drawing. Go a little slower. Sometimes people will try to do a thousand circles. And if you go a little slower, you can really feel whether or not your circle has corners. And I can feel my circle is rather egg shaped. So I'm going to slow it down and try to go maybe a little smaller and a little rounder. And then the next time you come to the bottom center of your circle, pause and go the opposite direction. Again, going for round circles with your nose crayon. Sometimes a little smaller is better. And sometimes closing your eyes is helpful. And I can tell the second direction is way less round. Usually we'll naturally choose to go in the easy direction first. And the second direction is a little more angular. But with my awareness and my attention, I can feel my way into rounding those flat spots, smoothing the corners out. And when you come to the bottom center, pause and bring your nose crayon back to the center, sitting up tall. And now we're going to draw infinity signs. So sideways figure eights in whichever direction you want to start in. Go in your natural first direction. And we're trying to get the center of the infinity sign right in line with the center of your body. Go a little slower. Feel a little more. Notice if you're trying to help this movement by clenching your jaw or tightening your shoulders. See if you can undo those and find some more ease in the movement. It always helps me to think of the beautiful smooth movement of Stevie Wonder because he's got a beautiful flow when he sings. It's not exactly a figure eight or an infinity sign. But it's so flowing and smooth. Next time you come to the center, pause and go the opposite direction. The figure eight. And it might feel a little awkward. Instead of speeding through the awkwardness, slow down and enjoy the awkwardness. It's a simple movement in some ways. And as you do this movement, bring a little awareness to the base of your skull. Notice how one side is getting stretched open as the other side is contracting. You're giving yourself a massage at the base of the skull with this smooth movement. And next time you come back to the center, pause and then come back to the first circles you did. Drawing circles on the wall in front of you with your extended Pinocchio nose, paintbrush, crayon, magic marker, relaxing the jaw. Start to make your circles spiral out a little larger with each lap around the circle. And then spiral back in smaller and smaller with each lap, with each orbit.
And come to the center, pause. And circle the other direction. You can start a little tiny and gradually spiral out with each orbit a little bigger, a little smoother, a little slower. Jaw is not helping, shoulders are staying soft. And then spiraling back in a little smaller with each orbit. Until you come to the center at stillness and pause. And if your eyes are closed, go ahead and open them up. We're going to lie down on the mat and do some self-massage. And where we're self-massaging, I'm going to turn sideways here. We want to come to the skull, find the skull, and then we're going to go just below the skull and kind of between the skull and the top of the spine. It's going to be easier to feel when we're lying down on the back. But there's almost there's a very small space between the base of the skull and the top of the spine. And that's what we're aiming for. So I'm going to bring my head pillow off to this end of the mat. And I want my bolster or couch cushion to be right along my sides. I'm not going to lay my head on the pillow just yet. I'm going to come onto my back with my knees bent. And then with knees bent, feet planted, and walk the feet a little wide and let the inner knees drop into each other. And I'm going to turn my head so you can see where I'm going. I'm going to take this hand on the same side, use the finger pads to draw circles. I'm going to start on the skull and then go down and find the little space. Now it's not really a space. It's the space between bones. But there's multiple layers of very strong muscles there. All these muscles that hold up our heads all day. So I'm going to come in there on both sides with my thumbs. Thumb pads first on the skull. And I'm going to draw some little circles sliding the skin a little bit and working down, down until I feel like I come off bone. And then press. Once I find that little gap, I'm going to press straight towards the ceiling with my thumbs. The backs of my hands are resting on the floor. I'm almost I'm pushing like towards the tip of my nose. One of my teachers said the feeling is a little like you're trying to fit a screwdriver into a can of paint. You're trying to just slide into that space, that narrow space and draw some circles doing some smooshing. You can even instead of drawing circles, go right to left, go towards the midline and then away from the midline. And you'll probably find that there's a ton of muscles up here that are really tight, really sore. And the smooshing, what ideally we're doing with the smooshing is spreading the muscle fibers so there can be more space for blood to circulate. Stop smooshing for a moment and leave your hands there, but relax your thumbs and just take a pause. It's a awkward position to work on yourself in, but it's something worth getting used to. And then come back into that zone with the thumbs one more time. And now see if you can find a tender point on each side. Press it and then look with your eyes like you're looking towards your belly button. You don't want to lift your head up. Just look with your eyes towards your belly button and then look with your eyes above your head.
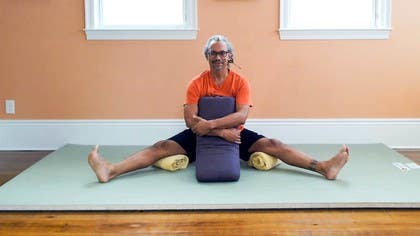
You'll feel those muscles under your thumbs contract as you look again with your eyes down towards your belly button. You'll feel those muscles stretch. One more time, look up. One more time down and then relax the hands out to the sides. That was a lot of work for our thumbs. Let's give our thumbs a little massage coming right into this meaty part at the base of the thumb. Don't use your thumb for this because we want to let both our thumbs rest, but we're going to circle and smoosh. This is another set of muscles that is really overworked and under-loved, under-massaged. And then do the other side, smooshing into this meaty part. This is called the thenar eminence. I think it's also called the mound of Venus. And then release. Give your hands a little range of motion and then come back to the center. Bring your feet in and now we're going to take our couch cushion or bolster and bring it right alongside the pelvis. I'm going to press down with my feet, lift my hips, and then set my hips up on this couch cushion or bolster. So right now I'm already getting a little bit of a held stretch with these muscles at the back of the neck. And as I walk my feet out, I'm going to get a stretch into the psoas. You want to slowly walk them out as far as feels comfortable. You may be able to straighten your legs all the way. And this is another great counter pose for sitting. We want to get this front plane of muscles to lengthen and soften. But if this is pinchy in the low back, you can try tucking the tailbone a little bit. You can try as you settle your weight and scooching the bolster or cushion down towards your feet. Or you can try just bringing your feet in a little bit, standing your feet so they're not all the way lengthened out. Whichever one feels best for you, we're going to stay in this pose for a few minutes. You want to keep your nose turned up toward the ceiling and take a few deep belly breaths. Any opportunity we have to breathe into the belly to get the diaphragm, to do its full range of motion, to help stimulate the rest and digest nervous system and turn off the fight or flight part of the nervous system. If at any point you feel like this is too high, walk your feet in a little bit and bring your knees together. That'll take any pressure off the low back. Otherwise you can stay here, stretching your psoas and the base of your skull at the same time. A few more deep belly breaths in and out. Notice if your jaw is holding, see if you can find some space in your jaw. And then deepening your breath, slowly start to slide one foot at a time back in and then bring your hands to the cushion, press down with the feet, lift your hips a little bit and slide that forward until your sacrum and tailbone come all the way down to the floor. You might need to lock your feet forward a little bit just to make that space. And take a pause with the feet flat on the mat, knees leaning into each other and the low back flat on the mat. A few deep belly breaths here.
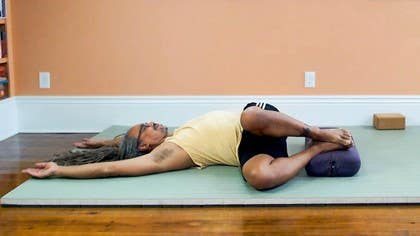
And from here we're going to imagine once again that we have that long Pinocchio nose with our crayon on the end, you're going to let the back of the head stay on the floor, but draw some circles on the ceiling. Really slow, really gentle, one direction. And as you draw those circles on the ceiling with the nose, notice that you're also drawing circles on the back of your head with the movement. And back to the center, bring your feet up onto your cushion or bolster, arms out to the side, press down with your feet a little bit, lift your hips a tiny and scootch them to one side about two or three inches and then set your hips down. Inhale, as you exhale you're going to take your knees the opposite direction that you swung your hips. So I took my hips to the left and now I'm taking my knees to the right into a twist. I can keep my arms here or I can raise my arms up overhead. See which one feels better for you. Raising the arms up overhead helps bring a stretch into the liver and gallbladder along the sides. And while we're here for a few breaths, we'll take advantage of that side stretch and make the liver releasing sound. It's kind of like the sound of a teapot or it can be a stork but kind of a hissing sound. So you inhale. Inhale. And the next inhale will be bring your feet back to center, your hands back down towards your side, press down with the feet, lift the hips up and go past center and a little bit to the other side and set your hips down. Inhale, exhale your knees to the other side. You can keep the hands here or raise them up overhead. It might take a little exploring to find what gives you that yummy side stretch. And let's do the liver releasing sound. Inhale. Inhale. Inhale. Inhale. And then bring the hands down along the sides. Bring the knees back to center, press down with the feet, lift the hips and bring them to center. And take a pause here. Inhale. As you exhale, draw your knees in towards your chest and actually widen them.
Take them towards your armpits. You can either take a hold of your shins, the backs of your knees or the outsides of your feet. If you're breathing like this to reach your feet, go for what's easier. Come into a wide legged version of happy baby pose or hugging the knees in towards the side ribs and rock a little side to side. And breathe. Come back to center. Stretch one leg out over your cushion or bolster. You might need to adjust it so it's right under your knees just right. And then we're going to come up and take this towel or blanket, bring it underneath the neck, make a little tiny roll with the edge that's close to you and bring that little roll right to the zone where we were smooshing earlier, the suboccipital space. You can kind of nestle it in there. Bring the hands to a comfortable position along your sides or out from your shoulders, wherever feels good. And let's take about five slow, deep belly breaths. One, two, three, four, five, six, seven, eight, nine, eight, nine, eight, nine, ten, ten, ten, ten, ten. Letting go of the breath, of the effort of the breath. Letting the head be soft. Draw, relax. Hands and arms soft. Belly soft. And the legs, feet, heavy. And the rest. You're welcome to stay here in Shavasana as long as you like. If you want to come out of the pose, start to deepen your breath again. And breathe a little movement, a little awareness into the toes, fingers, ankles, and wrists. Lengthen your body and slowly rolling your way onto one side. Take a pause on your side for a breath or two. And let your head stay heavy. Roll that top shoulder a little forward and press your hands down slowly, sitting up and come up to find a comfortable seated position.
Putting your palms together in front of your heart. Namaste.
Rest Deeply
Mention
 |
Arturo Peal (Teacher) |
 |
Sara S |
 |
Amanda H |
 |
Sandra Židan |
|
|
Anna H |
|
|
Susan R |
|
|
Marijana R |
|
|
Samreen F |
 |
Nina Schwitters |
 |
Laura M |
 |
Joan J |
 |
Agnes Gerritsen |
Comments


You need to be a subscriber to post a comment.
Please Log In or Create an Account to start your free trial.
