Description
About This Video
Transcript
Read Full Transcript
Hello, everyone. I'm glad you're here to practice with me today. I've got a great class designed here to help you bring more mindfulness to your posture and then start to develop a little bit more core strength around maintaining that healthy posture through various poses. For class today, it'll be very helpful to have a blanket, two blocks and a strap. And I want to invite you to grab your blankets and blocks for our first pose where you might use your blanket about the middle of your mat, more for padding than anything. And then take your blocks towards the back end of the blanket. So you've got them stacked pretty tall. And then I often put my knees at the front end of the blanket and I kind of feel for those blocks so I can sit back and I've got my tall seats where I'm already maybe noticing great posture similar to what I would feel if I was standing upright. Now, if you notice you feel like this is too high, you might come down one notch. I'm assuming that can still help you maintain that good healthy posture as if you were standing straight up. So what we'll do in the beginning, because posture often starts in our pelvis, is to take your hands down towards your pelvis and to feel your pelvis tip backwards and then forwards. Do a little kind of manual tilting back and forward so we know kind of all the possible places we could place the pelvis. And after doing that little rock and roll, then if we can keep your pelvis and what would feel kind of neutral as if you were standing, then slide your fingertips up towards your ribs. And let's kind of do a little circular movement with the ribs so you feel how they move around the spine, around the organs, and go maybe the other direction to loosen up some of the muscles also through the center of the body. And as we move the ribs, the pelvis of course is moving along a little bit. So now let's say we slow down that movement and you kind of try now to align your ribs right over your hips so that we're not in a back bend with your ribs sticking forward. You're just kind of neutral ribs over your pelvis. Now see if you can raise your arms up towards your ears and then we'll lace your fingers together and then press your hands lightly on top of your head to get a little feedback at the crown of your head. Now see if you can lift your spine, lift your head up into your laced fingers without pushing your ribs forward. So we're already elongating which is going to be helpful to maybe make some more space in the joints of your spine. So now what we'll try to do is constantly keep track in this class of your ribs and your pelvis. And I'm going to invite you to first start by taking your left hand down over your front rib area and keep track of this as we start to tilt our torso a little bit over to our left sides. Can you lift your head up into your right hand and notice if our head is tilting forward, we collapse in the chest. The head is just right. You feel a little bit more lift and space in that right side of your chest. Now tilt back up to center and now take your left right arm straight and with your right arm straight can you tilt over to your left. Notice that your head tilt forward, ribs pop forward into your hand. Just gently guide ribs in, lean your head back so it feels like it's in that space that creates more space here on your right side. Come up to center and now tuck your left hand into the small of the lower back. And as we reach over can we put the hand on top of the head and lift your head into your right hand and we're elongating as we tilt to our side. Let's come back up, both arms up in the air.
Lace your fingers, press your palms towards the ceiling and just get longer through your back muscles. And if reaching up straight up doesn't work for you, maybe you're reaching a little bit more forward. That's better in your shoulders. Let's take the hands back on top of the head, lightly press into the top of the head with your hands, lift up and now we'll keep track of the front ribs with your right hand in front of your ribs so we're trying to keep them from popping forward as we tilt a little bit over to our right sides. Can you lift your head into your left hand and guide your head maybe back but tends to slide forward. And then come back up and then let's go for a straight left arm and maybe you tilt a little bit further out to the right sides. Can we feel our ribs pop forward? Can we keep them over the hips even if you don't lean so far to the side? And then come up, put your hand back on your head and take that right hand behind your back. And now as we tilt to our right, lift your head into your hand and see if you can get a little taller and more spacious on your left side. One last breath there, come back up. As the hands come towards the top of the head, lace your fingers. One more time, we're trying to lift the back muscles, lift the ribs away from the hips and stretch, open the backside of your body a little bit more. Okay, one more cycle here. Unlace your fingers and as you lean forward now, if you can come off the block and set your blocks down and come up to stand on your knees and we'll try some of that same movement and add a little bit more here. All right, so let your arms, whenever you're ready, rise up, lace your fingers and this will be kind of our centering place where we put the hands on your head, draw your head back so it feels like it's right over your navel, right over the center of your hips. All right, now like we did before, if we take your left hand over your belly and start to lean over to your left sides, can you lift your head into your right hand? Come back up, right arm straight and tip over to your left, still lengthening through the crown of your head. Come back up, put your right hand back on your head, left hand behind your back and as you tilt to your side, lift your head into your hand, draw your head back but tends to lean forward. Okay, both arms up, lace your fingers, let's go for length in your whole back sides. Then bring your hands back on top of your head, keep lifting into your laced fingers and then slide your right hand right over your rib cage area. So when you go to your side, we're trying not to backbend, bring your head back in space, most likely, come up, left arm straight and as you reach further across the room, does your head come forward? It can be kind of sneaky, so you want to bring the head back into better alignment. Tilt up, hand on the head and then take that right hand behind your back, tilt to your sides, lift your head into your hand and then tilt back up. When your fingers are on top of your head, lace your fingers, press up. All right, and then last time feeling the whole backside body lift. Let's unlace the fingers and we'll try to keep track of that rib cage area now as we turn and face the short end of your yoga mat. Let's walk your hands forward for that tabletop position. When you're in tabletop, maybe if it's helpful, if you balance for a moment and lift your front ribs away from the ground, you can then feel your back diaphragm area, back of the rib cage, lift towards the ceiling. So let's try to maintain that neutral back as you stretch your left leg to the back of the mat, toes are on the floor and then bring your right arm up by your ear. Can you lift your head again so it feels like your head is perfectly aligned with your navel and the pelvis? Bring your right hand, left knee down, take your right leg straight back, lift your head up if it tends to fall forward. Bring your left arm up by your ear and practice supporting that posture, some deeper core strength as you hold. Right knee down, left hand down. Let's try again, left leg back, right arm up. If you're not sure about your head, the alignment, bring your right hand to the crown of your head and press your head into your right palm and get longer this way. Let's release knees and hands to the floor, right leg straight back. Bring your left hand to the crown of your head and give yourself a moment to maybe push your head into your left palm and see if that's helpful to kind of figure out where your head should be in space here. And then both hands down. Now let's stretch that left leg back and now in plank pose for a moment, notice again the head is lifted and reaching away from your heels, front ribs lifted and opening up your back body towards the sky. All right, knees to the ground, knees to your blanket. Walk your hands in towards your knees, thighs and then we're going to come up to stand on the knees. Let's bring your right foot forward in all these different places. Again, we might tune in freshly to your posture as you look straight ahead. And as we've been doing, take your hands to the top of your head. Okay, this time while you press your hands into your head and you lift up, let's do a little rotation to your right as you try to keep lifting your head into your hands and face forward. Again, do a little rotation to your right, face forward. Again, turning to your right and then forward. Now while we're here, if we can take your right hand in front of your belly area as we did before and we tilt a little bit over to your right sides, it's kind of feeling does your head tilt forward in space and can we bring your head back more or less to line up with your right shoulder? Okay, and then come on up and let your arms come down. Let's switch out and bring your right knee to the blanket and take your left foot forward. All right, when you are standing right over your right knee, let's bring your hands again on top of your head, make a little bit of contact, press down and gently lift up into your laced fingers. Okay, try to look straight out to your horizon. As you start to rotate to your left, start to notice again, often it's not a big movement, face forward.
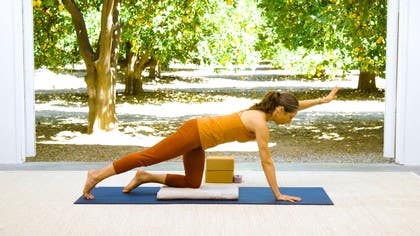
The part of the body that we're typically moving is the ribs, the shoulders, a little bit of the head and neck we're turning rather than moving from the hips. Face forward. Now this last time, take your left hand over that front belly area so your ribs stay right here as we tilt a bit over to the left and we're opening these muscles along that right side of your body as well as maybe some of those deeper muscles on the right side of your back. When we come back to neutral, let your arms come down and bring your knees to the blanket. Curl your toes under with your hands are down beside your knees. Let's lift your knees up and fold that blanket up perhaps and get the blanket out of your way. As we work, then our hands all the way forward and come into a little downward dog checking. So we'll stretch one leg now at a time straight back and then start to float your hips up into the air as you bend your knees and let your head dangle down for a moment between your arms. And downward dog, can we feel again that lift of the ribs in towards your back so that you can imagine maybe your head, your navel and your hips are all in a nice long line here and decrease any tension that might be in your neck area. We're going to walk now your feet forward towards the top of your mat, bend your knees and come up. Your favorite way to standing and then if you will, once you're getting upright, grab a block, right? So we're going to use a block in between the thighs. And I'm a huge fan these days of my block in the medium position. If that doesn't quite feel right for your body, maybe you go more narrow. I just want to give this as an idea to try in the beginning. So as you're standing, you might from here, let your hips circle around a few times and just kind of move your body so you feel the ground under your feet. Notice your weight shifting and we're going to try to dial into what feels like your center. So a place where you're kind of upright and comfortable at ease. And then as we've been doing, we'll raise the arms up and we'll lace the fingers and press them down into your head here. And so now standing, can you bring your head back? So it's better maybe aligned with your shoulders. And then in this position, maybe we keep for a moment our right hand over the front rib area and tilt to your sides. Just notice what that feels like here. Come back up. And then as we go ahead, as we did earlier, we go for a straight arm and let that right arm reach overhead. Come back and now let's lace your fingers together on top of your head and press up. Let the back waist lift, back shoulder blades lift. And then hands back on top of your head. We'll switch out and have the right hand over the ribs as you tilt to your right sides. Can you bring your head back in alignment? Come up. Go for a straight left arm, tip to your side, reach across and then come back up. Both arms up towards your ears, lace your fingers and that often can give us a little bit more access to reach up tall. Now when we unlace the fingers, reach them forward and squeeze the block as you come into your chair pose and see if you can maintain that nice long back as you do chair. We'll come back up on inhale, straight legs arms up, exhale into the chair, squeezing your block, inhale going up and exhale into that chair. One last time going up and then coming down. So now from here, let's get rid of that block and maybe we set that with the other block for a moment and let your feet open a little bit wider. So maybe a little bit wider than your shoulders. Turn your toes out a few degrees as we let the hands for a moment find the tops of the thighs and come into our kind of straddle seat. We'll let the hands reach up for your rib cage and see if you can feel here as we turn a little bit side to side. Try to imagine you've got a maybe a third hand on top of your head that's reminding you to keep that good posture as we try to loosen up along your spine. As we find some of that loosening up along the spine, let's pause and maybe deepen into the squat as you let your arms reach out in front of you to help you balance as you look out beyond your fingertips to your horizon. As you straighten your legs, pull your elbows in towards your waist and open up the front chest. Come back into that squat as your arms reach out in front of you, nice long spine. Pull the elbows in, open the chest, straight legs and then do your squat. Pull the elbows back. So all the while you're trying to keep this length from head to tail as if you were practicing with the block on top of your head. So it's not about like how deep you go, it's just can you keep that good posture? And I think oftentimes the inner legs and pelvic floor muscles, back muscles are part of what I consider core muscles that help stabilize our posture or promote even better posture. Now this next time when we're standing, let's slide our hands up to our rib cage and point your toes to the long end of the mat. And if you're not facing the long end, you might turn so that you are. Let's turn your right toes out first in the position like you might do for triangle pose. So I'm gonna have you take your right hand on top of your head as you tilt over to your right side and press your head into your hand. And maybe you can feel the muscles engaging where your left fingertips are. Some of those deeper core oblique muscles tilt up. Again, tilt out to the side and as you press into your hand with your head, notice if your feet are more grounded. I noticed my feet are rooting into the earth to help me press my head into my hand. Lift out. One more time, tilt to your side, ground your feet as you press your head into your hand.
I'm just noticing that your head need to go further back or forward. So it's kind of subtle and very deep work. Come back up and let your arms rest for a moment as you turn your right foot in and then turn your left foot out. Slide your hands back up to your rib cage. And then let's take the left hand on top of your head as you tilt yourself a bit to the left. Notice what's different. Press your feet down, press your head into your hand, tilt up. Again, as you tilt to your sides, press your head into your hands and notice if your feet are pressing down to help you move your head into your hand. Come back up. This last time again will hold as you find what angle works for you and you might notice that you're not tilting out as far as maybe you normally do in triangle if you're paying a little more attention to your posture. As if you were in mountain pose and you're just tipping your body to the side. One more second. And then come up and let your arms come down. Turn your feet forward and then heel toe your legs and feet towards each other and give them a little break. While you're giving your legs a break, grab your blocks if you will and bring them right out in front of the long end of your yoga mat. Now let's go again wider with your feet, kind of like you were just doing for triangle pose. Bend your knees and we're going to hinge from the hips to tilt forward and see when you tilt forward if your hands can land on tall blocks. So you have the sense that your head is lined up with your tailbone here. And when our body is parallel to the floor that we're trying to keep good posture by lifting our front ribs away from the earth and trying to feel like you've been feeling in all the other poses. The head lengthening away from the tailbone. Legs engaging. And maybe your feet go an inch wide or not. Maybe you've got a little bit adjusted to that position. Can we again catch the front ribs, lift them in, open back body, lengthen from head to tail. So it's sort of a little in between pose that we'll do a couple times. Let's bring the feet closer together. At some point, bend your knees, transfer your hands to your hips and come back up to standing. So first we're going to turn and face the left foot and face the short end of your mat if you're separating your feet like you do for warrior one. And I want to invite you to have your feet kind of a short step, a wide step as you transfer your hands on top of your head. Then bend your front knee. So see if your feet are close enough together that you can press down to lift up into the crown of your head. Okay.
Now when that's true, let your arms then come down to your side and we're going to practice bringing your right arm up by your ear, reach for the ceiling and then take that arm down. And then the left arm comes up and reach for the ceiling and that arm down. Both arms come up. We reach for the ceiling. Take one more breath, pressing your feet down, hands up. Take your hands back on top of your head. And from here, start to lean forward. Keep bending your front leg. And as you press your head into your laced fingers, lengthen through your spine as you push into your back heel. If you want a little bit more play or challenge, open your arms out wide out to the side. Palms face up as we lift our torso all the way back up to where we started in warrior. Hands on top of your head. Hinge from the hips, lengthen from your head to your back heel, develops a little more back core strength. Arms might open out to the side if you feel like you want more challenge. Palms up, come all the way back up to warrior one. Last time, hands on top of your head. A little bit more back strength here as you lean forward, press into your laced fingers. Arms open wide. Palms up, come back to warrior and we're going to turn back to the long edge of your mat facing forward. And then let's spin around and face your right side. So just your feet shorter step, short enough that the front leg bent. Hands on top of your head that you can lift your head into your laced fingers. If you ever need trouble with that, shorten your step. All right. And then the arms down. Let's take your left arm up first. Reach for the ceiling. Take the arm down. Right arm goes up for a big lift and then come down. Both arms come up and hold that lift as you press your feet into the floor. Hands on top of your head here and as you hinge from the hips, again that idea of leaning forward, press into your back foot as you lift your head into your hands. If you want, again, arms out to the side, a little more challenge for the back. Come all the way up, warrior one. Look forward. Hands on top of your head. Hinge from the hips as you lean forward. Press into your back foot. Press into your hands. Arms might go wide. Palms up as we come back up through warrior one. And one last time, hands on the head as you lean forward. So you're lengthening your spine. Great posture here. Arms might open wide. Palms up, back up to warrior and let your arms come down as you spin again to face that long end of the mat towards those blocks that are waiting for you as you bend your knees. Tilt forward from here, grab those blocks and let your feet go as wide as they need to so that you can have your head the same height of your pelvis. And just notice again, the belly, the front ribs are slightly engaged and lifting more towards the ceiling so that you're aware again of your posture. Head is in alignment with the tailbone. Take one more moment or two just trying to maintain that posture here. After enjoying that neutral position here, let's go ahead and start to bring your feet a little bit closer together. And then we can move the blocks out of the way as we come to have a seat on the floor. So now when we come down to the floor, this is where we want our blanket again to have a little something to sit on and also your strap. The first time we'll bring that into play. So we have the legs straight out in front of you and enough height underneath you that if your hands feel for your pelvis that you're tilting into what feels neutral. Sometimes that means the knees are bent. So now we're going to use the strap on the bottom of the feet to help us move the legs forward and straighten and give yourself lots of space to reach your hands forward or pull back so that you can sit up straight the way we've been doing throughout the class in the sitting position. So we'll in a moment maybe hold the strap with let's say just your left hand and feel maybe the right hand come to the crown of the head and see can you lift up into your hand and notice how much more you're waking up your legs when you press up into your hands. Now while we're holding that strap let's go ahead and send your right arm up toward the ceiling and get longer taller on the right side like we've been doing in several of the shapes here. Press your legs down to lift up. Let's switch out and now hold on to the strap with your right hand and let your left arm come up. Reach for the sky. Press your legs down. It's a little bit of effort right to keep your spine long in the sitting position and then we'll go ahead and release. You know as we get rid of that strap I feel like we definitely deserve a little time down on the floor for ending so maybe your blanket is used as your pillow under your head and when we come down to the floor one more little thing to discover here and work with our posture here when we're on our back. So please start with your legs bent and let's have the right hand over your belly rib diaphragm area as we take the left leg and left arm long and notice when we're on our back if we tend to push the ribs into your right hand and today can we soften the back of the ribs a little bit towards the floor and focus on getting longer here. Let's go ahead and switch out. Bring your left hand to that front belly rib cage area and stretch your right leg to the floor as you take your right arm back by your ear and as you get longer here notice which direction your ribs went. They go up. They stay neutral or down and to keep them a little bit more neutral maybe you can even feel there's a little bit of toning firming of some of the muscles under your hand in your abdominal area. Switch out one more time. Take your left leg and your left arm long to the floor with the intention to narrow your front ribs, soften back ribs towards the ground. Bend your left leg, left hand on the belly. Last time right leg goes long. Right arm back by your ear. Soften your back body towards the floor. You feel a little narrowing of your front ribs. Now let's take both legs and arms long so if possible stretching your arms by your ears and we've done this type of movement in this standing position, kneeling position. Can we soften the back ribs down towards the floor? So this pose would more or less mimic you standing with your core engaged to keep your front ribs a little bit more narrow. Let's try to keep that soft back body as our arms come down to our side and if you like your legs to be a little wider as we go into more full relaxation now into a little bit of shavasana after all our effort and focus on our posture. Just feeling your way each exhale a little bit closer to the ground, gently easing into a more quiet, spacious place as we ease into our exhales. The next couple of moments went twinkly in your fingers and toes. Just that little check in before we re-bend your legs which sometimes can be a little bit easier in your lower back area with legs bent. I hope that feels nice as a transition and then turn over to whatever side you're more comfortable. From your side position we'll press on up towards sitting and I would encourage you to grab that blanket that maybe you had under your head so that you have a little bit of padding to sit on so you can bring your pelvis a little bit more neutral. Then I feel like it's never a bad idea when we come back up to sitting to reorient ourselves with our hands on top of your heads. Bring your head back in alignment over the navel, over the center of the pelvis and may we remember again the feeling of our hands lightly pressing into our head as we walk around throughout the day and days and keep coming back to this practice as a way again to establish better posture. Thank you for practicing with me today. I hope this serves you well. Namaste.
Yoga for Mobility
Mention
 |
Melina Meza (Teacher) |
 |
Pam H |
 |
Angela D |
 |
Elizabeth M |
|
|
Heather D |
|
|
Judy S |
 |
Sandra Židan |
|
|
Elizabeth C |
|
|
Paula H |
 |
David G- |
 |
Pat Pao |
 |
Matthew |
 |
Lina S |
|
|
Louisa R |
|
|
Nina G |
Comments


You need to be a subscriber to post a comment.
Please Log In or Create an Account to start your free trial.
