Fallen Triangle
Description
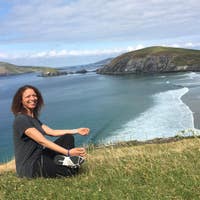
About This Video
Transcript
Read Full Transcript
Hi, everyone. Welcome back. So today we will be practicing fallen triangle. So it's another variation on side plank. And we'll continue to make friends with this version with various varieties of this particular arm balance. So I have two blocks for this practice and also a blanket. So if you want to come into Sukhasana into a cross-legged seated position, go ahead and do that and support yourself as you need. And also take a block with you. And with this block, we'll take the block so that it's the widest width, right? I like to bring my knees in and create just a little table for myself so that I can pick the block up using my forearms. And with my forearm squeezing the block, I try to rotate my thumb so they face down towards the floor and my inner upper arms face up towards the ceiling. And then squeeze the block between your forearms. And you start to feel all this exciting sensation across the arms and the upper back. And so now as you're squeezing, it's likely that the shoulders might be coming forward a little bit. So see if you can pull the shoulders back just a tiny bit. And without pulling the shoulders down, see if you can broaden across the upper back and the collarbones at the same time. And keep squeezing. Press, press, press, press, press into your block. And then as you exhale, you can bring your knees back up, take the block down, and set it aside. Okay, now bring your arms out in front of you so they're about shoulder width high. Take your fingertips, pull your fingertips down towards the floor so your wrists are in flexion. Then pull the fingertips up towards the ceiling and pull them back towards your shoulders as you press the bottoms of your palms forward. So your wrists are now in extension. Do that one more time. Fingertips point down. Fingertips face up. Then bring the palms to face down. So with your palms facing down, take your thumbs towards each other. Pull the fingertips down so you can notice that your wrist is sort of at an angle here. Keep the palms facing down as you take the fingers down. Lift the hands up, pull your pinky fingers towards your outer elbows without bending your outer elbows. Then bring the hands up so the fingertips face up, sort of at an angle again. Thumbs towards each other. Hands face down. The wrists start to flex. Pinkies pull towards the outer arms. Hands lift up and down. So you do that one or two more times. And as you're circling the wrists, just notice, right, I'm going to try to do what I want and what I don't want. So you can see in one arm how the wrist is kind of moving however it wants to. And then my other hand is very controlled. So see if you can keep the palms pretty much facing down the entire time so that we focus the motion in the wrists rather than the rest of the joints of the arm moving. Okay. That's pretty tiring. Release your hands down. Okay.
Take your hands to the sides of the body. You can have your hands on the blocks if your hands don't reach. Reach your left arm overhead. And then as you exhale, side bend over to the right. And if your left sitting bone gets light, that's quite all right. But think about it. So anchoring it down even if it lifts up so that your body is moving in two opposite directions. Your left hip is moving down towards the floor and your left arm is lifting up and overhead. Okay. And then lower your left arm down. Reach your right arm overhead and side bend over to the left. Okay. And on the inhalation, lift on up. Do that one more time to each side. Side bend over to the right. Anchor the left hip as you reach through the left fingertips. Rise up. Inhale, lift your right arm up. Take your body over to the left as you drop the right sitting bone towards the block and the right arm reaches over away from the hip. And inhale on up. Release the hands. And now you'll twist. So take your left hand behind you. So in my case, to reach the floor, I lean back. So I'm going to grab my other block to place my hand on. Take the right hand to the left thigh as you turn the torso to the left. And come back through center. Take your right hand behind you. Left hand to the opposite thigh. Inhale to rise. Exhale to turn. And back through center. So now take your hands to your heart. Thumbs touch your heart. And we'll twist again. Take an inhale, elongate your spine. As you exhale, turn to the left. And notice where your sternum is facing. From here, now reach your arms out to the sides. And you may have noticed that when you were twisting just prior to this, that you were able to go a little bit further, right? So this is an active twist. And back through center. Hands touch the heart. Take an inhale, elongate your spine. Exhale, turn to the right. Notice where your sternum is facing. Then take the arms out. Maybe you can actively twist a little bit more. And then from here, come back to center. Release your arms. Make your way onto your hip. So you're welcome to pull over your blanket as you push your blocks aside. And use the blanket as a way to support your outer hip. So you'll place your outer left hip onto the blanket. Take your left forearm down to the floor. And move your knees back so that the knees aren't tucked in towards the chest, but they're further back. From here, pull your right knee in towards your chest. Reach the right leg forward. Then take your right arm and reach it out to the side. Now the right arm can be straight or you can bend the elbow like cactus arms and revolve the chest towards the ceiling. Then bend your right knee and come back through center and we'll do the other side. So you'll see this from the back. I'll take my right hip to the blanket for some extra padding. Take the thighs back and the right elbow underneath the right shoulder to support you. And again, you're pushing down against the floor as your shoulder moves down in the direction of your elbow. Put your left knee in towards your chest, straight in the left leg. Then turn the torso out to the side as you revolve your chest up towards the ceiling. So in a way, it's very similar to our fallen triangle. Then bend your left knee, unwind from your twist and make your way down onto your belly. You can move your blanket aside, but keep it nearby. Find your block. And so the block can be a fun addition to this next pose. Take your arms down by your sides on an inhalation, lift up into Shalabhasana and you'll swim your arms. So reaching your arms overhead and bringing the arms back down. And so if you would like to do something a little bit different, can take your block, reach your arm overhead, pass the block to your other hand, take the block behind the back and then switch sides. Take the block back in the opposite direction and then circle again one more time. Pass the block off, pass it back off onto the other hand, bring it overhead and then lower the block back down. Give yourself a moment to rest your forehead on your hands. Okay, and on your inhalation, come on up, grab your blanket again and place it right underneath where your face is. Walk your right fingertips out ahead of you, take your left arm, you'll thread your left arm underneath you, like thread the needle pose. For right now, square the shoulders a bit so you're not quite turning just yet, but we will. Okay, then continue to slide the left arm forward, pull your right knee up into your chest, similar to what we were doing when we were lying on our side. Rest your head down, let it roll on the blanket and be supported by the blanket as you open the right arm up. And again, the right arm can be in cactus arms or straight out to the side. From here, you can keep the knee bent or straighten the right leg and maybe find some contact between hand and foot. Bend the knee, unwind back into that thread the needle pose, lift yourself up as you slide the arm out and change sides. Take the right arm underneath you, pause here for a moment so the shoulders are square-ish to the short edge of your mat. Then start to turn, pull your left knee up towards your chest as you rest your head and turn. And again, the hand can be in cactus arm or straight out. Stay here or straight in your left leg and maybe find some contact between the left foot and the right hand. If the leg is straight, bend the knee, roll back onto your abdomen, pause here for a moment, then unwind the hand, take your right hand underneath your shoulder, left hand underneath your shoulder and press yourself on up into tabletop. Move your blanket aside and grab your blocks. Take your blocks to the front of your mat. So you'll place your hands on the blocks and step your left foot forward. Tuck your right toes under, spin your right heel down to the floor and circle your right arm overhead so you're in extended side angle. Then take your right hand back down as you come onto the ball of your right foot. Stay on the ball of your right foot as you pick your left foot or you can drag your foot along the floor and cross it over so that it comes past your mat and turn the shoulders down. So it's a little bit like that, thread the needle. Notice that you're still on the ball of your right foot. Push into the blocks as you elongate your chest forward. Then from there, step your right, your left foot back into plank and take your right foot forward now. Reach your chest forward. Spin onto the inner edge of your left foot and seal the outer edge of the foot down into the floor. Circle your left arm overhead as you turn your chest to the left, extended side angle.
And circle your torso back down to the floor as you come onto the ball of your left foot. Drag or step your right foot out to the left. Turn your ribs down towards the floor. Pause here for a moment. Elongate the sternum towards the front edge of your mat. Push with the arms and then take your right foot back and step your right foot forward. Step your left foot forward. Move one of your blocks aside. Take your block with your right hand as you come on up to stand. Take a step back with your right foot so that your feet are about your legs distance apart. And hold the block really in any orientation. I'm going to take the medium height and take your right arm, spin the right bicep forward, lift the arm up and overhead. Then you're going to circle the arm back. Now as my arm comes forward, you can almost think like you're throwing a bowling ball, right? So as I reach the right arm forward, I'll then cross the block to either the inside or the outside of my foot. Turn the chest to the left. Reach your left arm up. Now push down through the right hand as you reach up through the left. To come out, take your left hand down, place it on your hip, grab your block, reach it forward. Really squeeze your block. Come on up. Circle the arm back. Give a little bend to your left knee as you come onto the ball of your right foot and step your right foot forward. Other side. Step your left foot back. Turn the toes out slightly. Hold onto the block with your left hand. Turn the left bicep to face forward. Reach the arm overhead. Lift up, reach up. Circle the arm slowly back so that the left side of your chest is still facing forward as your arm moves behind your body. As your arm comes alongside your body, reach the block forward. Pull your right hip back and then cross to the outside of your right foot. Turn the chest to the right. Lift your right arm up and then push these elevator doors open so that your chest spreads a little bit wider. Then as you exhale, look on down. Grab your block. Take your right hand down. Reach the block forward. Keep squeezing the block, squeezing the block. Circle the arm behind you with the left side of the chest still facing forward. Bend your right knee. Come onto the ball of your left foot and step your left foot forward. From here, you'll fold forward again. Take both of your blocks to the outsides of your feet. Step your right foot back. So very similar to the setup that we did with the left foot on the floor. So you're going to drag your left foot to the right side of the mat as you come onto the inner edge of your right foot. So before we were squaring our shoulders down, but now we're going to turn the chest for our fallen triangle. Reach the right arm up. Now here you can try and lift the left leg away from the floor. So this would be a progression. And maybe more of that outer edge of the foot comes to the floor like an extended side angle. Then place, rather than drop, place your outer edge of your left foot down onto the floor. Square the shoulders like you were in the thread, the needle position, and step back into plank. Try the other side.
So the right foot steps forward. Then from there, place the hands down. Step or drag the right foot over to the left. Turn the ribs down to begin. Spin onto the inner edge of your left foot. Lift your left arm up. So you're coming out of your twist. Push down as you reach up. And then perhaps here you lift your right leg. Maybe more of the outer edge of the left foot comes to the floor. Then as you exhale, place the outer edge of the foot down onto the floor. Take the left hand back to your block. Slide your right leg back into plank. Lower the knees and sit back. That was hard. Okay. So if you found that challenging, I have a little trick. So you're going to come back into this handy block placement, right, that we've been practicing. And you'll take your blanket and place the blanket over the blocks. Okay. We set up pretty much how we've been setting up. So you sit that outer left hip onto the blocks. Reach the left hand down, left hand slightly in front of the shoulder, and then reach the inner blade of your right foot towards the back edge of your mat. Then from there, pick your left foot up, reach it forward. You can turn it out a bit. Revolve the chest up towards the ceiling and reach your right arm up. Okay. And here, right, this could be a place where you practice pressing or sealing the outer edge of the right foot down into the floor. Okay. To come out, bend your left knee, place the left foot onto the floor, bend your right knee, and then come on up. So we'll see from the other side. So you'll take your right hip now, place the right hip onto the blocks, and you walk your right hand out in front of you, slightly out to the right. Straight in your left leg. Then from there, push the floor away, pick your right knee up a little bit, straighten your right leg, and lift your left arm up. Fall and triangle. And again, so you might kind of be here with the shoulder shrugging towards the ear, press away, lift from your inner right thigh. So that right leg is still very active as if you didn't have the support of the blocks underneath your right hip. Okay. And then to come out, bend the right knee, lower your hand, bend your left knee, and then walk yourself out and come to sit on your heels. So hopefully that was a more accessible version of fallen triangle. And so you can play with these over and over again in your body. Okay. So now we will come into upavishta konasana, so wide angled seated position. Have your legs a little bit wider than your mat, and you'll keep the same block set up. So as you inhale, lift the chest. As you exhale, try to bring your ribs forward towards the block set up. And then you can rest the ribs there, stack or fold your forearms, and lower your head. If there's more space available to you, bring the prop set up further forward and then rest your forehead on the block set up. Let your arms rest, let your wrists rest, broaden the back of your spine after all that twisting. Turn your palms down towards the floor. Okay. Press your hands against the floor to make your way out and walk your hands back. Take your left leg more towards the center of your mat. It's okay if it's still a little bit of skew. And bend your right knee, take the leg out to the side, turn your block set up so that the long edge of the blocks is facing the long edge of your leg or the long length of your leg. And reach your left arm to the inside of the block set up and see if you can rest your head. And if not, take your arm, right? And then you can even hold the side of your heads really relaxing. And take your right arm overhead. And then if you do go a bit deeper into this and you rest your head on the bolster blanket, then you can bend your elbow, hold on to your opposite shoulder, or even hold on to the blanket. And like we did at the beginning, it's okay if this right buttock comes away from the floor, but have that sense of direction that you're pulling the right buttock flesh down into the mat. And come on up, place the right hand back down onto your thigh, turn your head down to face the blanket as you come on up. Okay, take the right leg forward. Okay, and you're going to turn the bolster blanket set up, bend your left knee, take the left knee out to the side, right hand reaches towards the right foot, and the arm comes to the inside. Take your left arm overhead, place your head down onto the blanket. And then maybe hold the arm or hold the blanket or block. If you're propping yourself up a bit higher in this position, then take the upper arm, hold the head, and then the left arm can be overhead.
Turn the flesh of your left buttock down into the mat. And then to come out, slowly walk yourself up, take your hands down as you look down towards the blanket, and press yourself on up. Move your block set up aside. You'll take your left leg, bring it forward. We'll make our way down onto our back. So as you come down onto your back, bring your knees in towards your chest, and then hold on to the ankles or the shins as you gently draw the legs out to the sides. So we did a lot of this, crossing the leg past the body. So do like a half happy baby, hold onto the outer edge of your left foot or beneath your thigh, and reach the left leg out to the left. Gently pull your right leg to the right. And come back through center, find that same set up on the right side, pull the outer blade of your foot or underneath the thigh, reach the right leg to the right, pull the left leg back. Bend the right knee. Hold on to the outer blade. Move the right thigh to the right, left heel to the left, and let your abdomen be soft. Bend the left knee. Hold on to the outer edge of the right foot. Pull the left knee to the left. And back through center. Bring your knees in towards center. Give yourself a little rock side to side. Circle the knees in one direction and circle in the opposite direction. Return to center. Place your feet on the floor and stretch your legs forward, coming into Shavasana. And feel free to set yourself up with your props in any way that supports your body best. And feel how the back surface of your body makes contact with the floor. How the breath travels through all the nooks and crannies of the spine that you've discovered as you explore the fallen triangle with a sense of support, a sense of being uplifted. Shavasana. Shavasana. Deepen your breathing. Twinkle your fingertips and your toes. Bend your knees. Roll to one side and support yourself for a moment on your side. And using your hands, gently press yourself up into any comfortable seated position. And take your hands to your heart. Touch your thumbs to your heart to uplift them. Om shanti, shanti, shanti. Om peace, peace, peace. Namaste.
Comments

You need to be a subscriber to post a comment.
Please Log In or Create an Account to start your free trial.
