Description
About This Video
Transcript
Read Full Transcript
(waves crashing gently) Hey how you doin', this is Robert. Welcome to Yoga Anytime. This practice is a morning practice geared for beginners. Now keep in mind I'm aware that the beginner can look and feel a lot different from person to person. So if you're a beginner and you've got injuries, you might be different than the beginner without injuries.
So I'm going to teach what I feel would be a good, strong, solid morning practice for the beginner. Do what you feel is appropriate, what feels right. All right, and I understand that it might, you might not know what feels right because you're just starting out, so I'll do everything I possibly can to give you those tips, those little cues and signals, to let you know you're on the right path, for you. So you may notice that I'm on a blanket. If you have a blanket or a towel, grab it, roll it up, and sit on it.
A cushion works as well. Sit on the edge so that your sit bones rest comfortably and your pelvis moves into sort of a neutral slash anterior tilt, okay? So get that, get yourself set up, cross-legged position. We'll take a few moments here to find the breath, okay. So press the hands down gently on your thighs, sit up tall, maybe even pull the shoulders back, chest open, pull the shoulder blades toward one another.
See how that feels. Close your eyes. I'll be talking through some breath cues. You don't necessarily need to see. If you feel uncomfortable keep them open, but I invite you to close your eyes, I will close my eyes as well.
(breathes deeply) So first just simply notice the breath, feel it in the body. You don't need to do too many things to adjust it or change it, just say hello, breath. I'm aware of your existence. (breathes deeply) Sit tall, feel like you can really, like, get the sensation of a long, extended spine. The top of your head, we refer to the top of the head as a crown, the crown of the head, reaching up nice and tall, lengthened.
Now inhale through your nose, very deliberate, relaxed inhale through the nose, two or three seconds. And exhale through the nose, maybe even three to five seconds. (breathes deeply) Inhale through the nose. Exhale through the nose. If it's helpful press your hands gently on your stomach as you inhale, feel the stomach expand and push out, in a sense.
And exhale, pull the stomach in. So there's effort involved here. Inhale, stomach expands. Exhale, gently contracts. Three more, breathe in (inhales).
Breathe out (exhales). Inhale through the nose, exhale through the nose, stomach gently contracts. One more time, inhale. And exhale. Go ahead and open your eyes for a moment.
So that's as simple as we'll keep it for this practice. Simple inhalation through the nose, exhalation through the nose, with the diaphragm working. Okay, inhale, stomach expands, exhale, it contracts. As long as you're paying attention to that, and there is some sense of flow as we're moving through, posture to posture, all right, you're doing perfectly. All right, so try not to hold your breath when it becomes challenging, right.
Remember it's almost like the breath is the priority here. Okay, so, beginner, right, I'm gonna show you a pretty important part of the practice. We always hear about the feet, ground down to the feet, right? So just take a look for a moment. The ball of the foot is here.
This is the big toe mound or the ball of the foot. This is my left foot, it's right there behind the big toe. A lot of times you'll hear me and other teachers say press down into the ball of the foot, root down, ground down, whatever the language is, but that's there. Then you have this other near the pinky toe side. This is a whole other set of smaller bones.
That's the other corner, the pinky toe side. Then you've got the heel. Sometimes it's referred to as one spot. Sometiems I'll refer to it as two spots, kind of east and west, or side to side, okay. Let's say for this practice we've got four parts on the bottom of our feet that we always wanna be pressing down and engaging with, okay?
The toes will help in balance, but you don't necessarily want to grip the toes too much in some of the poses, okay? And I'll try to talk about that as we move forward. So feel that out for just a moment. Like, press your thumbs into these bones, becomes more familiar. A lot of us, including myself, wear shoes and boots.
I live on the East Coast, it's cold. My feet don't get exposed to the outside elements very often so anytime you can actually like, touch your feet, and massage yourself. Number one it just feels good, and number two, you just become a little bit more aware of a pretty important part of your body, right? So I'm not gonna spend all day massaging my feet. I just wanted to give you a sense of where your feet are, where the bones are, so that when I say something you know how to refer back to it, all right?
So let's actually start now at the front of the mat. We're going to come to stand. There are a lot of things we can do on our seat. We may revisit that later, but for now, we've got a sense of the breath, right. Let's apply that to some sun salutations.
So if you do have blocks, great. I've got these blocks here that I'll be using. These are made of cork, they're heavy duty, they're very stable. If you have the foam, we're going to set them up like so, so I wouldn't necessarily set them up like this if they were foam or any less stable. So if you've got the foam blocks, maybe set them up like this, it still gives you a sense of height and brings the ground up a little higher.
If you don't have blocks, you can even try a couple of sturdy books, be creative. If you don't have books, you don't have anything that resembles this, do your best without them. It's not absolutely necessary, but it is a nice addition. Okay so let's stand up. Take your blanket, whatever you rolled up, towel, T-shirt, pillow, cushion, just set it off, we're gonna use it again toward the end of the practice.
Okay so come to the front of the mat. And the idea here is to place the blocks about, well, your feet hip width, and the blocks on the outside of your feet, okay. So go ahead and stand tall, mountain pose. Lift your toes, and can you feel for a moment, you can close your eyes, number one, close your eyes while standing, it'll challenge your balance a little bit. So if it's too difficult, keep the eyes open.
But feel the bones that I was talking about in the bottom of your feet. Can you connect to the four corners? Spread your feet wide, it's like you really wanna get that idea, that feeling, of grounding down when you're doing any of these poses that require you to stand, especially when they get a little bit more difficult. So anyway, get that goin' on. Take a couple, like reintegrate with the breath, get back into relationship with your breath.
What I mean by that is just simply notice it. Bring your attention and awareness back to the inhale (inhales) and the exhale (exhales). Okay, we'll start super simple, just bring those arms up as high as you can, over your head, pressing the palms together. If you can't keep them straight, bend them a little bit. That's the breath in, the breath out, go ahead and bring them all the way back down.
Eyes open or closed, inhale, arms out and up. Big stretch on the inhalation, and exhale, the arms down by your side. Two more, inhale, get long, feel grounded in those bones in your feet, but shoot long through the fingertips, all the way up. That's the breath in, breath in is usually extension and length, exhale is (exhales) little bit of like, letting go or grounding. One more time, breathe in (inhales).
And breathe out (exhales). Let's add some more movement. Inhale the arms out, all the way up. This time you'll take the palms together, bend your knees a little bit, and draw the palms all the way down the center line of your body into a relaxed forward bend, bend those knees quite a bit. Hold on to opposite elbows and let yourself hang for a few moments.
If you hold on to opposite elbows, definitely bend the knees don't feel like you have to straighten your legs at all. Bend the knees, let the body kind of drape over wherever it ends up draping over. Continue to find that breath in, the breath out. (inhales, exhales) Might feel nice to take a few deep inhales and even deeper exhales. (breathes deeply) Let your arms hang now, now press your palms and fingertips into your shins with your knees bent, and press your chest away from your thighs.
Create a tabletop effect in your back body. So your spine is lengthened and long. Inhale here, and now exhale, knees bent, go ahead and fold back down. Remember what I said about inhalation, right, inhalation is extension and length, so breathe in, get long (inhales). Exhale (exhales), fold.
One more time, inhale (inhales). Use a little strength in the arms, pushing your body away from your legs. And exhale (exhales). Place your hands on the blocks, and step your right foot back, bring the back knee down, untuck the back toes. Bring the blocks if you have them up into the highest setting here.
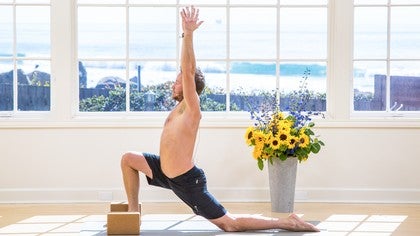
Now rest your hands on the blocks and let your left knee draw forward and lift the chest up. So low crescent lunge, you want to probably pay attention to the right side, your right hip flexor region, and your right kind of quadracept, all right, the top of your right thigh. Shoulders back, chest forward, neutral gaze, take a few breaths, so what I want you to do, right, if you're really a beginner here, the idea is to locate the stretch, locate the feeling, right, and breathe into that space. Just breathe very specifically into that space where you're feeling the stretch. From here, go ahead and put the blocks back down, curl the back toes, and to lift that left foot up, I want you to press your palms into the blocks, lift your back knee and try to lift your foot up off the mat before, instead of dragging it.
So lift, it requires you to super engage the core, okay, so lift up. Step back, and lift up into downward dog. Now if this is the first time in downward dog, go ahead and bend the knees and bring them down for a moment and tabletop, keep the toes curled. Now lift the knees a little bit, reach your butt back towards your heels, stretch your spine nice and long, and then exhale, lift the seat. Keep your knees nice and bent here.
A lot of times what happens is you straighten the legs. We're so determined to straighten the legs that this happens. And I can't really imagine that feeling so great for you. So see what it feels like, right. Bend the knees, chest toward the thighs, make a good connection with the hands on the blocks or the floor, how's your breath?
Are you still able to breathe in (inhales) and breathe out like we talked about in the beginning (exhales). Now we stepped our right foot back first, right, now we're gonna step the right foot forward to get into the left side, so go ahead and just simply lift the right foot up, and travel that right foot all the way up to the inside of the right block. So you might wanna bring the thigh up into the chest, point your toes forward in the direction of the front of the mat, lift the left heel as high as you can, pull the belly up and in, step, step, step, step and land. Now some of you will make it to about here. Just set the back knee down and get it there, okay?
Now get your placement for the lunge. Put the blocks back up on the highest level. And go ahead and let the hips sink forward and lift the chest (inhales). If you feel any aggravation in your low back, send that left knee farther forward, see what that feels like. All right, chest up, if you can close your eyes, close your eyes, take a couple of very deliberate breaths into the left side, your hip flexor region, quads once again, okay?
(breathes deeply) Turn the blocks back down, curl the back toes, lift. All right we'll now step that left foot up to meet the right, so there's this little movement you can do, you can straighten the front leg as much as you can, bend the left, and then (exhales sharply) step it up. When you land, stay low, press the palms into the shins and lift your chest away from the thighs like we did before. This is the half-forward bend. Get long on the inhale (inhales).
And fold, exhale (exhales). Don't be concerned if you can't touch the ground. It doesn't really mean anything, okay. Just simply feel the stretch in the hamstrings. Hopefully the back feels all right.
From this position, send your hips back. That will naturally bend the legs, bend the knees. Bring your arms forward, pull the belly up and in, feel the bottoms of your feet grounding down, right? Now from this chair position, I want you to rise all the way up on the inhale, but start the movement through the heels, okay, so press down through the heels. Inhale, reach all the way up, and exhale the arms down by your side (exhales).
Mountain pose. So let's do that one more time. Inhale (inhales). Now exhale, remember the hands right down the center line, knees bent to make it a little bit more accommodating. Forward bend.
Palms into the shins, inhale, half forward bend, get long here, step the left foot back this time. Blocks up, take your time when you're doing this. Get to know the placement, get to know your body here right? Now draw that, the hips forward. The right knee in a low lunge can go beyond the foot.
There's not really a lot of load here, okay? Go ahead and maybe add the hands up onto the thigh. Maybe even reaching the arms up just a little bit. Feels good for me to reach the hands back behind my head, reach the elbows back. Again if this bothers your low back, send the left knee farther forward.
Makes it a little bit more neutral. Inhale, reach up, exhale, bring those hands down to the blocks, put them down onto medium. Curl the back toes, lift the back knee, and then lift the right foot up off the mat. Lift it. Step back into downward dog.
Take a couple of deep breaths here. I find that the blocks are really helpful, but if you take your feet even wider, this helps to create a little bit more space in the hamstrings as well. But, you know, don't feel like if you straighten your legs, all the sudden the pose becomes better, right? Or all the sudden some magical thing happens. It's just not the case, right.
So feel comfortable, keeping those heels up, knees bent. Okay now we're gonna lead with the left leg once again. So inhale, that left leg up, exhale, see if you can really work hard here, okay. Work hard at pulling the left knee up, lifting the back heel. You're on your right toes almost.
Shoulders come forward, pull it up, up, up, up, and land. Set the back knee down. Set up your low crescent lunge. Arm variation, you can take the arms kind of wide into a field goal post and create some movement. You go inhale like so and exhale, open up.
Inhale (inhales). Exhale (exhales). Inhale the arms up, exhale the hands down. Curl the back toes. Lift, just like we did on the other side.
It's just this little like, momentum thing. You straighten the front, bend the right, and (exhales sharply) land. Inhale (inhales). Exhale (exhales). Hips back.
Arms forward, chest up, sit for a moment. Inhale, through the heels. Press down through the heels, strong legs, reach up. And exhale the arms down by your side. So let's go one full round, just like we did, but move a little bit faster, okay.
And if you're not ready for that, rewind and go back to the initial part and do it that pace once again, okay. So let's see what this feels like. Inhale, we'll try to do it just consecutive breaths. Exhale (exhales). Inhale, half lift (inhales).
Exhale, the right foot back, knee down. Still exhaling. Inhale (inhales). Exhale (exhales). Downward dog.
Inhale, right leg lifts. Exhale, step it up, place the back knee down. You're still exhaling. Inhale (inhales). Good.
One exhale, hands down. Step up, (exhales) finish the exhale. Inhale (inhales), half forward bend. Exhale, forward bend (exhales). Hips back, inhale.
Pause in chair, exhale (exhales). Inhale, rise up (inhales). Exhale (exhales). Inhale (inhales). Exhale (exhales).
Forward bend. Inhale (inhales). Left foot back, exhale (exhales). Inhale (inhales). Exhale (exhales).
Inhale, left. Exhale left (exhales). Inhale, arms high, low lunge. And one exhale, hands down (exhales) fold. Inhale (inhales).
Exhale (exhales). Inhale, hips back, arms up, chest out. That's the inhale, exhale sit a little lower (exhales). Inhale (inhales). And exhale (exhales).
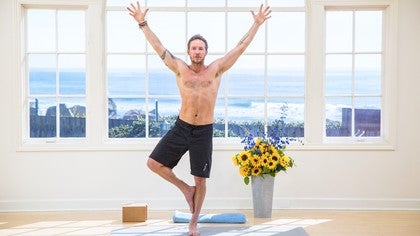
Okay so for mountain pose, just go ahead and take, if you've got blocks, go ahead and move them out of the way, off of the mat, we're not going to use them any longer. So go ahead, set them aside. We're gonna work on tree pose, all right? It's pretty simple, accessible, yet very challenging balancing posture. So start off with press your palms together.
Maybe even bring your thumbs to your sternum, all right? Now the way I like to teach it, especially for beginners, right, is to bend the right knee, turn the knee open, turn it to a little bit of a hip opener there, and you may only open a little bit for you, and that's okay, okay. So now place your right heel just above your left ankle. Okay, so you've got the right toes or even the ball, remember the ball of the foot is here, as support. If this is where you end up staying, keep in mind that this is a perfectly great tree pose, okay?
It'll change over time and with practice. So what you want to stay away from is immediately I see a lot of this, lot of the hip kind of kicking out, okay? So draw the hip right up and in, okay? You can bring some attention to your glutes. Can you kinda squeeze your glutes, your butt muscles up there, right?
Kind of squeeze and tighten this area. Now firm up the belly and your abdominal region. Chest open, shoulder blades drawn toward one another. You wanna stay here, stay here. If you wanna flirt with lifting the toes up, lift the toes up and keep 'em right around there so you know you've got them for assistance, okay?
If you are beyond the toes and you want to explore coming up a little bit higher, bring the heel just below the knee. Not on the knee, not anywhere near the knee, okay? Now press the foot into the leg, and the leg into the foot, and squeeze those glutes, and one big thing I've left out, and you may have already done it out of like, survival, is to stare at one spot. So that steady gaze, they call it a drishti. Steady, skilled gaze.
Don't look at me, cause I'm gonna wobble a little bit, right, and that's gonna mess you up. So find a place in your house or on the computer, TV, something, unwavered, focused, dedicated stare. And that'll help. Take the arms up if you'd like. Spread your fingers wide.
(breathing deeply) Good. All right, now let's exit. Palms to the chest and the right foot comes down. Shake out the balancing leg, take a deep breath in (inhales) and let a big breath out (exhales). That's a really helpful way to just kind of erase what happened, let it go, and feel a bit more fresh for the other side.
All right, so now you're on the right leg, right? Now keep in mind, why do we do this? Why are we even practicing this? Number one, focus, it requires so much focus to be able to balance and hold yourself up. Right, a lot of us are so distracted with life.
It's nice to just (exhales sharply) bring everything in and hone in one spot, okay? And the other is, it really cultivates and works a lot of different small, tiny muscles around your ankles, your feet, and low legs, okay, it's really important. So we're on our right leg. You want to place the heel just above the ankle, toes for support, stand tall and strong on that right leg, palms resting at your chest. Take a few moments here, find your bearings, get your bearings, get your balance.
Get that gaze. Good, slide it up if you're interested in that. So the heel just below the knee, so press the foot into the leg and the leg into the foot, so that both legs, even though this left one isn't necessarily down, it becomes part of that standing leg, see if that makes sense to you. Squeeze the glutes, brace the abs, and take the arms up. There are so many ways we can make this more challenging, right, this is the beginner class, let's keep it right here for now.
If there's anything that you want to explore or try. Aaah. Go for it. Try closing your eyes. Try lifting your right foot up off the mat.
If you do that, then you come here and do this. You teach. All right, check it out, exit (exhales). Big breath in (inhales). Clear it away, exhale (exhales).
Try not to, like, let's just say, you were there doing tree pose, and you were falling out of it, you just couldn't get it. Let that go for now. Let that go. Tree pose tomorrow will be different. Let that go, and we will now prepare for malasana, squat pose, okay, so grab that blanket, like I said, or whatever you're using.
We're gonna place that underneath our heels, and you'll notice a big difference. It'll make it more accommodating, we'll call it, okay? We'll place it like so. The more you roll it up, the higher your heels go, okay? So what we're gonna do is step about as wide as the mat, and place those heels up on the blanket.
Open your toes a little bit, okay, so you've got like 45-degree angle on your feet, heels up high, knees out, palms to the chest. And go ahead and sit as low as you can. If you know already you don't need the blanket, lose it. This is to help those, including myself, make the pose a little bit more accommodating. Okay so press the palms into the chest.
Press the elbows into the knees, knees out wide. If you're comfortable with this, close your eyes, and remember that breath that we were working with at the beginning of the practice, right. Just simple inhalation (inhales) and exhalation (exhales). Inhale (inhales). And exhale (exhales).
One more time, inhale (inhales). And exhale (exhales). Okay, another helpful option for this, if you feel like this is excruciating, right, and it is, I guarantee you, for some of you, it's not very comfortable, give this a shot. If you're working with a block or you have some kind of support, move the blanket out of the way. Keep it nearby, we'll use it one more time, but then bring the block up on its highest level, and try that.
Try placing the elbows on the insides of the knees, chest up, and make sure you're supported there. And that's a really nice option, give it a shot. Let's take just one or two more breaths here. (breathes deeply) All right, good. Let a big exhale out (exhales).
Lift up nice and gently, move the block out of the way, we don't need them any longer. Make your way down to your seat. And we're gonna finish with one posture, one simple posture. And it's a supine or a reclined, meaning lying on your back, spinal twist. And this will help to sort of reset the spine.
It just feels good, also. So go ahead and lie on down. Bring the knees in. Hug your knees in toward your body. Extend your left leg out as long as you can.
Now if that immediately brings any discomfort, keep it bent. (breathes deeply) I personally prefer the leg long, so I'll leave it long. Pull that right knee in nice and deep. As deep as it makes sense for you. Deep for you is different from me, possibly.
Okay now, if that left leg is straight, bend it, and then shift your hips over to the right side of the mat. So not in the center, your low back now slides over. Extend that left leg out one more time, spread your back nice and wide, left hand on that right thigh, right arm reaches nice and wide. If that bothers your shoulder, you can bend it into a field goal position. Now on your exhale, go ahead and find a nice gentle spinal twist.
So what you're doing here is you're bringing the right knee, which is bent, the right leg, which is bent, and drawing it across your body and over toward the left. Keeping your gaze straight up for now. So what we're working on here is rotation. Like a rotation of the spine. Twist, call it a twist, we're moving the spine.
Left, toward the left in this rotated fashion. Okay now slowly come back out. Situate yourself back onto the middle of the mat. Extend the right leg long and draw your left leg in. You can hold onto the, interlace your fingers around your shin or your hamstring, I should have said that on the other side, so feel free.
If you have a lot of extra weight here, and it's very difficult for you to do this, and you have some kind of belt or shirt or strap or anything wrap it around the shin or the hamstring and use that, because if you find yourself here, working extra hard just to hold yourself up, it may not feel that great, so try to make it more accommodating for you. Okay so pull the knee in, bring it down, shift it over. Bring the knee back in once again and across the body. (breathes deeply) You can come in and out. In and out meaning come away from the pose, which is out, breathe in, and breathe out (exhales).
Come back into the pose, good, come back out, inhale, and exhale. Slowly exit. Situate yourself back onto the middle of the mat. Give yourself one more squeeze. So give the hands a wrap around your shins or your hamstrings and pull in nice and tight, and then rock up to a seated position.
Grab that blanket once again. Prop your seat up on the blanket. Cross your legs, doesn't really matter how. Close your eyes for a few moments, sit nice and tall. Check in with how you feel now.
Maybe versus how you felt when you started. (breathes deeply) Take a few very conscious, attentive breaths. (breathes deeply) Take a few moments to remind yourself. Like it's really important that we reminds ourselves that this is like an ongoing practice, all right. And that yoga, if you're not familiar with it, there are probably no few different ideas of what the definition might be.
My loose definition is that it's like the relationship between your breath and your body. Isn't really commonly used, but I keep it as simple as possible. So relationship my breath and my physical body and how I'm moving it on and off of the mat. So if you're not already aware, right, it can be an amazing practice to improve your physical awareness, your mobility, your flexibility, your strength. It's an amazing practice to reduce stress and tension which I think a lot of us have, and a lot of us could, you know, stand to gain some tools on how to let go of that stress.
So with the physical body, you know, the improvements in the physical body, the reduction of stress and tension. I mean, that's pretty much all. If you're learning the practice of yoga right now, just keep it as simple as that. Know that there are numerous benefits out there, and they will change and you will notice them along the way but keep it simple. Watch your breath, move your body, learn how to move it with skill, and you're gonna be just fine.
Try not to get overwhelmed with yoga, right? Breathe, move your body, watch the videos. You'll learn a lot. So that's it for today. Press your palms together, and we'll actually end with a very simple, simple gesture.
I'll say, to your health, how about that? To your health, to my health, and to everyone's health. Namaste, have a beautiful, beautiful day. Peace.
Keepin' it Real
Comments
Elle
You need to be a subscriber to post a comment.
Please Log In or Create an Account to start your free trial.
